In this article, we will show you how to convert CSV files to Excel in several ways. Comma-separated values or CSV is a very useful and extensively used file format. It is a text file where the comma is the delimiter that separates the values in that file. You may often need to convert these CSV files to Excel documents (.xlsx format) for various operations or calculations.
CSV files are smaller in size than other file formats such as Excel or XML. They save data in plain text format, with no complicated formatting or information, resulting in reduced file sizes. Because of this, they are efficient for storage, transmission, and processing, especially when dealing with huge datasets.
We will provide quick steps to convert CSV to Excel in this article. Please stay tuned to this article, you may have some other topics that you are interested in.
Convert CSV to Excel: with Easy Steps
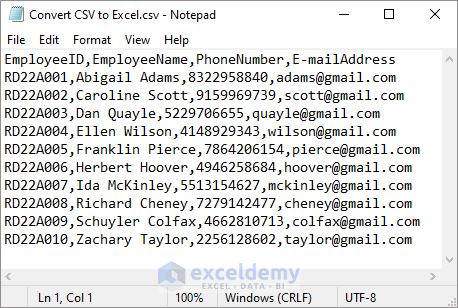
Assume you have the following CSV file containing employee info. Now you need to convert the CSV file to an Excel document to be able to create a dynamic dataset.
Follow the steps below to be able to do that.
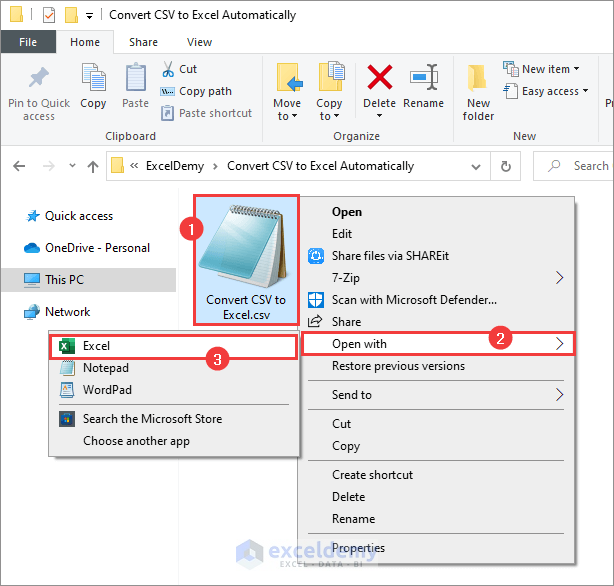
Step 1: Open CSV File with Excel
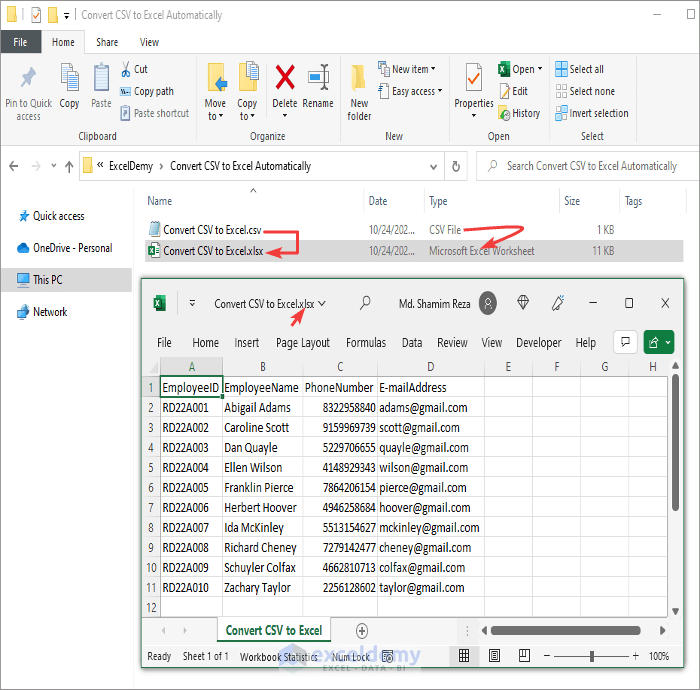
- First, go to the file location. Then right-click on the file name. Next, go to Open with >> Excel.
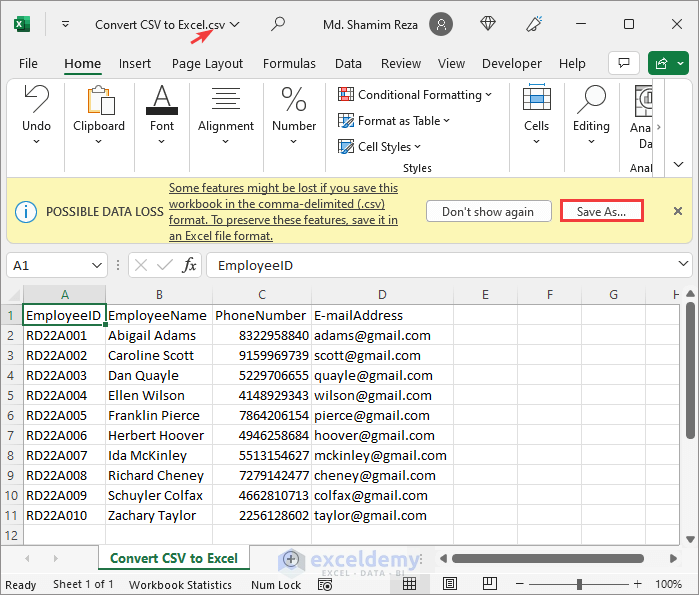
- Excel will automatically detect the data and arrange them into separate columns accordingly as follows. But the file is still in CSV Excel will show you a warning of Possible Data Loss with the option to Save As a different file format.
Read More: Difference Between CSV and Excel Files
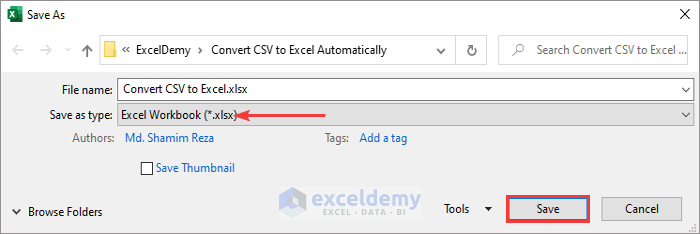
Step 2: Save CSV File as Excel Workbook
- Alternatively, you can also go to File >> Save As to convert the file format from CSV to XLSX.
Step 3: Open the Excel Workbook
- Finally, open the converted file to see the following result.
Read More: How to Convert CSV to Excel with Columns
How to Convert CSV to Excel with Columns
Sometimes Excel may fail to detect the data and insert all data into a single column as follows. This also happens if you copy the data from the CSV file and paste it onto an Excel worksheet.
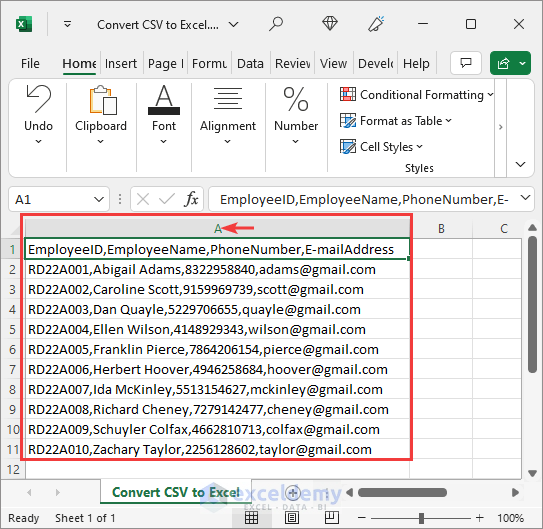
In such cases, you can use the Text to Columns wizard in Excel to extract the comma-separated values into separate columns. Alternatively, you can use the Get Data feature in Excel if the data in the CSV file has many columns. Follow the steps below to be able to do that.
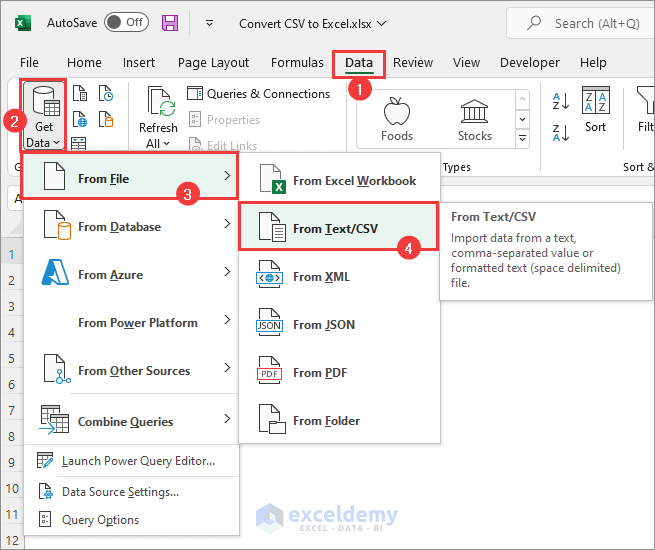
- First, go to Data >> Get Data >> From File >> From Text/CSV as shown below.
- Then browse the CSV file location, select it and click Import.

- After that, you will see the following preview. Excel will try to detect and reformat the data automatically. If you are satisfied with the formatting in the preview, then click on Load (Load To for specific location). Otherwise, click on Transform Data to go to the Power Query Editor.

Read More: How to Open Notepad or Text File in Excel with Columns
How to Convert CSV to XLSX without Opening
Suppose you need to convert the CSV file to XLSX without opening it. Follow the steps below to be able to do that.
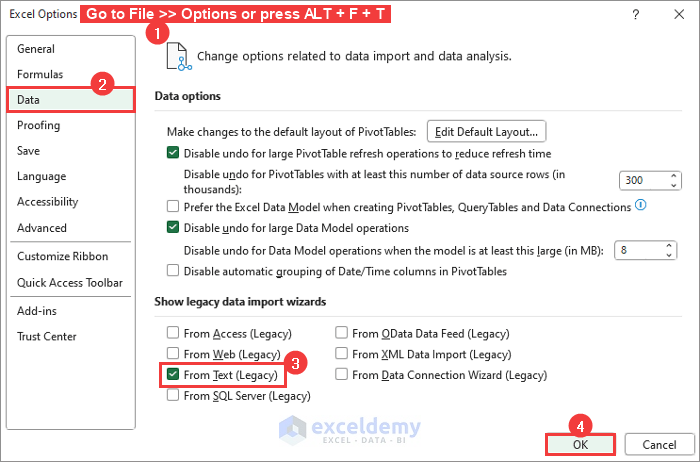
- First, go to File >> Options or press ALT + F + T. Then go to the Data tab, check the From Text (Legacy) checkbox, and click OK.
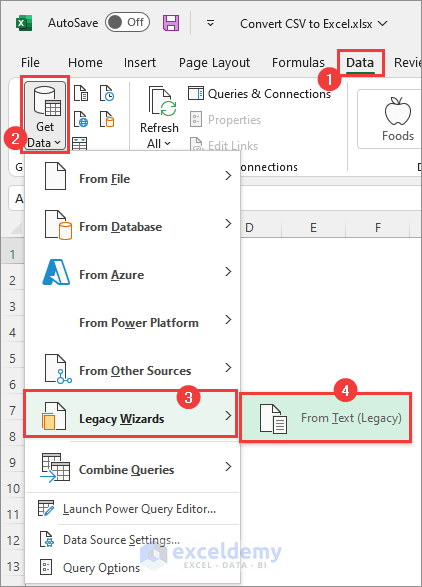
- Next, go to Data >> Get Data >> Legacy Wizards >> From Text (Legacy) as follows.
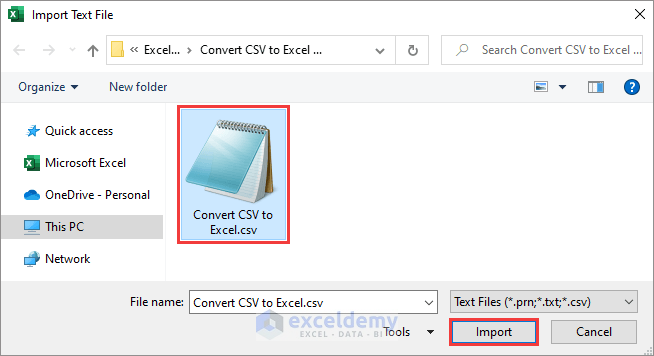
- After that, browse the CSV file location, select the file and click OK.
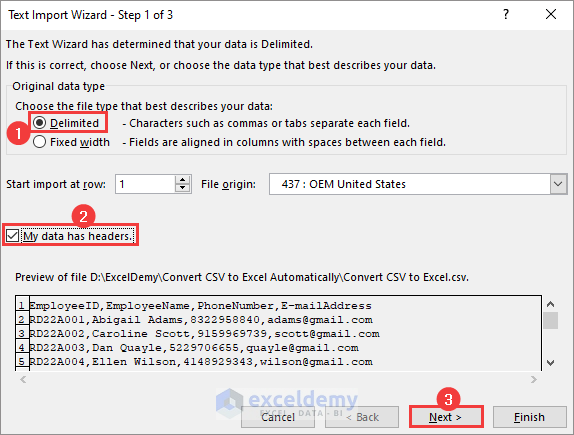
- Now the Text Import Wizard will open. Select the radio button for the Delimited file type, check My data has headers checkbox, and select Next.
- Then, check the Delimiters checkbox as required (Comma, in this case) and select Next.

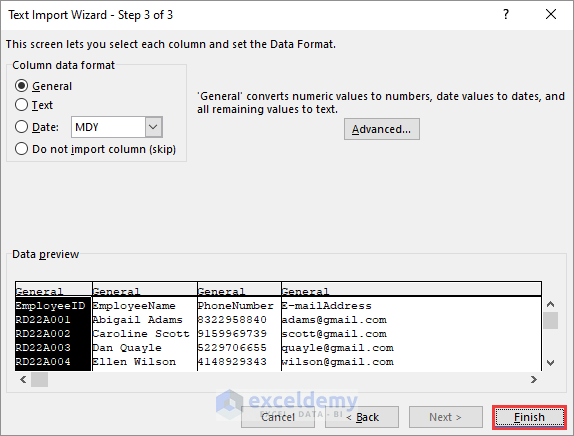
- After that, you can choose the Column Data Format if needed. Click on Finish.
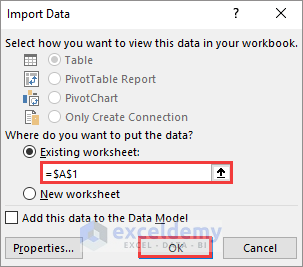
- Finally, select the location where you want to import the data and click OK.
How to Convert CSV to Excel Online
Assume you need to urgently convert a CSV file to Excel but it is not possible for you to follow the methods above. Then you can convert it online. Follow the steps below for that.
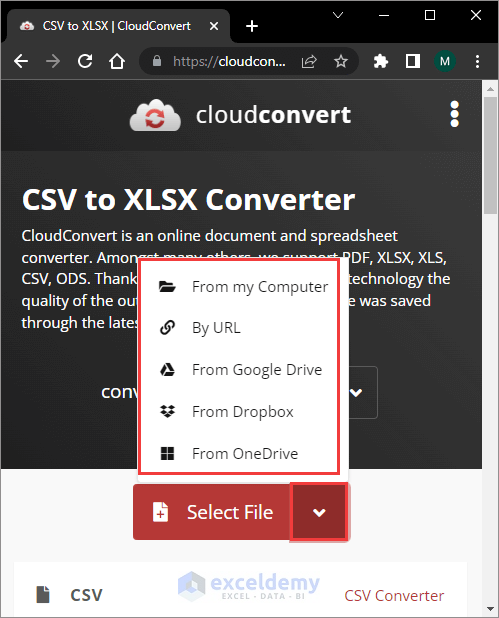
- First, go to https://cloudconvert.com/csv-to-xlsx. Then choose an option to select the CSV file and import it.
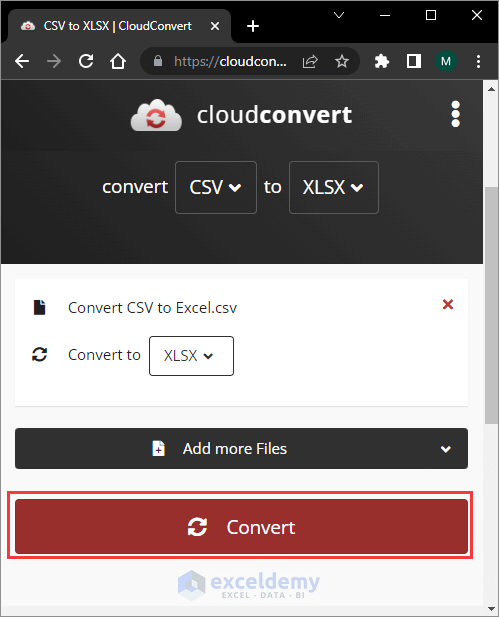
- Then click on Convert. This may take a few moments to process depending on the size of the CSV file.
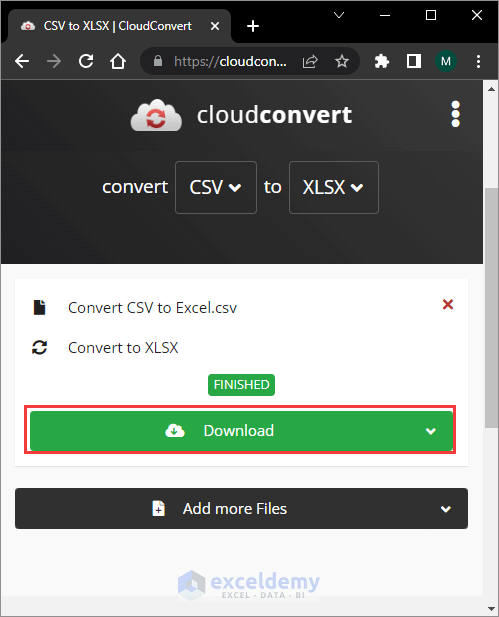
- After that, you will see the Download button for the converted Excel file as shown below.
Read More: How to Compare 2 CSV Files in Excel
Things to Remember
- A CSV file may contain values separated by other delimiters such as semicolons (;), spaces, tabs, etc. You need to choose the delimiter accordingly during the conversion.
- If you import multiple CSV files at once using the Get Data feature, they will be converted to separate workbooks.
Frequently Asked Questions
1. What is the difference between CSV and Excel file formats?
The plain text file format CSV (Comma-Separated Values) is used to store tabular data with each value separated by a comma. On the other hand, Excel is a proprietary file format used by Microsoft Excel to hold spreadsheet data with numerous sheets within a workbook and various formatting options. Compared to CSV files, Excel files have a greater capacity for sophisticated data structures.
2. Can I convert a CSV file to Excel without using Microsoft Excel software?
Without utilizing Microsoft Excel software, it is possible to convert a CSV file to Excel format. You may carry out the conversion without relying on Excel thanks to third-party software programs, web resources, and programming libraries that are readily available. LibreOffice Calc, Google Sheets, and different Python libraries like Pandas and Openpyxl are a few well-liked substitutes.
3. How do I retain leading zeros in a CSV file when converting to Excel format? Excel by styling the target Excel cells as Text before importing the CSV data. Excel will preserve the leading zeros instead of truncating them as numerical values if the data are treated as text.
Leading zeros in a CSV file can be preserved during conversion to
Download Practice Workbook
You can download the CSV file for practice from the download button below.
Conclusion
Now you know how to convert a CSV file to an Excel document automatically. Do you have any further queries or suggestions? Please let us know in the comment section below. Stay with us and keep learning.
Convert CSV to Excel: Knowledge Hub
<< Go Back to Import CSV to Excel | Importing Data in Excel | Learn Excel
Get FREE Advanced Excel Exercises with Solutions!
