Microsoft Excel is widely used to organize data. Sometimes, we have to deal with a huge amount of data and organize them in different columns. It is not impossible to face the problem that some of the data along with the columns get cut off at the time of printing. There is nothing to be panicked. In this article, I am going to explain 6 smooth possible solutions to the problem of cutting off text when printing in Excel. I hope this article will help you if you ever face the problem.
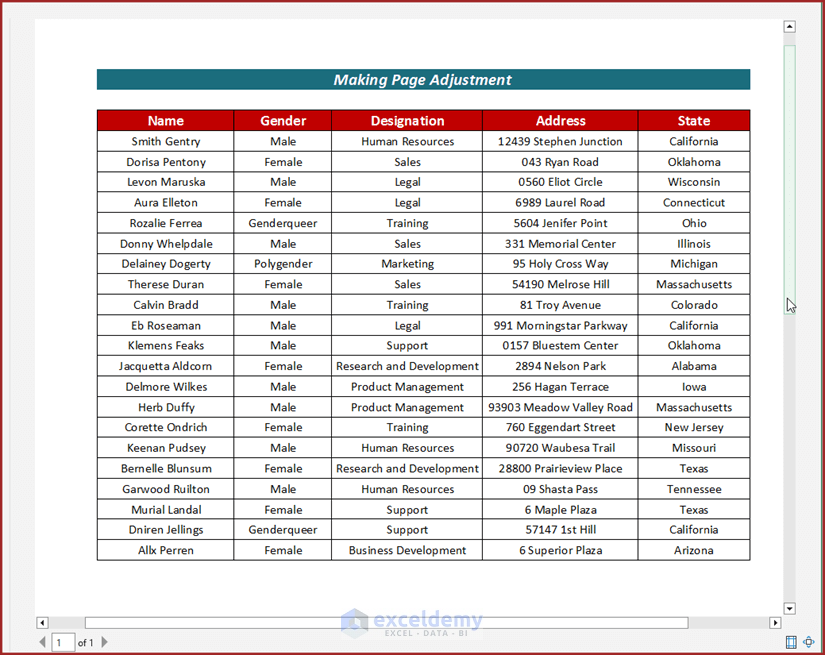
For more simplification, I have used a detailed dataset on the information of a company’s employees. I have organized the data in the Name, Gender, Designation, Address, and State columns.
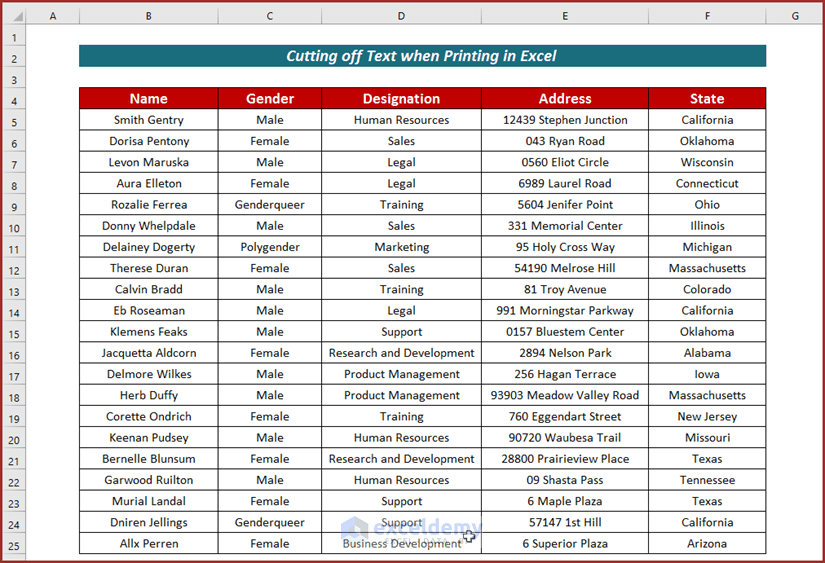
If we try to print this page by giving the Print command from the File tab, we will be able to see in the Print Preview section that the Address and State columns get cut off. Now, we will try to print the entire dataset on one page.
How to Solve If Cutting Off Text Problem When Printing in Excel: 6 Smooth Ways
1. Making Page Adjustment
In the first solution, we can alter the page size to accommodate all the columns on one page. This method gives the reader the much-needed continuity of the dataset. Let’s walk through the following steps to solve the problem.
Steps:
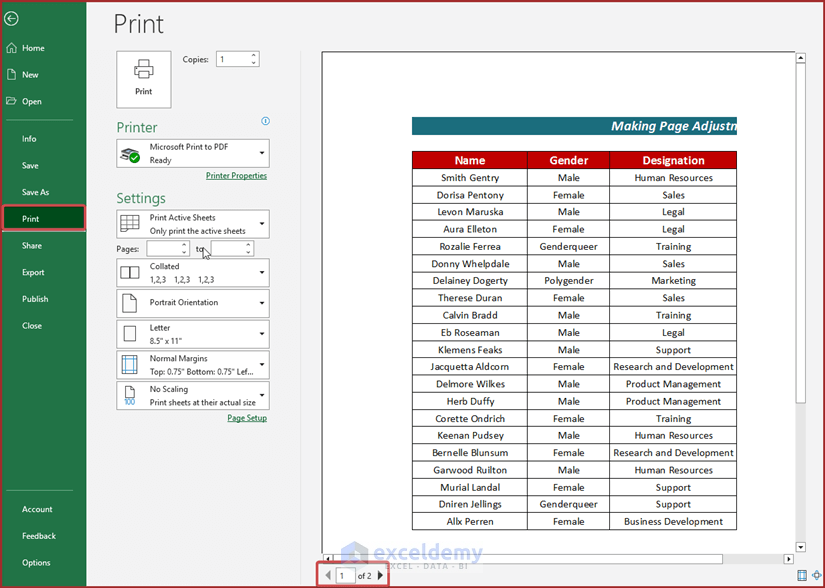
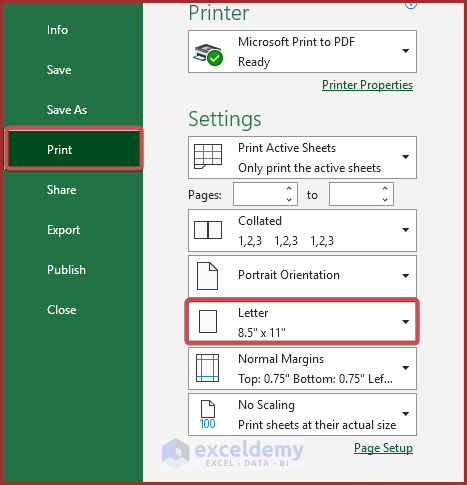
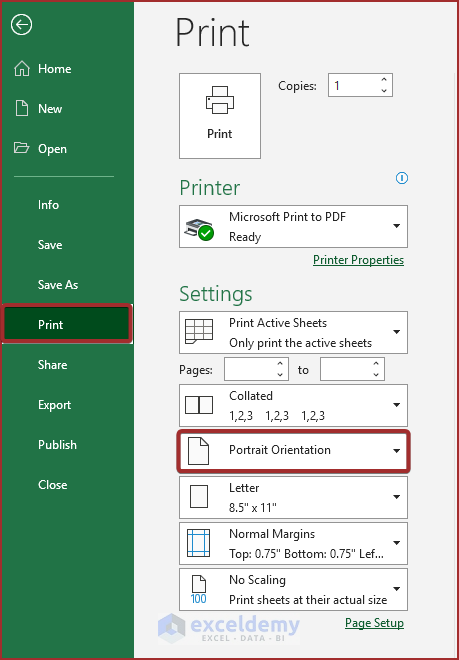
- First of all, go to the File tab.
- Next, select the Print option.
- Then, select the Letter option from the Settings section.
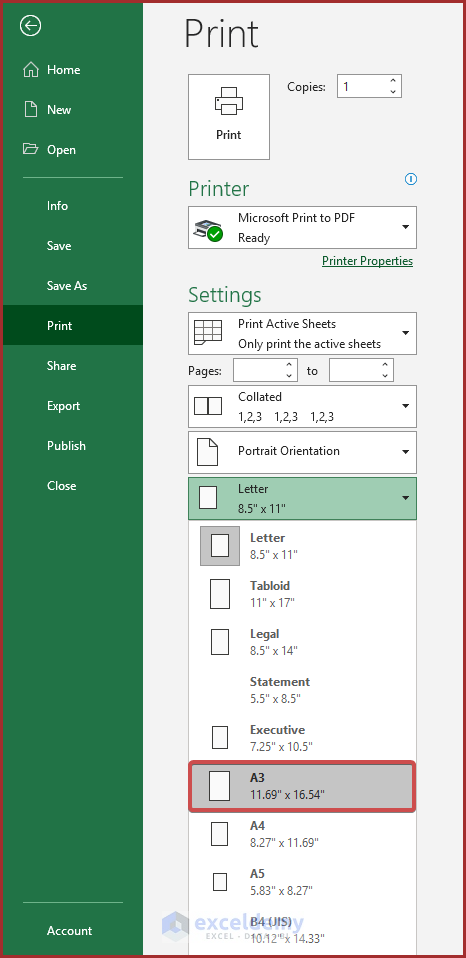
- From the Letter option, select A3.
In the Print Preview section, we can see that the entire dataset is adjusted on one page.
Now, you can click on Print to print the entire dataset without the text getting cut off.
Read More: How to Print Excel Sheet in A4 Size
2. Changing Orientation
The page orientation change is the foundation of our second solution. Page orientation can be either in landscape mood or portrait mode. By default, Excel will show your dataset as a portrait mood. However, you can adjust the orientation based on the column and row numbers. Use the landscape mode for higher column numbers and portrait mode for higher row numbers. Let’s walk through the following steps to solve the problem.
Steps:
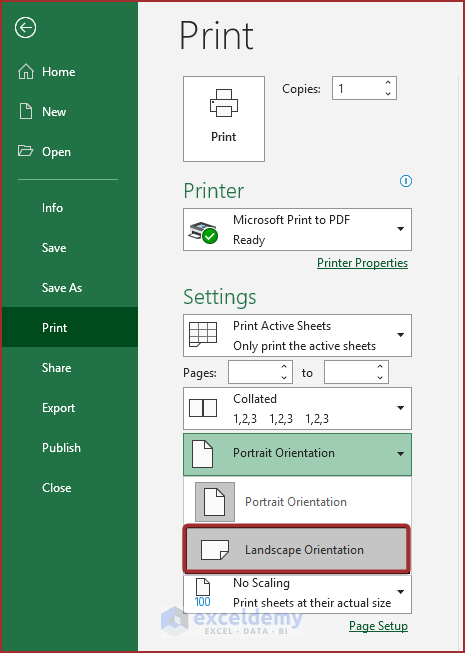
- Go to the File tab first.
- Then, select the Print option.
- Next, select the Portrait Orientation option from the Settings section.
- Now, select Landscape from the Orientation for our dataset, Landscape Orientation gives a proper output. That’s why we chose it.
We can see that the entire dataset got adjusted on one page in the Print Preview section.

3. Applying Size Feature
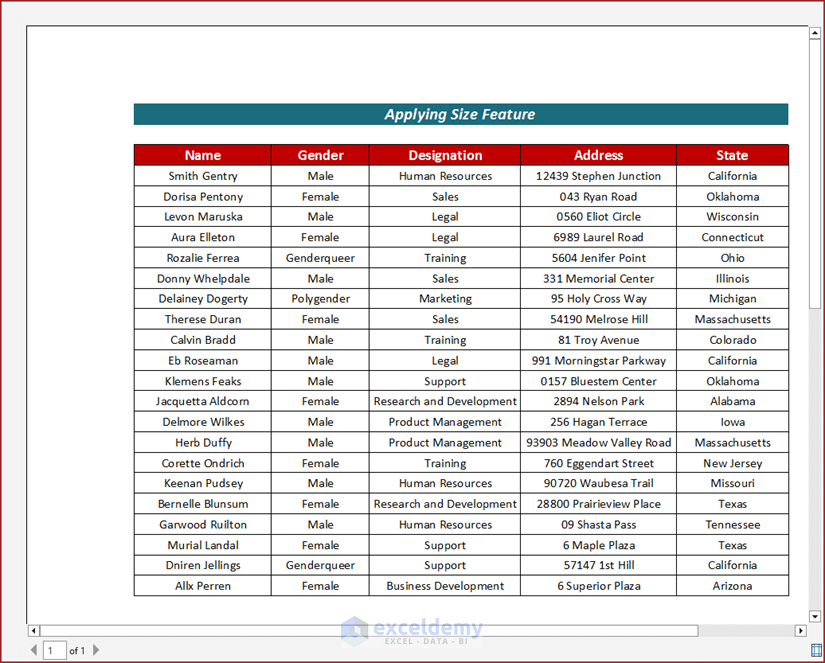
We can use the Page Size feature as the 3rd solution. Basically, Excel considers the page size for printing as Letter by default. But, with this paper size, all the columns may not be on one page. So with this solution, you can alter the page size to accommodate all the columns on one page. Now, let’s see the steps of this solution.
Steps:
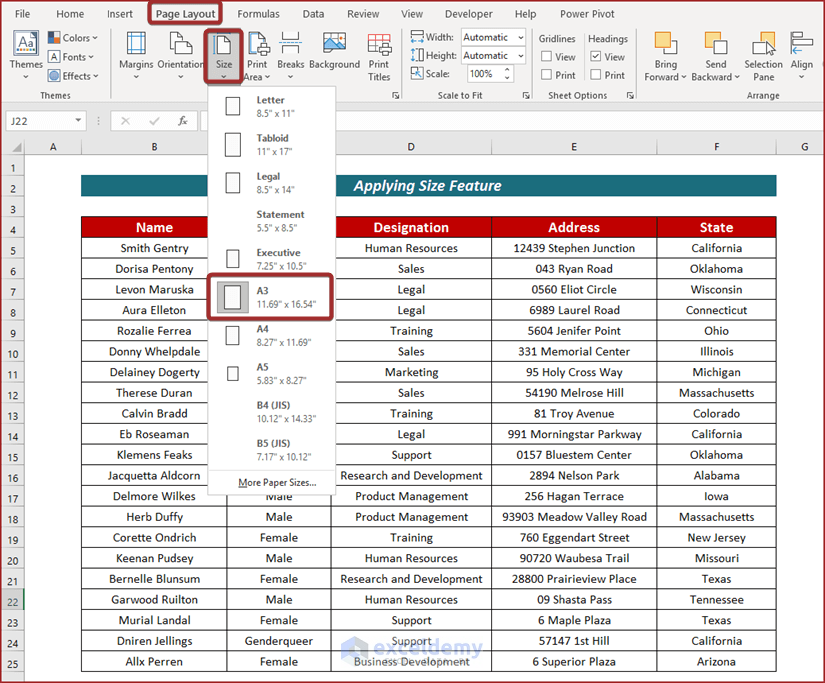
- Firstly, click on the Page Layout tab.
- Select Size from the Page Layout Then, you can choose according to your demand from the page size options. Here, I have chosen A3 to keep all the columns on one page.
Now, if you print the entire dataset, you will see that all the columns are on one page. There are no cutting-off columns. We can confirm it by watching the Print Preview section.
Read More: How to Print Excel Sheet in Full Page
4. Using Fit Sheet on One Page Option
Another efficient method to solve the problem is by fitting and printing the sheet on one page. By doing this, all the columns and rows will be adjusted automatically. You just need to follow the following steps to execute it.
Steps:
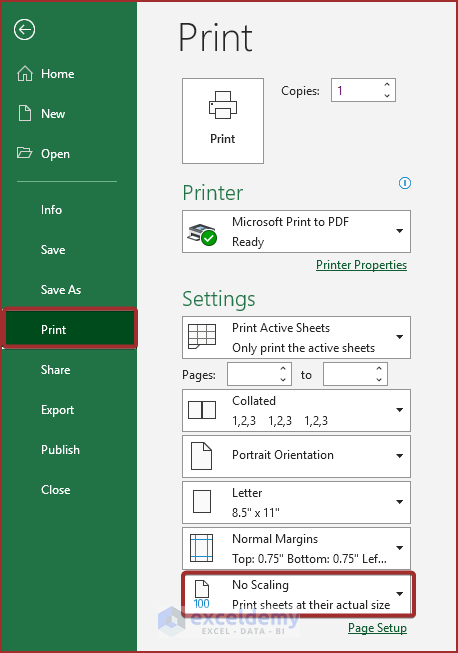
- Go to the File tab.
- Then, select the Print option.
- Next, select the No Scaling option from the Settings section.
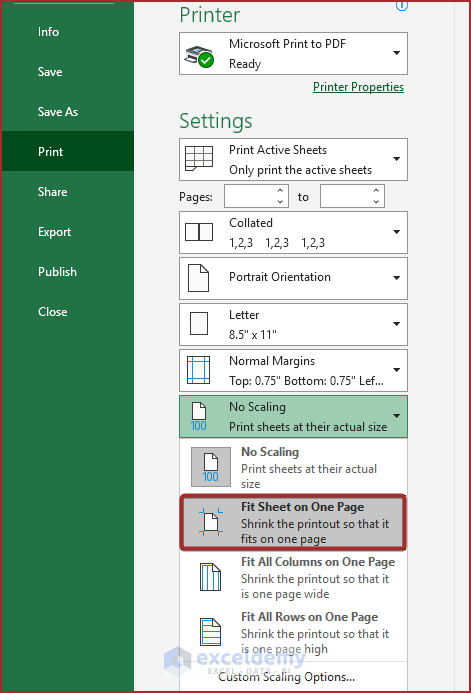
- Pick Fit Sheet on One Page option from the No Scaling section.
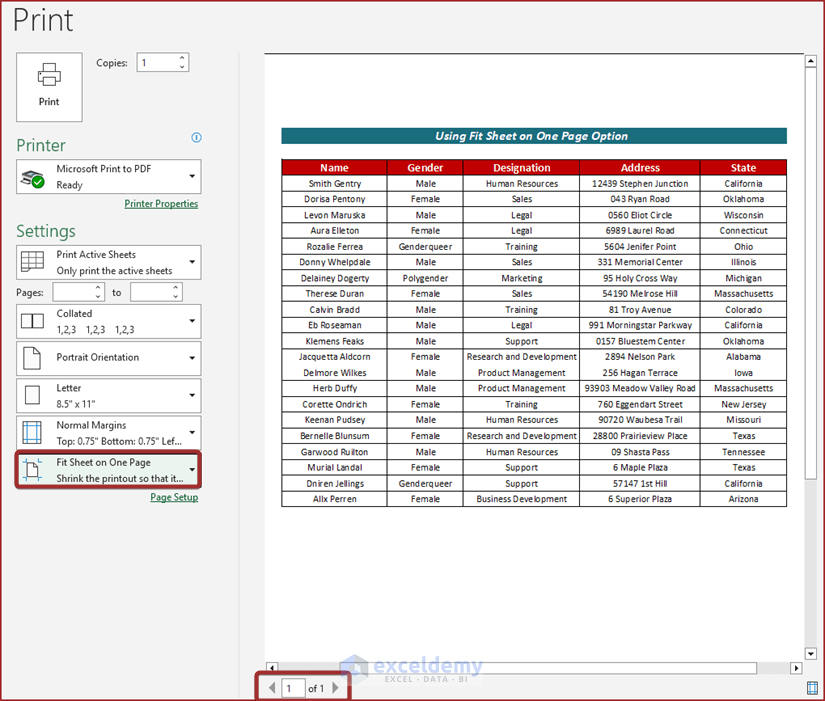
In the Print Preview section, we can see that the entire dataset got adjusted on one page.
Read More: How to Print Multiple Sheets in Excel
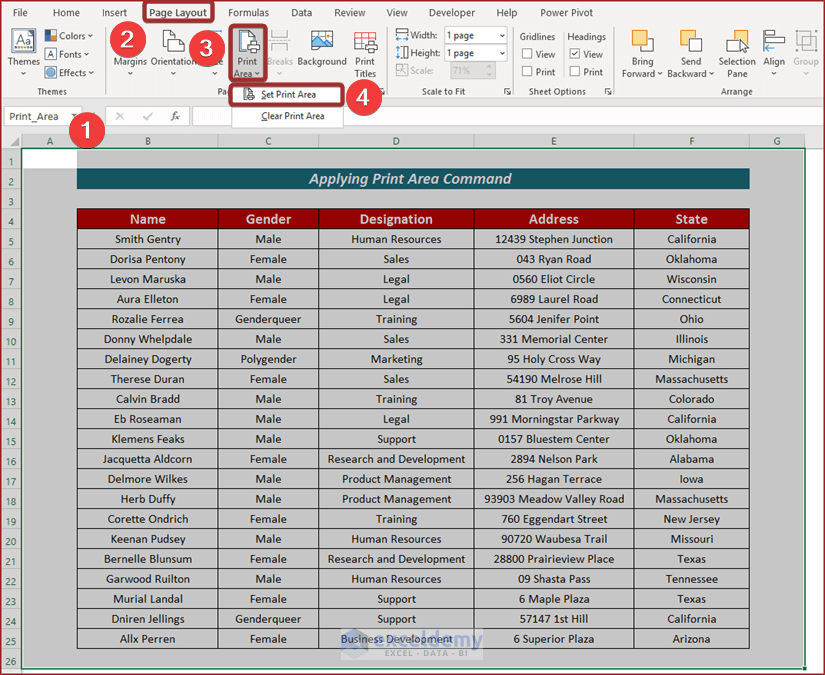
5. Applying Print Area Command
You can use the Print Area command as the solution for cutting off Columns when printing. Now, follow the steps of the solution given below.
Steps:
- As the first step, select the entire area that you want to print. In my case, I have selected cells A1:G26.
- Next, go to the Page Layout tab.
- Select Print Area from the Page Layout ribbon.
- After that, pick the Set Print Area option.
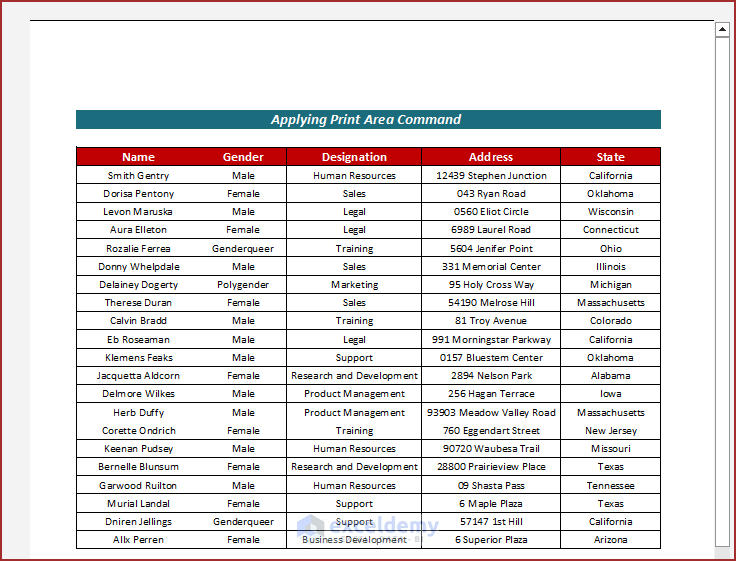
You can cross match whether the selected area is ready to print or not in the Print Preview section.
Read More: Make Excel Spreadsheet Bigger when Printing
6. Using Page Break Preview Option
Another very simple yet effective solution is to use the Page Break Preview option to solve the problem of cutting off text when printing in excel. Please follow the steps mentioned below to execute it.
Steps:.
- At first, go to the View tab.
- Next, select the Page Break Preview option from the View ribbon.
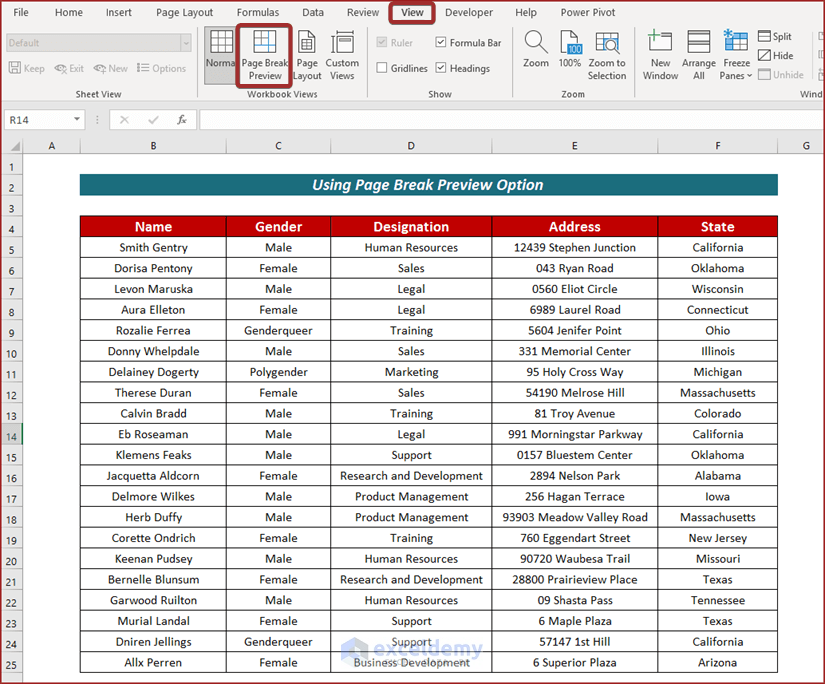
Now, you will see a blue dotted line as the border between the pages.
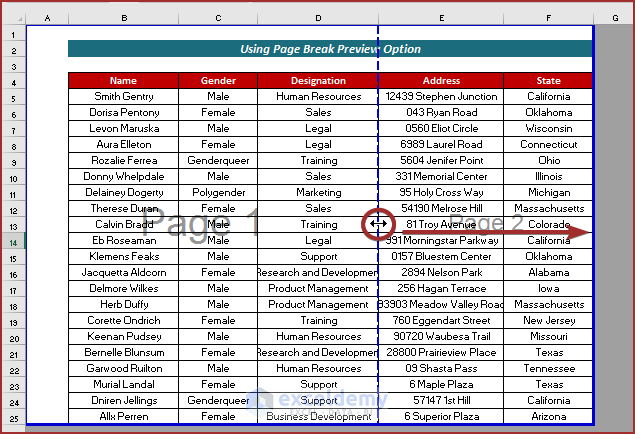
- Extend the blue dotted line as far as you want to print the area on the first page.
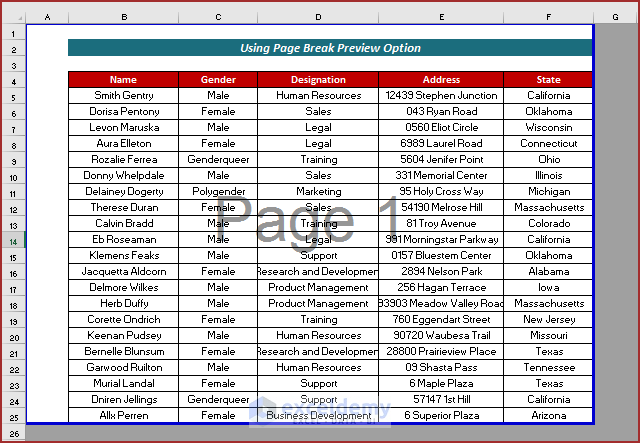
We can see that there are no cutting off columns. We can confirm it by watching the Print Preview section.

Thus, we can solve the problem of cutting off text when printing in Excel.
Read More: How to Print Excel Spreadsheet on Multiple Pages
Download Practice Workbook
Conclusion
That’s all for this article. In this article, I have tried to explain 6 smooth possible solutions as simple as possible to the problem of cutting off text when printing in Excel. It will be a matter of great pleasure for me if this article could help any Excel user even a little. For any further queries, comment below. You can visit our site for more articles about using Excel.
<< Go Back to Print Excel Sheet | Print in Excel | Learn Excel
Get FREE Advanced Excel Exercises with Solutions!
