Sometimes, we may need a little amount of information from a large set of a data table. In this case, creating a relationship between the tables is of great advantage as it makes the data table reader-friendly by organizing data in a fluent manner. In this article, I will show you how to create a relationship between tables in Excel.
How to Create a Relationship Between Tables in Excel: 3 Ways
In this section, you will find 3 effective and suitable ways to create a relationship between tables in Excel. I will demonstrate them here one by one. So, let’s check them right now!
1. Using Pivot Table
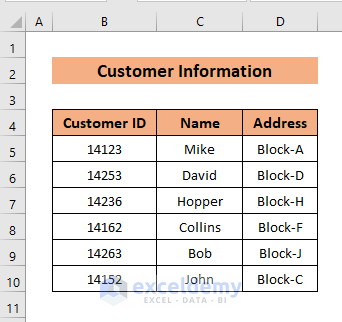
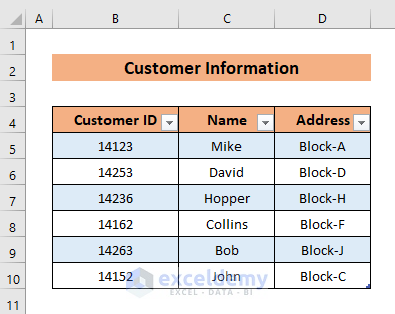
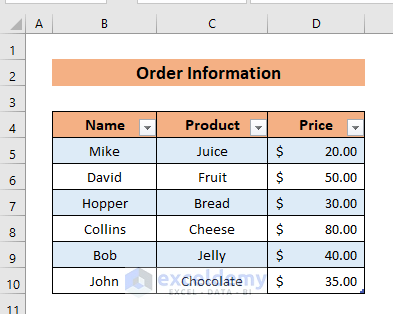
Let’s say, we have two tables describing different products ordered by some customers from separate addresses and their respective prices.
I have created the first column named Customer Information with headings: Customer ID, Name, and Address.
Another table named Order Information has headings like: Name, Product, and Price.
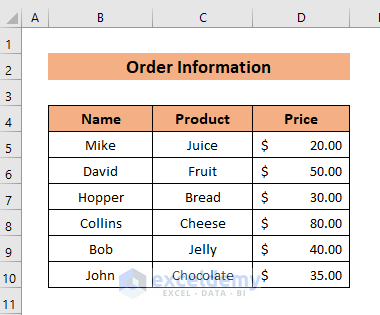
It is noticeable that there must be a common column to create a relationship between the tables.
Here, I will show the method of creating relationships using Pivot Table. In order to demonstrate this method, proceed with the following steps.
Steps:
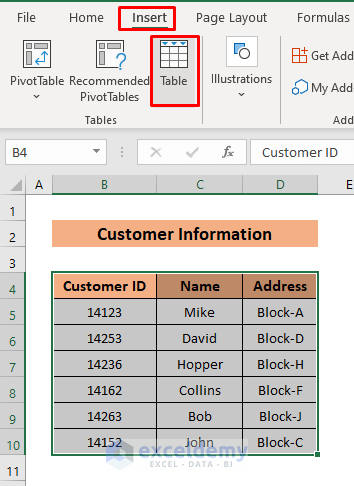
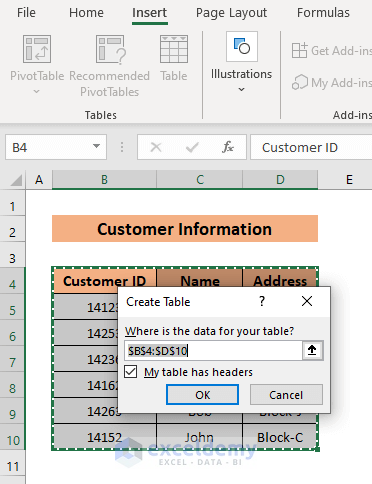
- First of all, select the data range of the first table (i. e. Customer Information)> go to the Insert tab> click Table.
- Then, click OK on the Create Table dialogue box.
- Now, your table will be created.
- Here, follow the same procedure for the other table (i.e. Order Information).
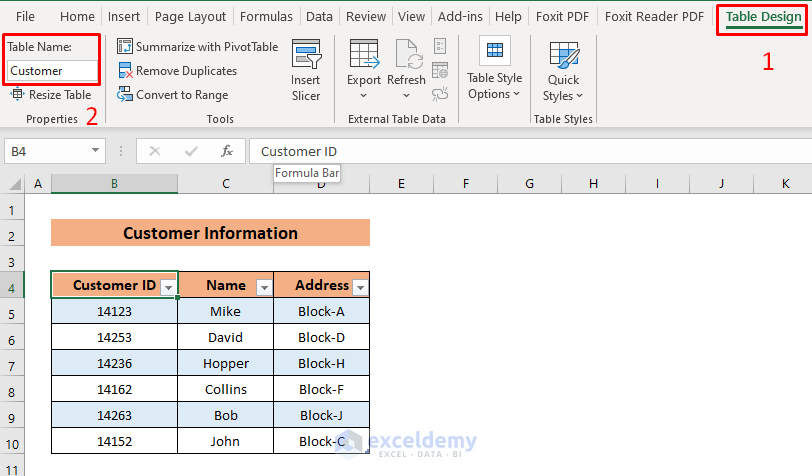
- Now, click on the Table > go to the Table Design tab> assign a name for the table.
I have named the first table Customer and the second table Order.
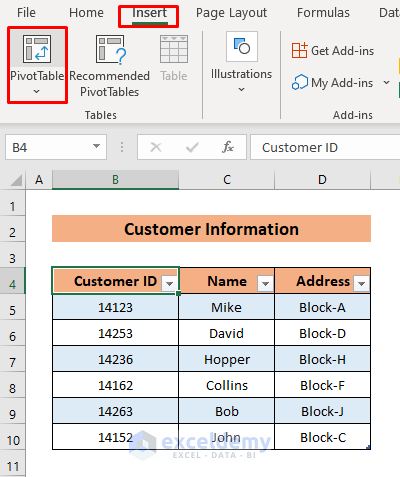
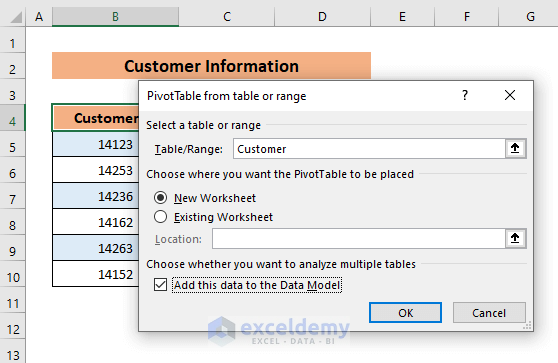
- After that, click on the Customer table> go to the Insert tab> and click Pivot Table.
- Here, PivotTable from table or range dialogue box will show up. Mark Add this data to the Data Model box and click OK.
- Now, the Pivot Table Fields will show up.

- Now, select the data type from both the tables (i.e. Address from the first table and Price from the second table) and click CREATE.

- After that, Create Relationship dialogue box will show up. Here, assign the table names and the common column (i.e. Name) and click OK.

- Finally, Excel will create a relationship between the two tables.
So, these are the steps you can follow to create a relationship between tables using the Pivot Table option.
Read More: How to Create Data Model Relationships in Excel
2. Create Relationship Manually
You can also create relationships between tables manually. For the same set of data, we will now create a relationship manually. In order to do so, just proceed with the steps below.
Steps
- First of all, add a new column to a table with the heading of another table that you want to relate to this table. (in our second table, there is a column named Price. We want to relate this to the first table).

- Then, select a cell in the new column, and apply the following formula.
=Order[@Price] This will be done by just putting a “=” sign and then selecting a value of the Price column from the second table.
- As a result, a relationship will be created between these tables.

Read More: How to Create Many to Many Relationship in Excel
3. Create Relationship Between Tables From Data Tab
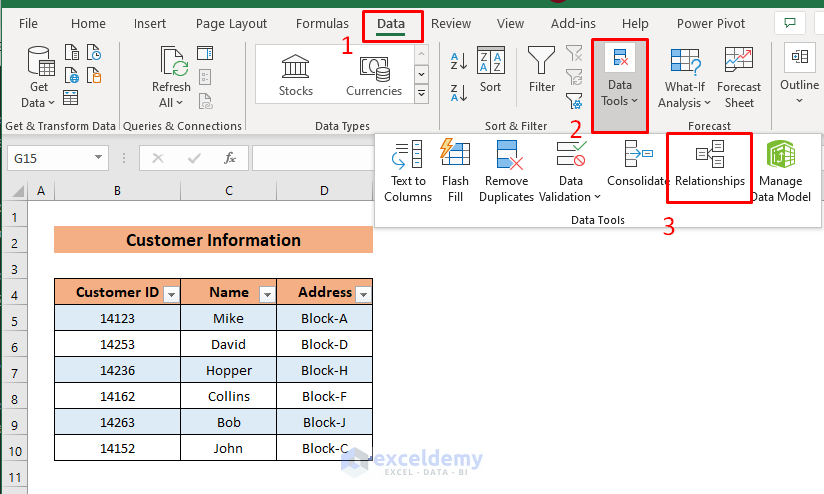
You can also create a relationship between tables by using the Relationship option from the Data tab. For this, follow the steps below:
- First of all, Create Table by following the procedure stated in method 1.
- After creating the table, go to the Data tab> select Data Tools. You will see that the Relationship option has been activated. Click it.
- Now, the Create Relationship dialogue box will show up just like method 1. Here, assign the Table name and the common Column name. Click OK.

- Hence, you will see that your relationship has been created.

Read More: How to Create Relationship in Excel with Duplicate Values
Download Practice Workbook
You can download the practice book below.
Conclusion
In this article, I have tried to show you some methods of how to create a relationship between tables in Excel. I hope this article has shed some light on your way of creating a relationship between tables in an Excel workbook. If you have better methods, questions, or feedback regarding this article, please don’t forget to share them in the comment box. This will help me enrich my upcoming articles. Have a great day!
Related Articles
- Create Entity Relationship Diagram from Excel
- How to Make One to Many Relationship in Excel
- How to Create Table from Data Model in Excel
- How to Manage Relationships in Excel
- [Fixed!] Excel Data Model Relationships Not Working
<< Go Back to Create Relationships in Excel | Data Model in Excel | Learn Excel

