Sometimes we need to align text in the cells of Excel worksheets. Excel has some quick features and functions for this. In this article, we’ll see them with some simple examples and explanations.
Here, I’ve used an Excel workbook with multiple worksheets that contain the same dataset. The dataset contains the Names of the students and their Marks.
1. Using Ribbon to Align Text in Excel
We can align text easily in Excel by using Ribbon. Some examples of using Ribbon to align text in Excel are given below.
1.1 Vertical Alignment
Top Align
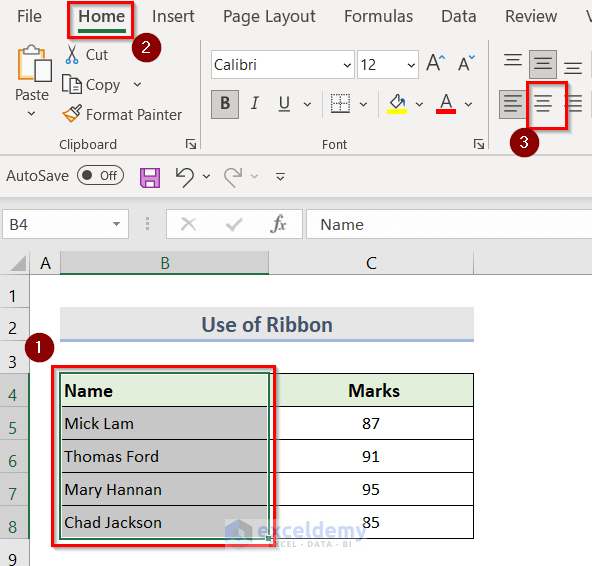
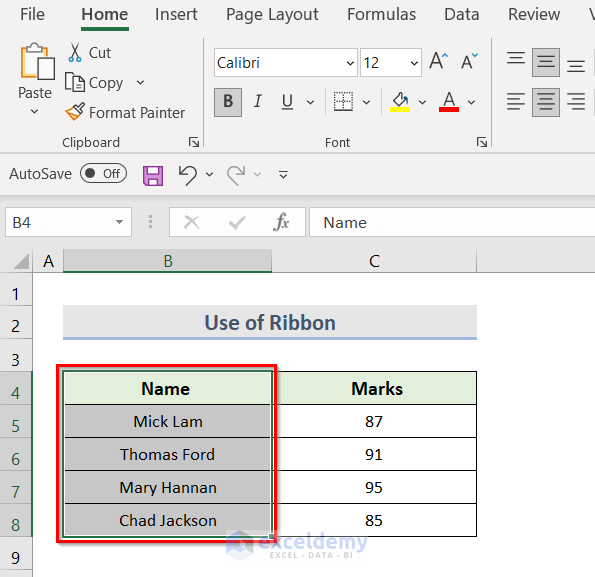
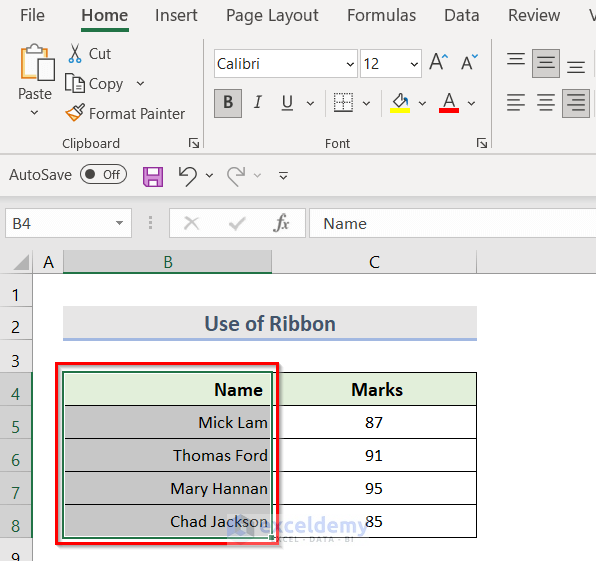
Suppose, we have a dataset (B4:B8) of some names of the students. We need to align them to the top.
Steps:
- Firstly, select the dataset (B4:B8).
- Next, go to the Home tab.
- After that, Select Top Align from the Alignment options.
- Now, we can see that top alignment is applied to columns (B4:B8).
Read More: How to Top Align in Excel
Middle Align
Here, we have a dataset (B4:B8) of some students’ names. Now We need to align them in the middle.
Steps:
- In the first place, select the dataset (B4:B8).
- Then, go to the Home tab.
- Finally, select Middle Align from the Alignment options.

- Now, we can see that the middle alignment is applied to columns (B4:B8).
Read More: How to Middle Align in Excel
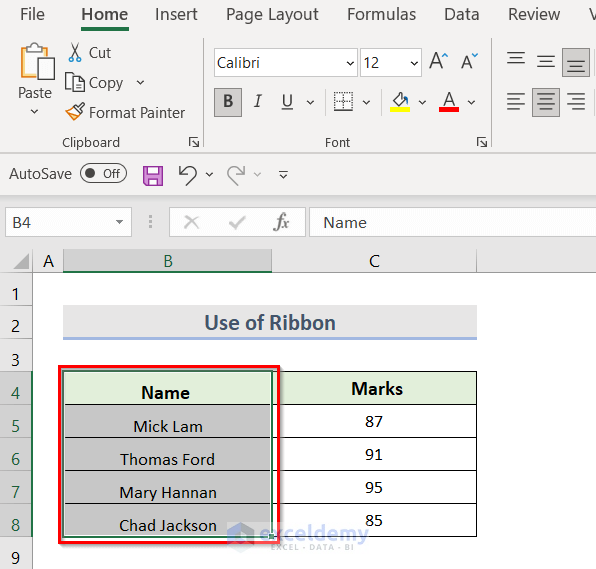
Bottom Align
The method for bottom alignment is the same as the top and middle alignment. The steps are shown in the pictures below:
First, select B4:B8 > Home tab > Bottom Align
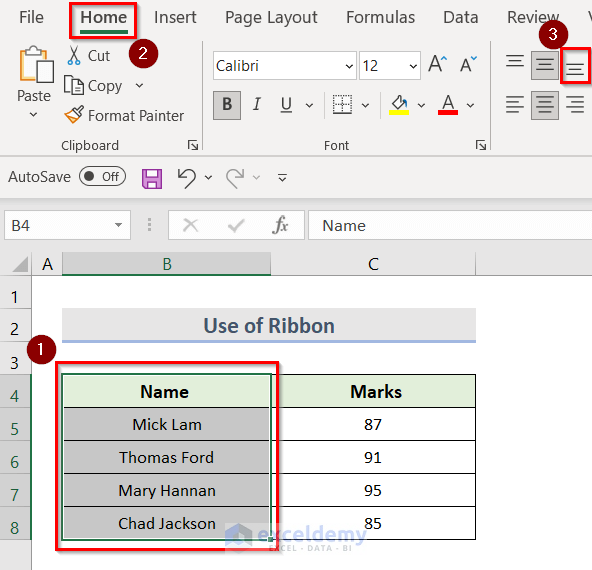
Finally, We can get the result below:
Read More: How to Bottom Align in Excel
1.2 Horizontal Alignment
Align Left
Suppose, we have a dataset (B4:B8). It contains some names of the students. We need to align the texts to the left.
Steps:
- In the beginning, select the dataset (B4:B8).
- Secondly, go to the Home tab.
- Lastly, select Left Align from the Alignment options.
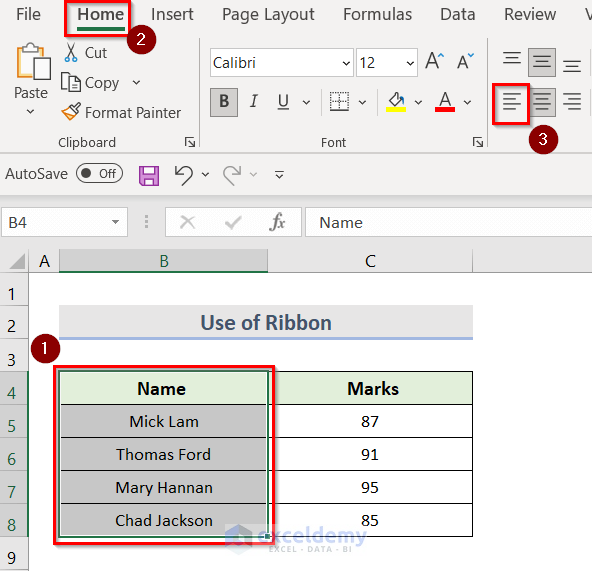
- Finally, we will see the result below.
Read More: How to Left Align in Excel
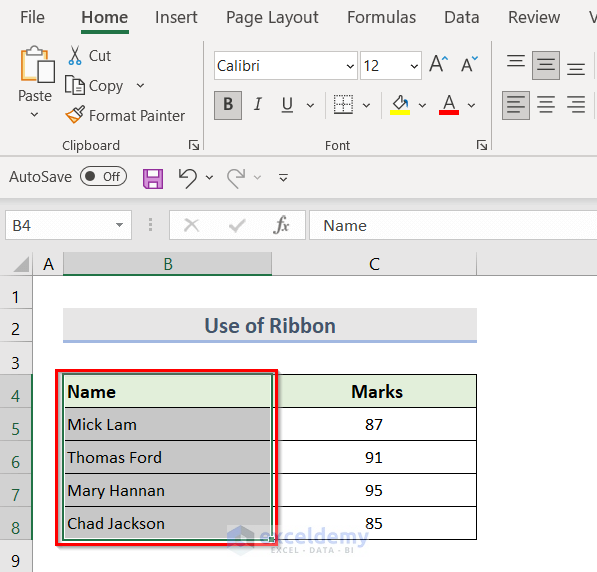
Center
The steps for center alignment are shown in the pictures below:
Select B4:B8 > Home tab > Center
In the end, we can see the final result below.
Read More: How to Apply Center Horizontal Alignment in Excel
Align Right
Here, the pictures below show the steps for the right alignment:
At first, select B4:B8 > Home tab > Align Right

Finally, we will see the below result.
1.3 Rotate Text from Alignment Group
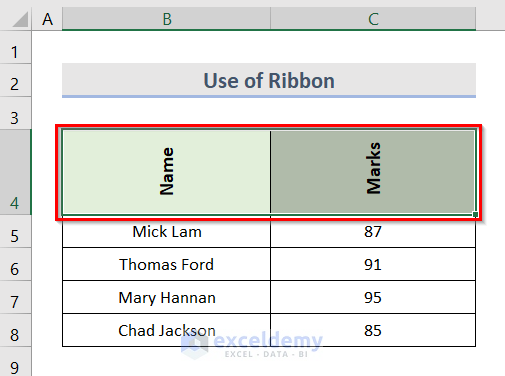
Sometimes we need to rotate text in Excel. We can easily rotate text by using Alignment Options that are available in Excel.
Suppose we need to rotate the text up of B4 and C4 cells.
Steps:
- Firstly, select cells B4 and C4.
- Secondly, go to the Home tab.
- After that, click on the Orientation option in the Alignment section.

- Next, click on Rotate Text Up.

- Lastly, We can see that texts in cells B4 and C4 are rotated successfully.
1.4 Indent Text from Alignment Group
Increase Indent
In Excel the Tab key of the keyboard does not indent text in a cell; it simply moves the pointer to the next cell. For example, we need to increase the indentation of the text in the dataset (B4:B8). By following the steps given below, we can increase the indentation of text in a cell easily.
Steps:
- In the first place, select the dataset (B4:B8).
- Next, Go to the Home tab.
- Now, click on the Increase Indent option in the Alignment section.
- Lastly, the increased indentation is shown in the dataset (B4:B8).
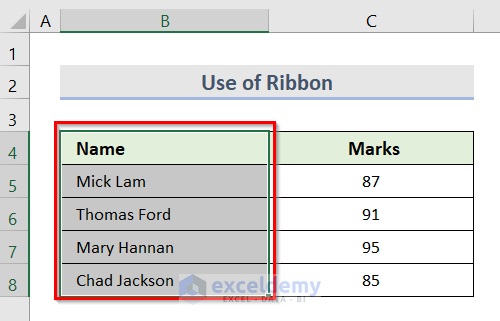
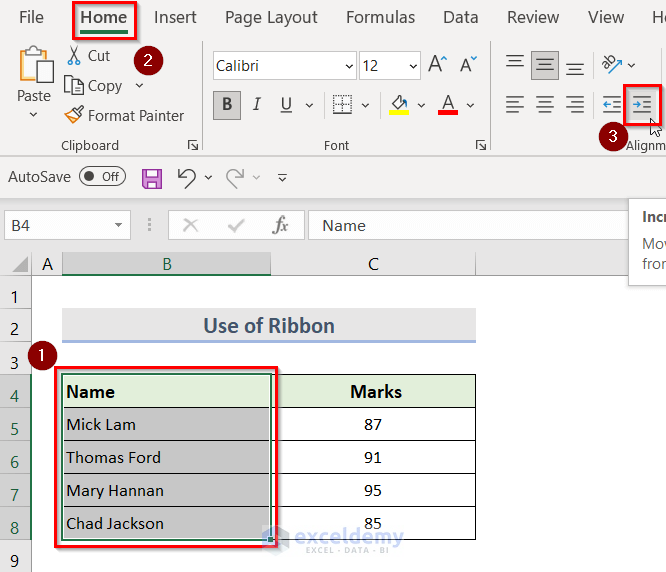
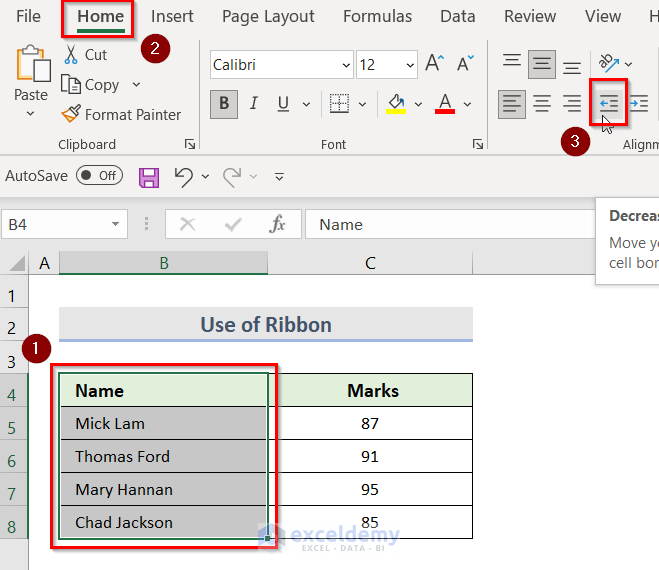
Decrease Indent
The process of decreasing the indentation of the text in a cell is almost the same as increasing the indentation. The steps to decrease indent are shown in the pictures below:
First, select B4:B8 > Home > Decrease Indent
Finally, we get the final result same as the picture below.

1.5 Wrap Text
When the data input in a cell is too large to fit, one of two things happens:
- A long text string extends over the cell border into the columns to the right if they are empty.
- If the adjacent cell contains data, a text string is terminated at the cell border.
In our example, the second option is applicable. The Excel Wrap Text option helps to display longer text in a cell without overflowing other cells. The term “wrapping text” refers to displaying the contents of a cell on multiple lines rather than one long line.
Suppose, we need to wrap the text of the dataset (B4:B8). According to the steps given below, we can wrap the texts quickly:
Steps:
- At first, select the dataset (B4:B8).

- Next, go Home.
- After that, click on the Wrap Text option in the Alignment.

- Lastly, We can see the wrapped text of the dataset (B4:B8).

2. Align Text in Excel with Format Cells Dialog Box
Another way to align text in Excel is to use the Alignment option of the Format Cells dialog box. For example, we can see that the dataset (B4:B8) of the picture below overflows the cells. We can fit the texts in a single line within one cell by using the Shrink to fit option.
Steps:
- In the beginning, select the dataset (B4:B8).

- Next, go to the Home tab and click on the Alignment Settings option according to the picture below.

- Now, a Format Cells dialog box will appear where the Alignment option will be selected by default.
- After that, click on the box beside Shrink to fit.
- Now, A tick mark symbol will appear.
- Then, click on OK.

- Finally, The dataset is shrunk to fit in a cell successfully.

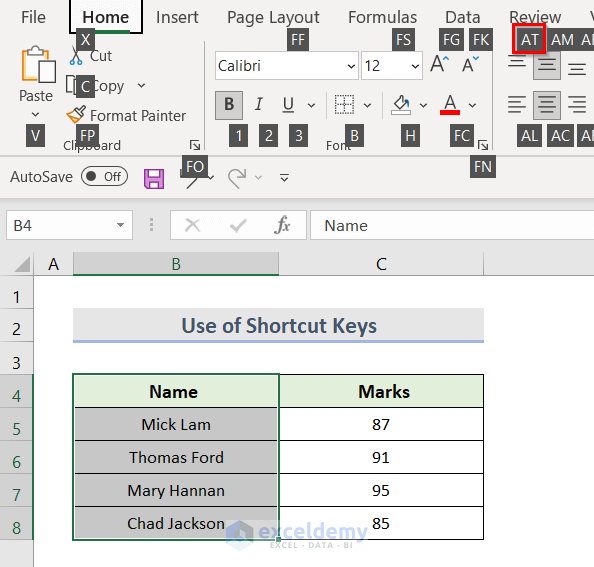
3. Applying Shortcut Keys for Text Alignment in Excel
The following keyboard shortcuts can help us to change the alignment of text easily in Excel:
- Top alignment: Alt + H, A + T
- Middle alignment: Alt + H, A + M
- Bottom alignment: Alt + H, A + B
- Left alignment: Alt + H, A + L
- Center alignment: Alt + H, A + C
- Right alignment: Alt + H, A + R
Here, Alt + H activates the Home tab. In the next combination, the first letter is always A which denotes Alignment, and the other one stands for direction. For instance, A + C denotes Center alignment.
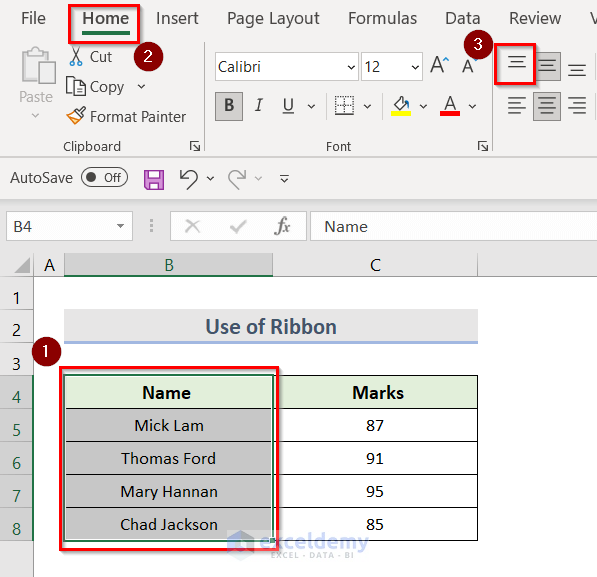
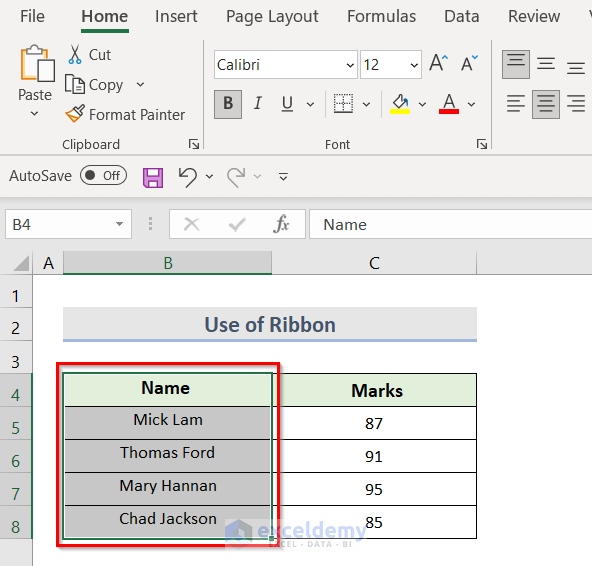
Assuming we need to change the alignment of the dataset (B4:B8) to the top. We can change this alignment very easily by using the keyboard shortcut.
Steps:
- First, select the dataset (B4:B8). We can see that the dataset is middle-aligned.

- Next, press Alt + H on the keyboard.
- After that, The Home tab will open and Excel will display all Alignment shortcuts.
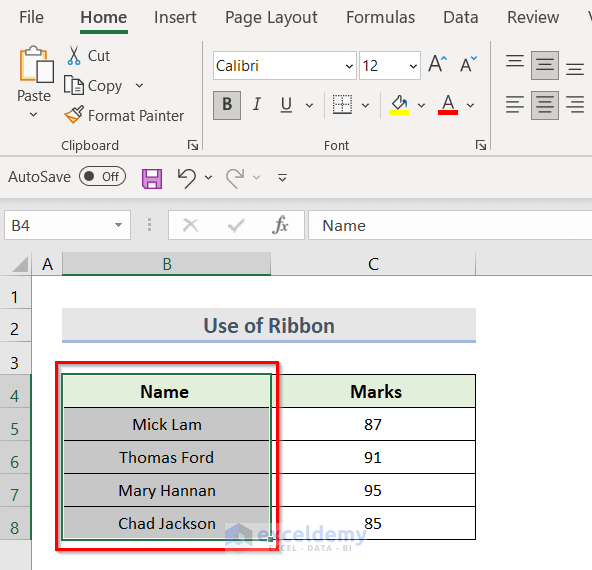
- Then, Press A + T for Top alignment.
- Finally, The data set will be aligned to the top.

Read More: How to Align Currency Symbol in Excel
Download Practice Workbook
Download the practice workbook from here.
Conclusion
I hope these three methods will be helpful for you to align text in Excel. Download the practice workbook and give it a try. Let us know your feedback in the comment section.
Related Articles
- How to Justify Text in Excel
- How to Align Colon in Excel
- How to Align Decimal Points in Excel
- How to Align Columns in Excel
- Default Alignment of Numbers in Excel
- How to Align Numbers in Excel
<< Go Back to Alignment in Excel | Excel Cell Format | Learn Excel
Get FREE Advanced Excel Exercises with Solutions!
