Method 1 – Applying the Justify Command to Justify Text in Excel
1.1 Merge Multiple Cells into One
Steps:
- Make sure that the cell into which you are merging the texts is in a column wide enough to hold the text. Here, the cell is B4.
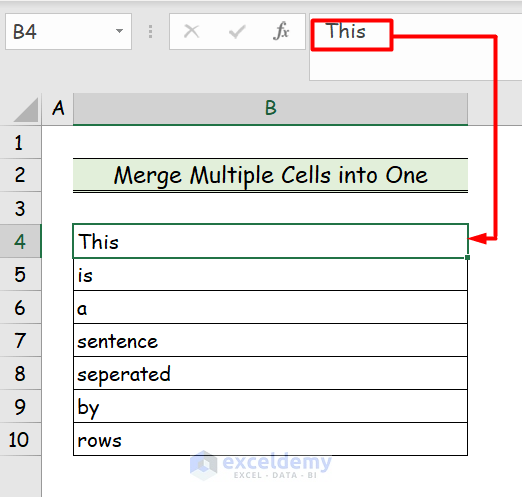
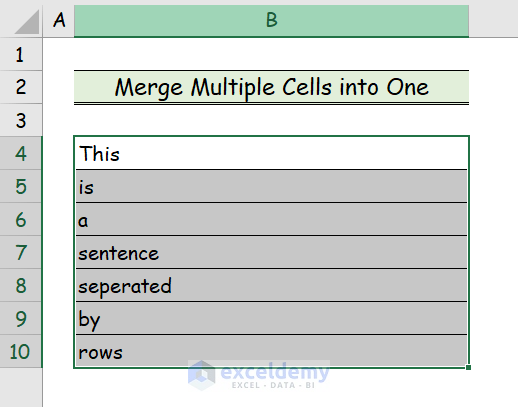
- Select all the cells with the texts that you want to merge. In this case, the cell range is B4:B10.
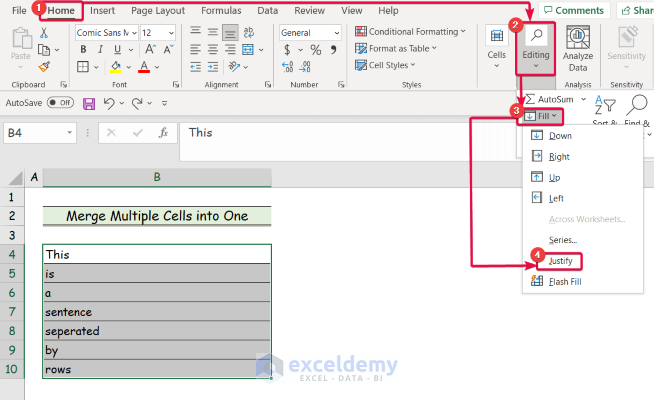
- Click on the Home tab in the ribbon.
- Go to the Editing group.
- Click on the Fill command.
- From the drop-down list, click on the Justify command.
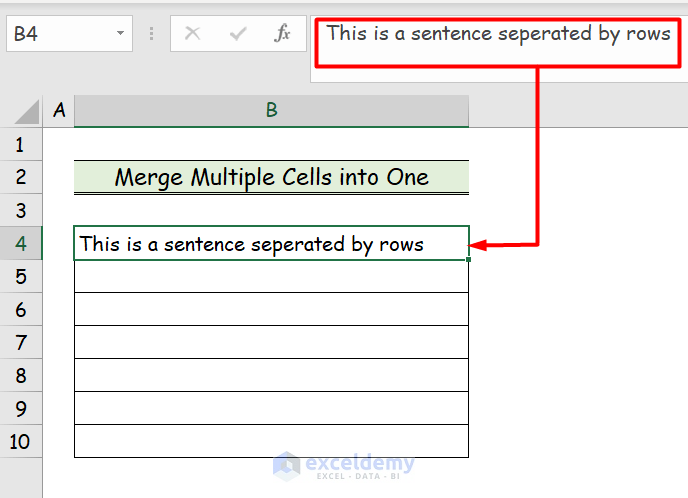
You will see your selected texts of multiple cells compiled in one single cell.
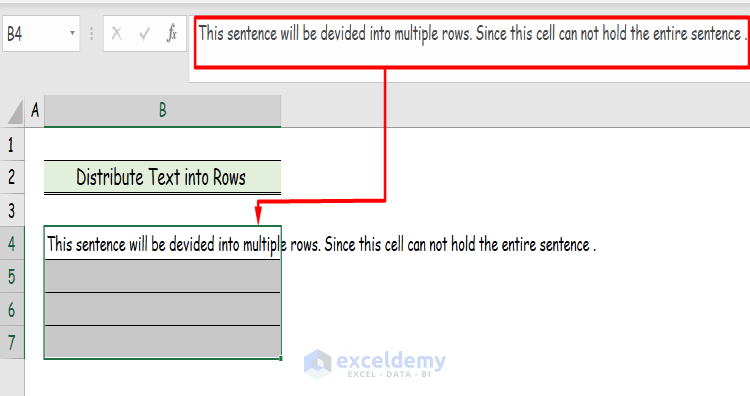
1.2 Distribute Text of a Single Cell into Multiple Rows
Steps:
- Select the cell containing the text. Here, the desired cell is B4.
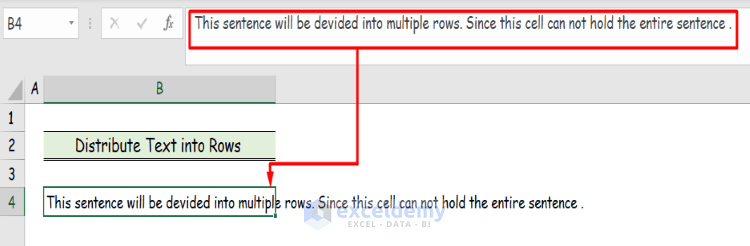
- Select one more row than the number of rows you think can hold the text. We have selected the cells in the B4:B7.
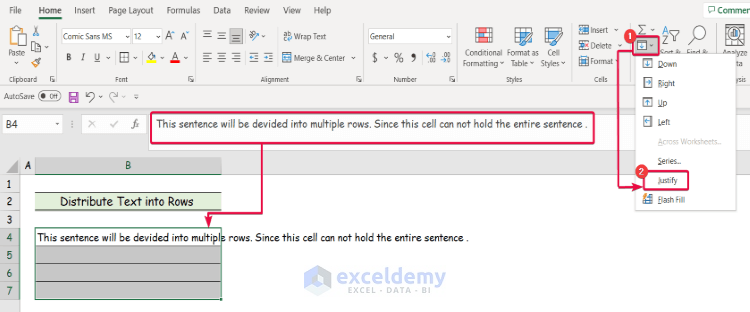
- Click on the Home tab in the ribbon.
- Go to the Editing group.
- Click on the Fillcommand.

- From the drop-down list, click Justify.
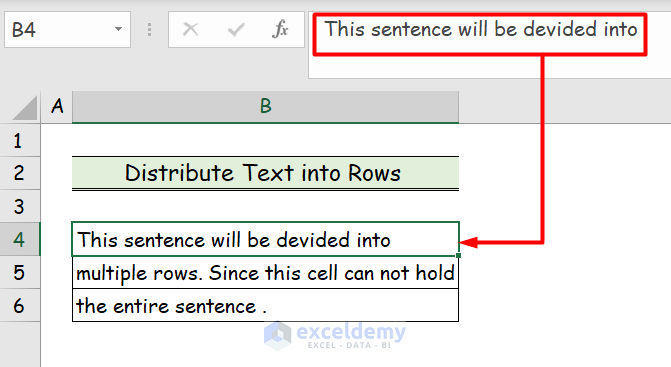
The sentence is distributed into 3 rows, namely B4, B5, and B6, as shown in the image below
Notes:
- While distributing text into multiple rows, please do not type more than 255 characters in a single cell.
- Otherwise, Excel will truncate the text up to 255 characters, and you will not get the full text
- The distributed texts do not reverse back to the single cell if you try to merge the text into one cell.
Read More: How to Align Currency Symbol in Excel
Method 2 – Using the Format Cells Command to Justify Text in Excel
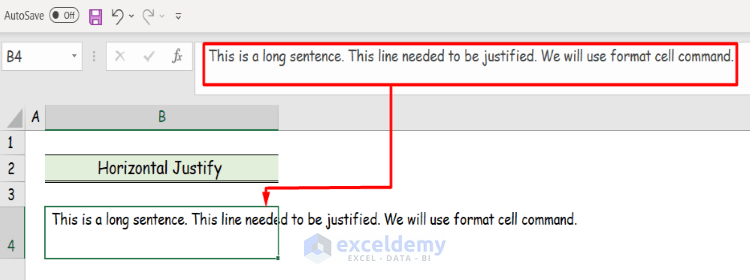
2.1 Justify Text Horizontally
Steps:
- Select the cell containing the text. We have chosen cell B4.
- Click on the Home tab in the ribbon.
- Go to the Alignment group.
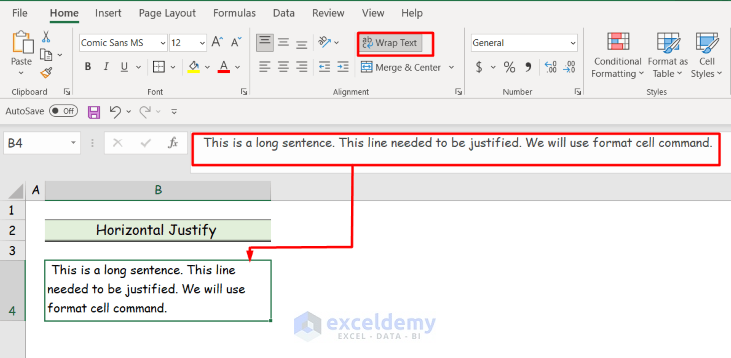
- Click on the Wrap Text command.
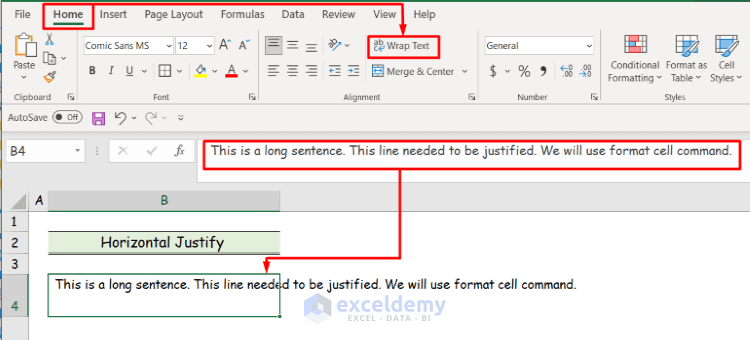
- The text is contained within the cell. But the alignment of the text is not that neat. There are spaces at the right of each line.
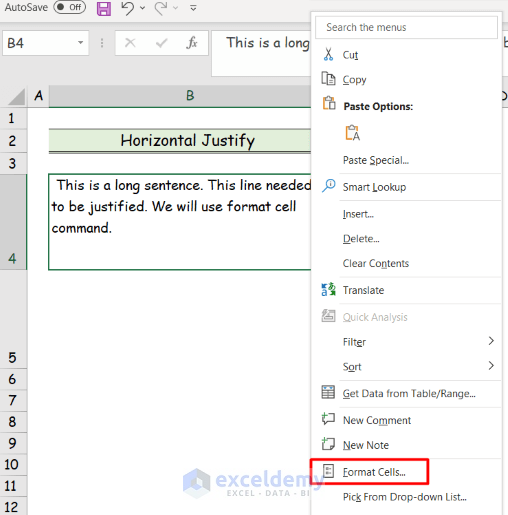
- Click on the right-click button.
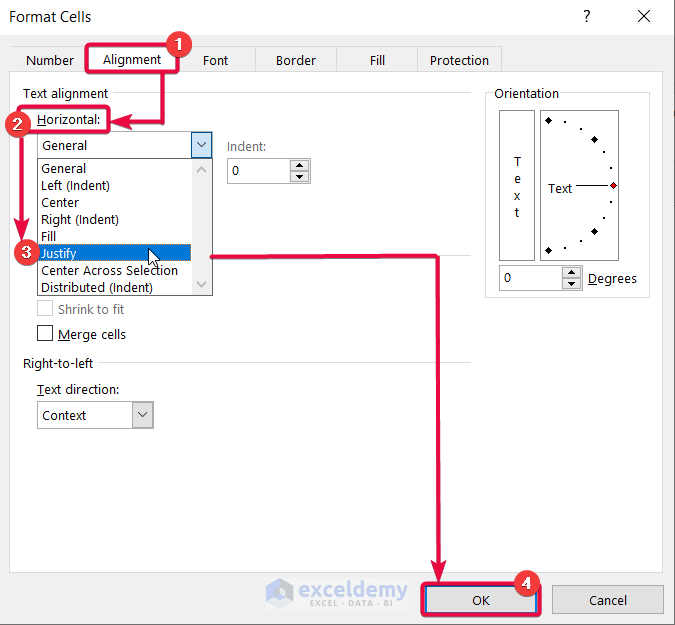
- From the options in the drop-down list, select Format Cells.
- Format Cells command box will appear.
- From the Format Cells dialog box, select Alignment.
- Click on the Horizontal tab.
- From the drop-down list, select the Justify command.
- Click OK.
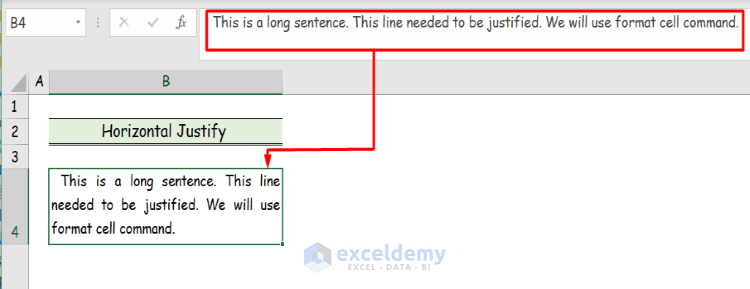
We can see the text is well aligned to the right. It looks neat and organized.
2.2 Justify Text Vertically
Steps:
- Select the cell that contains the text. We have selected cell B4.
- Go to the Home tab in the ribbon.
- Go to the Alignment group.
- Click on the Wrap Text command.
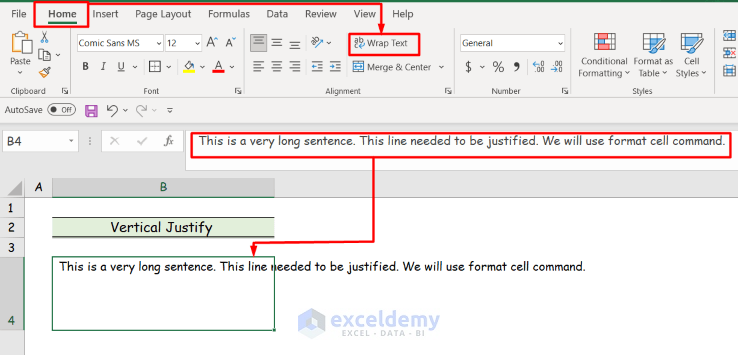
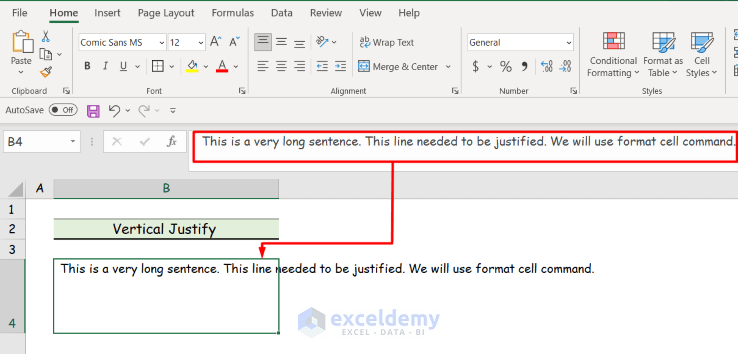
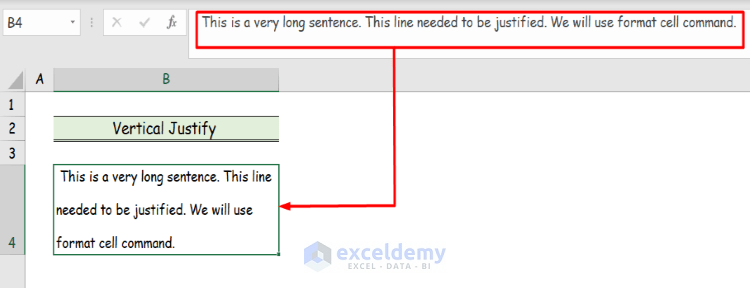
The text is contained within the cell. But the alignment of the text is not that neat. There is a chunk of space at the bottom of the text. We can use that space by justifying the text vertically.

- Click on the right-click button.
- From the drop-down list, select the Format Cells command.
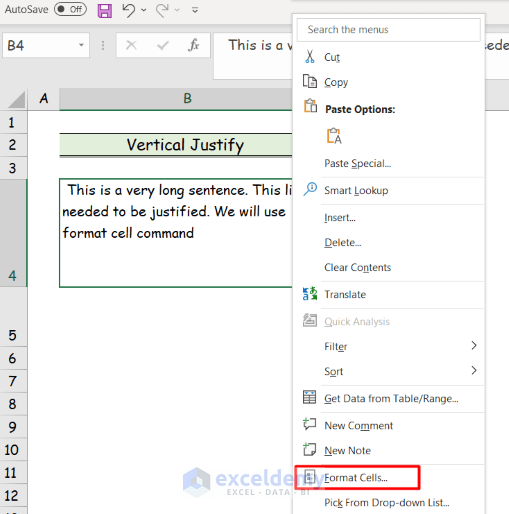
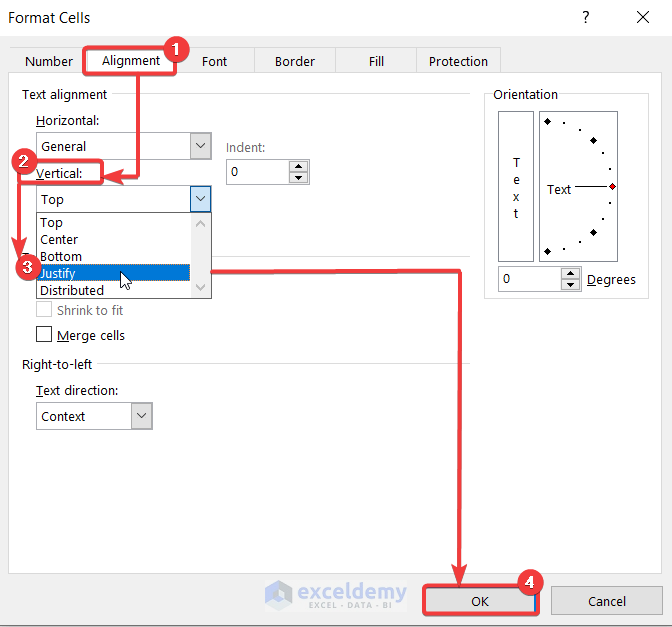
- From the Format Cells dialog box, select the Alignment tab.
- Click on the Vertical tab.
- From the drop-down list, select Justify.
- Click OK.
The spaces between the lines make it look more attractive and presentable.
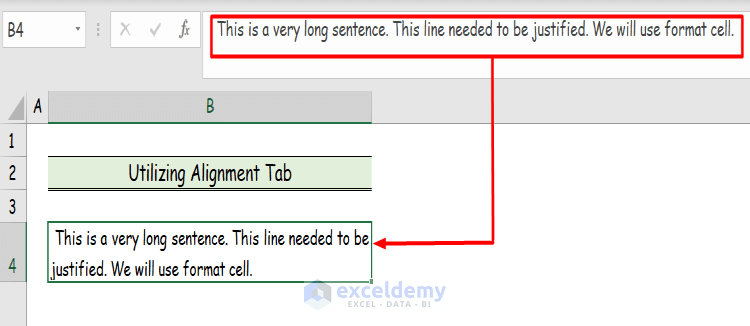
Method 3 – Utilizing the Alignment Tab to Justify Text in Excel
Steps:
- Select the cell that contains the text. We have chosen the cell B4.
- Go to the Home tab in the ribbon.
- Hover down to the Alignment group.
- Click on the Wrap Text command.
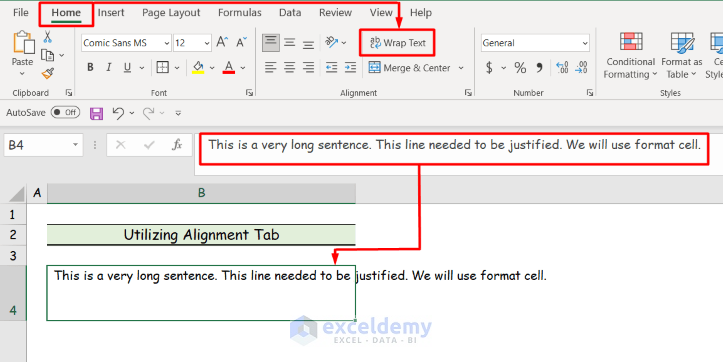
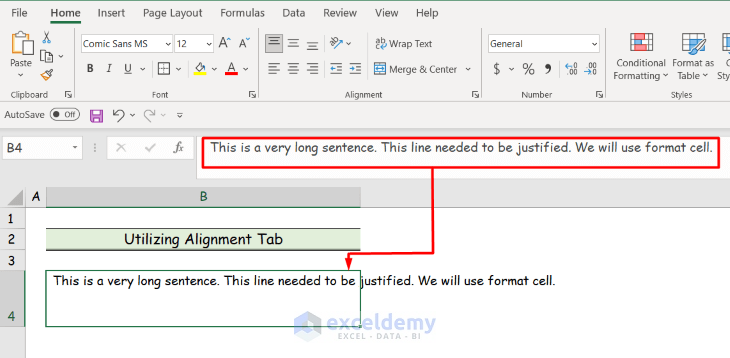
The text is contained within the cell. But we can align it to be more precise.
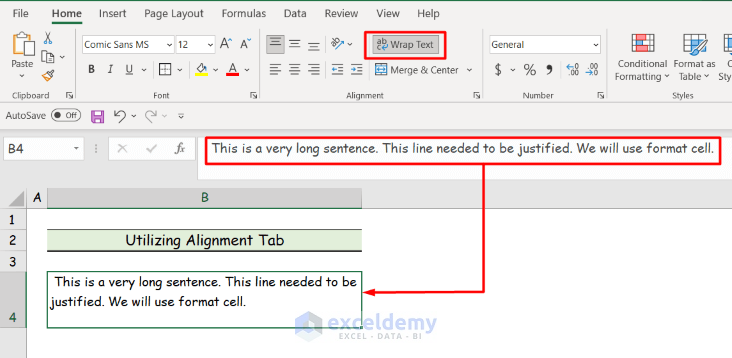
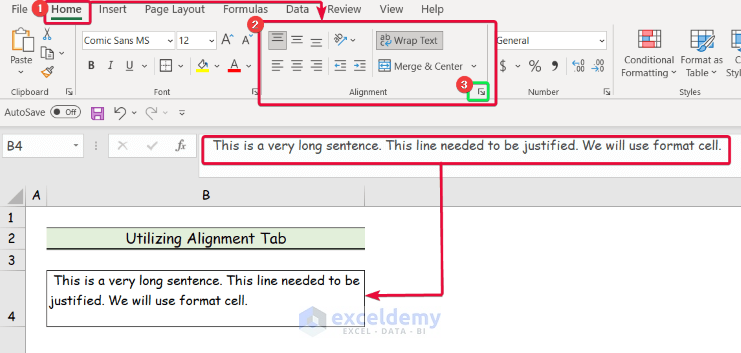
- Click on the Home tab.
- Go to the Alignment group.
- Select the tiny outward Arrow at the bottom right corner of the box.
- This will open the Format Cells dialogue box.
- Select the Alignment tab.
- Click on the Horizontal option.
- From the drop-down list, select Justify.
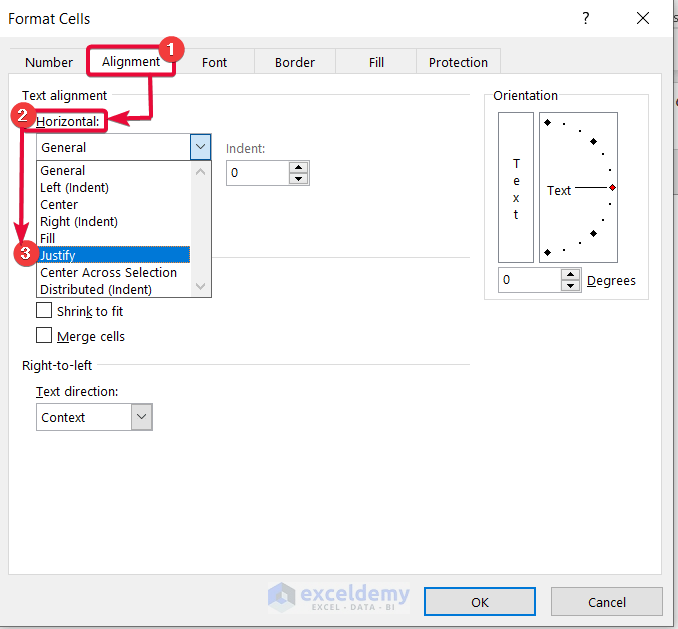
- Click on the Vertical Tab.
- From the drop-down list, select Justify.
- Click OK.
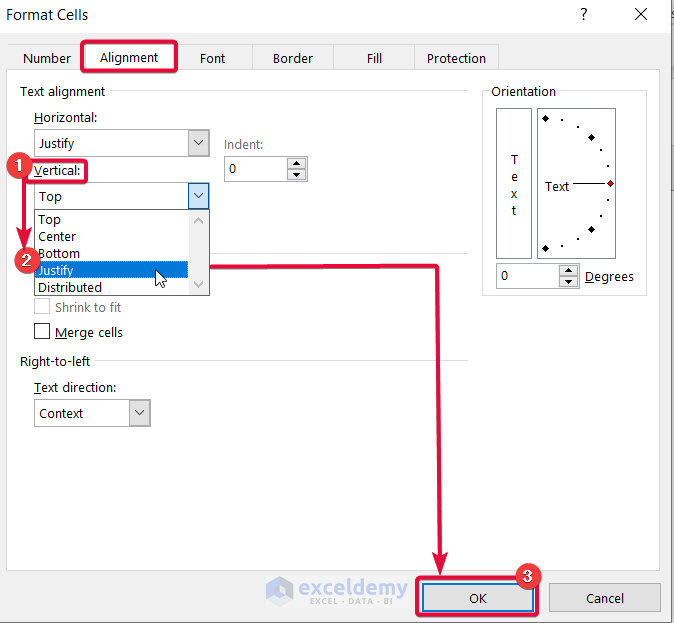
The text is well aligned to the right as well as properly spaced to cover the whole cell. Here, we have simultaneously justified the text horizontally and vertically.
Read More: How to Center Text in a Cell in Excel
Download the Practice Workbook
You can download the free Excel workbook from here and practice.
Related Articles
<< Go Back to Alignment in Excel | Excel Cell Format | Learn Excel

