Overview of the Types of Alignment
When working with data in Excel, proper alignment is crucial for effective data presentation. Not only does it enhance the visual appeal of your spreadsheets, but it also ensures clarity and readability. Let’s explore the various alignment options available in Excel.
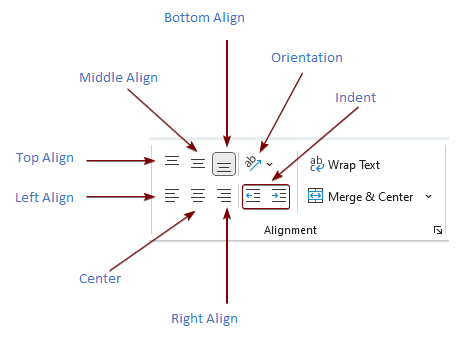
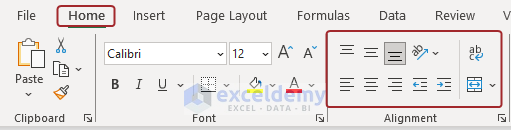
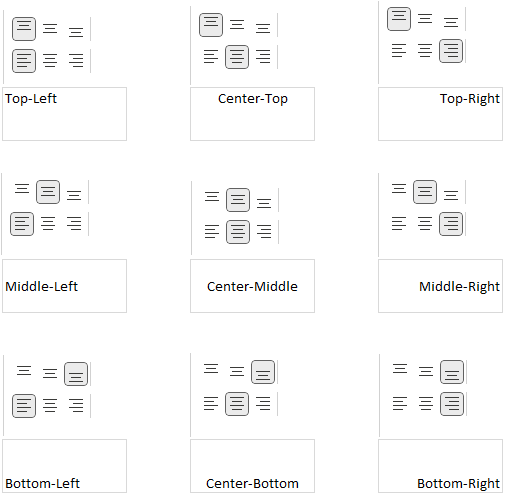
Here’s an overview of the types of alignment options in the “Alignment” group in the “Home” tab of the Excel ribbon.
Cell Alignment Basics
What Is Cell Alignment?
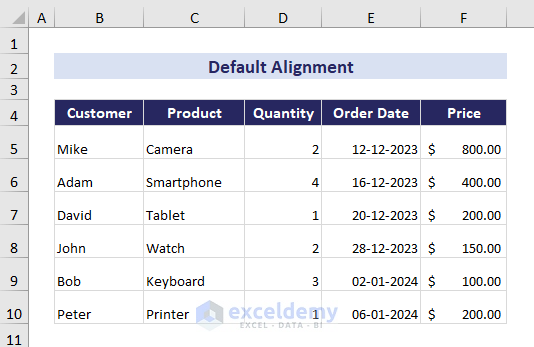
- Cell alignment refers to how the contents (text, numbers, or other data) within a cell are positioned or oriented.
- By default, cells are set to General alignment, which aligns content based on the data type:
- Numbers align to the bottom right corner.
- Text aligns to the bottom left corner.
Method 1 – Excel Ribbon Alignment Types
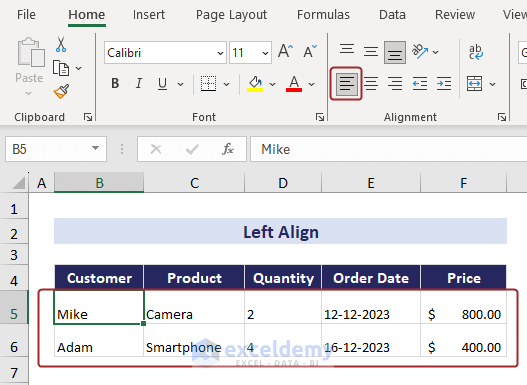
Align Left
- Content appears on the left side of the cell.
- Use for left-aligning text and numbers.
- Shortcut: Highlight cells, then go to Home, click on Alignment and select Left Align.
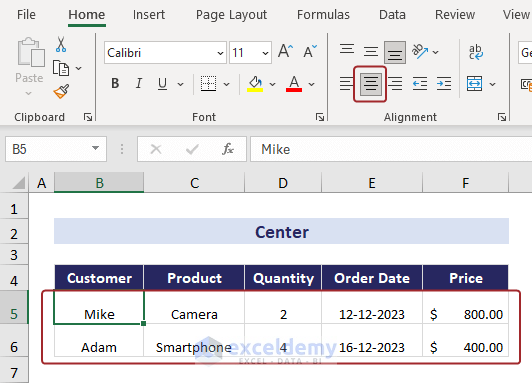
Center
- Centers text horizontally within the cell.
- Located between Align Right and Align Left in the Alignment group.
- Shortcut: Highlight cells, then go to Home, click on Alignment and select Center.
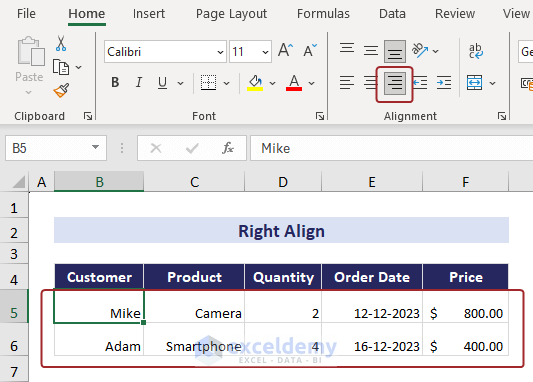
Align Right
- Shifts text to the right edge of the cell.
- Located next to the Center command.
- Shortcut: Highlight cells, then go to Home, click on Alignment and select Right Align.
Here are the shortcut keys for different types of horizontal alignment:
| Types of Horizontal Alignment | Shortcut Key |
|---|---|
| Align Left | ALT + H + A + L |
| Center | ALT + H + A + C |
| Align Right | ALT + H + A + R |
1.2. Vertical Alignment
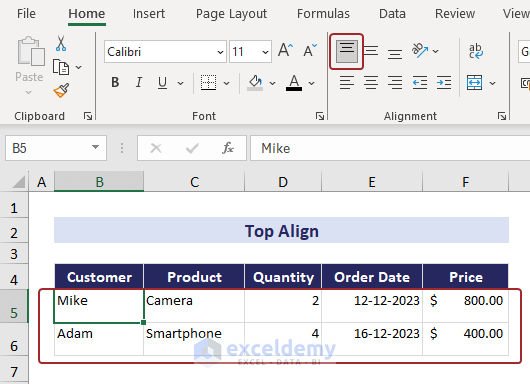
Top Align
- Moves text to the top of the cell.
- Useful for vertically aligning content.
- Shortcut: Highlight cells, then go to Home, click on Alignment and select Top Align.
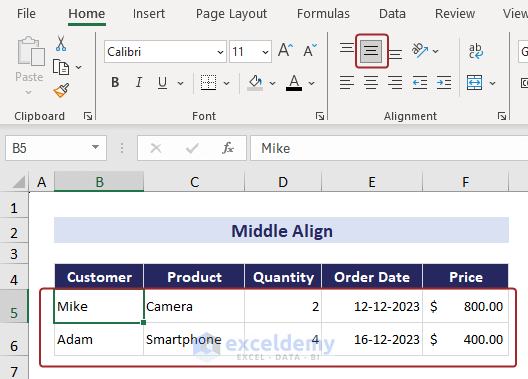
Middle Align
- Aligns text in the middle of the cell (between top and bottom).
- Shortcut: Highlight cells, then go to Home, click on Alignment and select Middle Align.
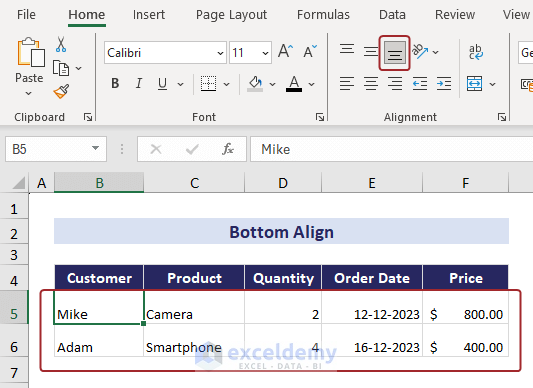
Bottom Align
- Aligns text at the bottom of the cell.
- Shortcut: Highlight cells, then go to Home, click on Alignment and select Bottom Align.
The Bottom Align option is always enabled for any type of cell content by default. When you select any horizontal alignment option (left, center, or middle), the Bottom Align option is also activated by default.
Here are the shortcut keys for different types of vertical alignment:
| Types of Vertical Alignment | Shortcut Key |
|---|---|
| Top Align | ALT + H + A + T |
| Middle Align | ALT + H + A + M |
| Bottom Align | ALT + H + A + B |
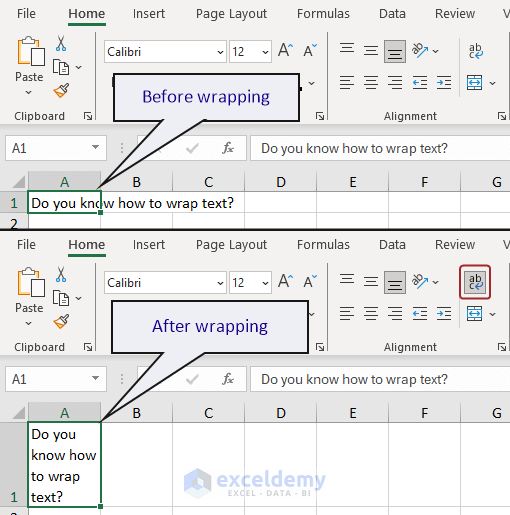
1.3. Wrap Text
- Use the Wrap Text feature to make cell content visible within its boundaries.
- Useful for handling lengthy text or labels, ensuring they display on multiple lines without adjusting row height manually.
- To wrap text:
- Select the cell range.
- Go to the Home tab, click on the Alignment group and select Wrap Text.
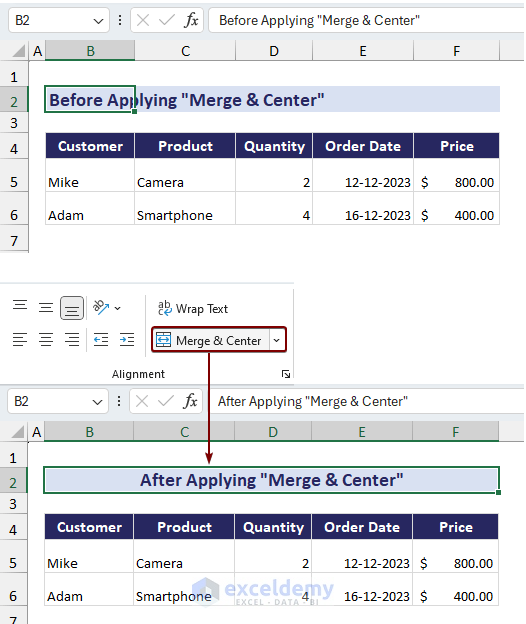
1.4. Merge & Center
- Combine and center the content of multiple cells into a single, larger cell.
- Commonly used for creating headings or titles across multiple columns.
- When you apply Merge & Center, it keeps the content of the first cell only.
- To merge cells with center alignment:
- Select the cells.
- Go to the Home tab, click on the Alignment group and select Merge & Center.
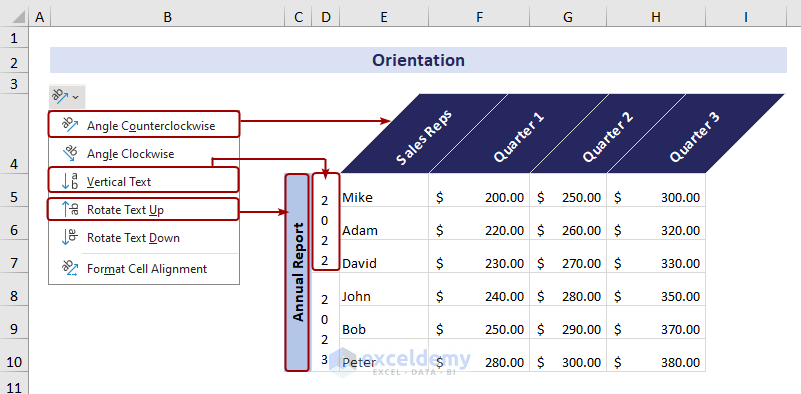
1.5. Orientation
- Rotate the content within a cell to create a specific visual effect.
- Options include:
- Angle Counterclockwise: Rotate text counterclockwise at a specified angle.
- Angle Clockwise: Rotate text clockwise at a specified angle.
- Top to Bottom: Align text vertically from top to bottom.
- Bottom to Top: Align text vertically from bottom to top.
- Vertical Text: Rotate text 90 degrees.
- To apply orientation:
- Select the range of cells.
- Go to the Home tab, click on the Alignment group and select the Orientation drop-down.
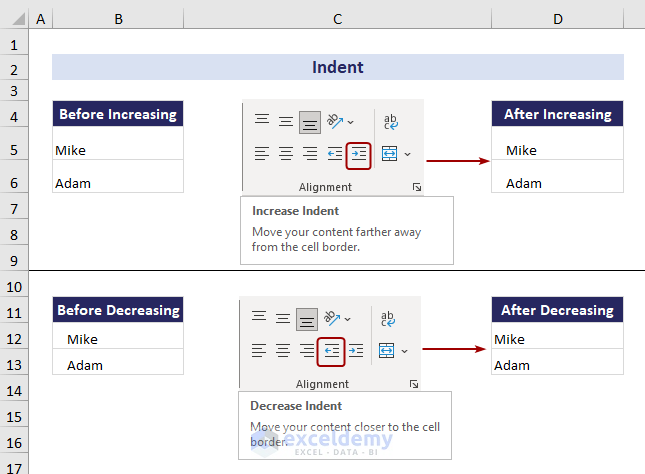
1.6. Indent
- Refers to the indentation of text within a cell.
- Two types of indent options:
- Increase Indent: Moves content further away from the cell border.
- Decrease Indent: Moves content closer to the cell border.
Read More: How to Align Columns in Excel
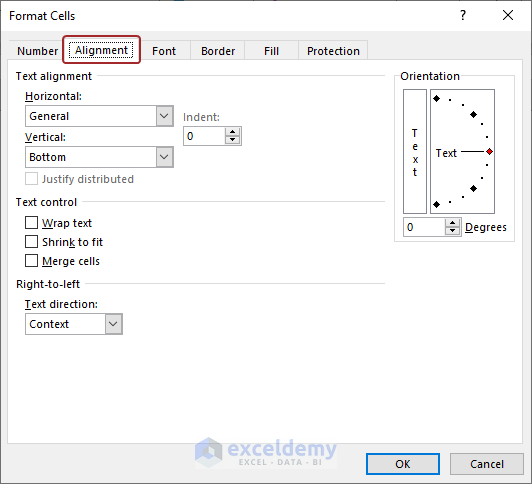
Method 2 – Types of Alignment in Format Cells Dialog Box
- The Format Cells dialog box provides additional alignment options.
- To access it:
- Press Ctrl + 1.
- Go to the Alignment tab.
- Explore all alignment features in the dialog box.
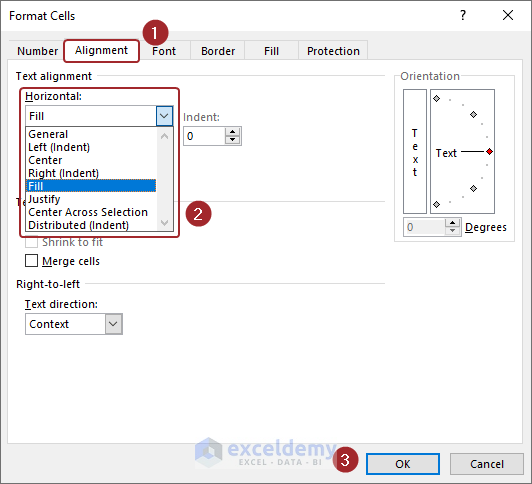
2.1. Fill
The Fill feature displays content at the cell border. If the cell is too wide, it repeats the content until it reaches the border.
To apply the Fill feature in the Format Cells dialog box:
- Navigate to the Alignment tab.
- Expand the Horizontal drop-down in the Text alignment section.
- Click OK.
Refer to the image below for an illustration of the changes after applying the Fill command:
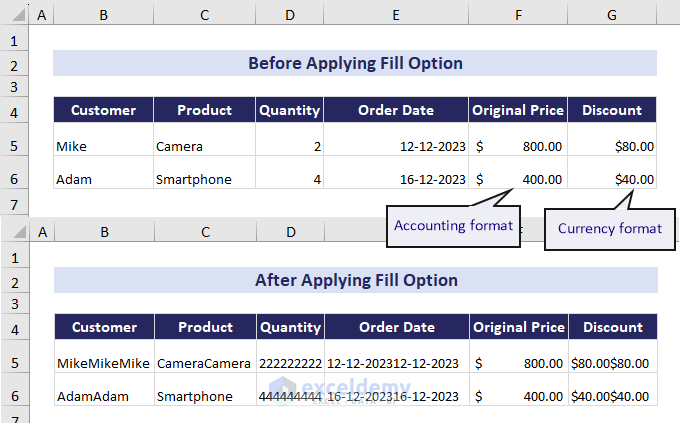
Note: The Fill option only shows changes for the Currency format, not the Accounting format.
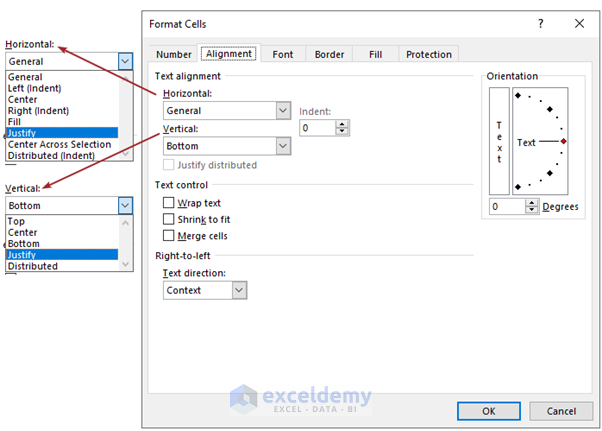
2.2. Justify
The Justify command is helpful if a word is too long to fit within a cell border. You will find the Justify command both in the Horizontal and Vertical drop-down of the Alignment group of the Format Cells dialog box.
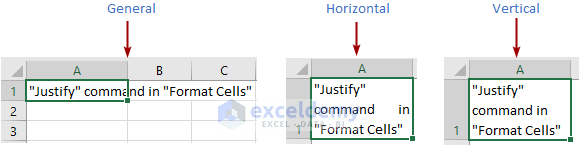
The horizontal Justify command adjusts the spacing between words in a cell to align both the left and right borders. That means Excel will stretch or compress the text within the cell. The vertical Justify command adjusts the spacing between lines in a cell to spread the text evenly from top to bottom.
To apply the Justify command in the Format Cells dialog box:
- Select the Alignment tab.
- Go to the Text alignment section, select Horizontal or Vertical drop-down and click on Justify.
- Click OK.
Note the difference between horizontal and vertical Justify commands in the below image. For the horizontal Justify command, the text of the second line is shifted to each side of the cell border.
 When the row height is not the default height, the Justify command doesn’t increase the row height further. You may find some words missing in the cell after applying the Justify command.

Note: Justify is different from Wrap Text because the Justify command focuses on adjusting the spacing of words or lines to achieve alignment along the cell border within a cell. However, the Wrap Text command deals with accommodating multiline text by expanding the row height.
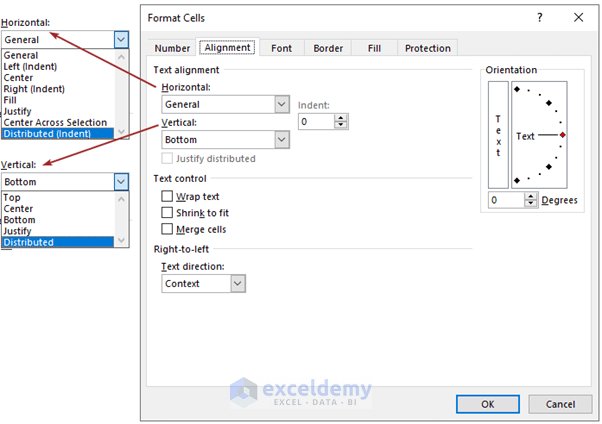
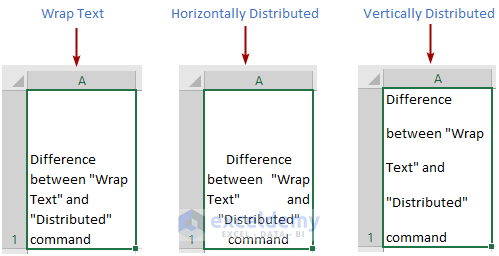
2.3. Distributed
The Distributed alignment type is available in both the Horizontal and Vertical sections of the Format Cells dialog box. This command also enables the Wrap Text feature.
To apply the Distributed command in the Format Cells dialog box:
- Select the Alignment tab.
- In the Text alignment section, choose either Horizontal or Vertical from the drop-down menu.
- Select Distributed.
- Click OK.
2.4. Center Across Selection
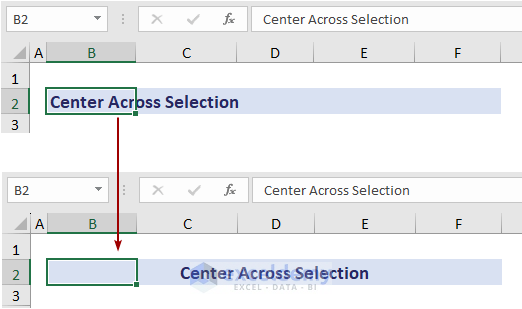
The Center Across Selection feature in the Format Cells dialog box in Excel is a text alignment option that allows you to center the text horizontally across a range of selected cells without merging the cells.
To apply the Center Across Selection command in the Format Cells dialog box:
- Go to the Alignment tab.
- In the Text alignment section, choose Horizontal.
- Select Center Across Selection.
- Click OK.

- The Center Across Selection command doesn’t affect or change the cell content; it simply displays the content in the center position.
- Refer to the image below for an illustration:
2.5. Shrink to Fit
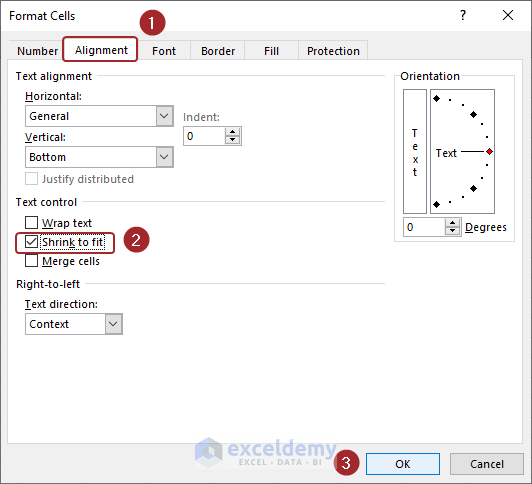
Shrink to Fit in the Format Cells dialog box is an option that automatically reduces the font size to fit the content within a cell. This feature is useful when the text in a cell is too long to be fully displayed within the given cell width.
To apply Shrink to Fit in the Format Cells dialog box:
- Select the Alignment tab.
- In the Text control section, check the Shrink to Fit option.
- Click OK.
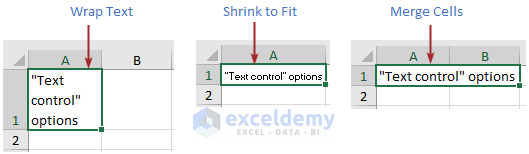
- You’ll also find the Wrap Text and Merge Cells commands in the Text control section. See the image below to compare the Text control options:
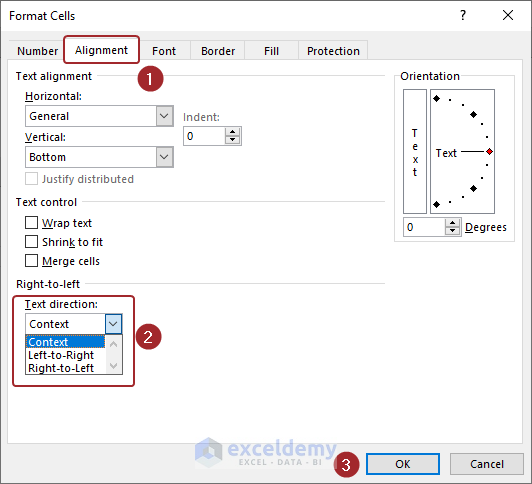
2.6. Text Direction
The Text Direction option includes three choices:
- Context: Choosing the appropriate Context option ensures that the text is displayed correctly according to the writing direction of the selected language. This is especially important when your Excel sheet contains a mix of languages with different writing directions.
- Left-to-Right: This is the default setting for most languages, where text is read from left to right.
- Right-to-Left: This option is available for languages like Arabic and Hebrew, where text is read from right to left.
To access the Text direction in the Format Cells dialog box:
- Select the Alignment tab.
- In the Right-to-left section, choose the desired text direction from the drop-down menu.
- Click OK.
Download Practice Workbook
You can download the practice workbook from here:
Frequently Asked Questions
-
Difference between Center Across Selection and Merge & Center:
- The “Merge & Center” command combines multiple cells into one larger cell, while “Center Across Selection” doesn’t merge cells. Instead, it centers the content within the selected range of cells.
- When you apply “Center Across Selection” to multiple cells, it displays the content of all those cells in their center position.
-
Difference between Justify and Distributed command in Excel:
- Justify: Adjusts word or line spacing to align both the left and right sides of the cell border.
- Distributed: Adjusts character or line spacing evenly across the cell’s width or height. It ensures a more uniform presentation of content in Excel cells.
Related Articles
<< Go Back to Alignment | Format Cells | Learn Excel
Get FREE Advanced Excel Exercises with Solutions!
