In our daily life, we have to deal with lots of data. Microsoft Excel is an excellent place to store those data. In order to store data or create a table, we can format data in many ways. One of the most common practices for formatting data is to apply center horizontal alignment in Excel. Are you having trouble applying center horizontal alignment in Excel? In this article, we will learn how to apply center horizontal alignment in Excel with 3 quick tricks.
There are 3 quick tricks in Excel to apply center horizontal alignment in Excel. We can apply center horizontal alignment to a single cell or in an entire table of data. The steps are the same for both cases. In this article, we will see 3 examples of applying center-horizontal alignment. We will need a dataset like the below one to do so. The dataset contains the Student ID numbers of 6 students and their Total Marks. The dataset shown below is aligned in the default alignment of Excel. Now we will see how to apply center horizontal alignment in the dataset.

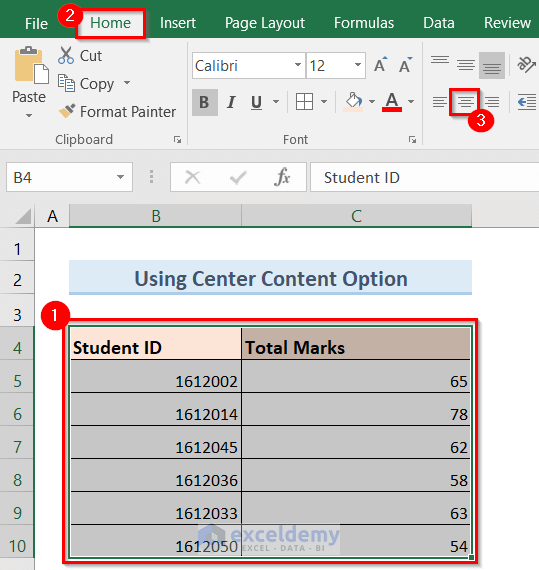
1. Using Center Content Option to Apply Center Horizontal Alignment in Excel
Using the Center Content option is the easiest and quickest way to apply center horizontal alignment in Excel. If you want to be really quick to apply center horizontal alignment to your data, then this will be the best method to do the job.
Steps:
- First, select all the cells of your dataset in which you want to apply the center horizontal alignment. For the example shown below, select the (B4:C10) cells.
- Then, click on the Home tab on your ribbon.
- After that, click on the Center Content option like the below one.
- As a result, center horizontal alignment will be applied to your dataset like the image below.

Read More: How to Center Text in a Cell in Excel
2. Using Format Cells Option to Apply Center Horizontal Alignment in Excel
Using the Format Cells option is also an efficient way to apply center horizontal alignment. To do so, follow the steps below.
Steps:
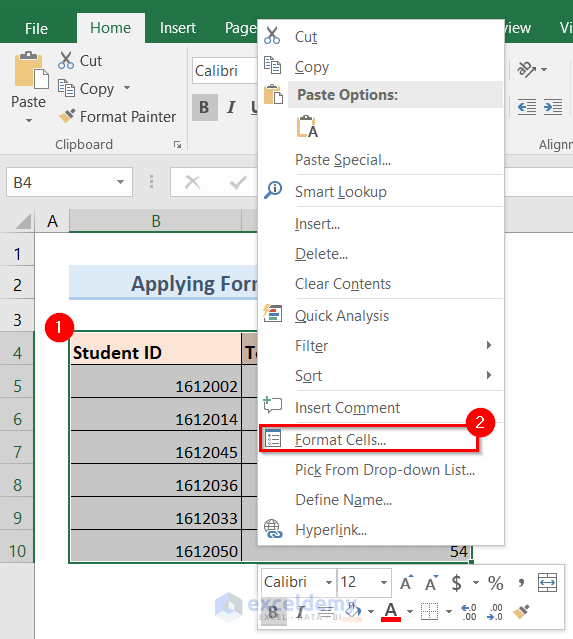
- First of all, select all the cells of your dataset again in which you want to apply the center horizontal alignment. For the example shown below, select the (B4:C10) cells.
- Next, right-click on your mouse.
- As a result, a pop-up window will appear on the screen.
- Now, click on the Format Cells option from the pop-up window as shown below.
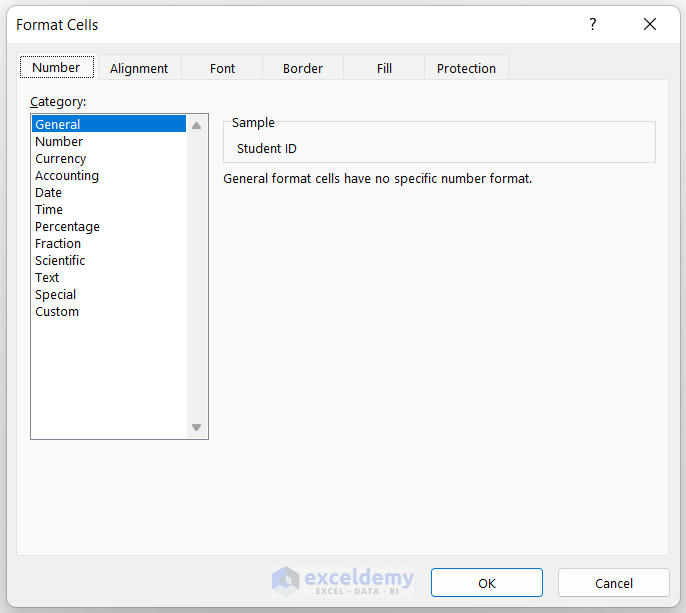
- Then, a new pop-up window named Format Cells will appear on the screen like the image below.
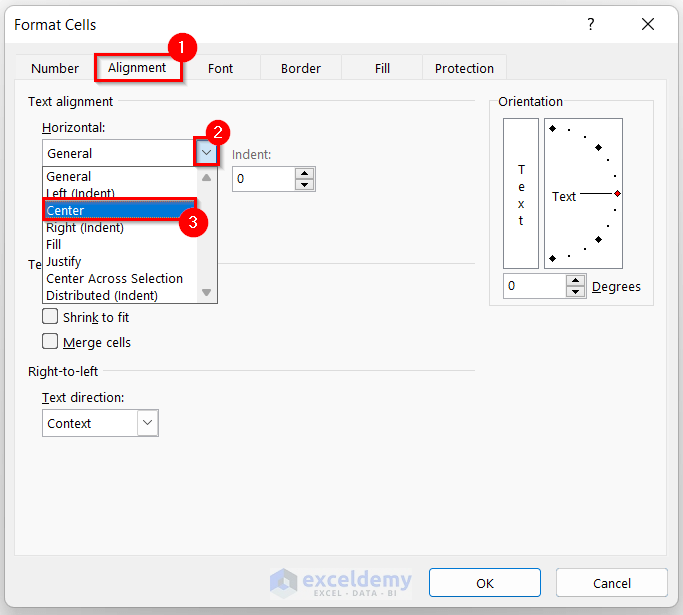
- Subsequently, go to the Alignment >> click on the Horizontal drop-down option >> Select Center as shown below.
- Afterward, click OK.

- Finally, center horizontal alignment will be applied to your dataset like the one below.

Read More: How to Align Text in Excel
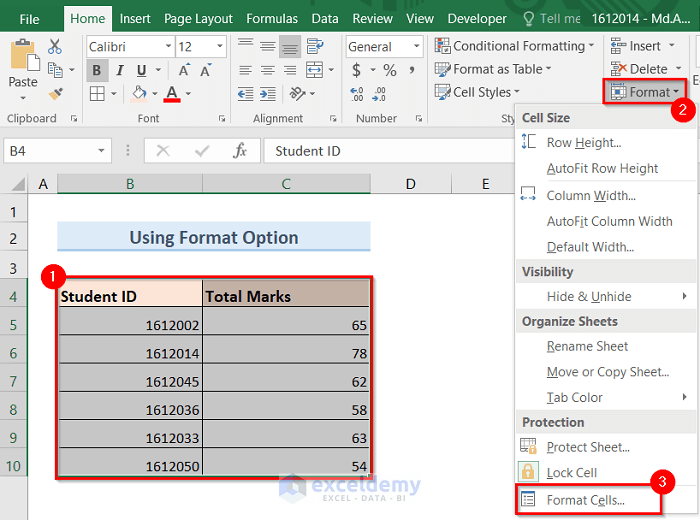
3. Use of Format Option to Apply Center Horizontal Alignment in Excel
Using the Format option is another way to apply center horizontal alignment. This method is quite similar to the Using Format Cells option method. In order to use this method, follow the steps below.
Steps:
- First, select all the cells of your dataset in which you want to apply the center horizontal alignment.
- After that, click on the Format drop-down option.
- Next, click on the Format Cells option as shown below.
- Hence, a new pop-up window named Format Cells will appear on the screen like the image below.
- Go to the Alignment tab >> click on the Horizontal drop-down option >> Select Center as shown below.

- Next, click OK.

- As a result, it will apply center horizontal alignment to your dataset like below.

Read More: How to Middle Align in Excel
Things to Remember
- If you want to be quick and efficient in using Excel, then the Center Content method will be the best option for you.
- You can use these 3 methods both for a single cell or a table of datasets as shown in this article.
- You can apply center horizontal alignment to any kind of data such as numbers, characters, time, and date by following these 3 methods.
Download Practice Workbook
You can download the Excel workbook from here.
Conclusion
Hence, follow the above-described methods. Thus, you can easily learn how to apply center horizontal alignment in Excel. Hope this will be helpful. Don’t forget to drop your comments, suggestions, or queries in the comment section below.
Related Articles
- All Types of Alignment in Excel
- How to Top Align in Excel
- How to Bottom Align in Excel
- How to Align Right in Excel
- How to Left Align in Excel
- Align Two Sets of Data in Excel
- How to Change Alignment in Excel
- [Fixed!] Excel Cell Alignment Not Working
<< Go Back to Alignment in Excel | Excel Cell Format | Learn Excel
Get FREE Advanced Excel Exercises with Solutions!
