When dealing with a worksheet that has a lot of data pages, it is essential to set the proper page numbers for them. Otherwise, it will be difficult to find necessary data in time or link the worksheet pages to one another. If we add the footer on page 1 to the current worksheet, then it helps us by easing our work. So, it is very important to learn how to add the footer on page 1 to the current worksheet.
How to Add the Footer Page 1 to the Current Worksheet: 3 Easy Methods
We’ll use a sample dataset overview as an example in Excel to understand easily. For instance, we have a dataset of people with their Names in Column B, Department in Column C, and Salary in Column D. At this point, you want to add the footer page 1 to the current worksheet by following 3 methods. Follow the steps of both methods below to do so:

1. Choosing Page 1 Option from Footer Section
There are two processes by which you can add the pages to your worksheet. Here I will show you, how you can choose the Page 1 option directly from the Footer section. To perform this, follow the below steps.
Steps:
- First, select the Header & Footer option under the Text section of the Insert tab.

- After that, you will see the Header & Footer under the Design tab.

- Now, under the Footer section select the Page 1 option.

- Last, by scrolling down the worksheet, you will see the desired result.

Read More: How to Insert a Footer in Excel
2. Choosing “Page 1 of ?” Option from Footer Section
We can do the same thing using Page 1 of? option. This method is similar to the first method only with slight changes, The steps of this method are.
Steps:
- At the very beginning, repeat the similar steps of the first method. In short: go to the Insert> Header & Footer>Footer options.
- Then, instead of choosing the Page 1 option, you will select the “Page 1 of ?” option in this method.
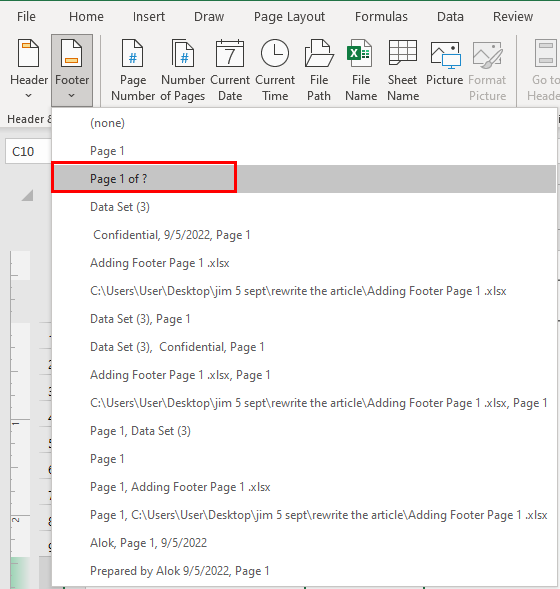
- Finally, you will see the number of each individual page along with the total number of pages. It means if you have a total of 5 pages, after selecting this Footer option you will see Page 1 of 5 on the first page, Page 2 of 5 on the 2nd page, and Page 5 of 5 on the last page.

Read More: How to Remove Header and Footer in Excel
3. Assigning Page from Page Setup Dialogue Box
Another way of inserting Header & Footer is by launching the Page Setup dialogue box. To do this, we have to follow the below steps.
Steps:
- First, select the dialogue box launcher of the Page Setup under the Page Layout tab.

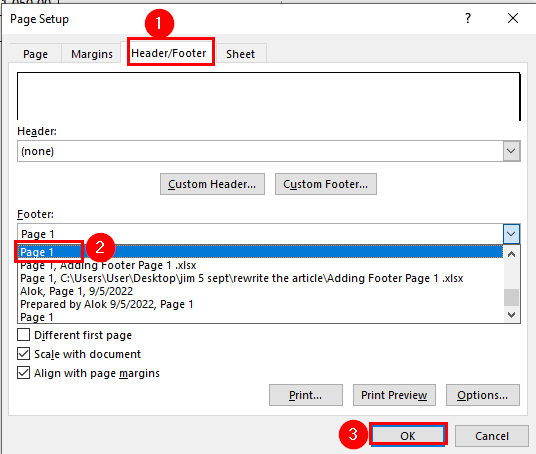
- Second, In the Page Setup dialogue box, select the Header/Footer option, and then in the Footer option, select the Page 1 option and then click OK.
- Last, you will see the page numbers appear serially on every page.
Things to Remember
You can also use the Custom Footer option to select the alignment of the footer. For this, you need to select the Custom Footer button. After this, a new window will open up where you can customize the page footer on your own. Here the Insert Page Number actually works like the Page 1 option from the Design tab.
Download Practice Workbook
You can download the practice workbook from here.
Conclusion
Henceforth, follow the above-described methods. Hopefully, these methods will help you to add the footer on page 1 to the current worksheet. We will be glad to know if you can execute the task in any other way. Please feel free to add comments, suggestions, or questions in the section below if you have any confusion or face any problems. We will try our level best to solve the problem or work with your suggestions.
Related Articles
- How to Edit Footer in Excel
- How to Use Header and Footer in Excel
- How to Hide Header and Footer in Excel
<< Go Back to Header and Footer | Page Setup in Excel | Print in Excel | Learn Excel
Get FREE Advanced Excel Exercises with Solutions!
