Method 1 – Fit the Whole Dataset on a Page
- Select the Fit to option, initially go to the Page Layout tab >> Launch the page setup dialog >> Select the Fit to 1 option >> Hit the Print Preview command to check the outcome.
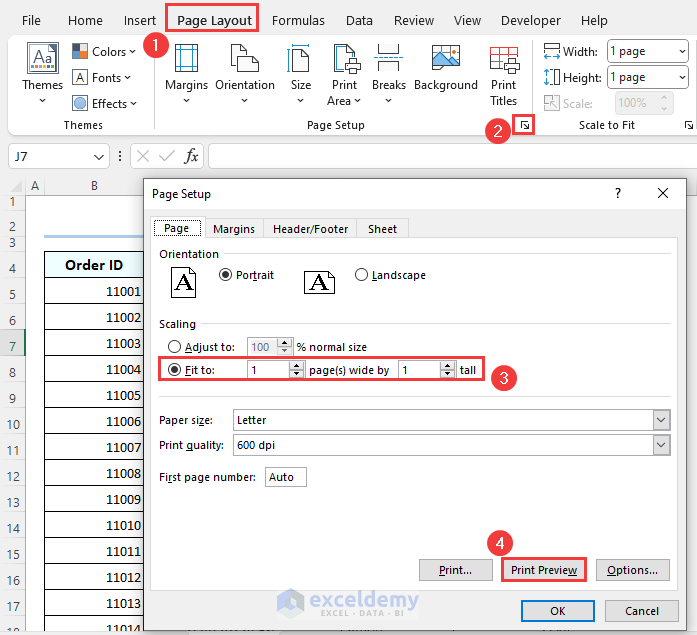
- Obtain the whole dataset on a single page.
Note: You can select the Page Setup command again if you require any changes.
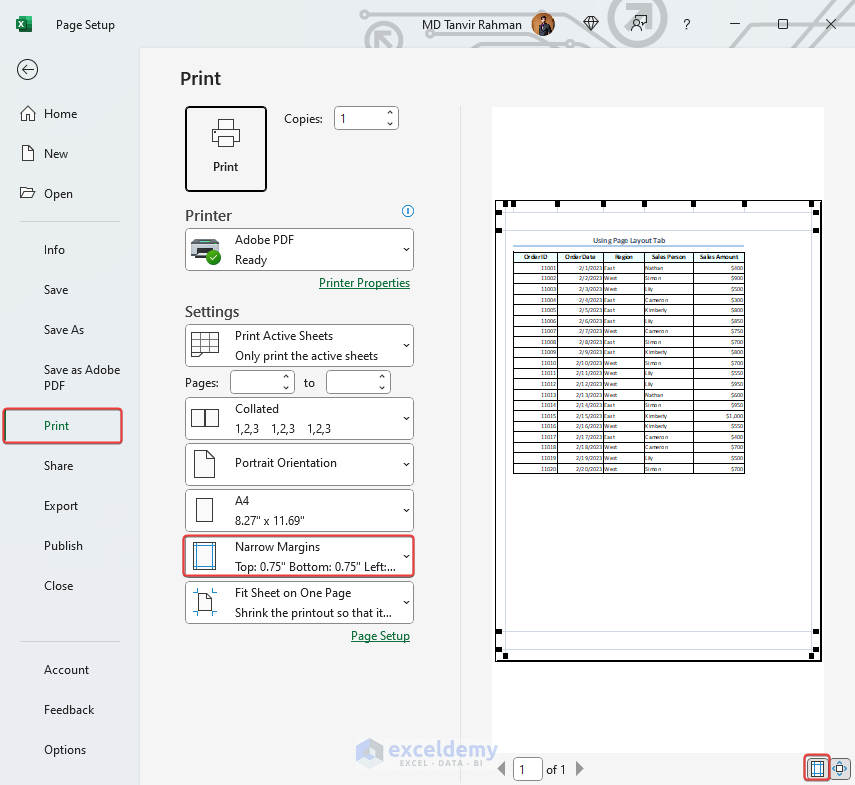
Method 2 – Setup Margins in Excel Page
- Go to the Page Layout tab >> Expand the Margins command >> Select the Narrow option.
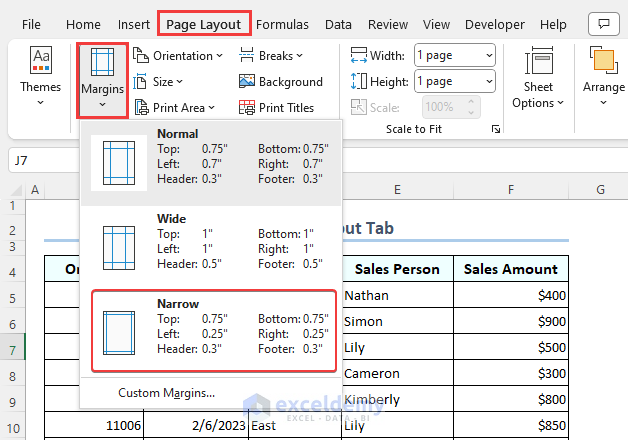
- Press Ctrl + P keys to observe the Print preview. Select the Show margin option for better understanding.
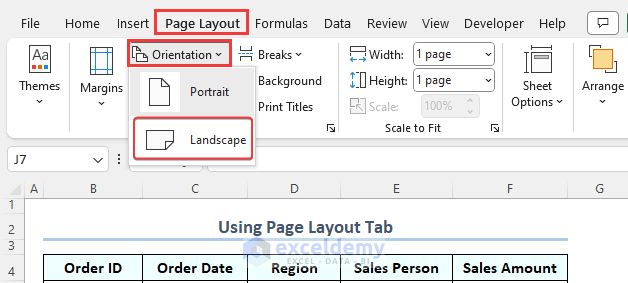
Method 3 – Setup Page Orientation in Excel
- Select Landscape orientation; go to the Page Layout tab >> Expand the orientation command >> Select the Landscape option from the list.
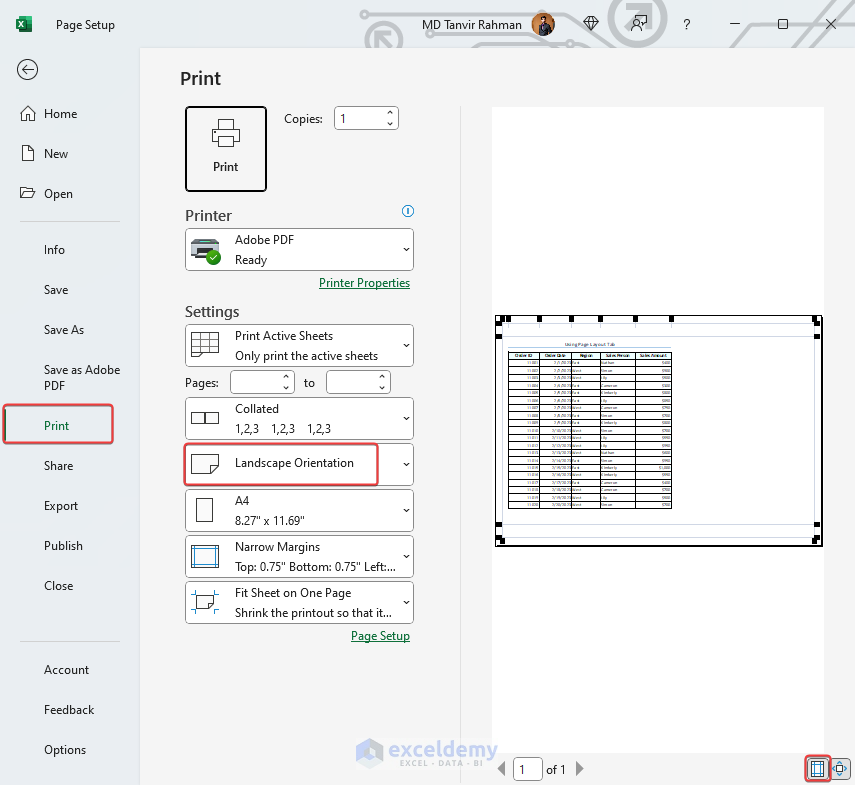
- Press Ctrl + P keys to observe the outcome from the Print, select the Show margin option.
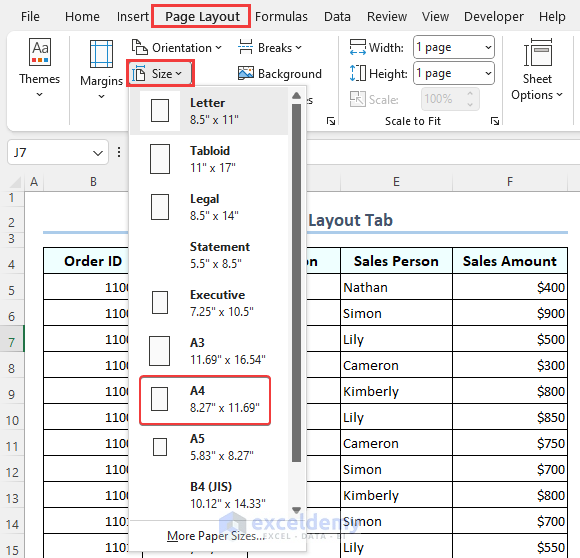
Method 4 – Select Size of Page
- Select page size, go to the Page Layout tab >> Expand the Size command >> Select the A4 option from the list.
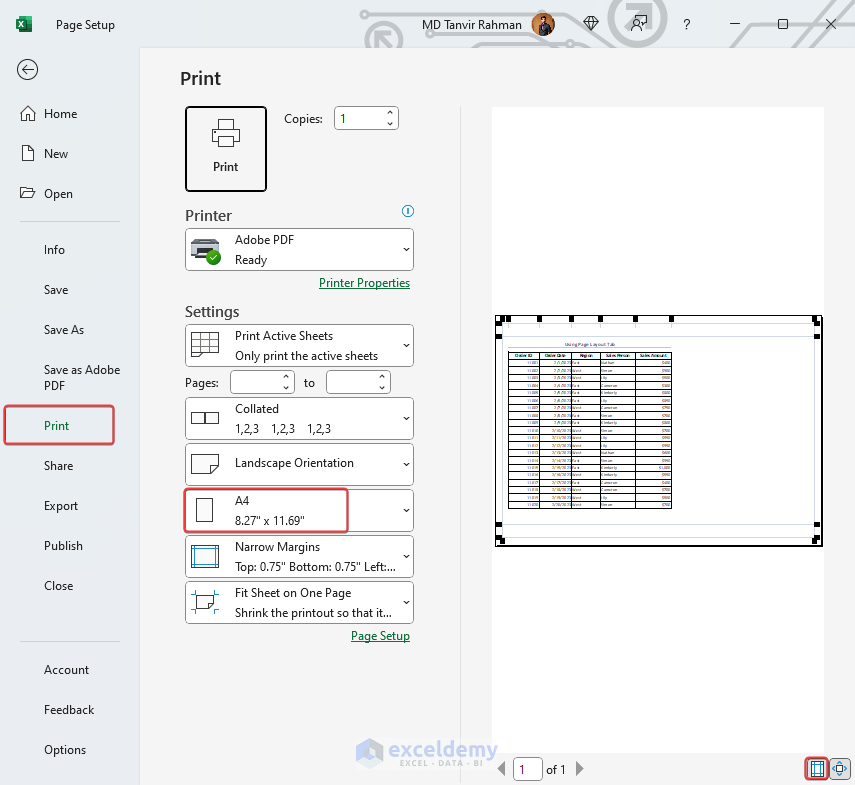
- Press the Ctrl + P keys to open the preview on the Print the Show margin option helps for better understanding.
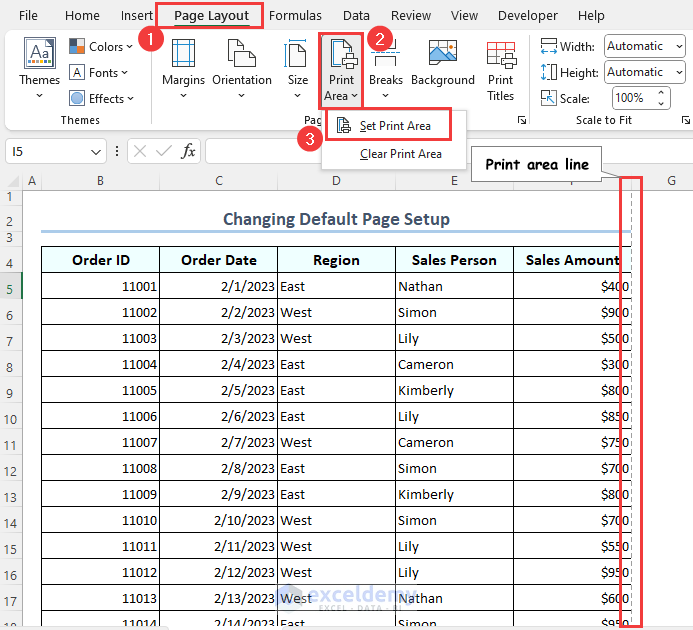
Method 5 – Setup Print Area for Page in Excel
- Select the print area, go to the Page Layout tab >> Expand the Print Area command >> Select the Set Print Area option from the list.
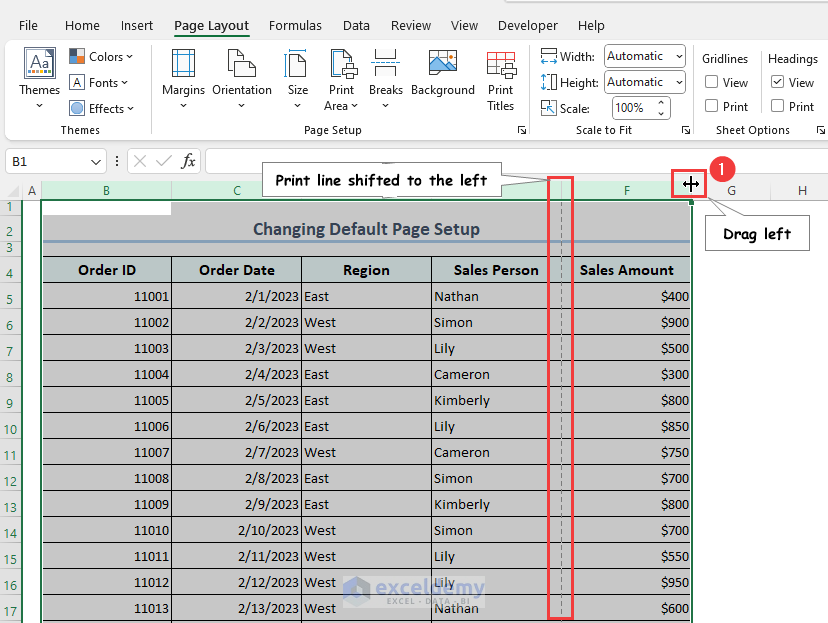
 Holding the borderline of the column and dragging it to the right, you will observe the shifting of the print line. Sales Amount column is excluded from the 1st page.
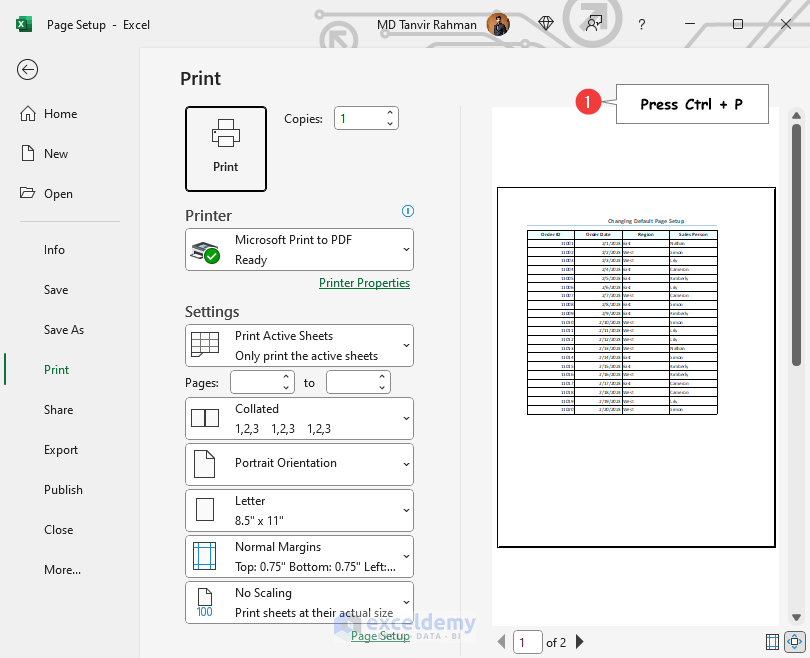
- Press Ctrl + P keys to navigate the dataset without the Sales Amount column in the Print menu.
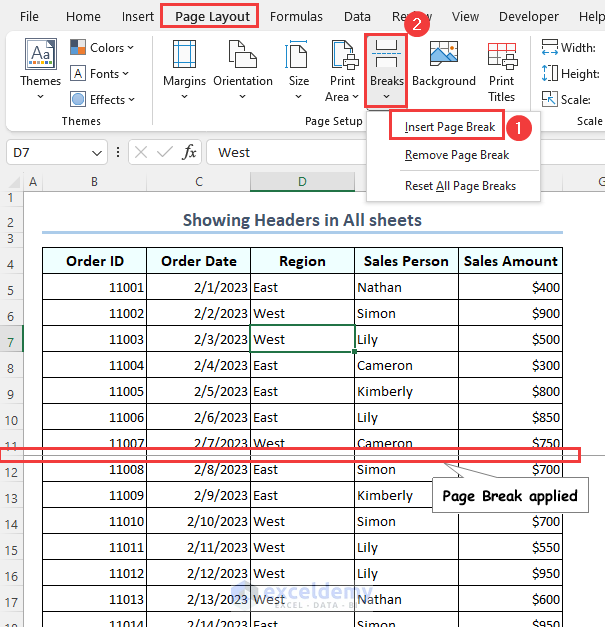
Method 6 – Insert Page Break
- Apply a page break after the 11th row, select the 12th row >> Go to the Page Layout tab >> Expand the Breaks command >> Choose the Insert Page Break option from the list.
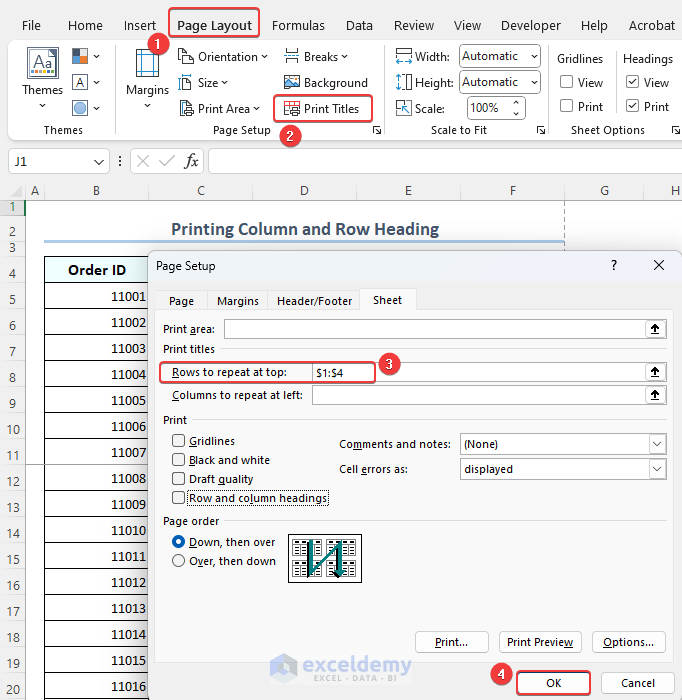
Method 7 – Repeat Top Rows for All Pages
- Repeat the row or heading, go to the Page Layout tab >>Launch the Page Setup dialog box >> Select insert $1:$4 in the Rows to repeat at top field >> Hit OK.
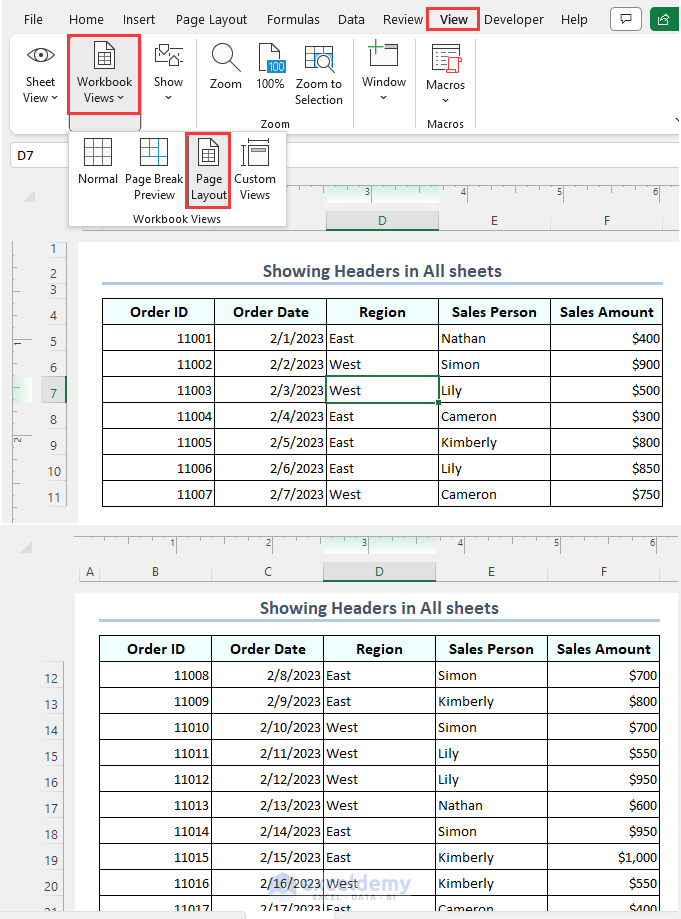
- Go to the View tab >> Expand the Workbook Views command >> Select the Page Layout button to observe the two new pages with a header.
Method 8 – Print Row and Column Headings with Dataset
- Insert rows and column numbers, go to the Page Layout tab >> Launch the Page Setup dialog >> Go to the Sheet menu >> Check the Row and column heading option.
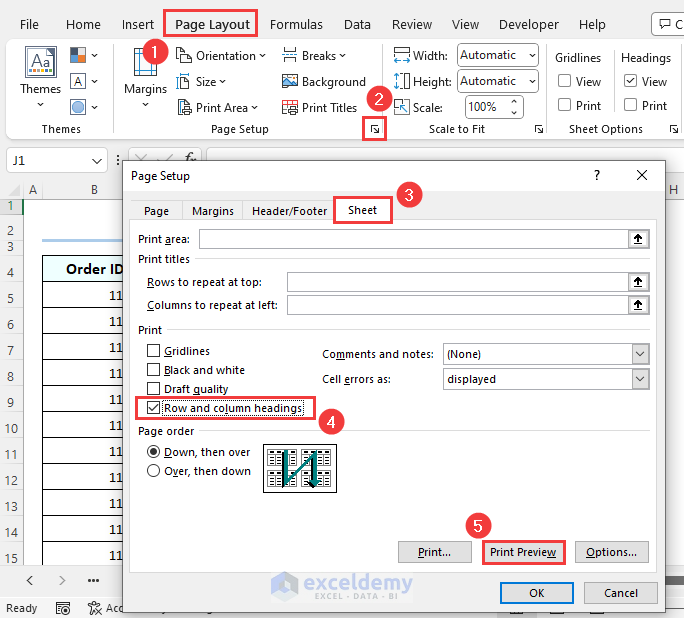
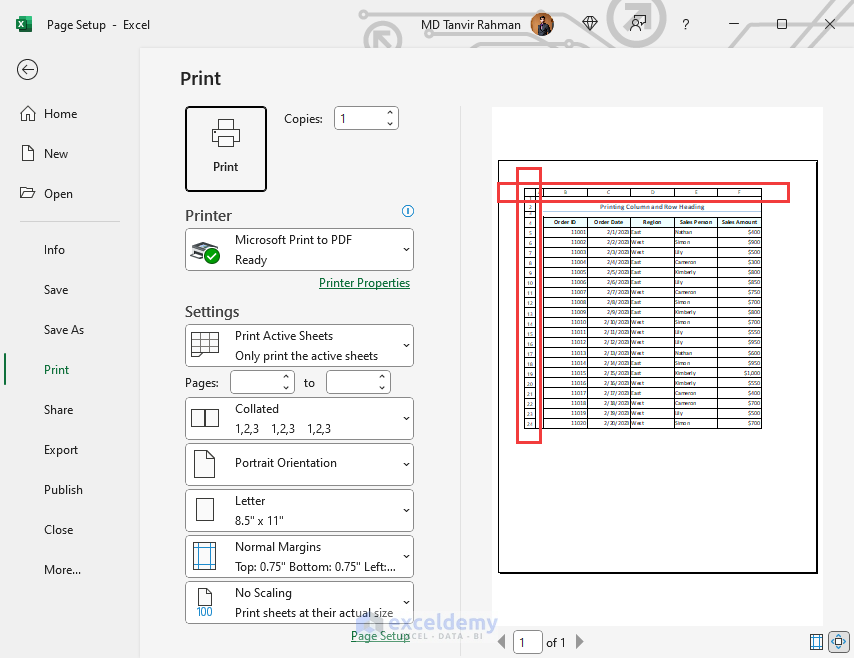
- Press Ctrl + P keys to observe the outcome on a page containing row and column headings.
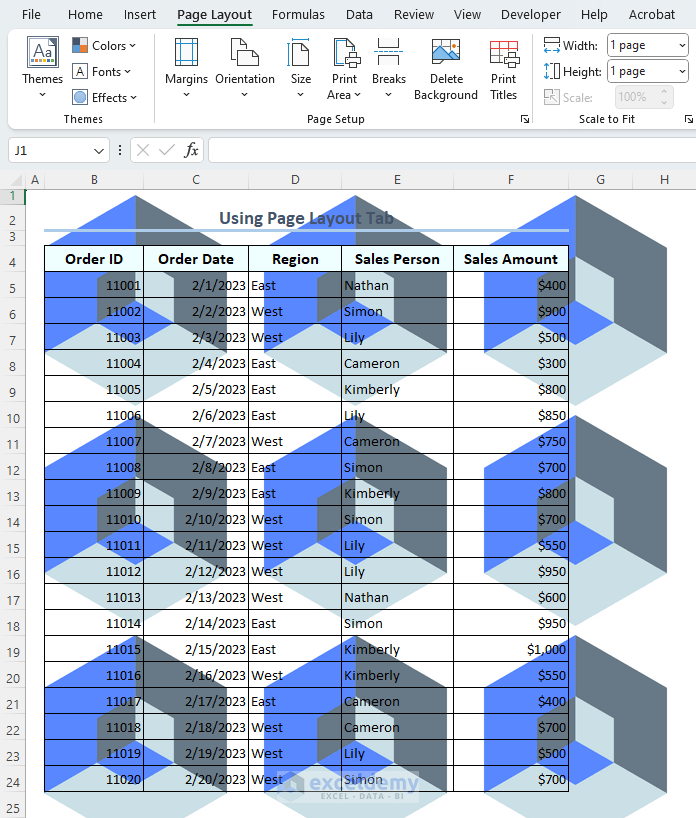
Method 9 – Insert a Background Image
- Insert the background picture, go to the Page Layout tab >> Select the Background command >> Select From a file command from the Insert Pictures dialog.
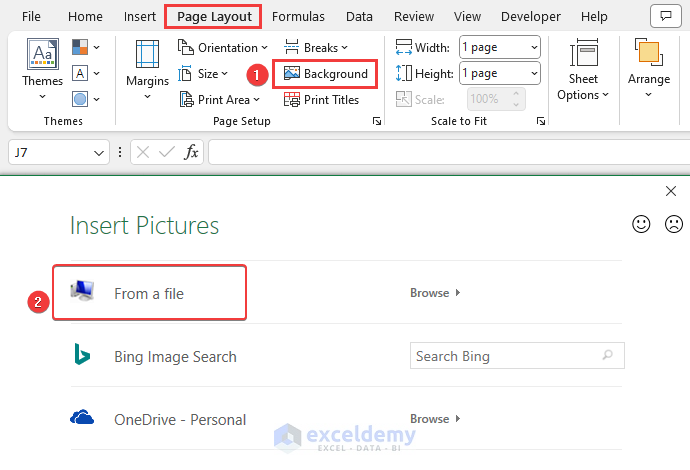
- Selecting a logo from the local storage of a personal computer, we insert the logo as the background of the dataset.
Note: The user must change the transparency before importing the background image. There is no option in Excel to change the transparency of the background image in Excel.
Things to Remember
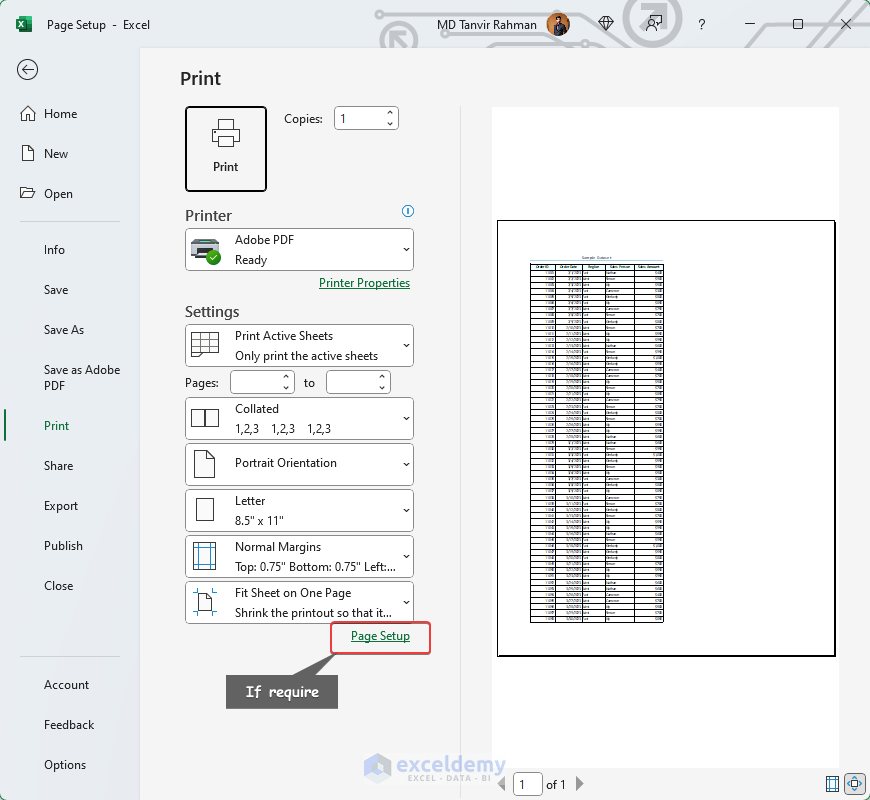
- Press Ctrl + P keys to check the output as Preview on the Print menu.
- Adjust the transparency of the image before importing it as a background image.
Download Practice Workbook
To practice, please download the Excel Workbook file from the link below.
Frequently Asked Questions
Q1. What is my A4 size in Excel?
Go to the Page Layout tab >> Click the Size button from the Page Setup group >> Select A4 paper size from the drop-down menu.
Q2. What is a page break in Excel?
Page Break in Excel is an imaginary line that split the spreadsheet into two or multiple pages.
Q3. How to do page 1 and page 2 in Excel?
Go to the Insert tab >> click Header & Footer from the Text group.
Setup Page in Excel: Knowledge Hub
<< Go Back to Print in Excel | Learn Excel
Get FREE Advanced Excel Exercises with Solutions!
