Headers and footers are used in Excel Sheets to show some information at the top and bottom respectively of each sheet. When we print the Excel file those are visible. The footers help to organize the pages sequentially from the page number. In this article, we will learn how to insert a footer in Excel with the proper illustration.
How to Insert a Footer in Excel: 2 Methods
1. Add Footer from Insert Tab
In this first method, we will use the Insert tab to add a footer in Excel.
📌 Steps:
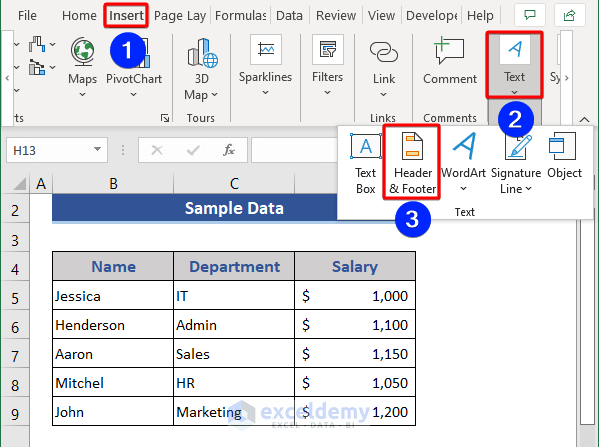
- First, go to the Insert tab.
- Now, click on the Text field.
- We will see a list of options. Now, choose Header & Footer option.
- Look at the Tabs & Commands section.

The Header & Footers tab is showing here. We will insert the footer from this section.
- Click on the Go to Footer option.
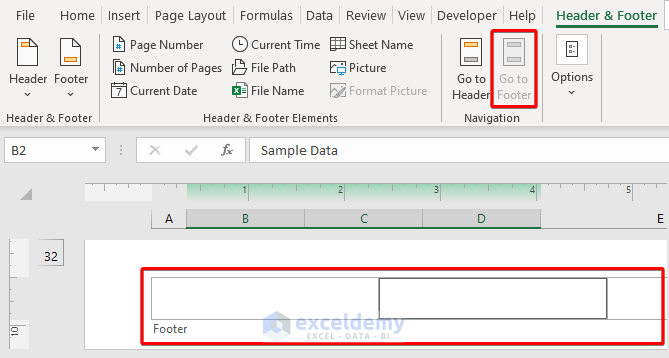
We can see a box named Footer at the bottom of the sheet. There are 3 sections in the box. We can view the footer information at the right, left, or middle part of the sheet based on inputting information on those boxes.
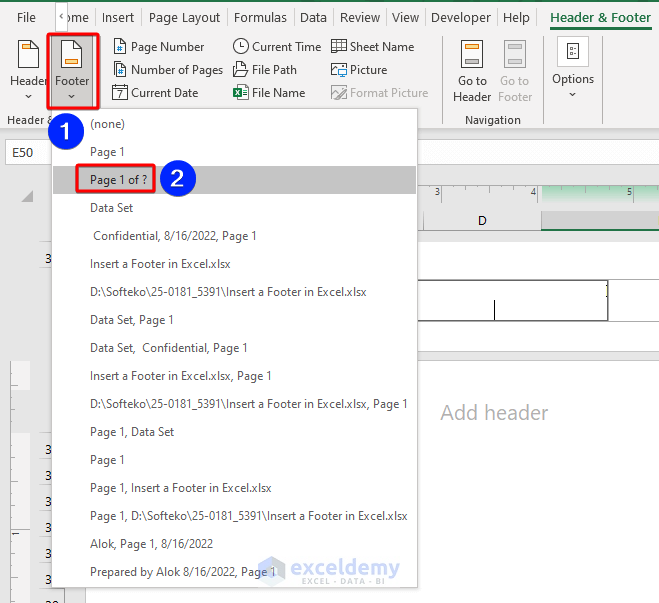
- There are some default footer options in Excel. Click on the Footer tab.
- A list is shown here of different options. We choose our option from that list.
- Now, look at the bottom of the sheet.

The footer is showing mentioning the page number. You can use the same process to add a header in Excel.
2. Add Footer from Page Layout Tab
There is another option to insert a footer in Excel using the Page Layout tab.
📌 Steps:
- Now, click on the Page Layout tab.
- Click on the arrow of the Page Setup section.

- Page Setup window appears here.
- Choose the Header/Footer tab.

We can see the Footer box on the window.
- Click on the down arrow of the Footer.
- A list will show. Choose the desired footer from the list.

- Our desired footer has been selected here.
- Click on the Print Preview button.

- Now, look at the bottom section of the print preview. The footer is shown here.
How to Edit or Remove Footer
We already showed how to insert a footer in Excel. In this, we will explain how to edit and remove from Excel.
How to Edit Footers:
We can edit the footer only from the Page Layout section. Here, we can change the margin of the page and adjust the position of the footer.
📌 Steps:
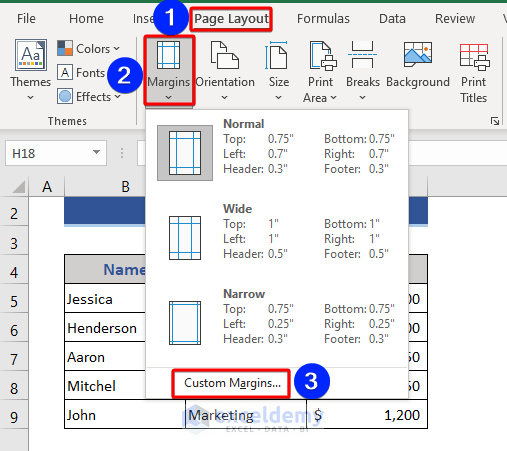
- Go to the Page Layout tab first.
- Then, choose the Margin option from the ribbon.
- Now, a window will appear with some default margin options.
- There is an option named Custom Margins. Click on that option.
- The Page Setup window appears.
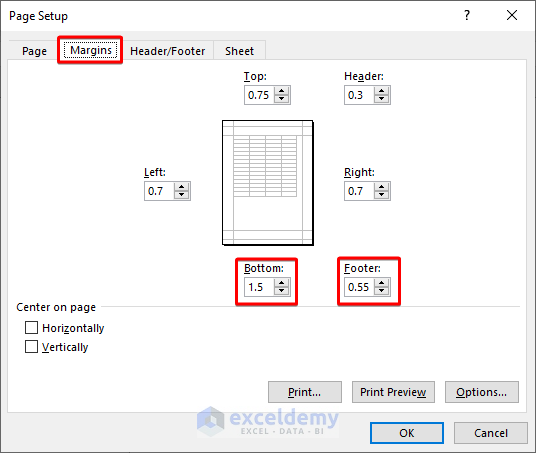
- Choose the Margins tab.
- Now, adjust the measurement of the Bottom and Footer section.
Now, click the Print Preview and see whether further changes are needed or not.
How to Remove Footers:
As we added the footer in two different ways, we can also remove it in those ways.
📌 Steps:
- First, click on the Footer of the Excel sheet.
- Then, the Headers & Footers tab appears.
- Click on the Footer field.
- Choose the (none) option from the list.

The footer will vanish now.
We can also remove the footer from the Page Layout option.
- Enter the Page Setup window as shown before.
- Click on the down arrow for the Footer box.
- Choose the (none) option again. Finally, press the OK button to remove the footer completely.

Download Practice Workbook
Download this practice workbook to exercise while you are reading this article.
Conclusion
In this article, we described how to insert a footer in Excel. We also added how to edit and remove the footer from Excel. I hope this will satisfy your needs. Please give your suggestions in the comment box.
Related Articles
- How to Add The Footer Page 1 To The Current Worksheet
- How to Use Header and Footer in Excel
- How to Hide Header and Footer in Excel
<< Go Back to Header and Footer | Page Setup in Excel | Print in Excel | Learn Excel
Get FREE Advanced Excel Exercises with Solutions!
