In this article, we will discuss some methods to add a header in Excel. We can insert a header on each page of our Excel worksheet, which typically contains some fundamental information about the spreadsheet, such as the page number, date, name of the workbook, etc.
How to Add Header in Excel: 5 Quick Methods
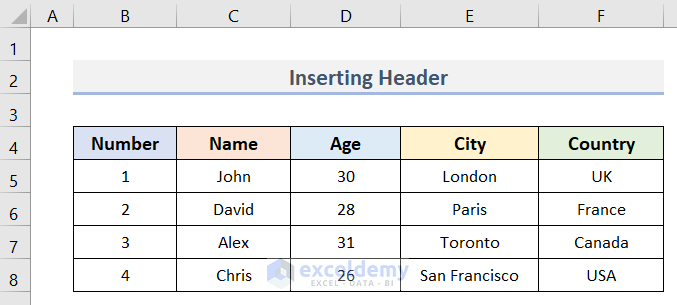
Suppose we have the dataset below (B4:F8) in an Excel worksheet that contains the Numbers, Names, Ages, Cities, and Countries of some students. We’ll add a header to this worksheet using 5 different methods.
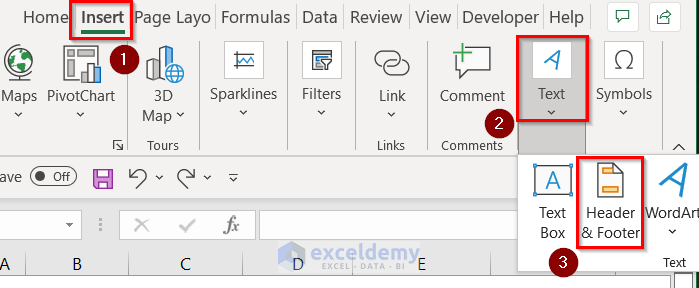
Method 1 – Using the Insert Tab to Add a Header in Excel
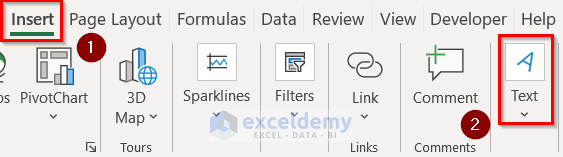
We can easily add a header to an Excel worksheet by using the Insert tab on the Excel ribbon.
Steps:
- Go to the Insert tab.
- Select the Text option.
- Select Header & Footer from the Text group.
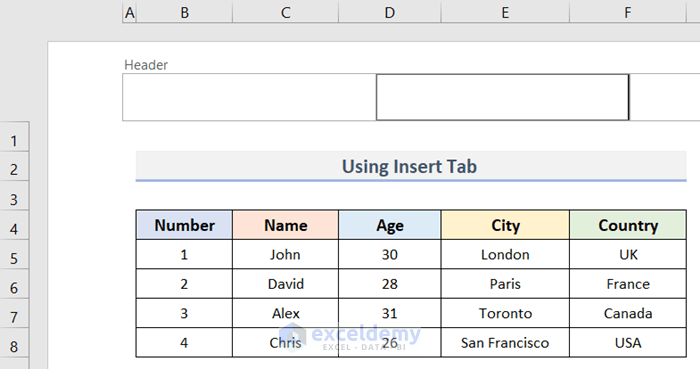
The worksheet will switch to Page Layout view and 3 sections for inserting the Header will be visible. Usually, the cursor remains in the middle box.
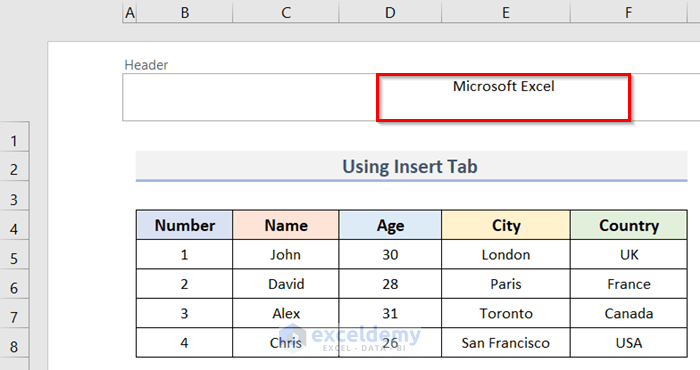
- Enter header text in any of the 3 Header sections. For example, type ‘Microsoft Excel’ in the middle section.
Read More: How to Add Same Header to All Sheets in Excel
Method 2 – Using the Page Layout Tab to Insert a Header
We can also create headers in Excel by using the Page Layout tab.
Steps:
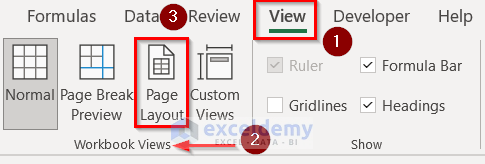
- Go to the View tab.
- In the Workbook Views group, click on Page Layout.
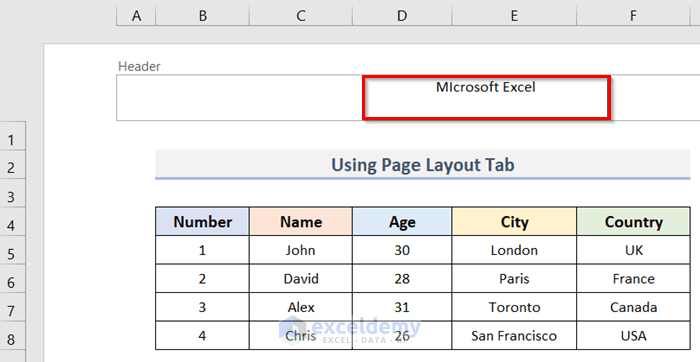
The Header section will appear.
- Like in the previous method, enter the desired header in the different sections.
Method 3 – Using the Page Setup Dialog Box to Insert a Header
To add a header to a single worksheet or more than one worksheet at once, use the Page Setup dialog box, where we can also customize and edit our header.
Steps:
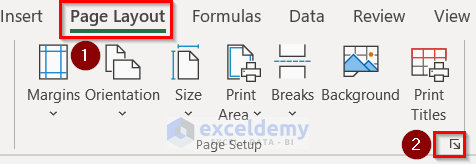
- Go to the Page Layout tab in the Page Setup group.
- Click the Page Setup Dialog Box Launcher.
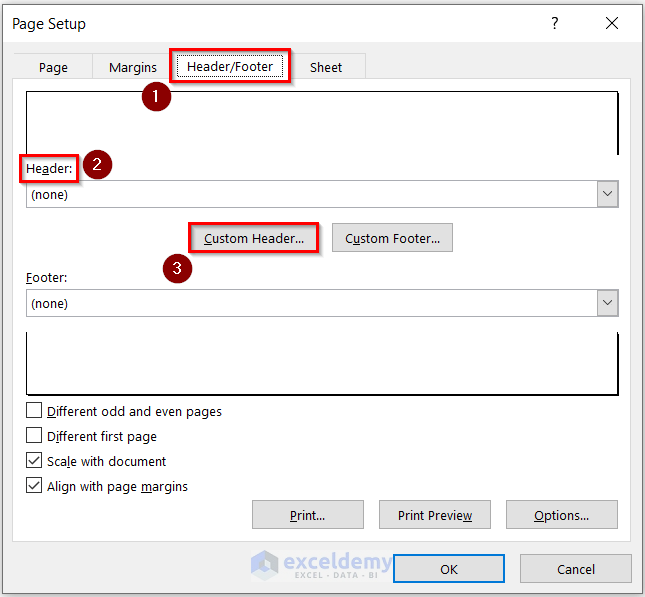
The Page Setup dialog box will pop up.
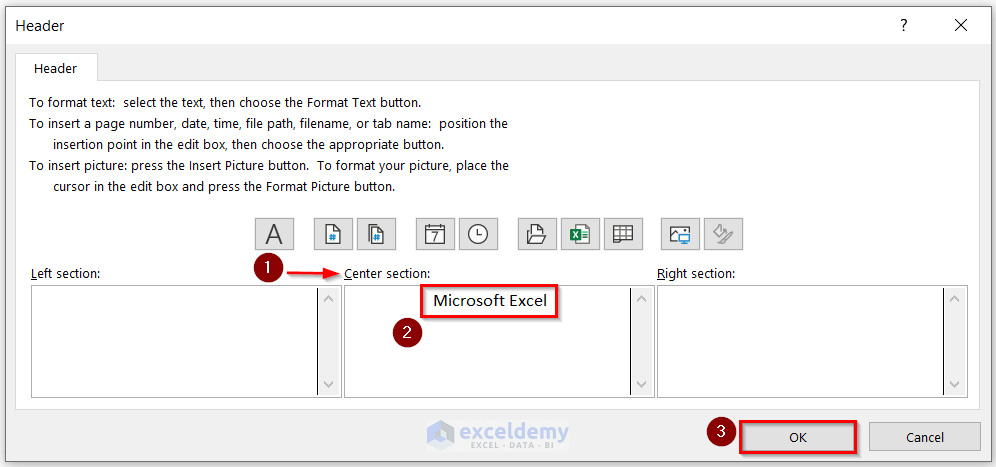
- Select the Header/Footer tab from the dialog box.
- Go to Header and click on Custom Header to customize the header.
- Alternatively, insert a built-in header from the Header dropdown menu.
A Header dialog box will appear.
- Enter a header in the Left section, Center section, or Right section as you wish.
- Click OK.
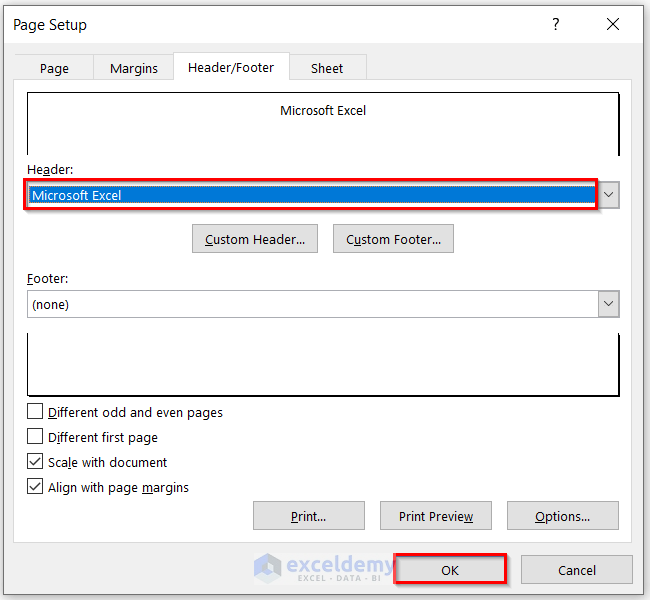
The header is visible in the Header box of the Page Setup dialog box.
- Click OK.
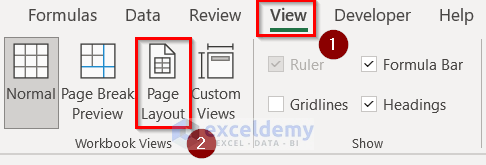
To show the header in the worksheet:
- Go to the View tab.
- Click the Page Layout in the Workbook Views group.
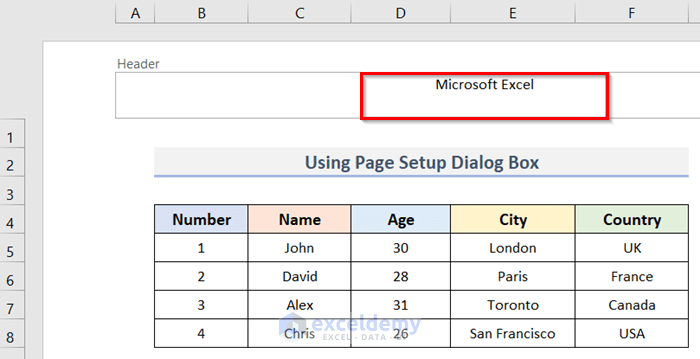
The worksheet will turn into a Page Layout view and the Header will be visible at the top of the page.
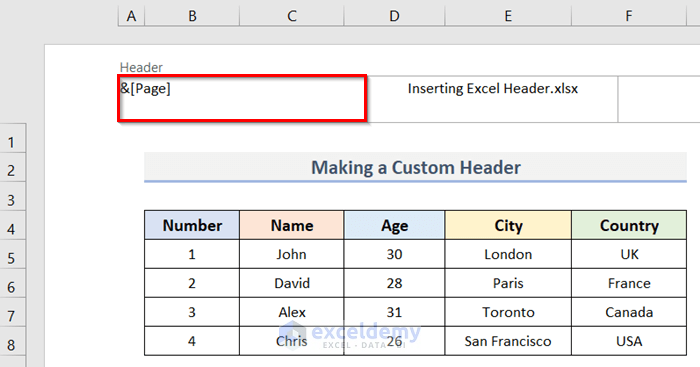
Method 4 – Creating a Custom Header in Excel
In addition to the predefined headers available in Excel, we can also create our own with custom text images and files. Here, we’ll make a custom header that includes page numbers and file names. Moreover, we can add the company logo, current date, and so on.
Steps:
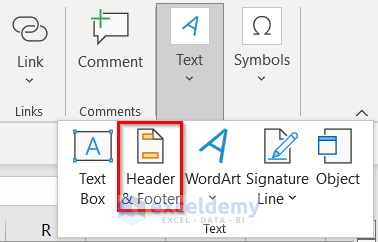
- Go to Insert > Text.
- Select Header & Footer in the Text group.

The Header sections will open up on top of the page, as the page switches to Page Layout view.
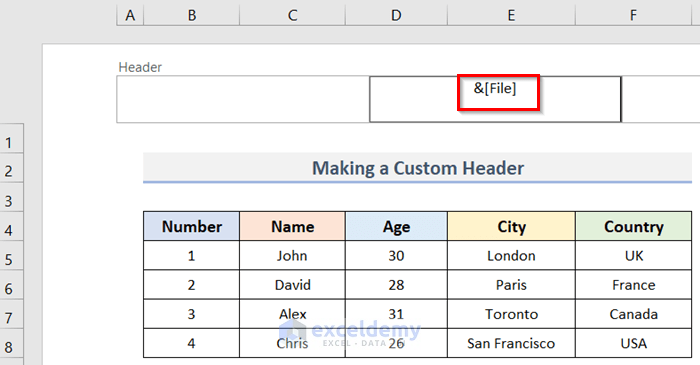
To insert the Excel file name as a header:
- Select the specific Header section where the file name will go.
- Select the Center Section.
- Go to the Header & Footer tab.
- Select File Name from Header & Footer Elements.

The Excel file name is added as a header in our worksheet.
- To see the file name that we just added, click anywhere outside the Header box.

Just like inserting a file name, we can add a page number as a header in our Excel worksheet as follows:
- Select a Header section.
- Go to the Header & Footer tab > Header & Footer Elements group > Page Number.
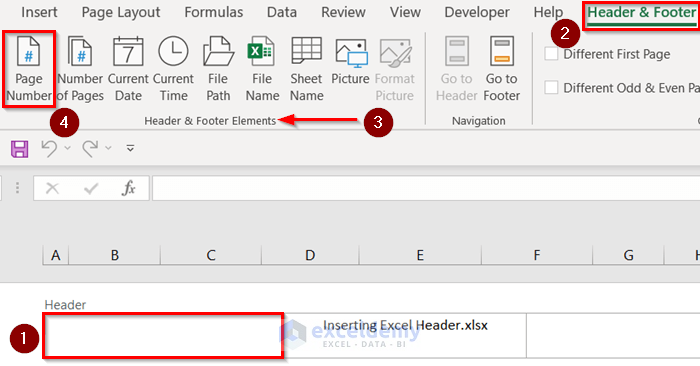
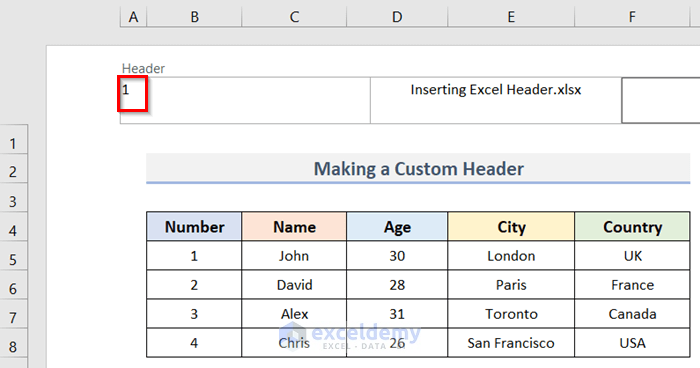
A page number is added to our header.
- To see the page number, click outside the selected cell.
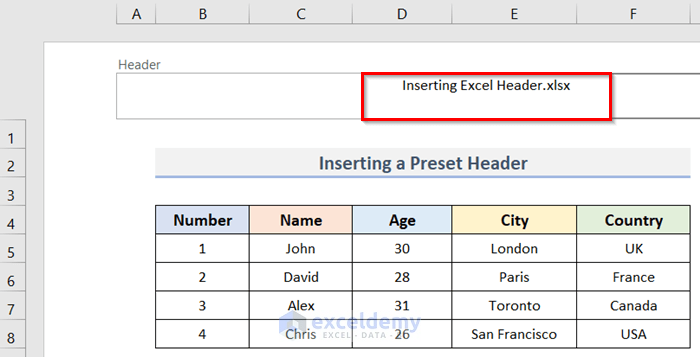
Method 5 – Adding an Excel Preset Header
Excel includes a number of pre-built headers that can be added to a file easily.
Steps:
- Go to the Insert tab and select the Text option.

- Select Header & Footer from the Text dropdown menu.
The Header section will open up on the top of the worksheet.

- Go to the Header & Footer tab and click on the Header dropdown menu in the Header & Footer group.

- Select a header option from the dropdown menu, for example ‘Inserting Excel Header.xlsx’.
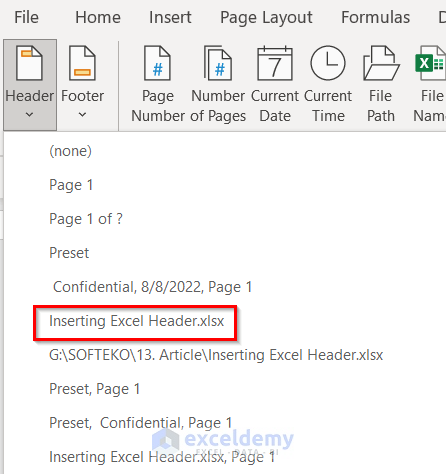
We have added a preset header in Excel.
How to Change a Header in Excel
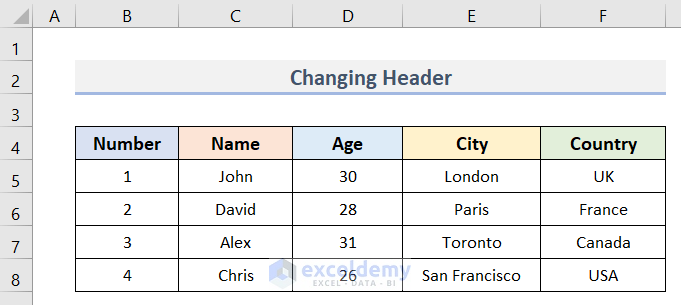
Sometimes, we may need to modify the header we added. Suppose we have a datasheet (B4:F8) where we have already added a header. Let’s change it.
Steps:
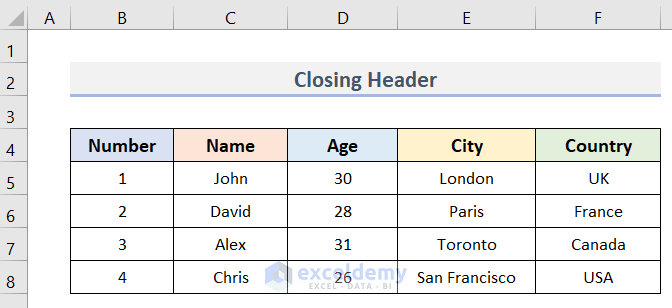
In the above screenshot, we can’t see the header as the worksheet is in the Normal view option. If we change it to the Page Layout view then the header will be visible.
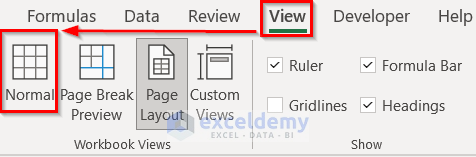
- Go to the View tab > Workbook Views group > Page Layout.

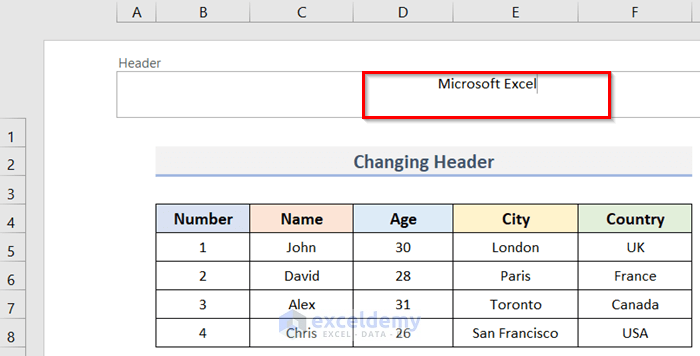
The worksheet will transform to the Page Layout view with the Header visible at the top of the sheet. We can see ‘Microsoft Excel’ in the Center Section of the Header box.
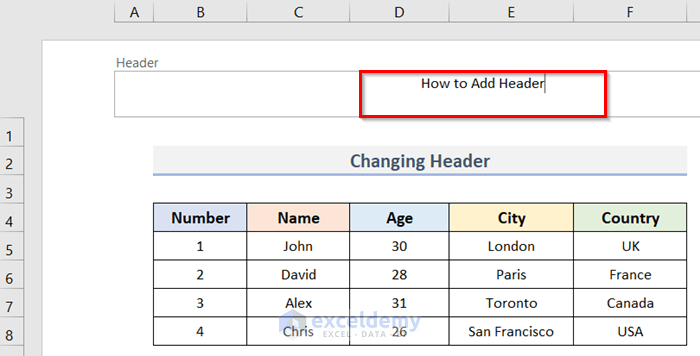
- To change the header, simply delete the previous text and type new text. Here, we have typed ‘How to add Header’ instead of ‘Microsoft Excel’.
Read More: How to Insert Logo in Excel Header
How to Close a Header in Excel
We often need to exit the header and footer view and return to the regular view after finishing adding the Excel header. Suppose we have a dataset (B4:F8) in Excel where we have added a header named ‘Microsoft Excel’.
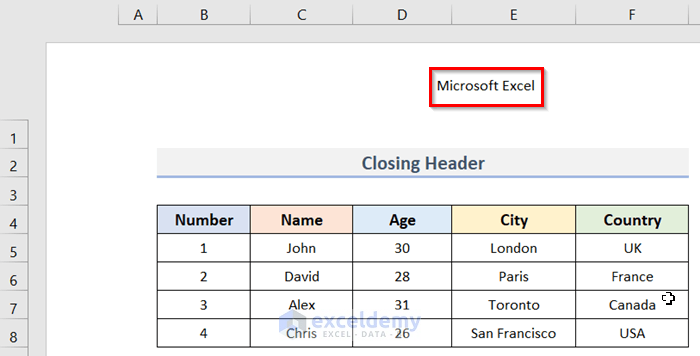
We can close the Header by shifting from the Page Layout view to the Normal view.
Steps:
- Go to the View tab > Workbook Views > Normal.
We have closed the Header successfully.
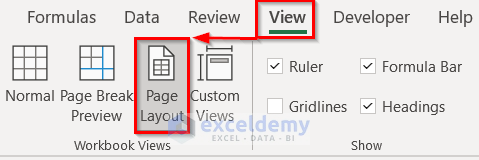
How to Remove a Header in Excel
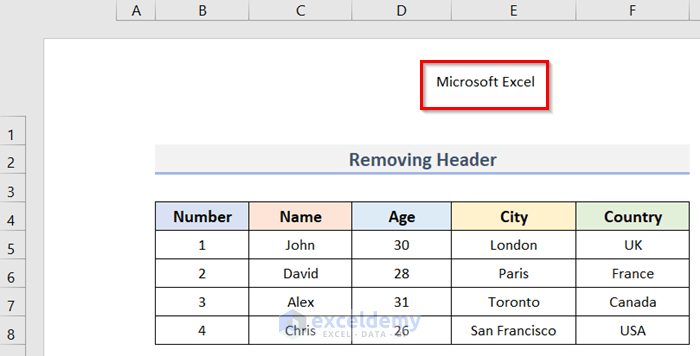
Suppose we have the dataset below where we have inserted a header. Let’s remove the header.
Steps:
- Go to the View tab and select Page Layout from the Workbook Views group.
The Header will appear.
- Select the Header text box.
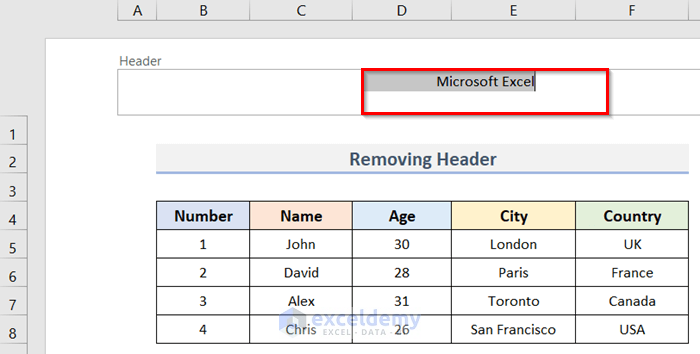
- Press the Delete or Backspace key on the keyboard and the header will be removed.

Advantages of Using Headers in Excel
Headers help the layout to look more professional and save time by eliminating the need to change the header of each sheet manually.
Things to Keep in Mind
When we add a Header in Excel, it is carried forward to all sheets. If you need to change any individual sheet’s Header, go to that sheet’s Header to make the required changes.
Download Practice Workbook
Related Articles
- How to Print Excel Sheet with Header on Every Page in Excel
- How to Move Header in Excel
- How to Maintain Excel Header Alignment
- How to Keep Header in Excel When Printing
<< Go Back to Header and Footer in Excel | Page Setup in Excel | Print in Excel | Learn Excel
Get FREE Advanced Excel Exercises with Solutions!
