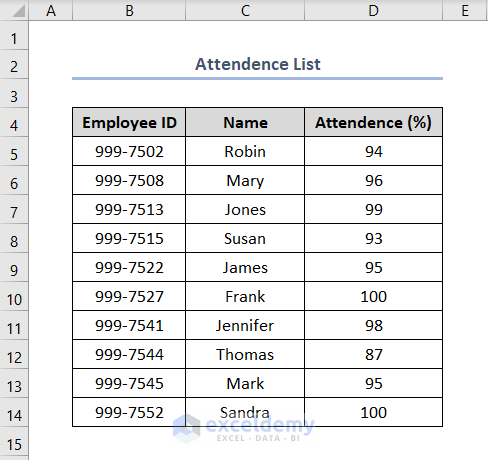
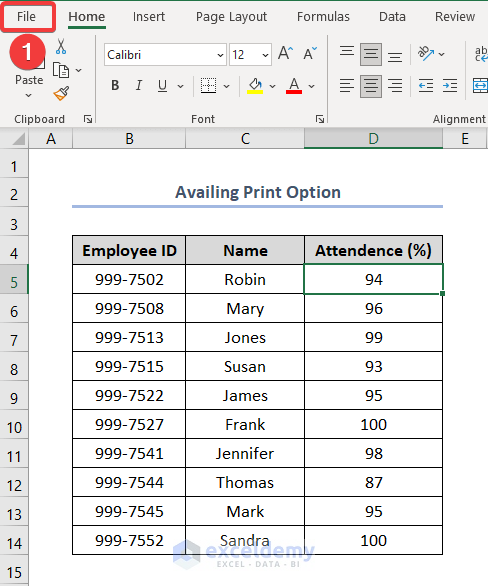
We have a dataset of employees of the IT department of an organization named ABC containing their attendance list for the month of May 2022. By default, the header of our Excel file is blank.
Method 1 – Editing Headers Using the Insert Tab in Excel
Steps:
- Go to Insert > Text > Header & Footer.
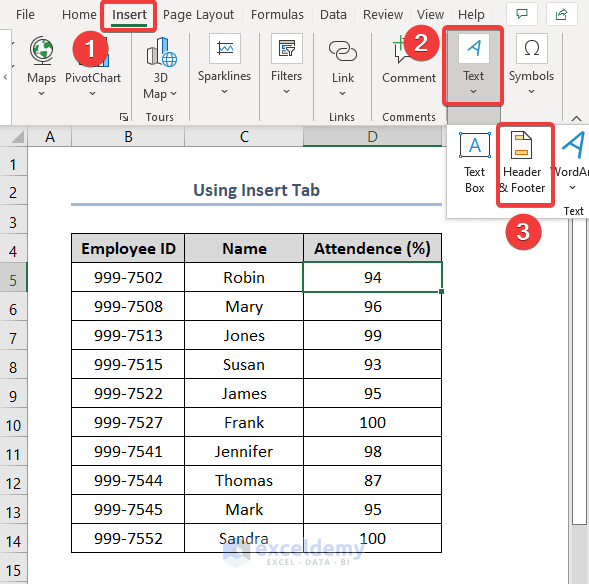
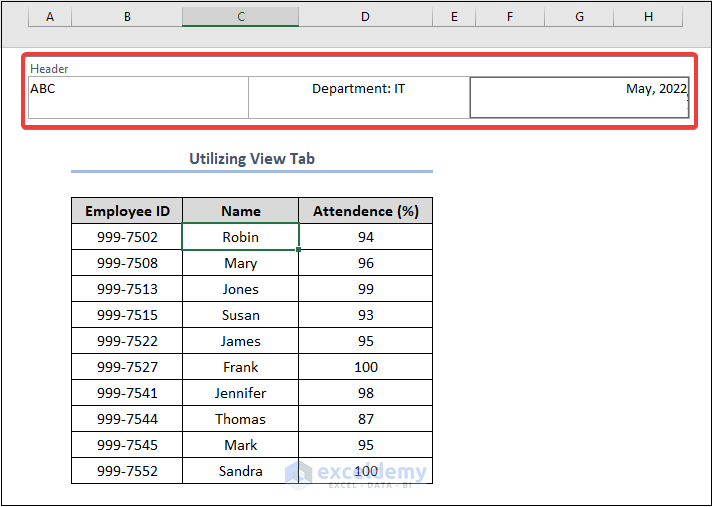
- In the Header box, the cursor will go to the left header first. Enter our desired header, “ABC” in the left header box.
- Place the cursor at the center header box and enter “Department: IT”.
- Do the same thing in the right header box and enter “May 2022”.
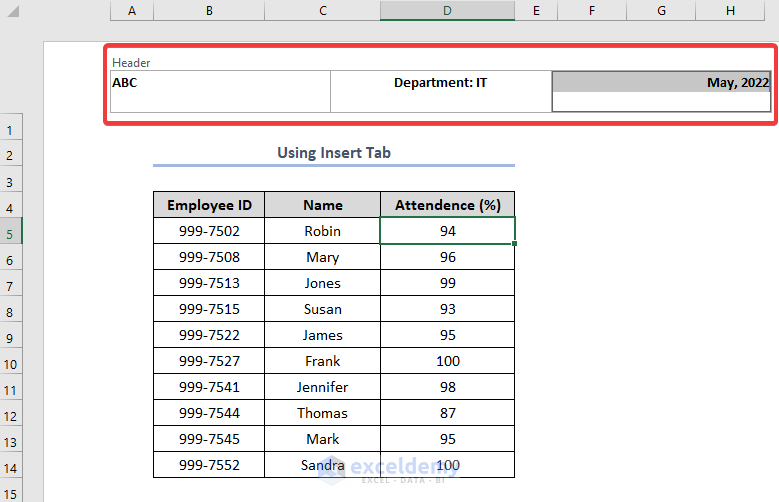
- Click anywhere in the worksheet to leave the header area.
Read More: How to Add Header in Excel
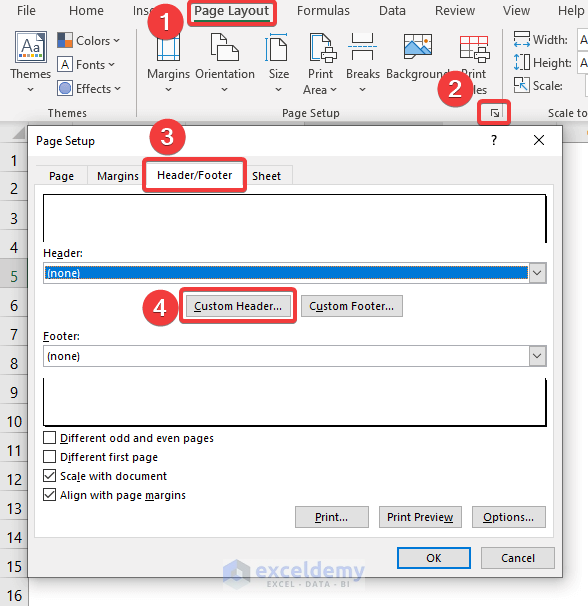
Method 2 – Using the Page Layout Tab to Edit Header
Steps:
- Select the Page Layout tab.
- Click on the small arrow in the bottom right corner of the Page Setup group. This will open a Page Setup dialog box.
- Select Header/Footer > Custom Header.
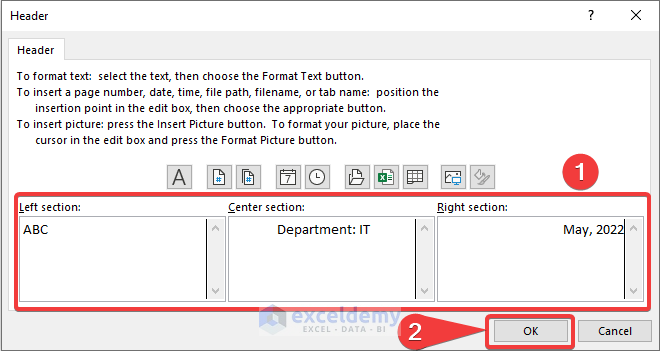
- A dialog box named Header will open. At the lower part of that box, there is space to input your 3 different headers. Fill that box out and click OK.
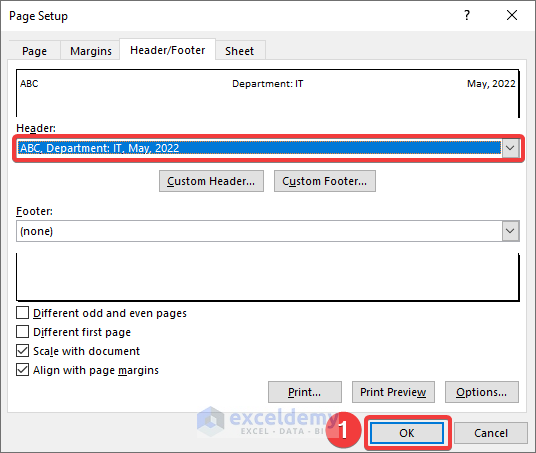
- This will return you to the Page Setup dialog box. In the Header option, you can see our custom header as highlighted.
- Click OK.
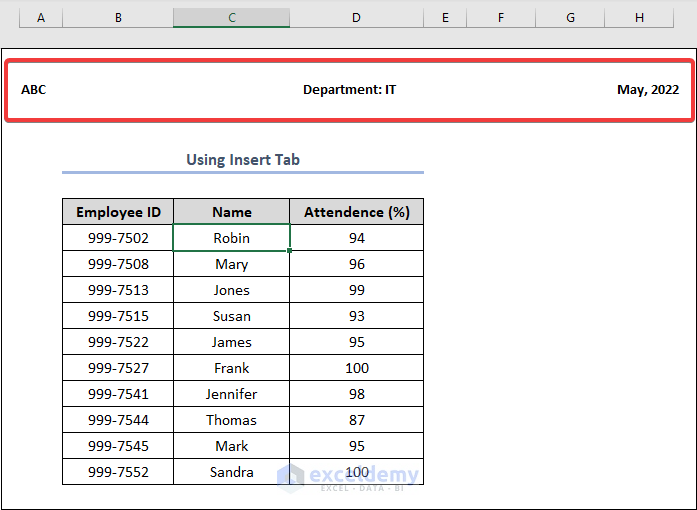
You can see our worksheet illustrated with the header on top.

Read More: How to Maintain Excel Header Alignment
Method 3 – Editing the Header with View Tab in Excel
Steps:
- Select View. From the Workbook Views group, click on Page Layout.
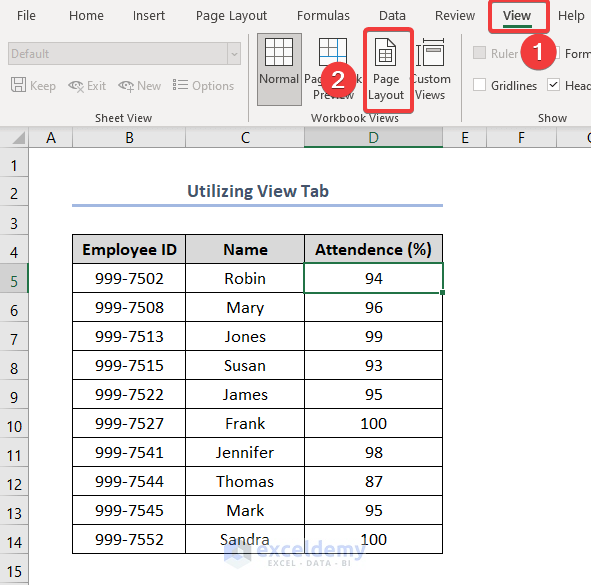
- This will show the workbook as a Page Layout view.
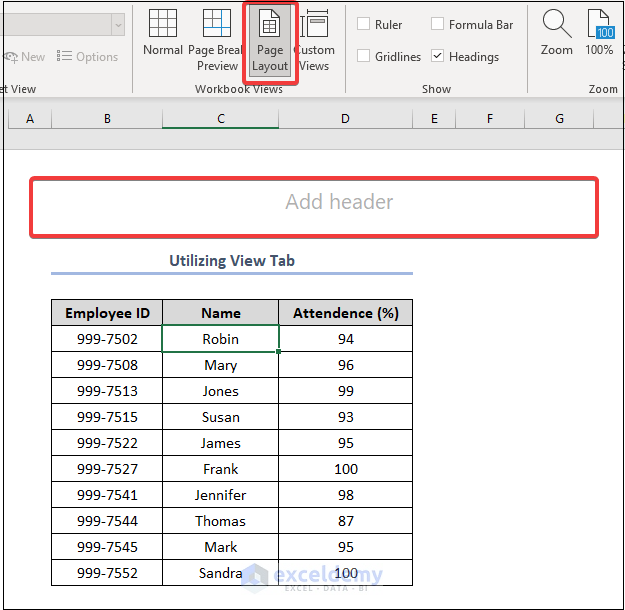
- Click on Add header and enter the header names as method 1.
Read More: How to Print Excel Sheet with Header on Every Page in Excel
Method 4 – Using the Status Bar to Edit Headers in Excel
Steps:
- Follow the image below to select the Page Layout option from the Status Bar placed at the bottom part of the Excel window.
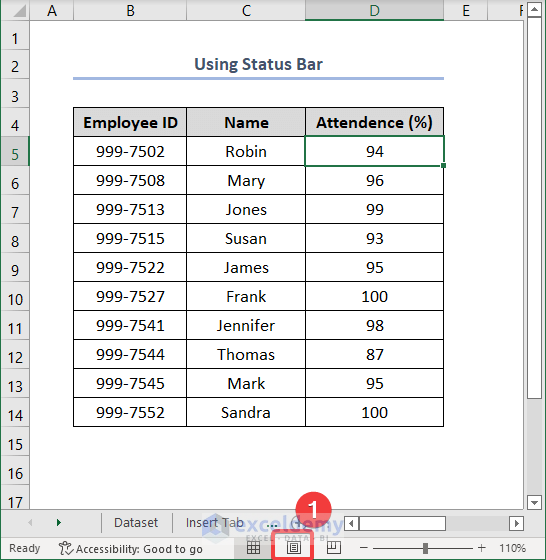
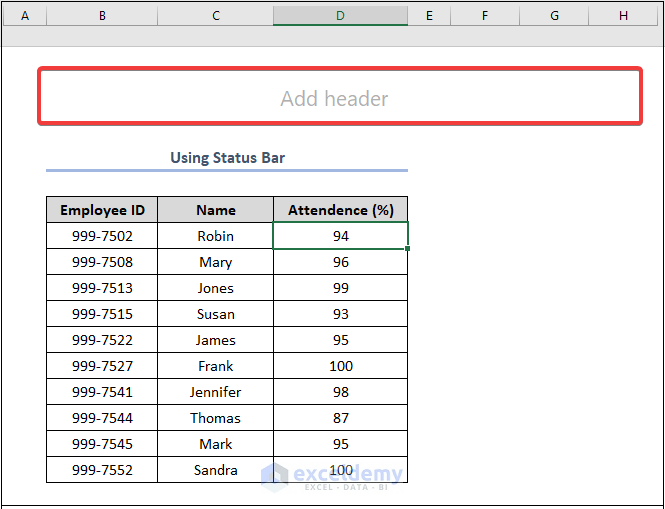
- This action will turn the workbook into a Page Layout view.
- You can edit your header by clicking the Add header box.
Method 5 – Editing Headers While Printing in Excel
Steps:
- Go to the File tab from the ribbon.
- From the left side panel, select Print.
- From the print option, click on Page Setup.
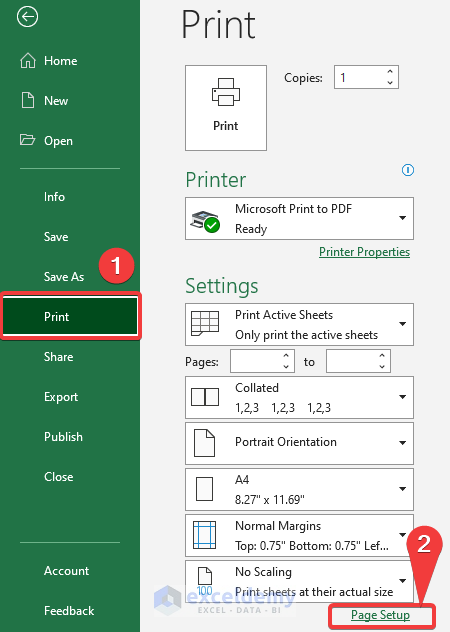
- You will open a Page Setup dialog box just like we did in method 2.
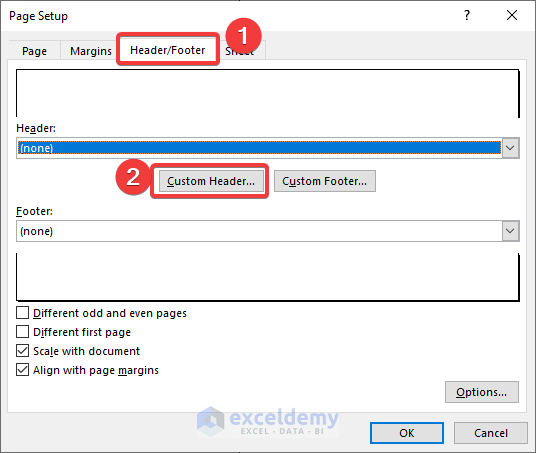
- Select Header/Footer > Custom Header. The remaining procedure is just like method 2.
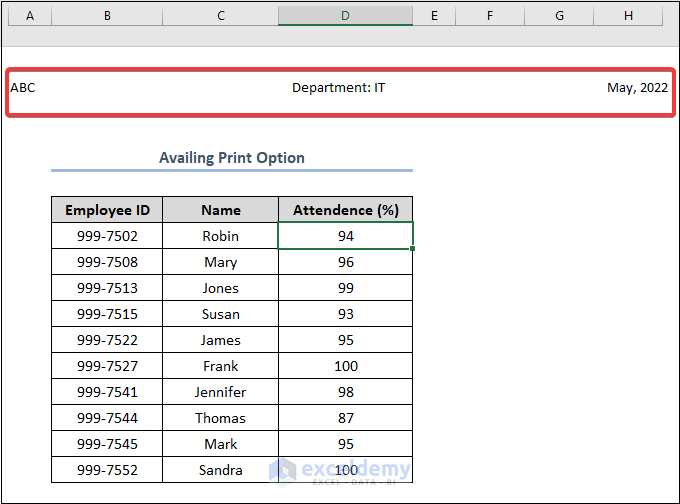
- We can see our document in the Print Preview option with a header.
Read More: How to Keep Header in Excel When Printing
Method 6 – Applying VBA Code for Editing Headers
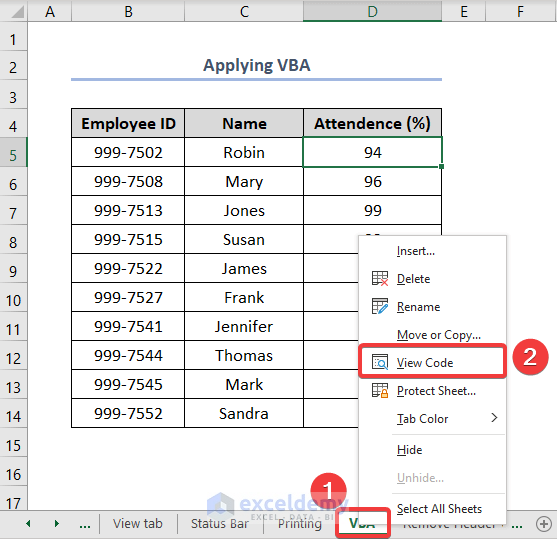
Steps:
- Right-click on the Sheet name and select View Code.
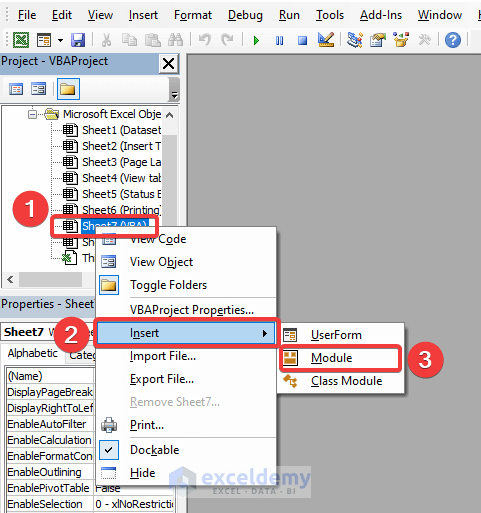
- A window named Microsoft Visual Basic for Applications opens.
- From Toggle folders, select Sheet7 (VBA) > Insert > Module.
- A window appears on the right.
- Enter the following code into the window:
Sub Edit_Header()
With Sheets("VBA").PageSetup
      .LeftHeader = "ABC"
      .CenterHeader = "Department: IT"
       .RightHeader = "May, 2022"
End With
End Sub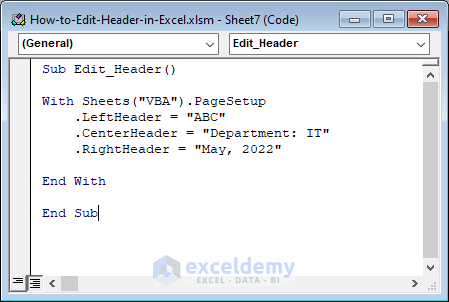
In the above code, we used the PageSetup object to assign the relevant page setup attributes along with the With statement. Later, we used the LeftHeader property to input the specified text in the header (left-aligned). Similarly, we applied the CenterHeader and RightHeader properties to get the output in the header (center-aligned and right-aligned, respectively).
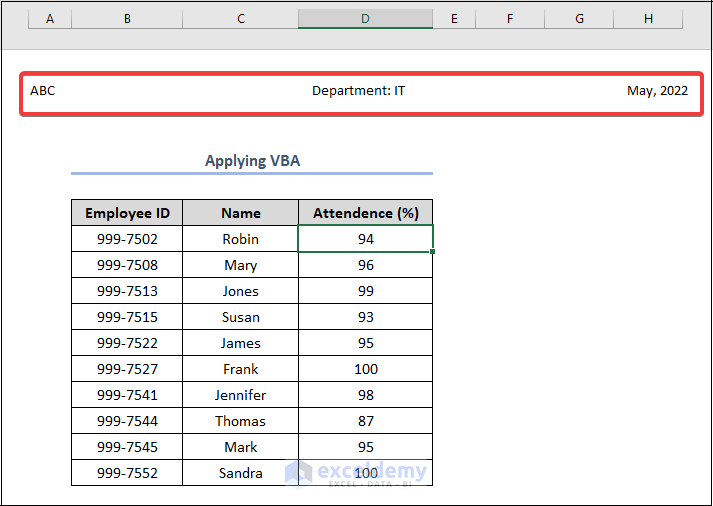
- Select Run from the top ribbon and then close the window. You can see the header in your worksheet by going to the Page Layout view using the Status Bar.
How to Remove Headers in Excel
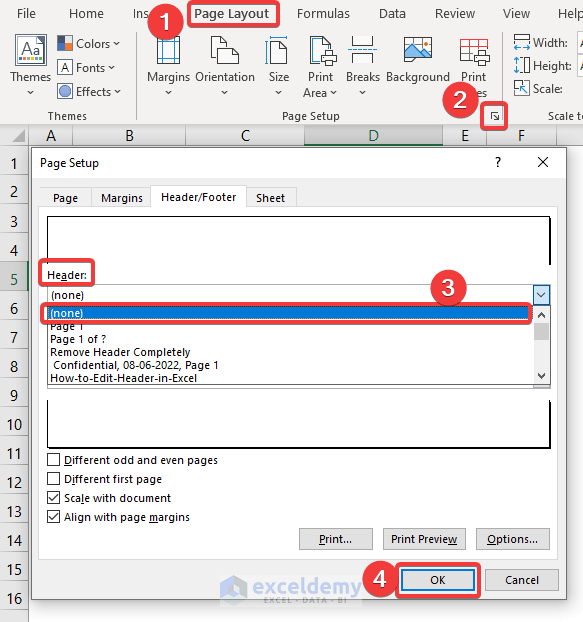
Steps:
- Select the Page Layout tab from the ribbon.
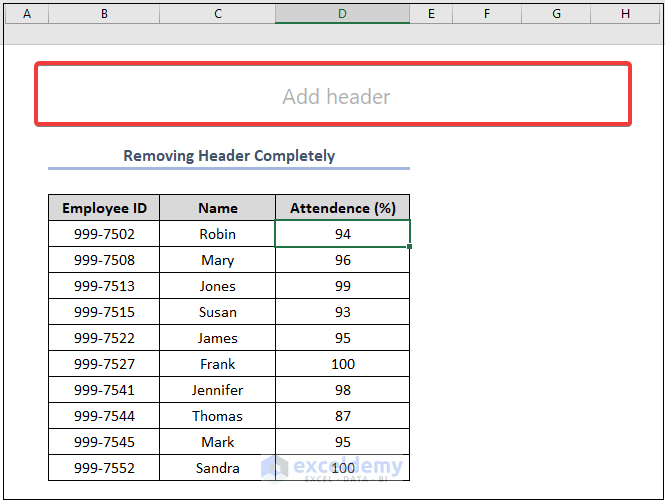
- Click on the small Page Setup icon, and from the Page Setup dialog box, select none and click OK.
- Turning the view from Normal to Page Layout, we can see that our header is completely blank.
How to Make the Header Different on the First Page
Steps:
- Select the Page Layout tab.
- Click on the Page Setup icon in the bottom right corner.
- You will open a Page Setup dialog box.
- Select Header/Footer > check mark Different first page > select Custom Header.
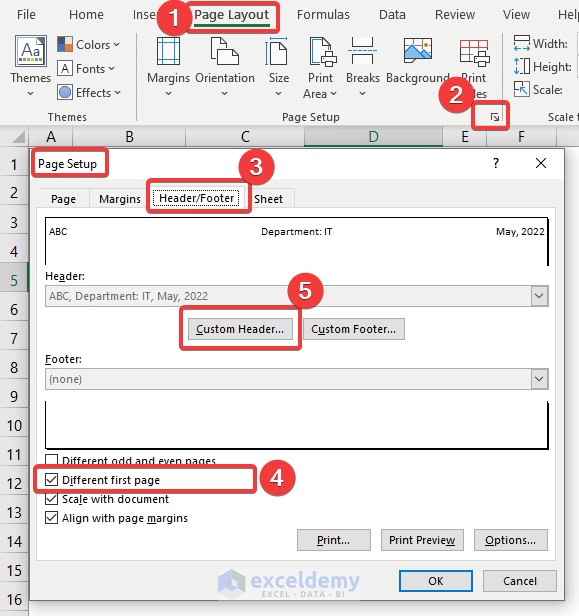
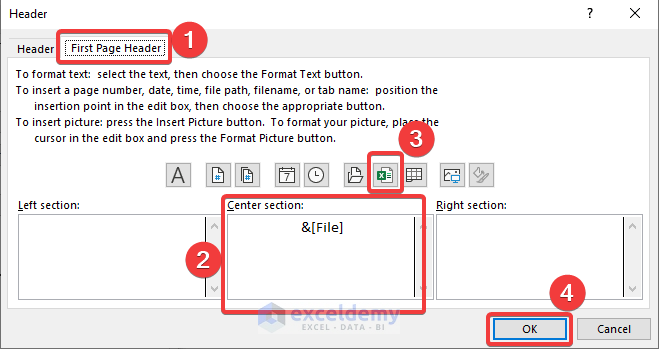
- We can see a header dialog box like before. But the difference is that it has a new tab named First Page Header which wasn’t available before. Now, we can give a completely different header on the first page of the worksheet. For example, we’re giving the file name as our first-page header.
- Select First Page Header > Center Section > Insert File Name symbol.
- In the Page Layout view, we can see that our first page has a different header name.

Things to Remember
- Sometimes, you cannot see the header in the Normal view. You always have to shift the view to Page Layout.
- Press ENTER to start a new line in the header box.
- Use two ampersands in the text of a header to incorporate a single ampersand (&). For example, to include “Rasel & Brothers” in a header, type Rasel && Brothers.
Download the Practice Workbook
You may download the following Excel workbook to practice.
Related Articles
- How to Add Same Header to All Sheets in Excel
- How to Move Header in Excel
- How to Insert Logo in Excel Header
<< Go Back to Header and Footer | Page Setup in Excel | Print in Excel | Learn Excel
Get FREE Advanced Excel Exercises with Solutions!

Actually it’s not what I’m searching. But kinda similar maybe. My datatset is pretty long in the vertical direction. Whenever i scroll down the column headings moves up. So, i got confused which data means what. Is it clear to you? Thanks in advance.
Hello NEA KYTONEN,
I’ve understood your problem. Don’t worry, I have the solution also. See the image below.
This is quite a long dataset. This worksheet has 716 rows. So, whenever you scroll down in the sheet, the column headers go up and get vanished from the display like the following image.
As a result, you cannot see the headings and you messed up with a huge amount of data. There is an easy solution to this problem. See the steps below.
• At first, select the row just under the header row. Here, it is Row 5.
• Then, go to the View tab.
• After that, click on the Freeze Panes drop-down on the Window group of commands.
• Lastly, select the Freeze Panes feature.
Now, you can see we have scrolled down to Row 77 still headings are there in their positions.
That’s all from me on this topic. Hope you find it helpful. Let us know if you have any other issues respecting Excel. Also, follow our website, ExcelDemy, a one-stop Excel solution provider to explore more.