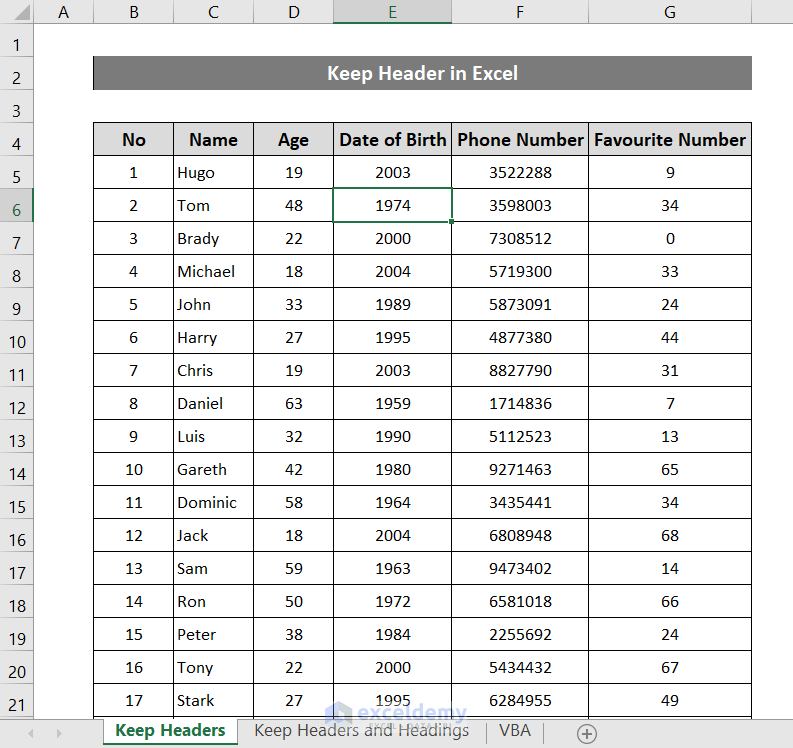
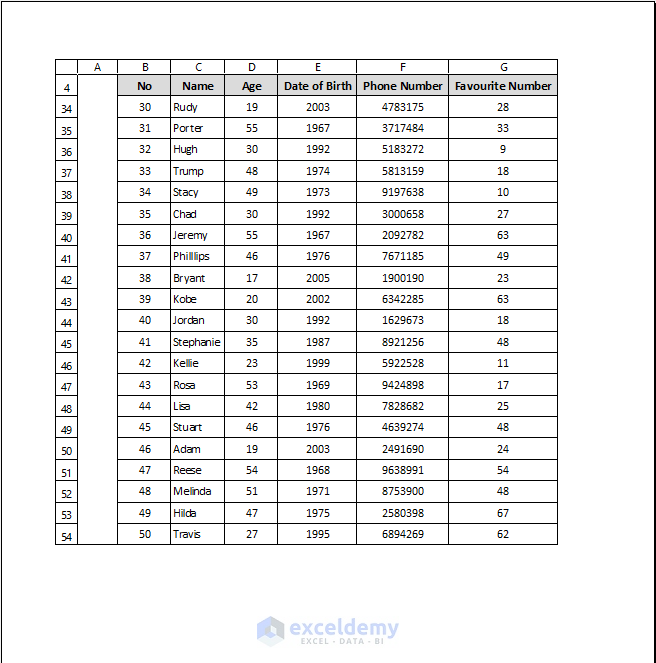
For this tutorial, we’ll use a table that has 50 rows which aren’t possible to print on one page.
Upon printing, on the second page, it will look something like this.

As you can see there is no header on the second page. We’ll show how you can fix that.
Method 1 – Using Page Setup to Keep the Header When Printing
Steps:
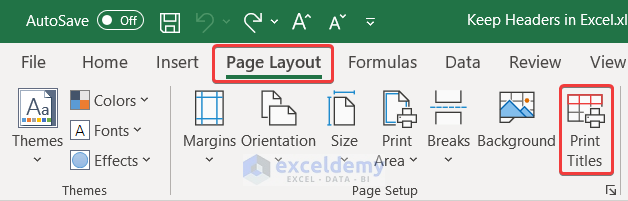
- Go to the Page Layout tab.
- Under the Page Setup group, click on Print Titles.
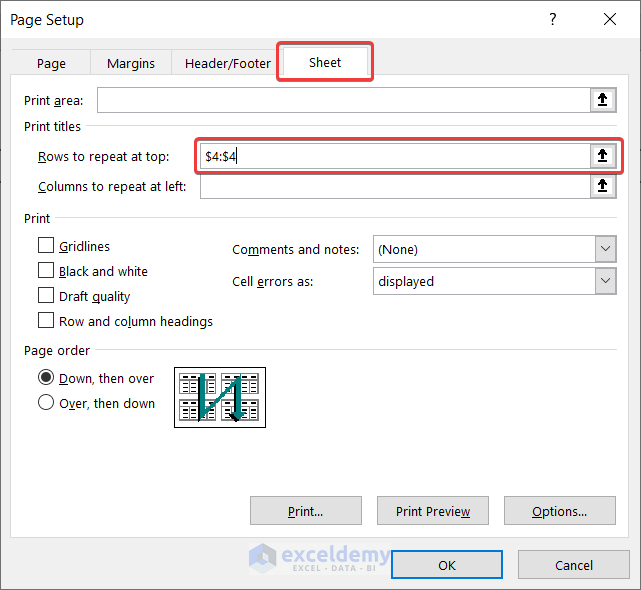
- In the Page Setup box, go to the Sheet tab.
- Select Rows to repeat at top of the Print Titles.
- Select row 4 from the spreadsheet or type $4:$4 in the box.
- Cick on OK.
- Go to File, then click on Print (or press Ctrl + P) to print the spreadsheet and it will have headers in the later pages.

Read More: How to Add Header in Excel
Method 2 – Applying VBA Macro to Keep Header in Excel
Steps:
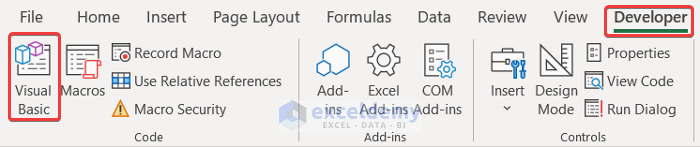
- Go to the Developer tab.
- Select Visual Basic from the Code group.
- In the VBA window, go to Insert and select Module.
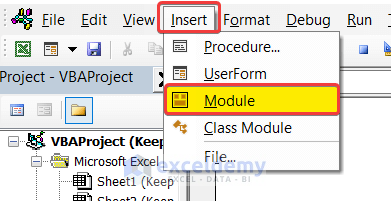
- Select the module from the Modules folder and insert the following code.
Sub Repeat_Header_Every_Page()

Dim TotalPages As Long

TotalPages = Application.ExecuteExcel4Macro("GET.DOCUMENT(50)")

With ActiveSheet.PageSetup
.PrintTitleRows = "$4:$4"

ActiveSheet.PrintOut From:=1, To:=TotalPages
.PrintTitleRows = ""

End With
End Sub- Save it and close the window.
- Go back to the Developer tab and select Macros.
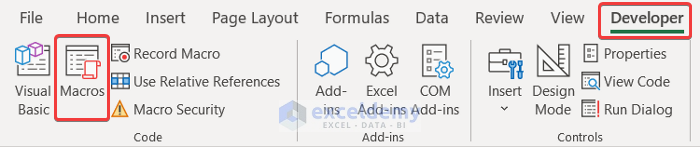
- In the Macro box, select the macro with the name you have just created and click on Run.

- Save the pages as a PDF document, which will contain a header in the later pages. You can then print the PDF.

Read More: How to Add Same Header to All Sheets in Excel
Method 3 – Using Sheet Options to Keep the Row and Column Headers When Printing
Steps:
- Go to the Page Layout tab.
- Go to the Sheet Options group and, under Headings, check the box for Print.

- Go to File, then click on Print (or press Ctrl + P). You can see the row and column headings in the preview print and your printed page will have them, too.
Read More: How to Remove a Header in Excel
Download the Practice Workbook
Related Articles
- How to Print Excel Sheet with Header on Every Page in Excel
- How to Edit Header in Excel
- How to Move Header in Excel
- How to Maintain Excel Header Alignment
- How to Insert Logo in Excel Header
<< Go Back to Header and Footer | Page Setup in Excel | Print in Excel | Learn Excel
Get FREE Advanced Excel Exercises with Solutions!
