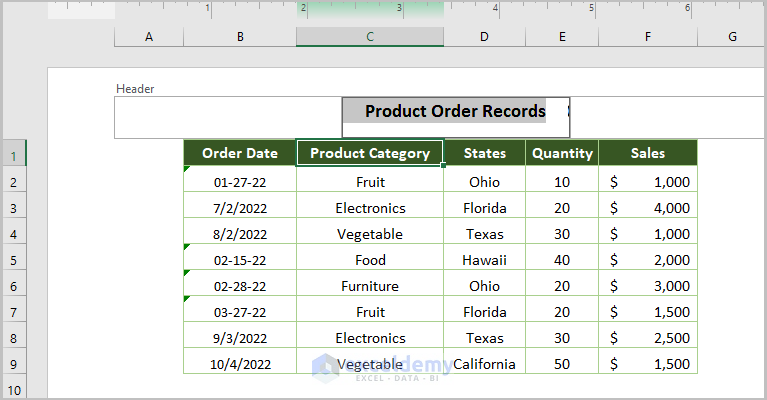
The header in the sample dataset is Product Order Records.
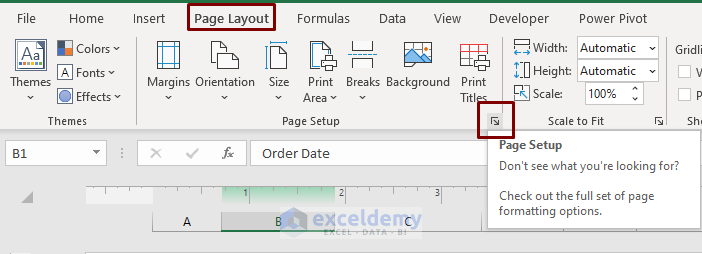
Method 1 – Using the Page Setup to Remove a Header in Excel
- Go to Page Layout > click the drop-down arrow located at the right bottom of the Page Setup ribbon.
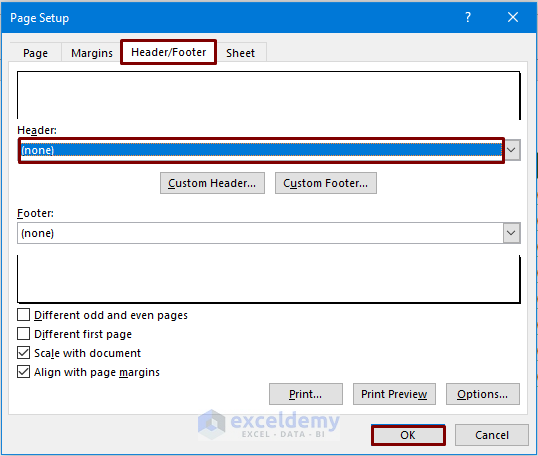
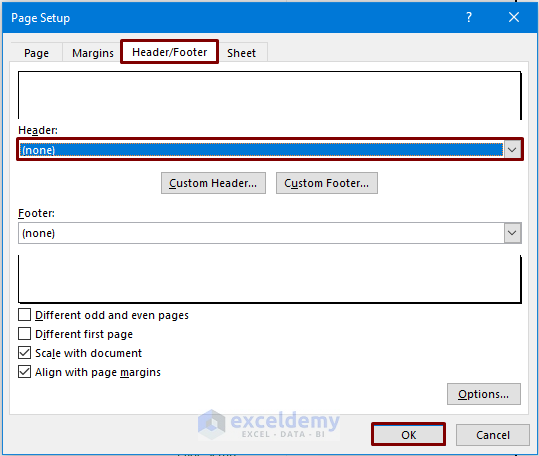
- In the Page Setup dialog box, select Header/Footer.
- Choose none and click OK.
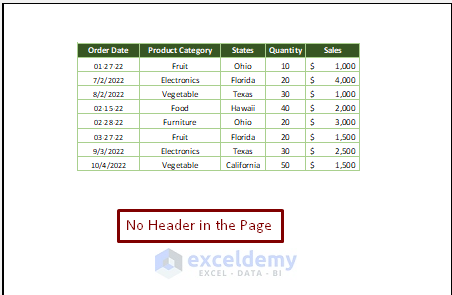
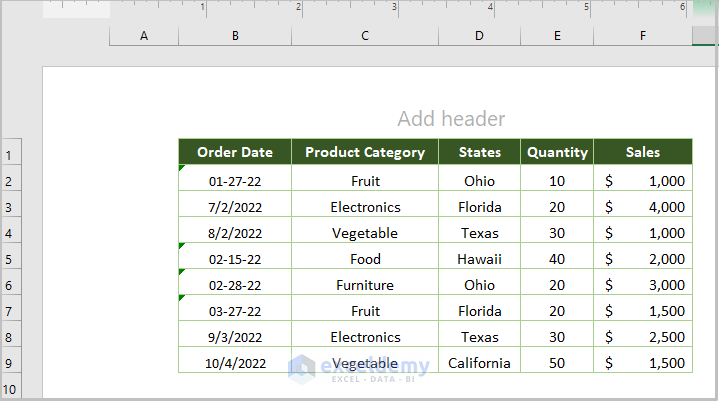
This is the output.
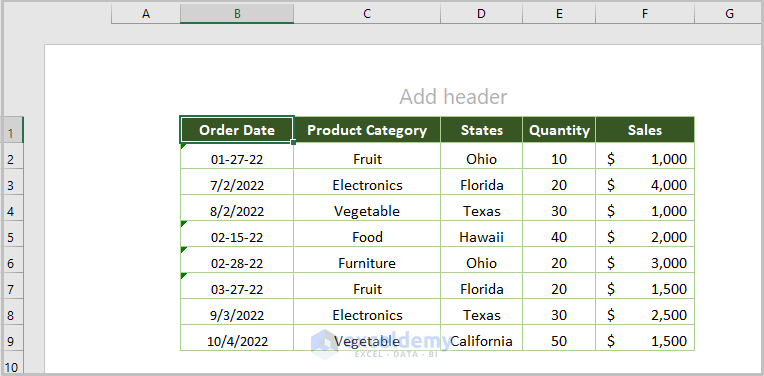
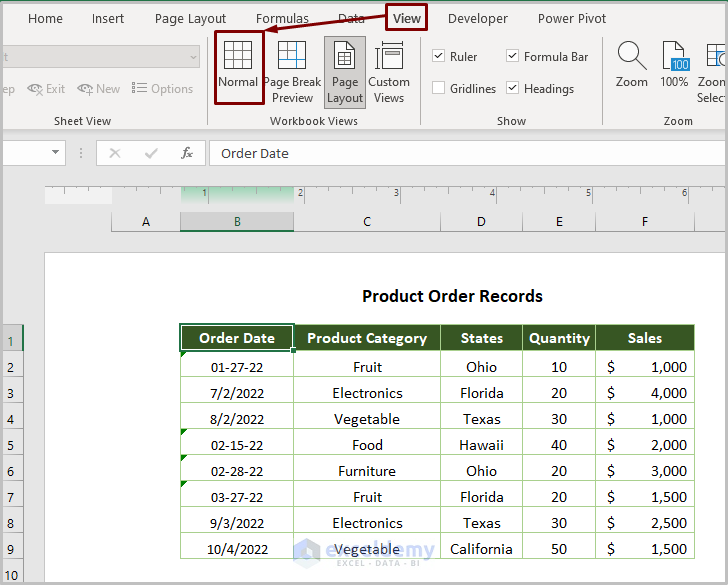
- To remove the space created by the header, in View, select Normal.
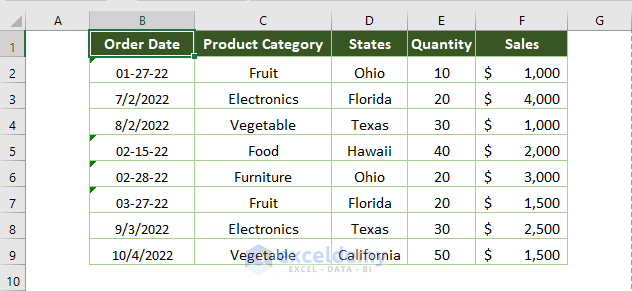
This is the output.
Read More: How to Add Header in Excel
Method 2 – Deleting a Header While Printing
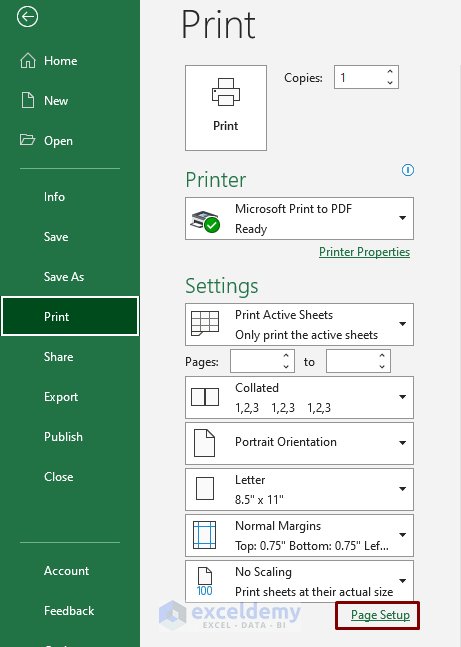
- Go to the print preview by clicking File > Print > Print Preview (or pressing CTRL + P).
- Choose Page Setup.
- In the Page Setup dialog box, select Header/Footer and choose none.
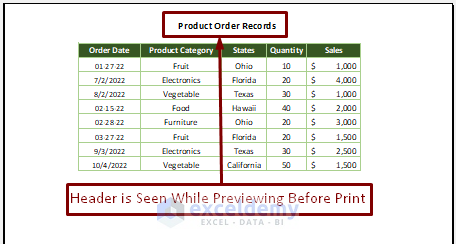
This is the output.
Read More: How to Add Same Header to All Sheets in Excel
Method 3 – Removing a Header from the Second Page
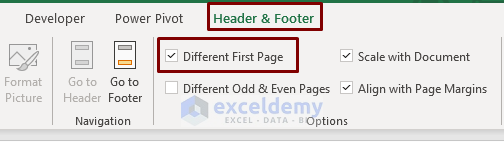
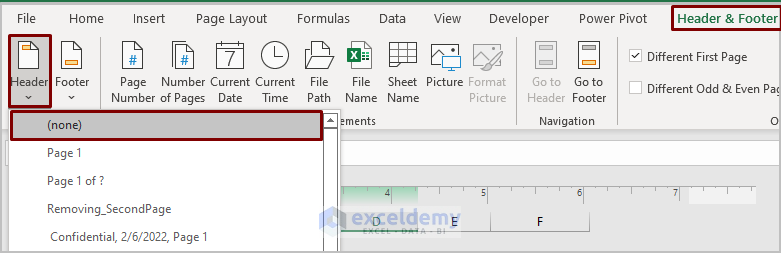
- Select the current header and check Different First Page in Header & Footer tab.
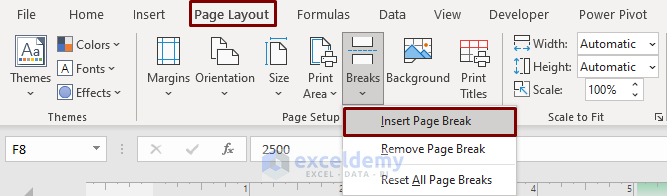
- Click outside the current dataset and select Insert Page Break in Page Setup.
- Enter a new header (Product Order Records-2) in page 2.
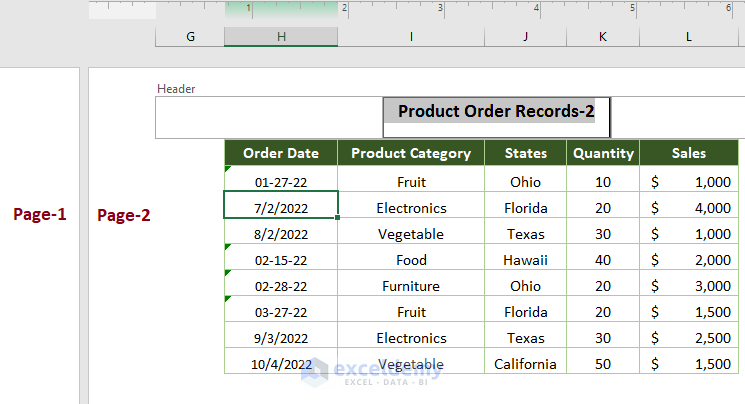
- Remove the header from the second page by choosing none in Header in the Header & Footer tab.
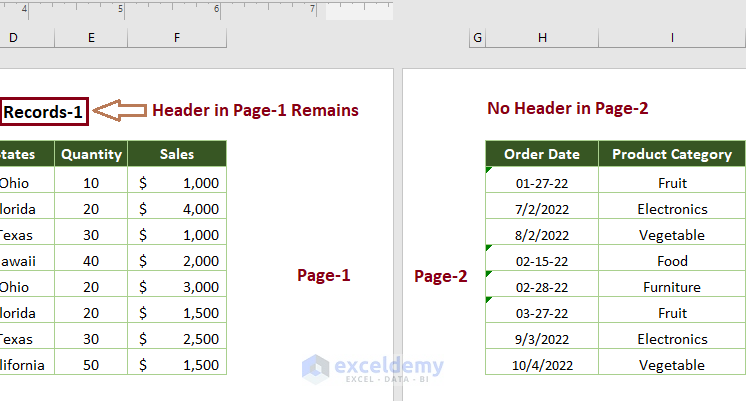
This is the output.
Method 4 – Using a VBA Code to Remove a Header in Excel
Step 1:
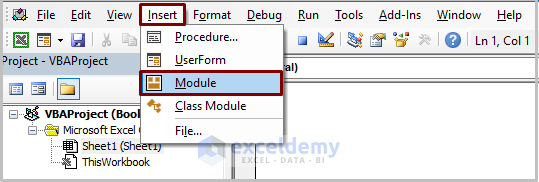
- Open a module by clicking Developer > Visual Basic.

- Go to Insert > Module.
Step 2:
Then copy the following code into the module.
Sub Removing_Header()
With Sheets("Sheet4").PageSetup
    .LeftHeader = ""
    .CenterHeader = ""
    .RightHeader = ""
End With
End Sub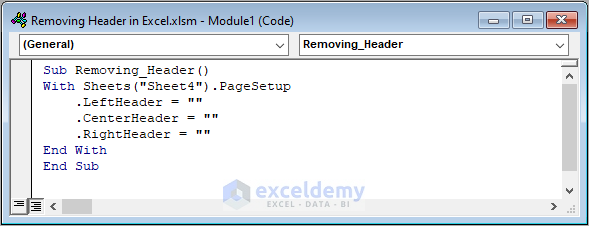
In the above code, Sheets collection is used to get the sheet (Sheet4) in which the header will be removed. PageSetup, which holds all page setup properties (e.g. margins, header & footer) was assigned. All types of the header (left, right & right header) were set as blank.
Step 3:
- Run the code (Press F5 or Fn + F5) and the output will be the following:
Related Content: How to Keep Header in Excel When Printing
Things to Remember
- If you want to close the header (instead of removing it), press Esc.
- If you want to remove the header quickly, simply select the header and press Delete or Backspace.
Download Practice Workbook
Related Articles
- How to Print Excel Sheet with Header on Every Page in Excel
- How to Edit Header in Excel
- How to Move Header in Excel
- How to Maintain Excel Header Alignment
- How to Insert Logo in Excel Header
<< Go Back to Header and Footer | Page Setup in Excel | Print in Excel | Learn Excel
Get FREE Advanced Excel Exercises with Solutions!
