Removing page borders in Excel refers to erasing borders from the outside cells of a page.
In this Excel tutorial, you will learn how to remove any page border in Excel.
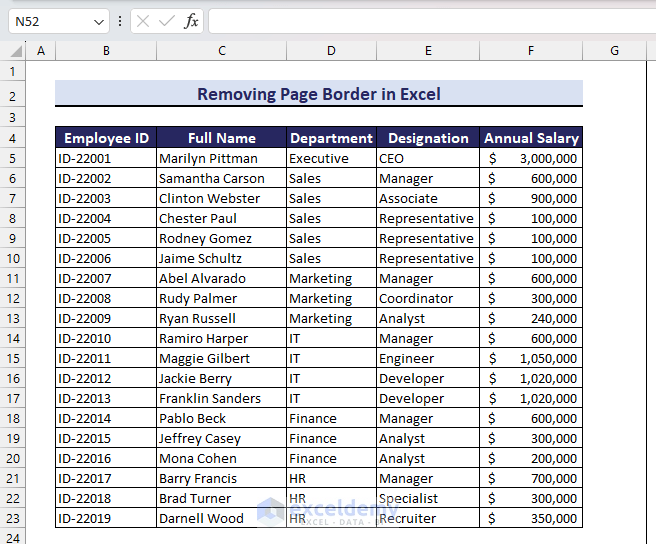
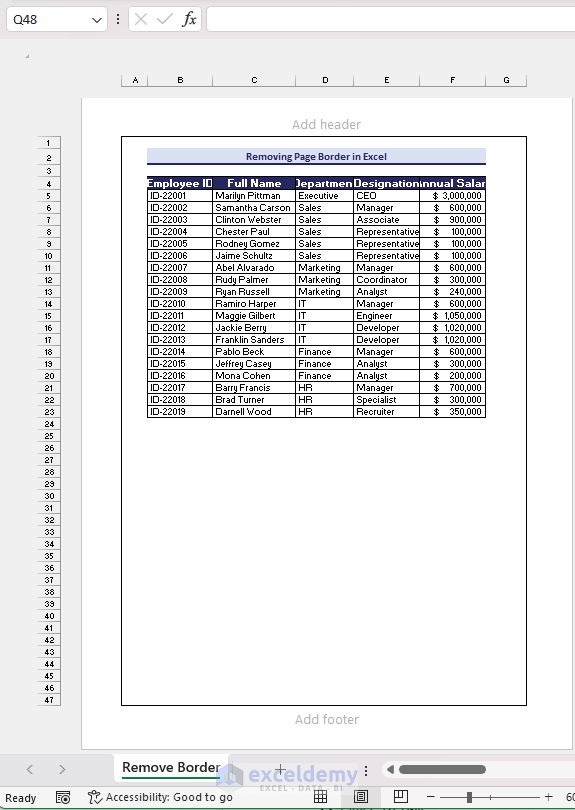
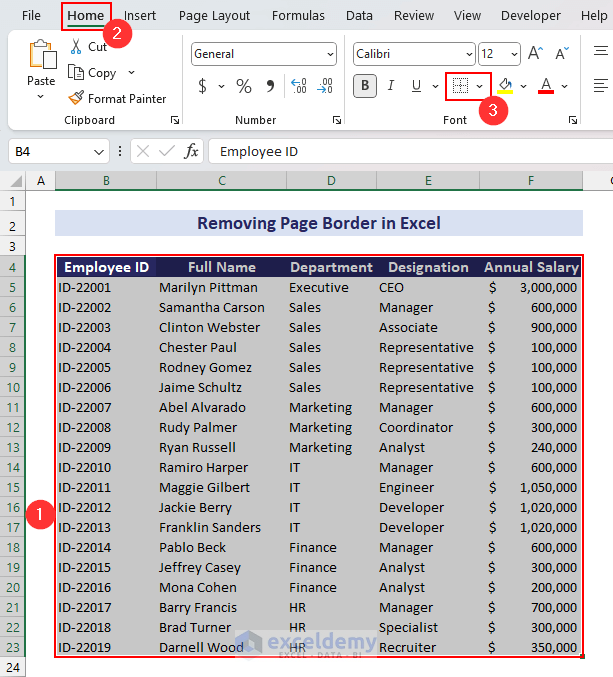
Although there isn’t any exact feature like Page Border in Excel, we can add page borders in the print area by applying the Outside Borders command. For example, consider the following dataset that contains a few employee details.
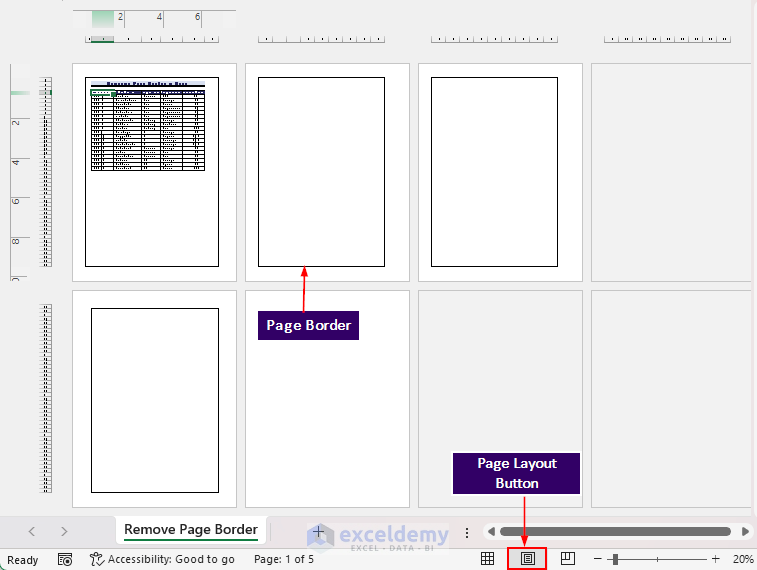
If you click the Page Layout button from the Status Bar, you will view the borders around some of the pages.
If you try to print the worksheet, you will notice these page borders in the print area as well.
Click the image for a detailed view
Now removing page border in Excel can be done in two ways: Using the Erase Border tool or using the No Border command.
1. Applying Erase Border Tool to Remove Page Border
Removing any page border can be quickly done by the Erase Border tool. Apply the following steps to remove the page border by using the Erase Border tool.
Step 1: Select Page Layout Button
- In the bottom-right corner of your Excel window, you will find the Page Layout button.
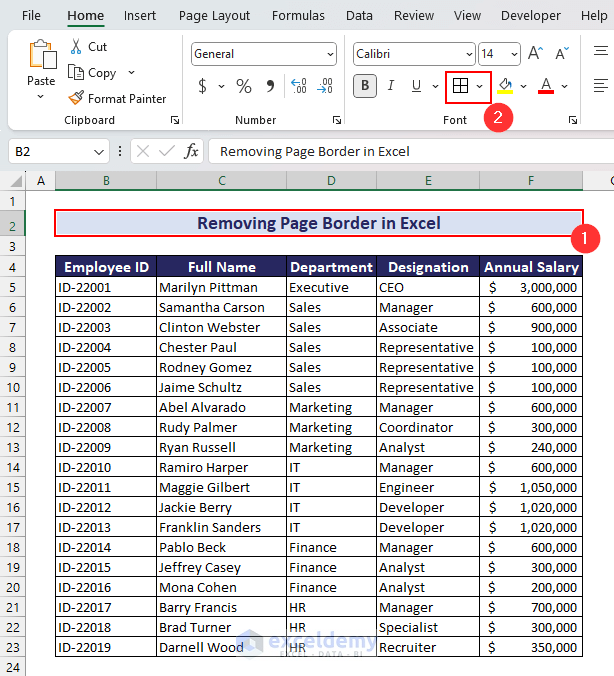
- Click the Page Layout button and your workbook view will be like the following. You can see the page borders around the layout of the page.
Click the image for a detailed view
Step 2: Select Erase Border Tool
- Go to the Home tab => click the Borders dropdown => you will find the Erase Border option under the Draw Borders group of commands.
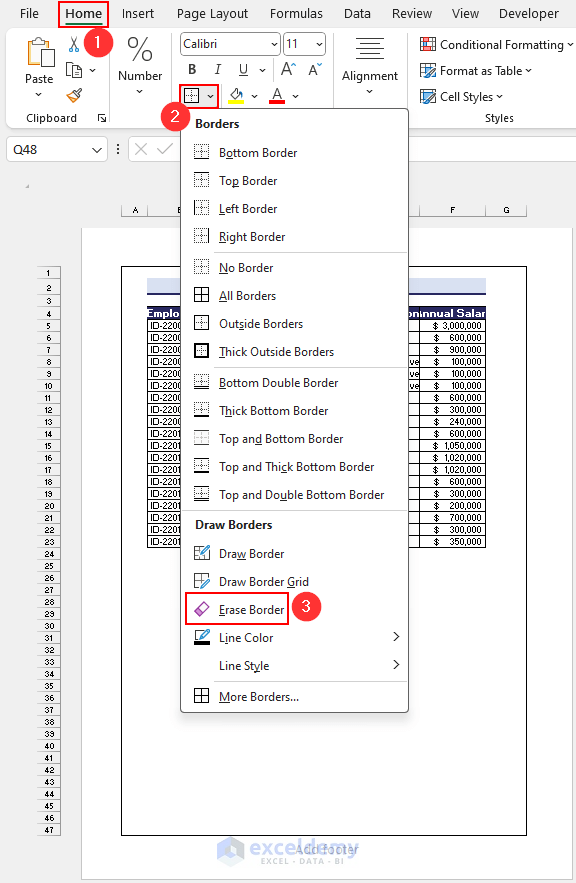
You can click the image for a detailed view
- If you select the Erase Border tool, small plus (+) icons will appear in each corner of the cells. You will also notice an Eraser icon instead of the arrow symbol of your mouse pointer.
![]()
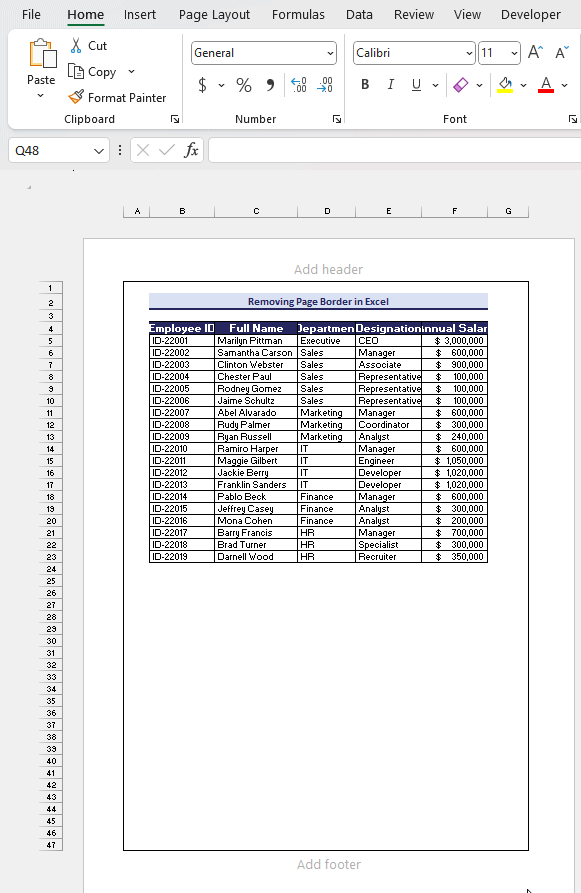
Step 3: Erase Page Borders
- Drag the Eraser icon over the page borders to remove them.
- After removing page borders, click the Erase Border button or the Esc key. You will notice there are no page borders now.
Read More: How to Remove Borders in Excel
2. Using No Border Command
We can also apply the No Border command to remove page border in Excel. However, the borders in the actual dataset will be removed in this case. Therefore, you have to restore the cell border of the dataset.
Follow the steps below to remove borders using the No Border command.
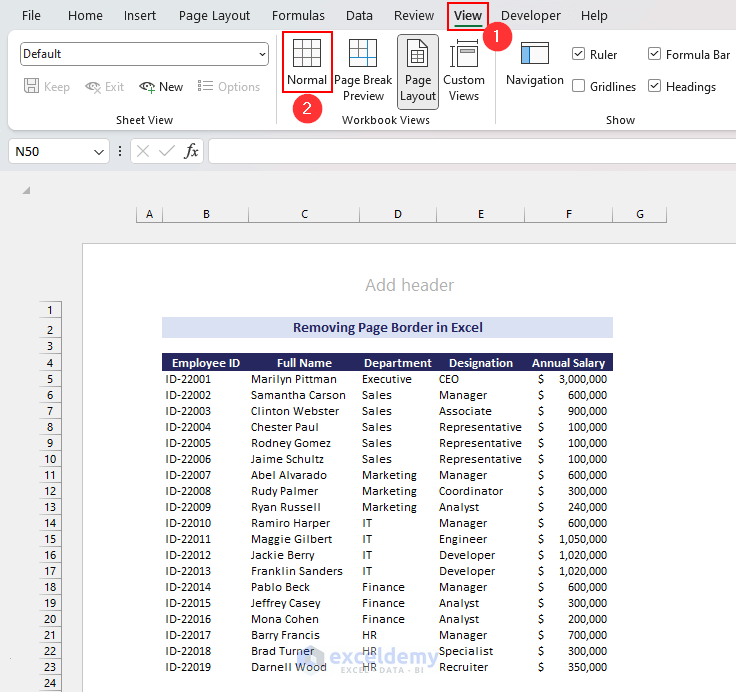
Step 1: Check Page Layout from View Tab
- First, go to the View tab. You will see the Page Layout option under the Workbook Views group of commands. You can find this option in the bottom-right corner of your Excel window as well.
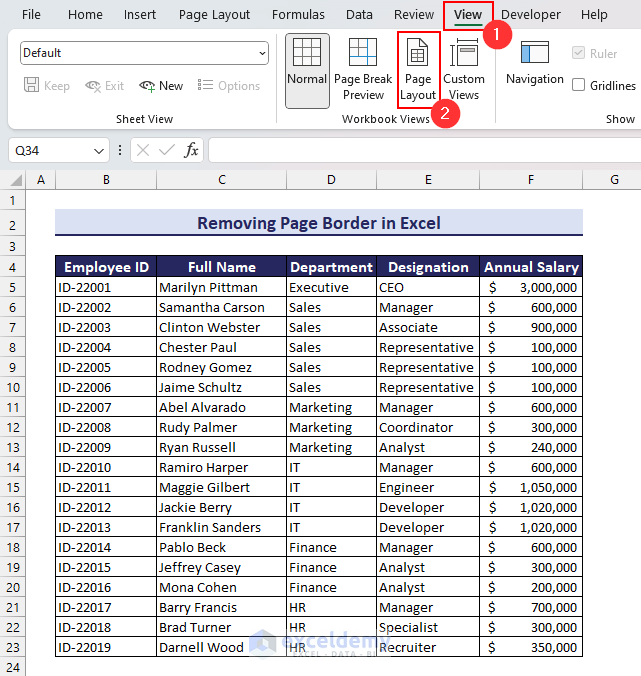
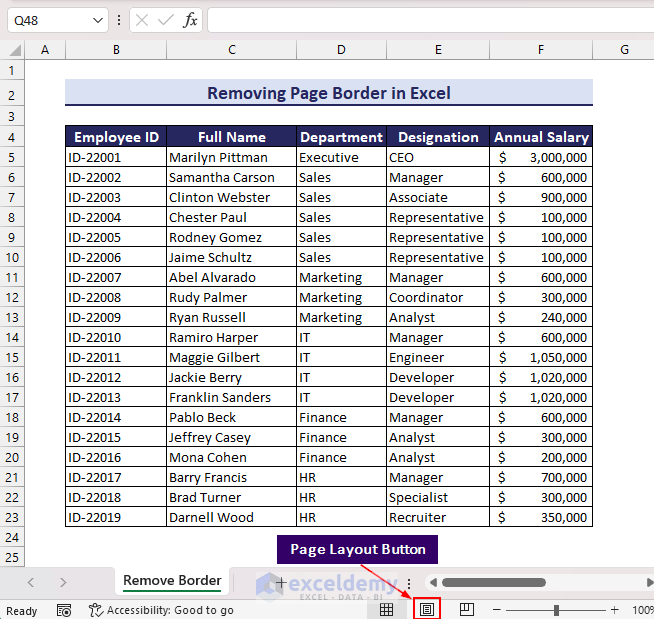
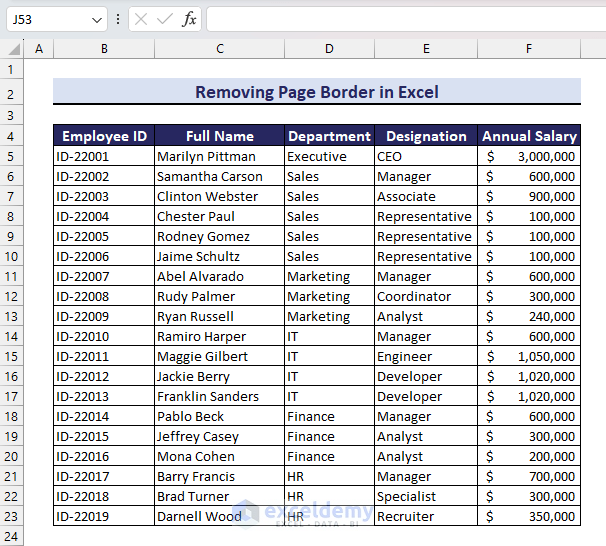
- After clicking the Page Layout command, your workbook view will split into pages. Now, you can view the page border around the layout of the first page (i.e. range A1:G47).

Click the image for a detailed view
Step 2: Remove All Borders from the Page
- Select the range A1:G47 (i.e. all cells on the first page) and go to the Home tab. You will see the Borders dropdown under the Font group of command.
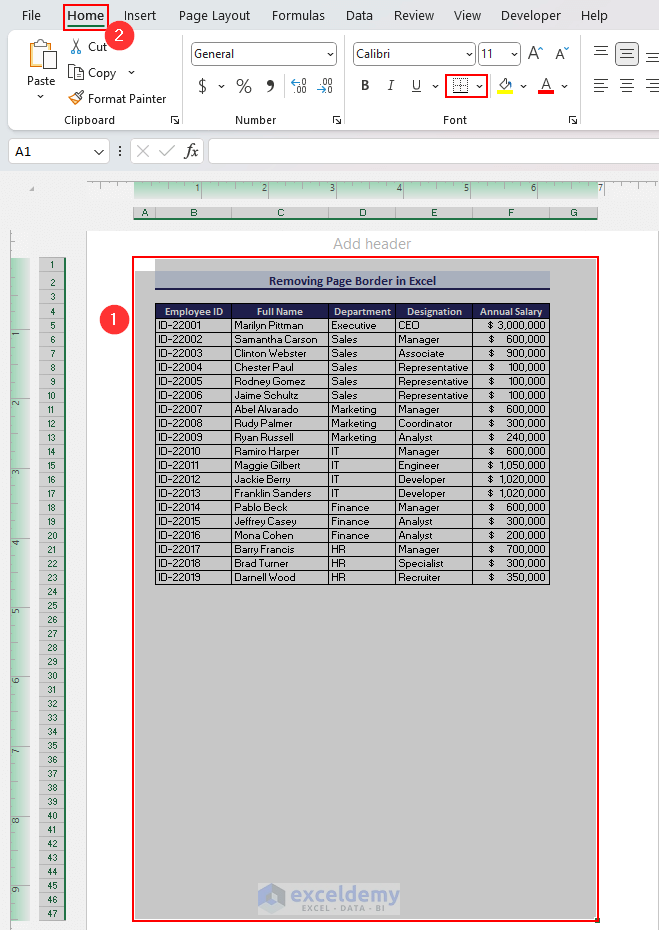
You can click the image for a detailed view
- Click the Borders dropdown and you will find the No Border command.
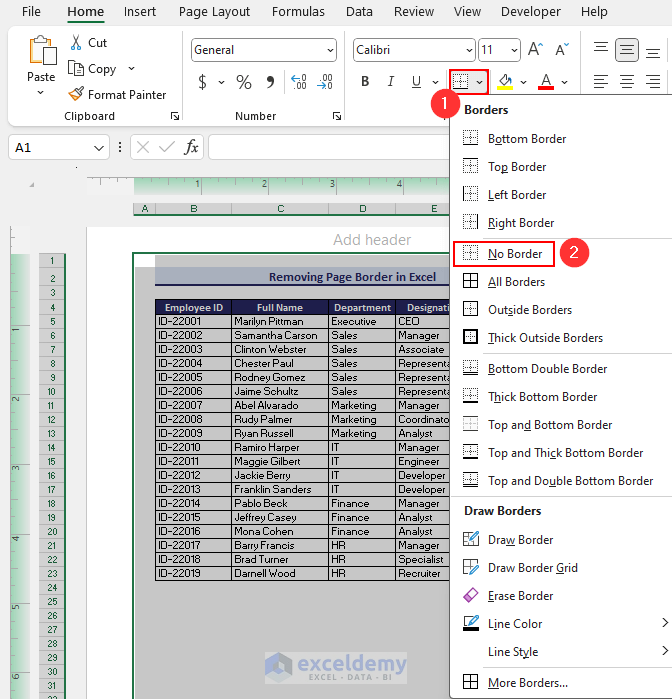
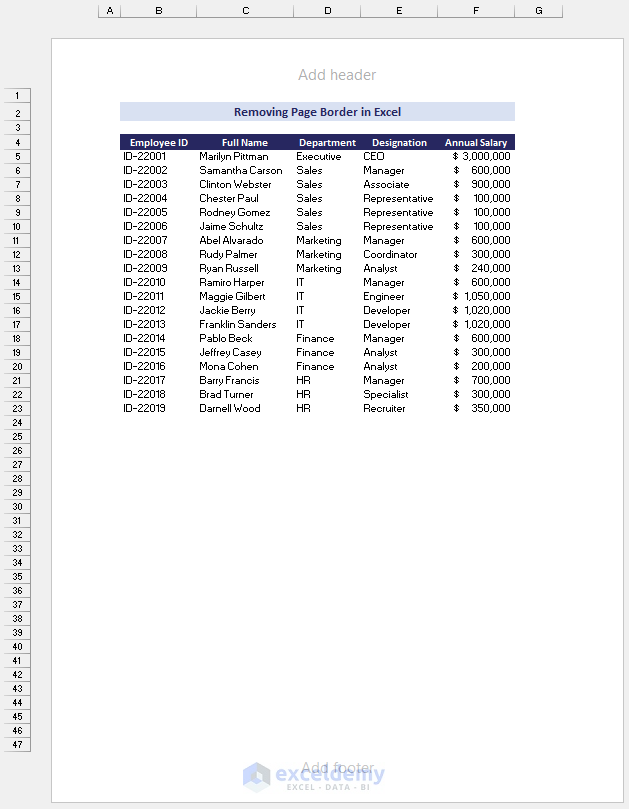
- After selecting the No Border command, the page border and cell borders will be removed.
Step 3: Return to Normal View of Workbook
- After that, go to the View tab again. You will see the Normal option under the Workbook Views group of commands.
Step 4: Restore the Borders of the Dataset
- After clicking the Normal command, the Workbook view will return to normal. As the cell borders of the dataset are also gone, we have to restore the borders. If you don’t require cell borders in the dataset, then you can skip this step.
- Select the range B4:F23 (i.e. data table) and go to the Home tab. We have to use the Borders option again.
- Click the Borders dropdown and you will find the All Borders command.

- After clicking the All Borders command, you will get cell borders around the cells of range A4:F23.
- After that, select the merged cell B2:F2 (i.e. table header) and go for the Borders dropdown again.
- After clicking the Borders dropdown, you will get the Thick Bottom Border command.

- After selecting the Thick Bottom Border command, you will get a bottom border in the merged cell B2:F2. Our dataset borders are now restored.
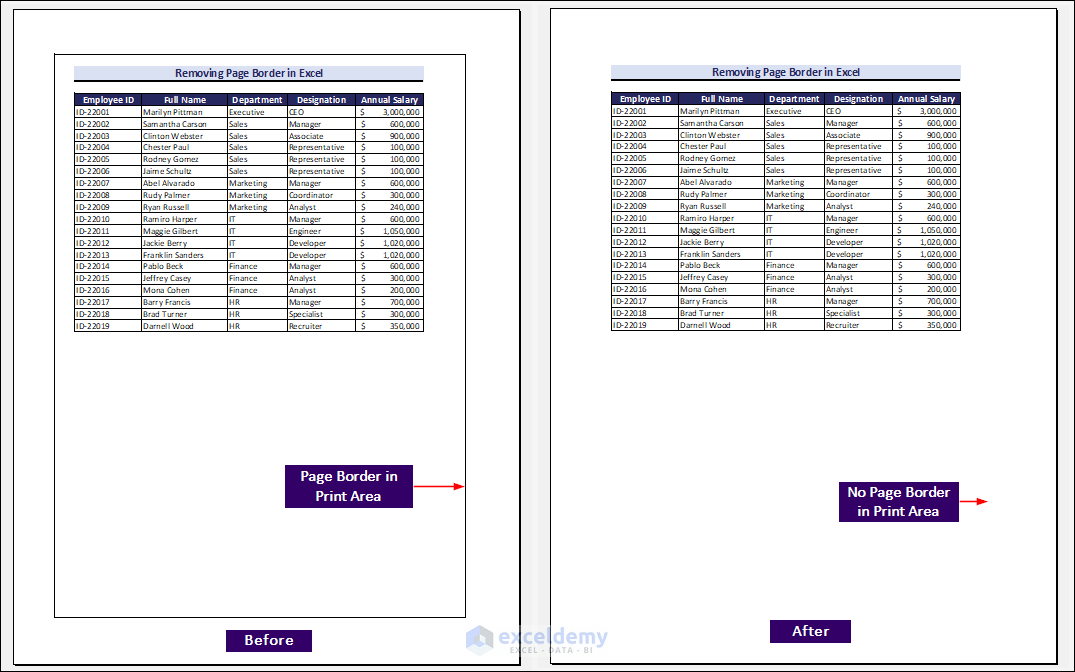
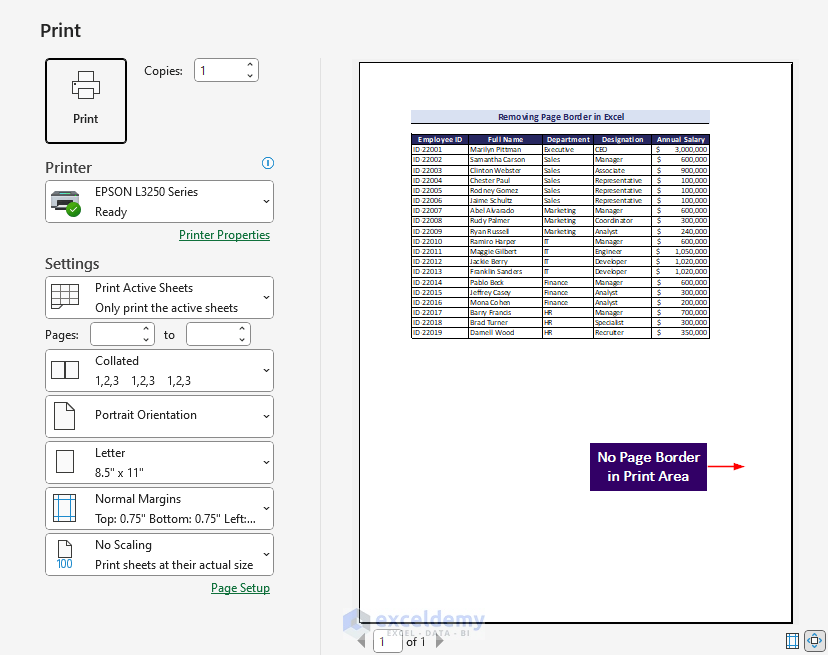
Now, if you click the Print command from the left-side pane of the File tab (or, apply the keyboard shortcut Ctrl + P). You will get the following print preview. As you can see, there is no page border in the print area.
You can click the image for a detailed view
Read More: [Fixed!] Border Not Showing in Excel
Tips While Removing Page Border in Excel
- There isn’t any exact feature for applying or removing page borders in Excel. Page borders are added by applying the Outside Borders command around the cells of the page.
- The position of the page border may vary based on the settings of page margins.
Download Practice Workbook
Conclusion
This concludes our tutorial on how to remove any page border in Excel. We showed steps to use the Erase Border or No Border command to remove any page border. We hope that this tutorial was helpful for your requirements. Let us know your feedback in the comment section.
Related Articles
- How to Make Graph Paper in Excel
- How to Change Border Color in Excel
- How to Lock Borders in Excel
- How to Cancel Moving Border in Excel
<< Go Back to Cell Borders in Excel | Excel Cell Format | Learn Excel
Get FREE Advanced Excel Exercises with Solutions!
