In Microsoft Excel, cells are distinguished by cell borders. But sometimes border colors are not visible. In that case, we need to change it.
In this article, we will discuss how to change the border color in Excel.
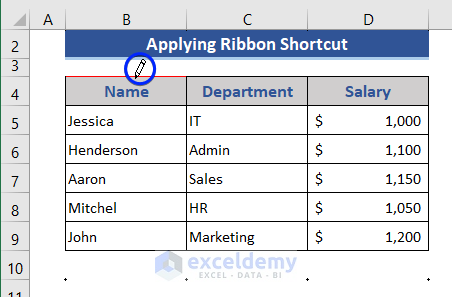
Here, we will discuss 3 simple methods to change border color in Excel. We have taken a sample Excel sheet, where the border of the cells is black.

We will show how to change the color of the cells in the below section.
1. Using the Format Cells Option to Change Border Color in Excel
In this method, we will use the keyboard shortcut to change the border color of desired cells.
📌 Steps:
- First, place the cursor on cell B4.
- Select range B4:D9 using the down and right arrow buttons.
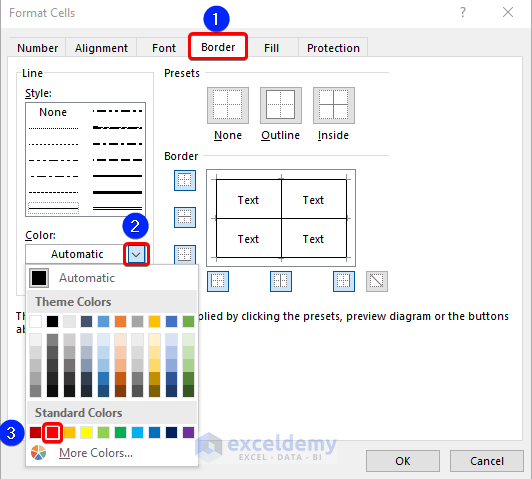
- Then, press Ctrl+1.

- Now, the Format Cells window appears.
- Go to the Border tab.
- We get the Color section here.
- Click on the down arrow of the Color section.
- Now, choose your desired color from the list.
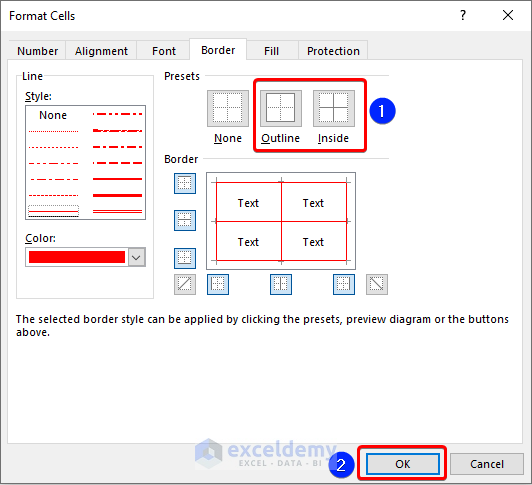
As we want to color all the borders of the cells, we need to change the color of both the outside and inside of the cells.
- Choose Outline and Inside from the Presets section.
- Finally, press the OK button.
- Look at the worksheet now.

- We can see the border has been changed into red from black.
- We can also avail of the Format Cells option from the Context Menu. Just select the required cells and press the right button on the mouse.
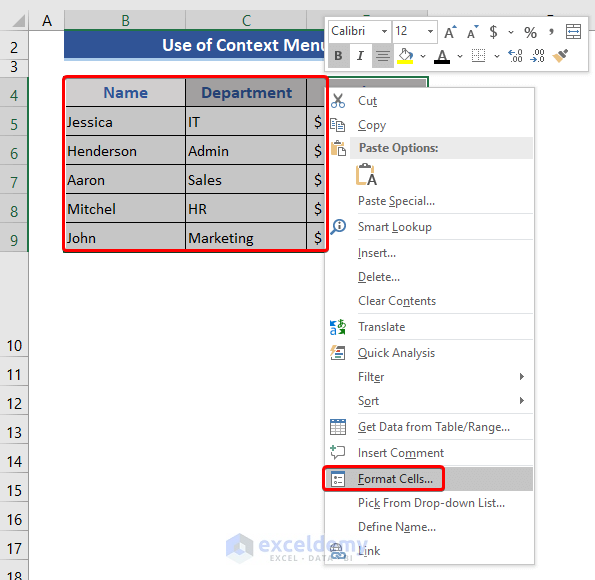
- After that, follow the steps of the mentioned above section.
Read More: How to Add Cell Borders Inside and Outside in Excel
2. Changing Border Line Color from Excel Borders Drop-Down
In this section, we will discuss a process based on the ribbon option to change the color of the border. Here, we need to choose the cell borders each time to change the color.
📌 Steps:
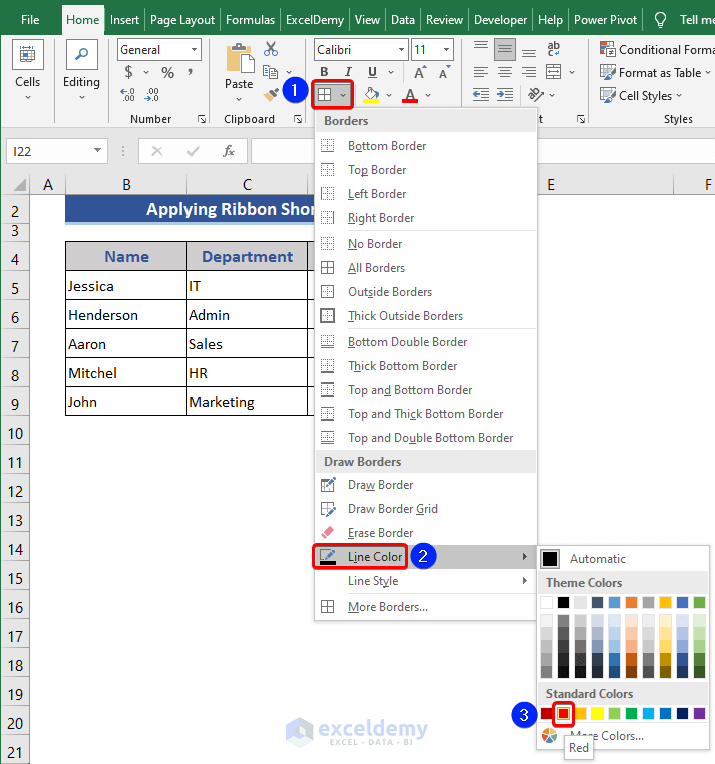
- Click on the down arrow of the All Borders section from the Home tab.
- A list of options will appear here.
- Choose Line Color from there.
- Now, a list will appear with different color options.
- We chose our desired color.
- We can see a drawing pencil appears.

- We will draw the cell borders with the chosen color using a pencil. Also, some dots are showing. Those dots are the edges of each cell.
- Now, select a border of any cell.
- We can see the border color has changed.
- Similarly, choose all the required cell borders to change the color.

- In this method, we can change the border color of any cell without previous selection.
Read More: How to Add or Remove Dotted Border in Excel
3. Change Border Color of Entire Worksheet from Advanced Display Options
In the previous methods, we changed the border color of selected or a certain number of cells. But now, we will change the border color of the entire sheet.
📌 Steps:
- Click on the File tab.

- Now, the list will appear. Choose the Options from there.

- The Excel Options window will appear.
- Choose the Advanced option from the left side.
- Find out the Display options for this worksheet section from the right side.
- Now, check the Show gridlines option.
- Then, click on the down arrow of the Gridline color section.
- A list of colors will appear at the same time.
- We chose our desired color.

- Finally, press OK.

We can see that the entire border of all cells of the entire sheet has changed.
Read More: [Fixed!] Border Not Showing in Excel
Download Practice Workbook
Download this practice workbook to exercise while you are reading this article.
Conclusion
In this article, we described how to change border color in Excel. We showed two situations. One is for certain cells and another one is for an entire sheet. I hope this will satisfy your needs. Please fell free to give your suggestions in the comment box. Goodbye!
Related Articles
- How to Make Graph Paper in Excel
- How to Remove Page Border in Excel
- How to Lock Borders in Excel
- How to Cancel Moving Border in Excel
<< Go Back to Cell Borders in Excel | Excel Cell Format | Learn Excel
Get FREE Advanced Excel Exercises with Solutions!
