You will need to print Worksheets on a number of occasions. There are times, however, when publishing the entire report is unnecessary, resulting in a waste of paper and time. This tutorial will show you how to print the selected area in Excel that you need.
How to Print Selected Area in Excel: 2 Examples
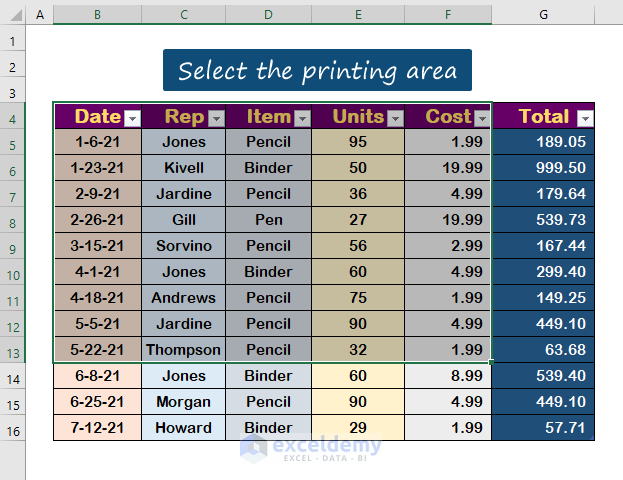
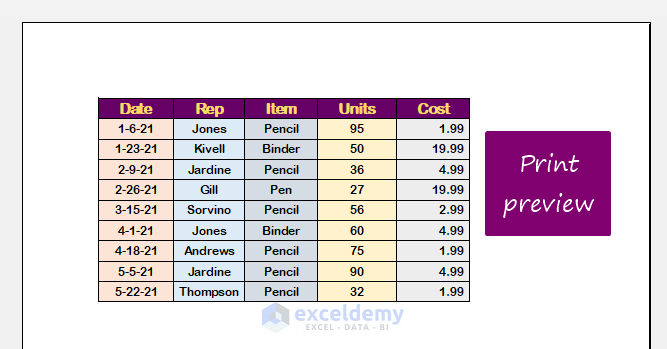
We’ll show you two examples of how to print selected areas in Excel in the sections below. The first is the simplest, which uses the printing choice, while the second uses the Page Layout feature. We’ll use the sample data set shown in the screenshot below.

1. Basic Approach to Print Selected Area in Excel
This is the most typical method for printing a specific area. Follow the instructions below to do so.
Step 1:
- Select the desired cells.

Step 2:
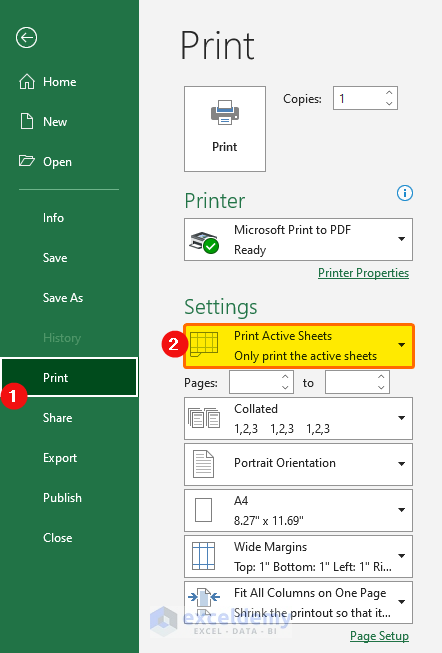
- Click on the File.
- Then, click on the Print.
- Select the Print Active Sheets.
Step 3:
- Choose the Print Selection.

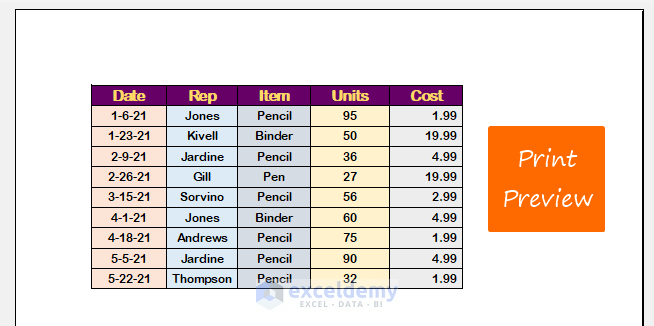
Step 4:
- You can see the print preview in the window.
Notes. To open the printing option, you can also press Ctrl + P
2. Use the Page Layout Option to Print Selected Area in Excel
In addition to the previous method, you can print the selected area with another procedure by following the steps below.
Step 1:
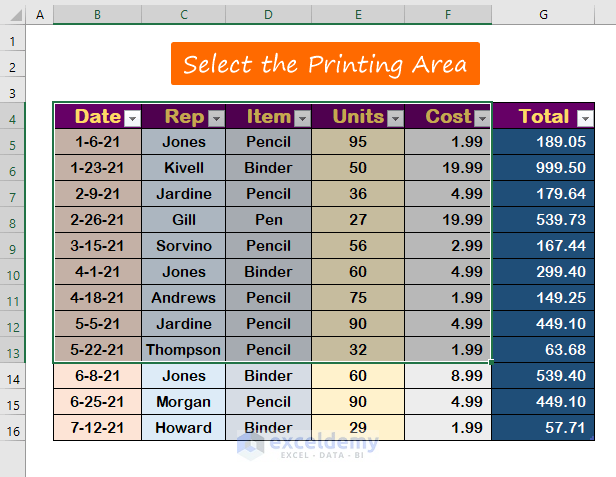
- Firstly, select the area.
Step 2:
- From the tab select the Page Layout.
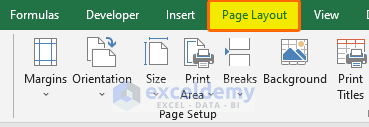
Step 3:
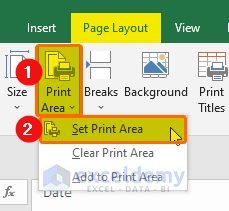
- Click on the Print Area.
- Then, select the Set Print Area.
Step 4:
- By using Ctrl + P, you may now navigate to the printing section. You’ll see in the preview that it just shows the area you’ve chosen.
Notes. Click Page Layout > Print Area > Clear Print Area to eliminate a print area.
Read More: How to Set Print Area in Excel
Download Practice Workbook
Download this practice workbook to exercise while you are reading this article.
Conclusion
To summarize, I hope this article has shown you how to print a specific area in Excel. Review the practice book and apply what you’ve learned. Because of your support, we are willing to pay for projects like this.
Please don’t hesitate to contact us if you have any questions. Please leave a comment below and tell me what you think.
Related Articles
- How to Print Selected Area in Excel on One Page
- How to Set Print Area with Blue Line in Excel
- How to Set Print Area for Multiple Pages in Excel
- How to Center the Print Area in Excel
<< Go Back to Print Area | Page Setup | Print in Excel | Learn Excel
Get FREE Advanced Excel Exercises with Solutions!
