Spell checking is mandatory sometimes while working on an Excel Worksheet. In this article, we will see how to perform a spelling check on the active worksheet of Excel. The methods are very simple. Along with the active worksheet, you will see the process for multiple and all worksheets.
Perform a Spelling Check on the Active Worksheet in Excel: 3 Effective Ways
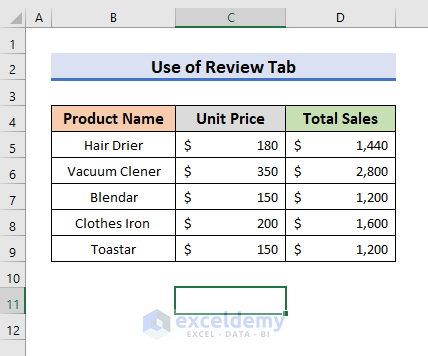
To explain the methods, we will use a dataset that contains the Product Name, Unit Price, and Total Sales of some products. In the dataset, there are 3 misspelled words. We will try to perform a spelling check on the active worksheet and find the correct spelling using the following methods.

1. Use Review Tab to Perform a Spelling Check on the Active Worksheet
1.1 Range or Multiple Cells on the Active Worksheet
To perform the spelling check for multiple cells in your worksheet, you can follow the steps below.
STEPS:
- First of all, select the cells where you want to perform the spell check.

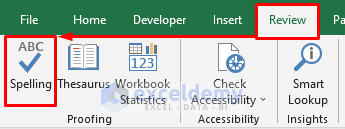
- Secondly, go to the Review Tab and select the Spelling option.
- Alternatively, you can press the F7 key to open the Spelling dialog box.
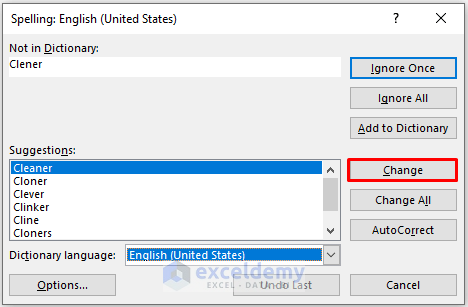
- After selecting the Spelling option, you will see a spell checker box appear. You can select your desired language under the Dictionary Language drop-down.
- In that box, you will also find the Ignore and Change options.
- In the suggestion option, you will see different words relevant to the word you misspelled. Usually, the most relevant words come first.
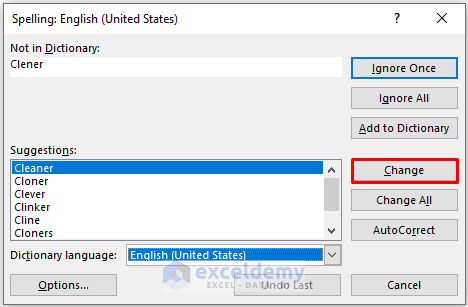
- In the following step, select the word that you think is right and press on the Change option.

- After selecting the Change option, you will see that the misspelled word which was “Clener” is changed into “Cleaner”.
- The same box will appear for the next cell.
- In this way, you can check the spelling of all the selected cells.
- The box will appear only for the cells where you have inserted misspelled words.

- After checking all the selected cells, you will get to see the below box appear in your worksheet.
- Press OK there to continue.

- Finally, after performing a spelling check, you will see results like the picture below.

1.2 Entire Worksheet
To perform the spelling check for the entire worksheet, you need to follow the steps below.
STEPS:
- Firstly, select any cell of your worksheet outside the dataset.
- Secondly, select the Spelling option under the Review tab.
- Or, you can also press F7 which is the shortcut key for the spell-check.
- Instantly, you will get the below dialogue box.
- Press Yes there for continuing the spell check.

- After clicking on Yes, you will get the same spell checker box as before.
- After changing the misspelled words, a message box will appear.
- Click OK to proceed.

- Finally, the spelling check process will give you the results below.

1.3 Multiple Worksheets
You can also perform a spelling check for multiple worksheets in Excel. To check the spelling for the multiple worksheets, you can follow the steps below.
STEPS:
- In the first place, select the worksheets manually while pressing the Ctrl key.

- After that, select the range where you want to perform a spelling check.

- In the following step, press the F7 key for a spelling check.
- Select the desired suggestions and click on the Change option for implementing the correct spells.
- After changing all the misspelled words, a message box will appear.
- Click OK to proceed.
- Lastly, you will see results like the picture below.

1.4 All Worksheets
If you want to perform a spelling check in all worksheets in the workbook, then you will have to follow the steps below.
STEPS:
- To select all worksheets of your workbook, select any worksheet and press the right button on your mouse.
- After doing this select the option, Select All Sheets.

- This will select all the worksheets in your workbook. Now to perform the spelling check do the same thing that is stated in the previous methods.

1.5 Excel Formula Bar
If your cell contains any formula Excel will not check the spelling for that specific cell. So, you need to select the text from the Formula Bar. Let’s follow the steps below to see how we can check the spell inside a formula.
STEPS:
- Firstly, select the words in the formula bar.

- Now, after selecting the word press the F7 key or select the Spelling under the Review tab.
- It will open the Spelling box.
- Select the desired suggestion and click on the Change option.

- After finishing the check, a message box will appear.
- Click OK to proceed.

- In conclusion, you will see the correct spelling in the formula bar.

2. Correct Spelling Errors with AutoCorrect Option in Excel
While typing ‘shouldn’t’, ‘wouldn’t’, ‘couldn’t’ we often make spelling or typing mistakes. To get rid of this kind of mistake you can use the AutoCorrect option. Let’s pay attention to the steps below to see how we can introduce the AutoCorrect option.
STEPS:
- In the beginning, click on the File tab.

- Secondly, select Options. It will open the Excel Options box.

- Thirdly, select Proofing and then, click on AutoCorrect Options.

- In the AutoCorrect box, check all the options in the AutoCorrect tab.
- Then, click OK to proceed.
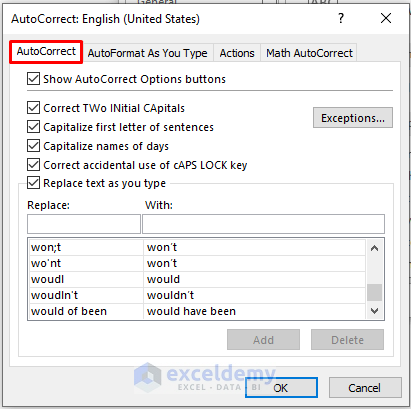
Note: You won’t be able to get all words correctly using the AutoCorrect option. It will only work on the predefined mistakes in the AutoCorrect box. You will find them just below Replace and With boxes.
- Now, go to the sheet and type wo’nt.
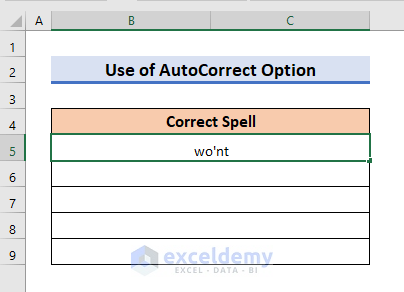
- Press Enter to see the correct spelling automatically.
- Also, you can type woudln’t.

- Now, if you press Enter, you will see the correctly spelled word.

3. Apply Excel VBA to Carry Out Spelling Check on the Active Worksheet
In Excel, you can also use VBA to carry out spelling checks on the active worksheet. VBA stands for Visual Basic for Applications. In the following sections, we will see some examples of Excel VBA to perform a spelling check.
3.1 Active Worksheet
In the first case, we will use VBA to perform a spelling check on the active worksheet. Let’s observe the steps below to see how we can implement the macro.
STEPS:
- In the first place, go to the Developer tab and select Visual Basic. It will open the Visual Basic window.
- Alternatively, you can press the Alt + F11 keys together to open it.

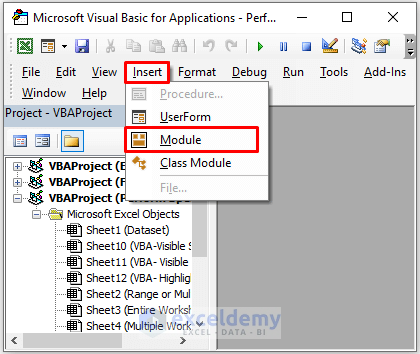
- Secondly, select Insert >> Module in the Visual Basic window. It will open the Module window.
- Now, type the code in the Module window:
Sub Spell_Check()
ActiveSheet.Cells.CheckSpelling
End Sub
- After typing the code, press Ctrl + S to save the code.
- You can press the F5 key to run the code.
- Otherwise, navigate to the Developer tab and select Macros.

- At this moment, select the desired code from the Macro box and Run it.

- After running the code, the Spelling box will appear.
- Click on the Change option like Method 1.1.

- Finally, you will see results like the picture below.

3.2 Before Closing a Workbook
We can also use VBA to perform a spelling check before closing a workbook. Follow the steps below to see how we can implement this.
STEPS:
- Firstly, press Alt + F11 to open the Visual Basic window.
- Secondly, double–click on the This Workbook option inside the Microsoft Excel Objects section. It will open a Code window.

- Type the code in the Code window:
Private Sub Workbook_BeforeClose(Cancel As Boolean)
Sheet9.Cells.CheckSpelling
End Sub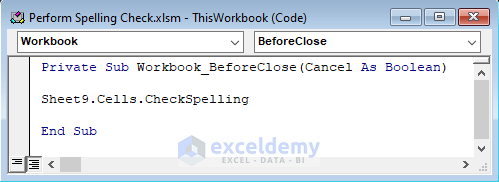
Here, Sheet9 is the sheet where we want to perform a spelling check before closing the workbook.
- Press Ctrl + S to save the code.
- Now, if you click on the Close icon of the workbook, then the Spelling box will appear.
- Click on the Change to apply the correct spelling.

- After changing all misspelled words, a message box will appear.
- Click on Save to proceed.

- Finally, if you re-open the workbook, you will see the correct spelling in Sheet9 of that workbook.

3.3 Visible Sheets
Sometimes, we can have visible and hidden worksheets in a workbook. To perform a spelling check only on the visible sheets, you need to follow the steps below.
STEPS:
- First of all, go to the Developer tab and select the Visual Basic window.
- Secondly, select Insert >> Module in the Visual Basic window.
- Then, type the code below in the Module window:
Sub Check_Spell_in_Visible_Sheets()
For Each WS In ActiveWorkbook.Worksheets
 If WS.Visible = True Then
 WS.Activate
 WS.CheckSpelling
 End If
Next WS
End Sub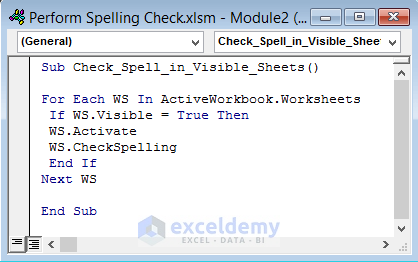
- After typing the code, press Ctrl + S to save it.
- Now, hit the F5 key to run it.
- As a result, Excel will start performing a spelling check from the first sheet of the workbook.

- Finally, repeat the steps of Method 1.1 to get the desired results.
3.4 Visible and Hidden Sheets
- If you want to perform a spelling check on both the Visible and Hidden sheets, then, follow the steps of Method 3.3.
- But, use the below code in the Module window:
Sub SpellCheckAllSheets()
For Each WS In ActiveWorkbook.Worksheets
 WS.CheckSpelling
Next WS
End Sub
3.5 Highlight Misspelled Words
- To highlight the misspelled words in the dataset, follow the steps of Method 3.3.
- But, type the below code in the Module window:
Sub Highlight_Misspelled_Words()
For Each Clr In ActiveSheet.UsedRange
 If Not Application.CheckSpelling(Word:=Clr.Text) Then _
 Clr.Interior.ColorIndex = 22
Next Clr
End Sub
- After running the code, you will see results like the picture below.

[Fixed!] Spelling Check Not Working in Excel
Sometimes, spelling checks may not work in Excel. This can happen due to some reasons. Here, we will talk about some possible reasons and their solutions.
1. Spelling Button Is Disabled
If the Excel Sheet is protected then, the Spelling button may be disabled.

To solve it, go to the Review tab and click on the Unprotect Sheet option.

2. Cells Containing Formulas
When a cell contains a formula, the spelling check may not work. To solve it, you need to check the Formula Bar. We have discussed it in Method 1.5.
3. Spell Checking Working Only on Some Cells
Sometimes, spell-checking may not work on all cells. Rather only work on the active cells. This may happen if you are in Cell Edit Mode.
Press Enter to get out of the editing mode. Then, you can perform a spelling check in all cells.
Read More: [Fixed!] Spell Check Is Not Working in Excel
Download Practice Workbook
You can download the practice book from here.
Conclusion
As you can see the process of checking the spelling in Excel is very simple and doesn’t require so many steps. It is easy and fun. Hopefully, after reading this article you will not have any doubts regarding the spell-checking process in Excel. In this article, we have 3 easy methods to Perform a Spelling Check on the Active Worksheet in Excel. Furthermore, we have also added the practice workbook at the beginning of the article. To test your skills, you can download it to exercise. Lastly, if you have any suggestions or queries, feel free to ask in the comment section below.
Related Articles
- How to Turn on Spell Check in Excel
- How to Check Spelling and Grammar in Excel
- How to Turn Off Spell Check in Excel
<< Go Back to Spell Check in Excel | Proofing in Excel | Learn Excel
Get FREE Advanced Excel Exercises with Solutions!

I have never considered how important spell-checking is in excel. Thanks for your great work.
It is actually important 🙂 Thanks for your feedback.