Excel Scrolling Options for Vertical and Horizontal Scrolling
1. Scrolling Using the Arrow Keys
- To scroll up, select a cell => Press the Up Arrow (↑)
- To scroll down, select a cell => press the Down Arrow (↓)
- Use the Right or Left arrow keys to scroll in those directions.
2. Scrolling Using the Vertical and Horizontal Scrollbars
Click and hold the left mouse button on the vertical or horizontal scroll bar, move it in the desired direction to scroll through the dataset.
Take a look at the following video for a better understanding.
3. Using the Mouse Wheel
Turn the mouse wheel inward to scroll down and outward to scroll up.
What Is Smooth Scrolling in Excel?
Smooth scrolling means scrolling the spreadsheet smoothly and gradually rather than jumping from one cell to another.
Mimicking Smooth Scrolling in Older Versions:
Press the mouse wheel once and hover your mouse in the direction you want to scroll the worksheet. You can follow the GIF image given below.
Scroll Lock – Scrolling with Arrow Keys Without Moving the Active Cell
How to Turn On/Off Scroll Lock Feature?
To turn on the scroll lock feature, right-click on the status bar => find the option Scroll Lock => and click on the Scroll Lock option if found unmarked.
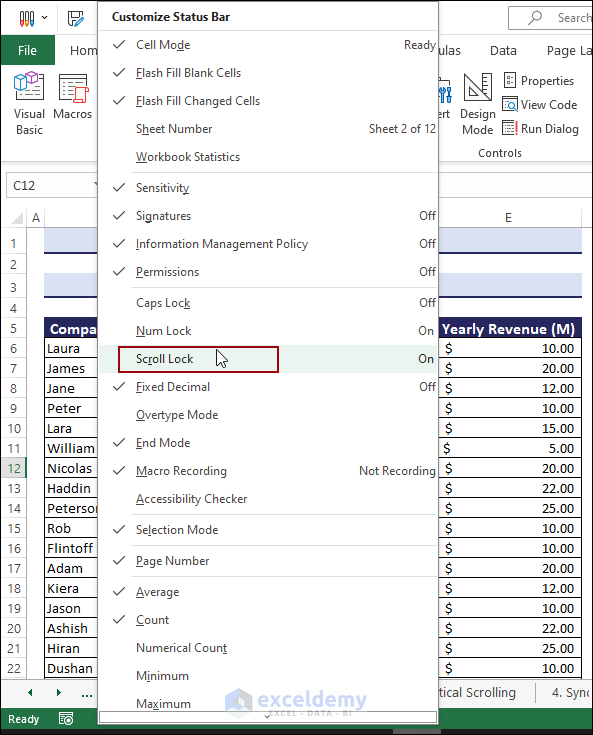
To turn the Scroll Lock off, simply unmark the command again from the status bar.
Scrolling Without Moving the Active Cell:
After you have turned on the Scroll Lock feature, if you scroll with arrow keys, you will not move from cell to cell.
![]()
If not found on your keyboard, you can use the On-Screen keyboard of your Windows operating system.
How to Scroll One Row at a Time in Excel?
To scroll one row at a time, click the vertical scroll bar’s up and down arrows. Clicking once will scroll one row.
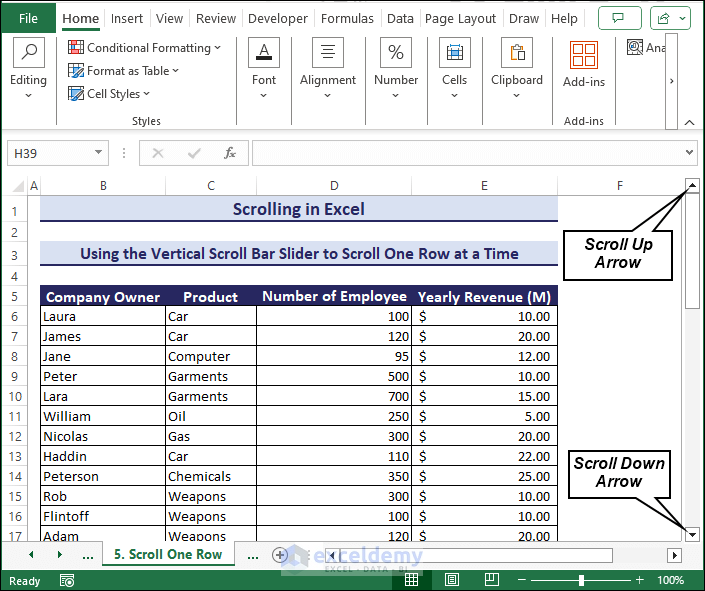
Look at the following GIF image to see how to scroll one row at a time using a vertical scroll bar.
Another way is changing the mouse settings.
To change mouse settings so that when you turn the scroll wheel, one row will be scrolled with one unit turn-
- Go to Mouse settings from the Control Panel => Select the Change mouse settings option.
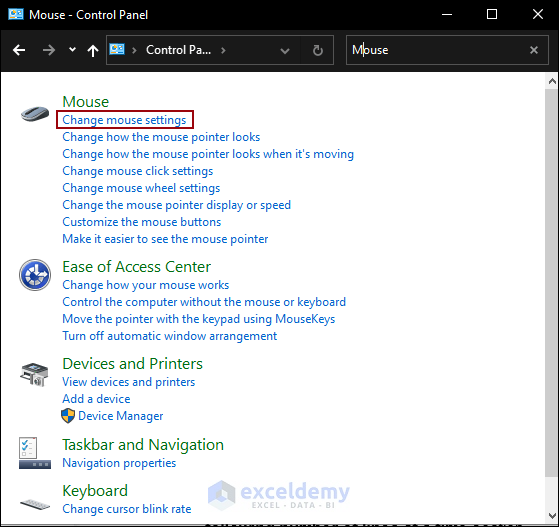
- The Mouse Properties window appears => Select Wheel tab => Insert 1 in The following number of lines at a time section.

When you rotate the scroll wheel, you will see the effect of scrolling one row at a time.
How to Simultaneously Scroll 2 Workbooks in Excel?
- Go to View tab => Window group => Select the View Side by Side
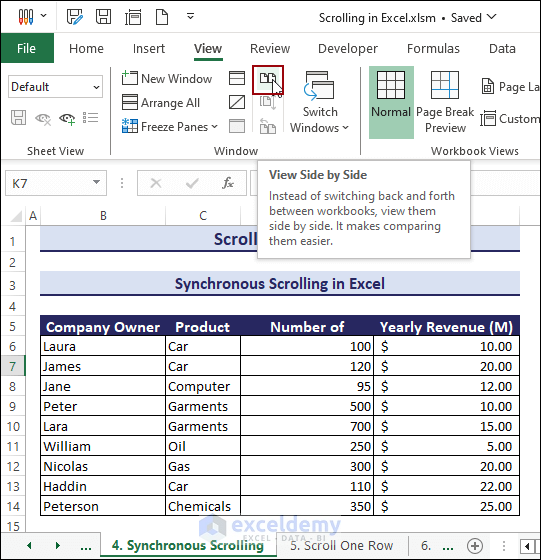
The Synchronous Scrolling command will be enabled automatically for both workbooks.
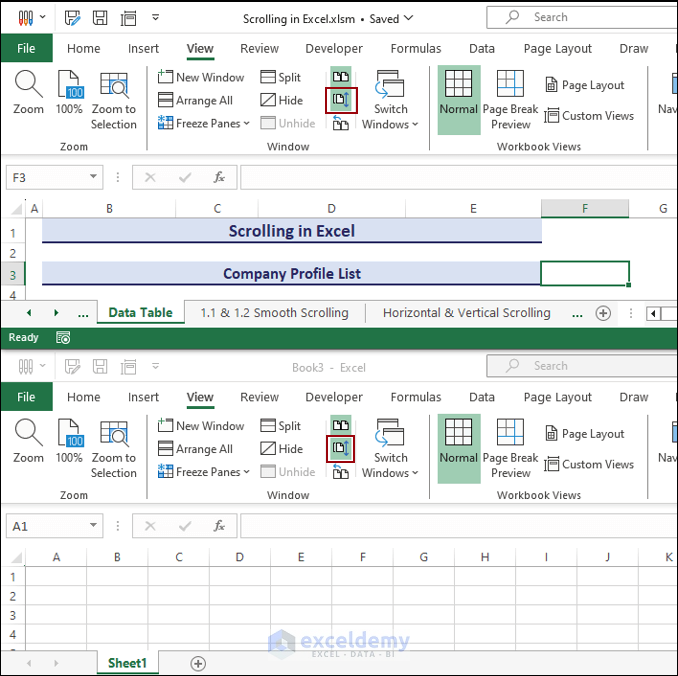
- Select any cell from any workbook and scroll the mouse wheel.

Click on the image for a clearer view
How to Repeat Rows When Scrolling in Excel?
Follow these steps:
- Select row 6 => Go to the View tab => Window section => Click on the Freeze Panes drop-down => Freeze Panes.
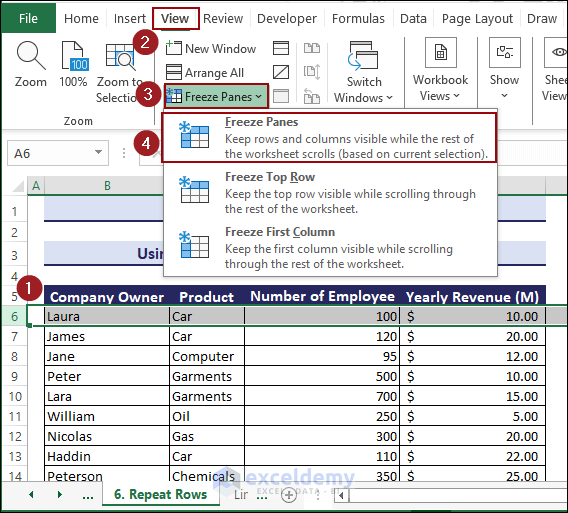
- A gray-colored line will appear above row 6.
- The rows above the line (rows 1-5) will repeat while scrolling.
- Scroll down using the mouse wheel. We will get results like the following screenshot.
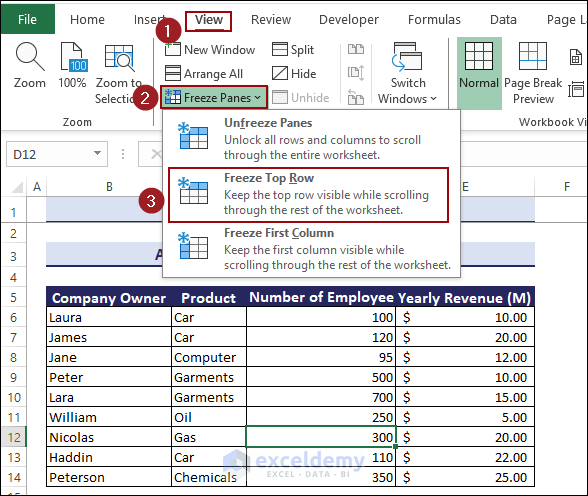
Note 1: To repeat only the first row or first column, go to View tab => Window => Click on the Freeze Panes drop-down => Freeze Top Row, or Freeze First Column.
Note 2: To freeze both a row and a column at the same time, choose the cell directly below the row and to the right of the column. Click on the “Freeze Panes” command.
How to Limit Scroll Area in Excel?
Limiting the Scroll Area in Excel means restricting scrolling to a set range. It helps you to focus on a certain part for better visibility.
There are 2 ways we can limit the scroll area in Excel.
- Changing Worksheet Properties from the Developer Tab
- Applying a VBA Code
Method 1 – Changing Worksheet Properties from the Developer Tab
- Go to Developer tab => Controls => Properties.
- The Properties window pops up => Set scroll area in the ScrollArea. The range in my case is $A$1:$F$28.
- Click the Close (X) button to close the Properties.

- Your Excel sheet can no longer scroll beyond this range.
Method 2 – Applying a VBA Code
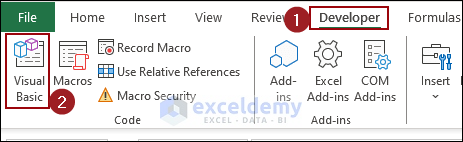
- Go to the Developer tab => Visual Basic.
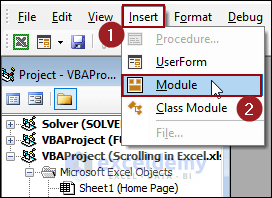
- Select Insert tab => Module.
- Then a VBA Module will be launched. Enter the following code and run the macro.
Sub Limit_Scroll_Area()
Dim mtm As Worksheet
Set mtm = ActiveSheet
mtm.ScrollArea = "$A$1: $E$25"
End Sub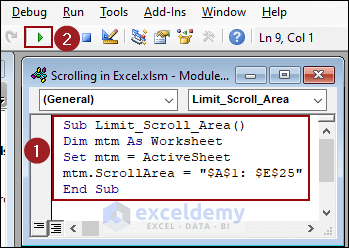
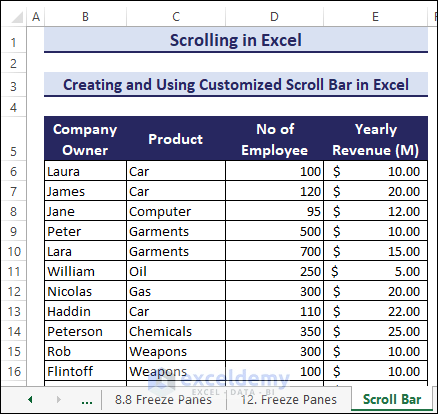
Creating a Custom Scrollbar Within a Sheet to Scroll Through Large Data
Create a custom scrollbar for that particular dataset only and scroll in that specific area, not in the whole worksheet.
Follow these steps:
- Generate a blank dataset with the same formatting and column headings.
- From the “Scroll Bar” sheet, go to the Form Control menu and choose Developer => Insert => Scroll Bar.
- Design the Scroll Bar and drag it to give it a vertical scrollbar shape.
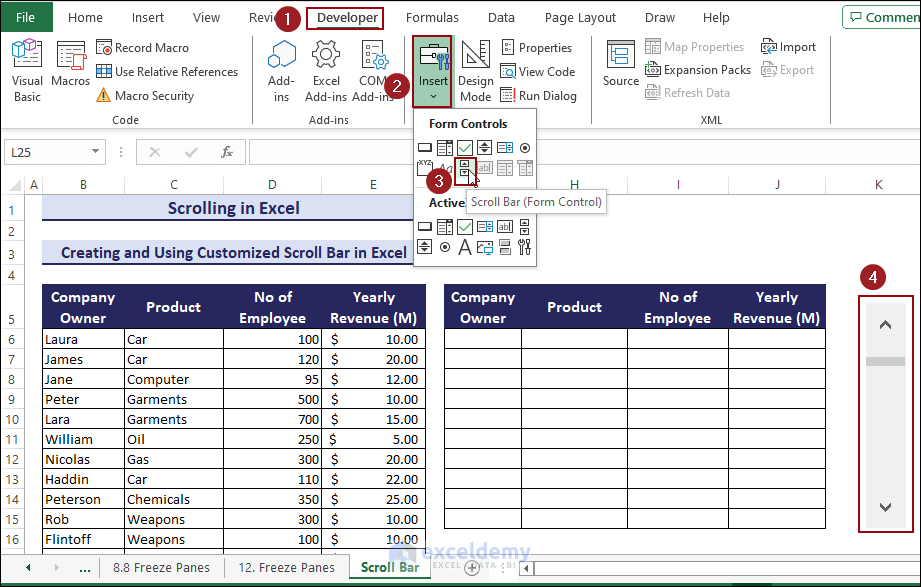
Click here to enlarge the image
- Right-click on the Scroll Bar and select Format Control from the Context Menu.
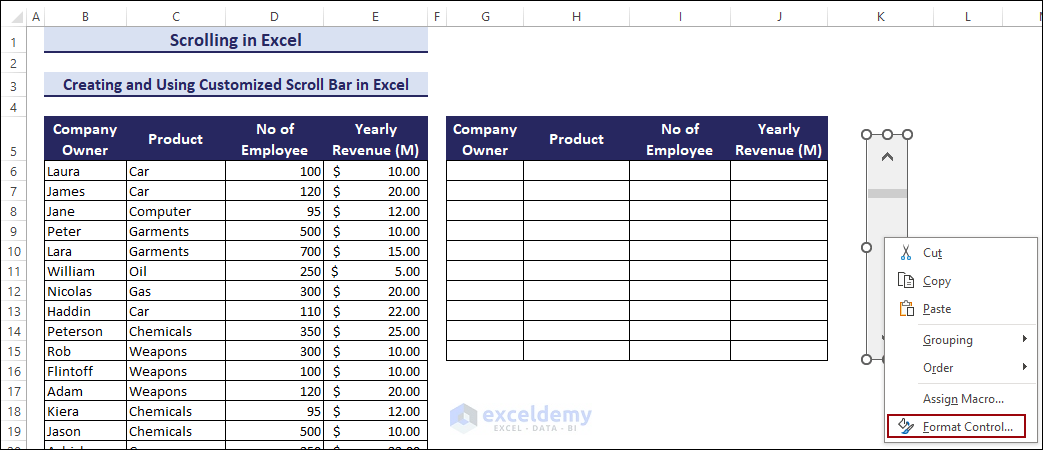
Click here to enlarge the image
- In the Format Control dialog box, insert the parameter. In our case,
- Current Value: 0
- Minimum Value: 0
- Maximum Value: 20 (It is 20 in this case since we display 10 rows at a time. When the user enters the value 20 for the scroll bar, rows 20-29 are displayed)
- Cell Link: $L$1
- Other parameters are kept default values
The Scroll Bar is linked to the L1 cell. The value of this cell changes from 0 to 20 when you scroll down the custom bar.
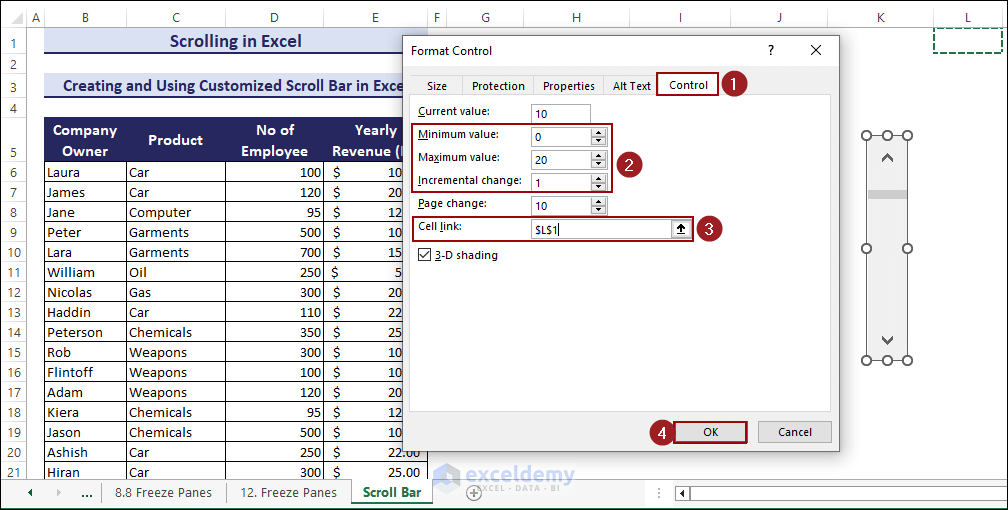
Click here to enlarge the image
- Link the data using the formula below in cell G6 (in the “Scroll Bar” sheet).
=OFFSET(B6,$L$1,0)- Copy this formula to the rest of the cells in the blank dataset.
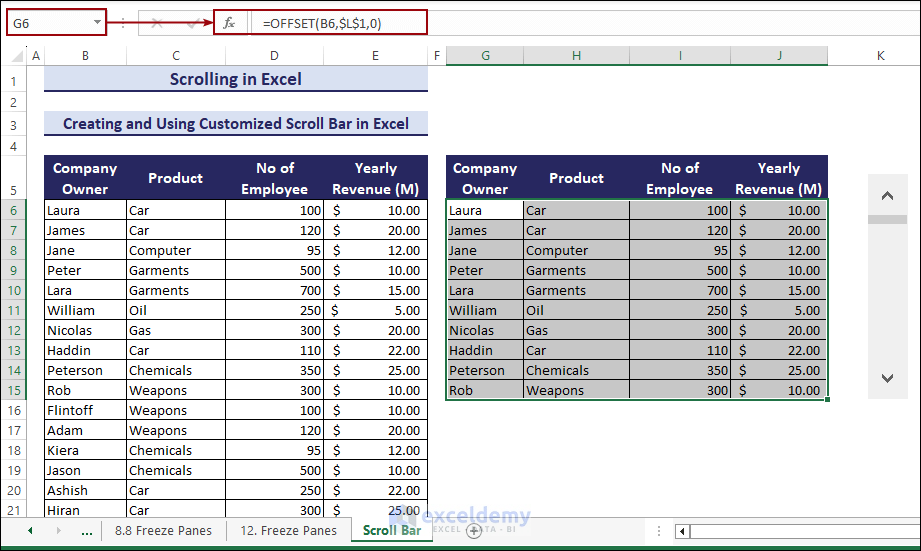
Click here to enlarge the image
Scroll and see the magic.
What Issues You May Face While Scrolling in Excel?
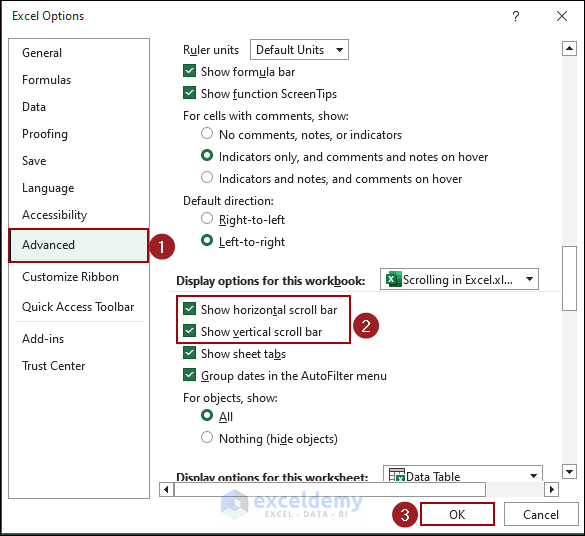
Method 1 – Horizontal or Vertical Scroll Bar Not Visible
The default Scroll Bars of an Excel workbook may not always be visible. Sometimes it can be accidentally disabled in the worksheet.
- Select File tab => Options.
- Excel Options dialog box will pop up => Select the Advanced option => Scroll down and check both Show horizontal scroll bar and Show vertical scroll bar options under Display options for this workbook menu => OK.
- Tthe Scroll Bars will display.
Method 2 – Mouse Wheel Zooming In or Out Instead of Scrolling
- To disable the feature, just open the Excel Options window from the File menu and select the Advanced
- Scroll and uncheck the “Zoom on Roll with IntelliMouse” feature => Press OK.
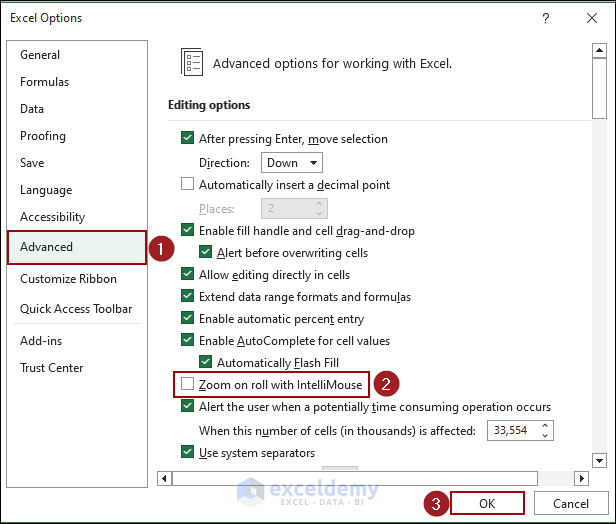
This will disable the feature, and you will be able to scroll with the IntelliMouse.
Download Practice Workbook
Scrolling in Excel: Knowledge Hub
- How to Move Up and Down in Excel
- [Fixed!] Excel Scrolling Too Many Rows
- [Fixed!] Up and Down Arrows Not Working in Excel
- Horizontal Scroll Not Working in Excel
- Excel Not Scrolling with Arrow Keys
- [Fixed!] Arrow Keys Not Moving Between Cells in Excel
- [Solved!] Vertical Scroll Not Working in Excel
- How to Stop Excel from Scrolling to Infinity
- How to Stop Excel from Jumping Cells When Scrolling
- How to Stop Arrow Keys from Scrolling in Excel
- How to Turn On/Off Scroll Lock in Excel
<< Go Back to Navigation in Excel | Learn Excel
Get FREE Advanced Excel Exercises with Solutions!

This is good stuff!
Hello Peter,
Thanks for your appreciation, it means a lot to us. Keep exploring Excel with ExcelDemy!
Regards
ExcelDemy