Download the Practice Workbook
Why Is Date Picker Useful in Excel?
Here’s an example of a date picker in Excel. You can use it to select a date from a calendar-like template to input into a cell.

Limitations of the Date Picker in Excel
Microsoft’s Date Picker control is only available in 32-bit versions of Excel 2016, Excel 2013, and Excel 2010, but it won’t work on Excel 64-bit or on later versions. For other versions of Excel, use a third-party add-in.
Step-by-Step Guide to Insert a Date Picker in Excel
Step 1 – Enable the Developer Tab
If you can see the Developer tab on your Excel ribbon, you can skip this step.
- Click on the File tab.
- Click on Options.
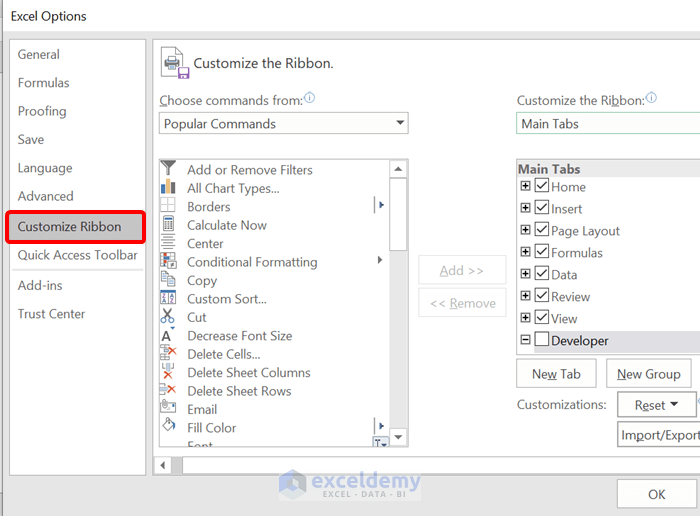
- From the Excel Options dialog box, click on Customize Ribbon option on the left side.
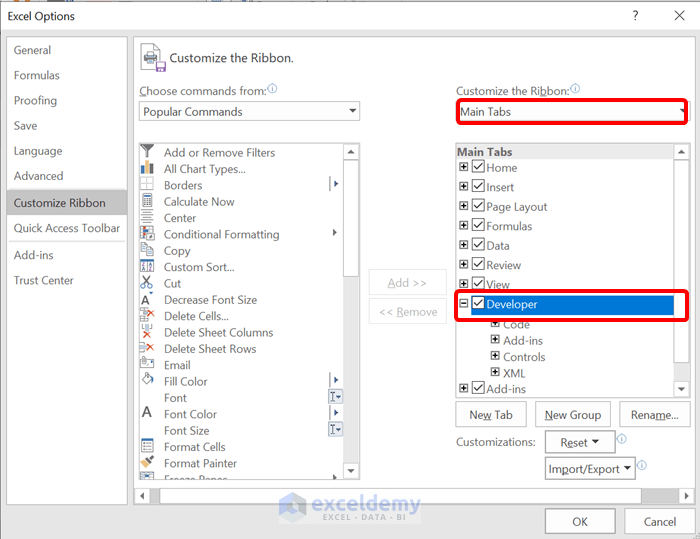
- From the list on the right, select Main Tabs.
- Check the Developer box.
- Press OK.
- Exit Excel Settings.
Step 2 – Insert a Date Picker
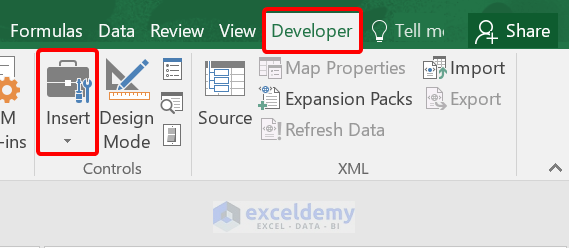
- Go to the Developer tab.
- From the Controls tab, click on Insert.
- From the ActiveX Controls, click on More Controls.
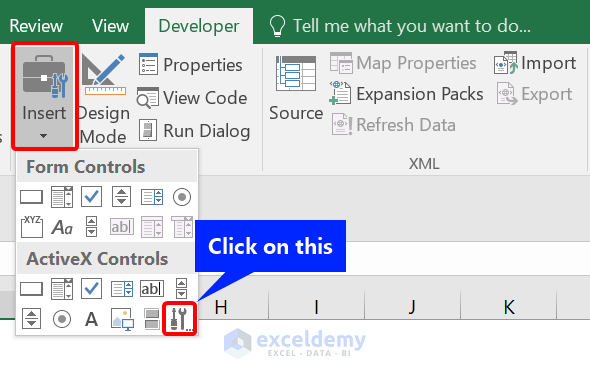
- Select Microsoft Date and Time Picker Control 6.0 (SP6) from the More Controls dialog box.
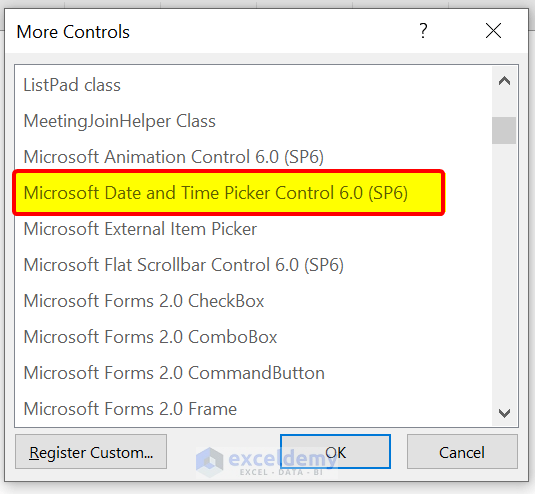
- Click on OK.
- Click on the cell where you want to insert the date picker.
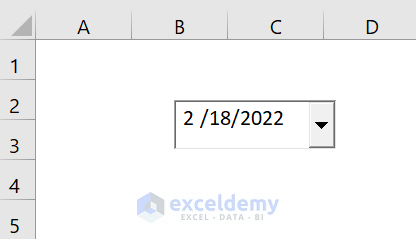
- This inserted a date picker control in the cell.
When you insert the date picker control in the worksheet, you will see an EMBEDDED formula in the formula bar.
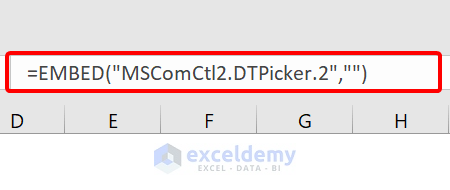
You can’t change it. It will show a “Reference not valid” error if you do.
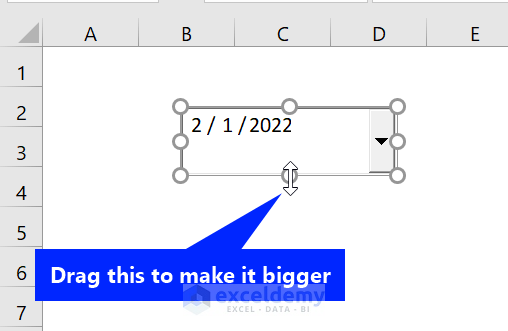
Step 3 – Customize the Date Picker
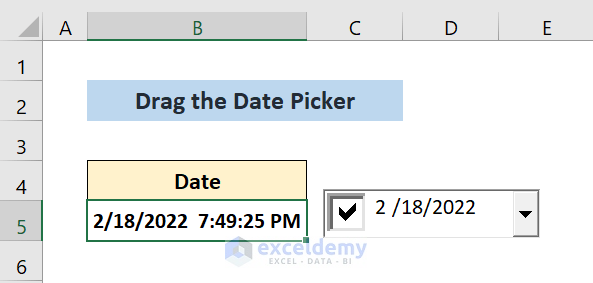
- To make it larger or smaller, drag the date picker by its corners.
- While the Design mode is on, right-click on the date picker, then click on Properties.
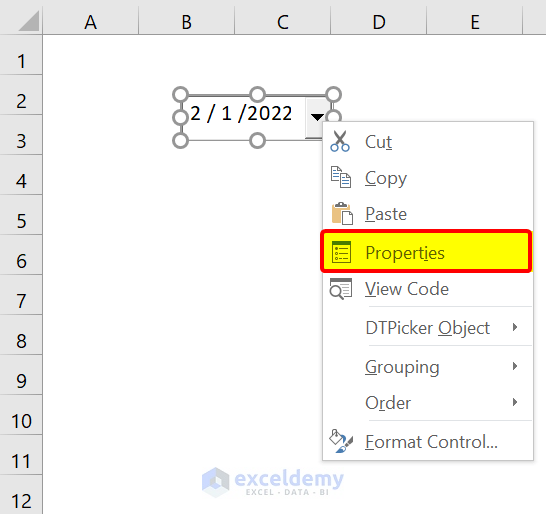
- You will see various options. We will work with a few of them.
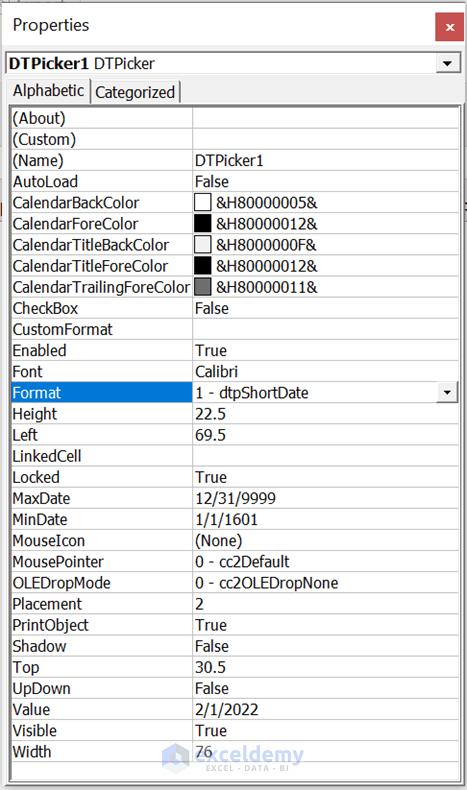
- You can change the height, width, font, color, etc.
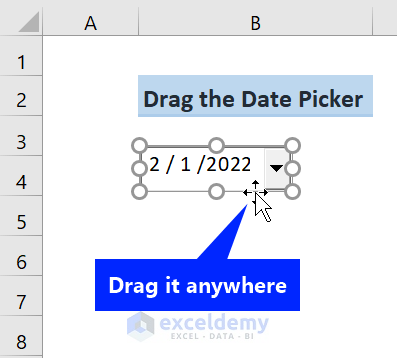
- Drag the date picker to the location of the cell where you want to place it.
Step 4 – Link the Date Picker Control to a Cell
- Right-click on the date picker.
- Click on Properties.
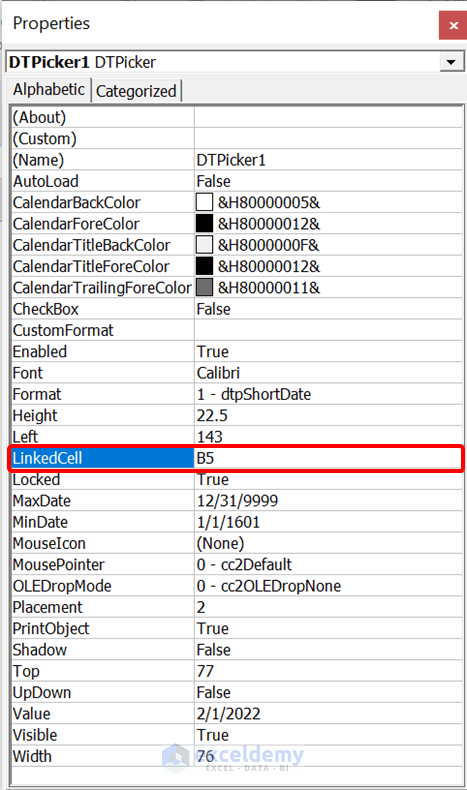
- In the Linked Cell option, type the cell reference you want to connect.
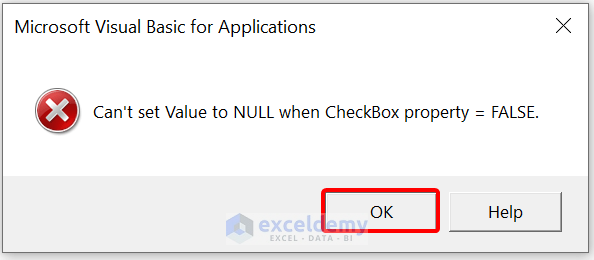
- When you select a date from the calendar, you will automatically see the date on the linked cell. Click on OK if Excel shows the “Can’t set cell value to NULL…” blunder.
- To accept Null values, change the value from FALSE to TRUE in the CheckBox.
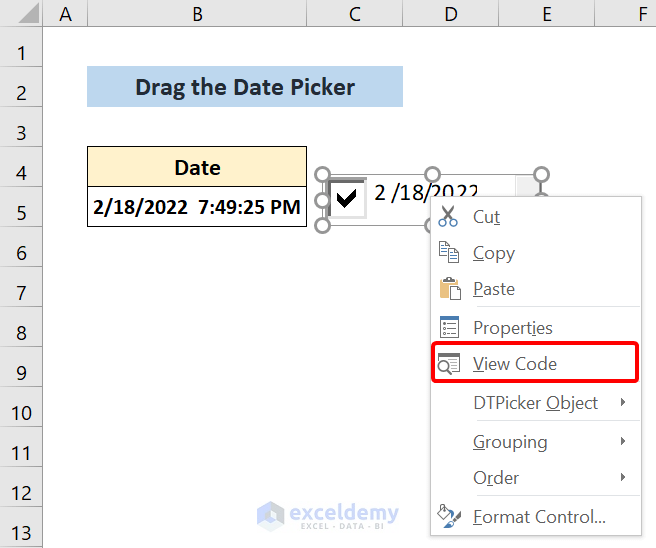
- If you right-click on the date picker and click on View Code, you will see the VBA code associated with it.
How to Insert a Date Picker on a Whole Column in Excel
Case 1 – Insert a Date Picker for a Single Column
Steps
- Insert a date picker (see above).
- Right-click on the date picker.
- Click on View Code.
- Clear the VBA code and insert the following:
Sub Worksheet_SelectionChange(ByVal Target As Range)

  With Sheet1.DTPicker1
    .Height = 20
    .Width = 20
    If Not Intersect(Target, Range("B:B")) Is Nothing Then
      .Visible = True
      .Top = Target.Top
      .Left = Target.Offset(0, 1).Left
      .LinkedCell = Target.Address
    Else
      .Visible = False
    End If
  End With

End Sub
This code sets column B as a date picker.
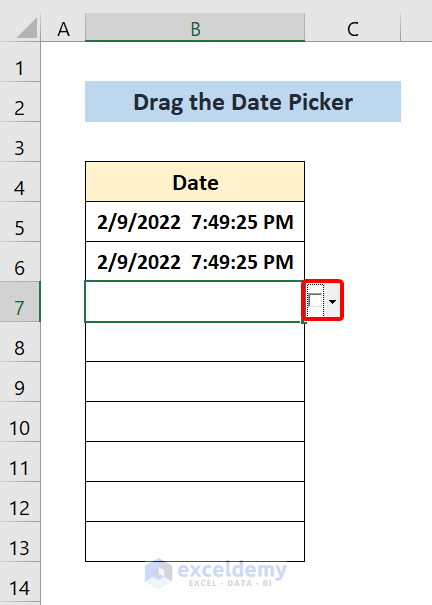
- Deselect the Design mode.
- Click on any cell of column B. You will see date picker control from every cell.
Code Explanations:
  With Sheet1.DTPicker1
    .Height = 20
    .Width = 20
This code demonstrates the sheet number (Remember your sheet number even if you have changed the name) and the date picker number. Here, we have sheet1(Basic Datepicker sheet) and date picker 1. Height and width that you set manually.
  If Not Intersect(Target, Range("B:B")) Is Nothing Then
      .Visible = True
This code demonstrates that if any cell of column B is selected, the date picker will be visible. Or you can set a custom range like Range(“B5:B14”). It will set the date picker only for those particular cells in column B.
 .Top = Target.Top
  .Left = Target.Offset(0, 1).Left
  .LinkedCell = Target.Address
The “top” property basically means it proceeds along with the upper border of the designated cell. It is equivalent to the “top” belongings value of the specified cell.
The “Left” property is equivalent to the next right cell (of the cell that you specified). It is the length of the left border from the outer left of the worksheet. We used the offset function to get the cell reference of the right cell.
“LinkedCell” connects the date picker with the target cell. When we select the date from the dropdown, it allows that in the cell.
   Else
      .Visible = False
When you select any other cell rather than a cell of column C, the date picker won’t show up.
Read More: Excel Macro: Insert Date and Time in a Cell (4 Examples)
Case 2 – Insert a Date Picker for Multiple Columns
Use the code from Case 1 and make the following change in the IF segment:
If Not Intersect(Target, Range("C:D")) Is Nothing ThenThe following code will set a date picker for columns B, D, E, G:
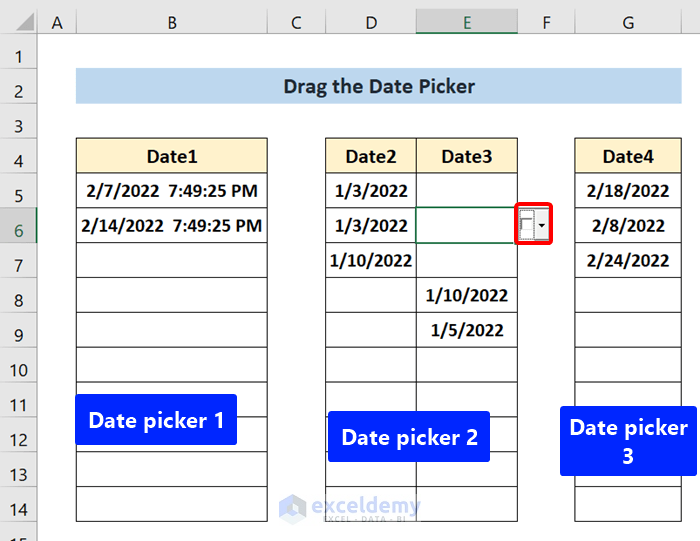
Here, we are not assigning the date picker in the entire column. We are inserting it in a range of cells. Date picker 1 for B5:B14, Date picker 2 for D5:E14, and Date picker 3 for G5:G14.
Private Sub Worksheet_SelectionChange(ByVal Target As Range)

  With Sheet1.DTPicker1
    .Height = 20
    .Width = 20
    If Not Intersect(Target, Range("B5:B14")) Is Nothing Then
      .Visible = True
      .Top = Target.Top
      .Left = Target.Offset(0, 1).Left
      .LinkedCell = Target.Address
    Else
      .Visible = False
    End If
  End With

  With Sheet1.DTPicker2
    .Height = 20
    .Width = 20
    If Not Intersect(Target, Range("D5:E14")) Is Nothing Then
      .Visible = True
      .Top = Target.Top
      .Left = Target.Offset(0, 1).Left
      .LinkedCell = Target.Address
    Else
      .Visible = False
    End If
  End With

  With Sheet1.DTPicker3
    .Height = 20
    .Width = 20
    If Not Intersect(Target, Range("H5:H14")) Is Nothing Then
      .Visible = True
      .Top = Target.Top
      .Left = Target.Offset(0, 1).Left
      .LinkedCell = Target.Address
    Else
      .Visible = False
    End If
  End With

End Sub
We have three date pickers: one for column B, one for columns D and E combined, and another one for column G.
Things to Remember
- Make sure to link the date picker with a cell if you are working with one.
- Your file should be saved as a Macro-Enabled Workbook (.xlsm).
- To make any change to the date picker, make sure to select it from the developer tab.
- To see the changes, deselect the date picker.
Frequently Asked Questions
Are there any Excel add-ins available for date pickers?
Some popular add-ins include “Mini Calendar and Date Picker” and “Excel Date Picker (DateDialer)”.
Can I restrict the selectable dates in an Excel date picker?
With VBA programming, you can control the range of dates available for selection, such as setting a minimum and maximum date range or excluding certain dates.
Can I use an Excel date picker in multiple cells or worksheets?
You can either duplicate the code or add multiple instances of the date picker control within your VBA solution. To use VBA for date pickers, check out this article.
Excel Date Picker: Knowledge Hub
- [Solved!] Datepicker Not Showing in Excel
- How to Use Date Picker in Excel 64-Bit
- Excel Date Picker for Entire Column
- Make an Alternative to Datepicker in Excel
- How to Insert Calendar in Excel Cell
- Insert Drop Down Calendar in Excel Without Date Picker
- How to Use Excel UserForm as Date Picker
<< Go Back to Learn Excel
Get FREE Advanced Excel Exercises with Solutions!

THank you so much. The STUPID explanation from Microsoft (imagine) wasn’t clear enough
How do I get just the date and not the time to display in the linked cell?
Hey Stacy, You can read the following article to get just the date to display in the linked cell
https://www.exceldemy.com/insert-drop-down-calendar-in-excel/#Step_4_Link_Drop_Down_Calendar_to_a_Cell_in_Excel
Otherwise, you can go to the developer tab on the ribbon. Then, select Add-ins from the Add-ins group. In that Add-ins, add Mini Calendar and Date Picker. From there, you can add only the date in the linked cell.
Try this solution, I think you will get your desired result. If you have more problems inform us.
I tried using Microsoft Office Professional Plus 2013 and I could not find the Microsoft Date and Time Picker Control 6.0.
Cheers
Thanks for the explanation. But the number format is not applied to the date.
Target.NumberFormat = “dd.mmm.yyyy” no matter if it is inside the VBA code or directly selected for the cell format.
Thanks
Hi ISE. Thanks for your comment. Actually the date format is defined from the Number format. You can choose your date format from Number Format under the Home tab. There is no need to add VBA code to define date format.
This does not work. The control is not in the ActiveX Controls list, and the DLL/OCX files that enable it are no longer available.
Thank you, STEVEN BRITTON, for your wonderful question.
Here is the explanation to your question.
It is true that the “Microsoft Date and Time Picker Control 6.0 (SP6)” is no longer available in Windows 11 and more recent versions of Microsoft Office. This control is no longer supported by Microsoft and is no longer included in the default ActiveX control set.
The most recent editions of Excel, including Windows 11, allow you to enter a date picker using a different method. You can now choose dates in Excel by using the built-in Microsoft “Calendar Control” date picker.
This article will help you how to add date and time picker control. Check this below link.
How to Use Excel UserForm as Date Picker
I hope this may solve your issue.
Bishawajit, on behalf of ExcelDemy
I don’t have that control either. My only close choice is Microsoft Outlook Date Control but it won’t work. Are you using Windows 11? I’m wondering it is due to the upgrade and things have changed. I know I used it in the past in Excel which is so puzzling now.
Thank you, KC, for your wonderful question.
Here is the explanation to your question.
It is true that the “Microsoft Date and Time Picker Control 6.0 (SP6)” is no longer available in Windows 11 and more recent versions of Microsoft Office. This control is no longer supported by Microsoft and is no longer included in the default ActiveX control set.
The most recent editions of Excel, including Windows 11, allow you to enter a date picker using a different method. You can now choose dates in Excel by using the built-in Microsoft “Calendar Control” date picker.
This article will help you how to add date and time picker control. Check this below link.
How to Use Excel UserForm as Date Picker
I hope this may solve your issue.
Bishawajit, on behalf of ExcelDemy
This “Microsoft Date and Time Picker Control 6.0 (SP6)” does not exists under Windows 11. It has a “Microsoft Outlook Date Control” but when I try inserting into the spreadsheet it gives me an error box “Cannot Insert Object” not sure what’s going on but I’m well experienced using the Developer and creating forms with it however, it appears that things have changed and the selection provided is obsolete now.
Anyone have information on what to use for inserting a datepicker in Excel?
Thank you, KC, for your wonderful question.
Here is the explanation to your question.
It is true that the “Microsoft Date and Time Picker Control 6.0 (SP6)” is no longer available in Windows 11 and more recent versions of Microsoft Office. This control is no longer supported by Microsoft and is no longer included in the default ActiveX control set.
The most recent editions of Excel, including Windows 11, allow you to enter a date picker using a different method. You can now choose dates in Excel by using the built-in Microsoft “Calendar Control” date picker.
This article will help you how to add date and time picker control. Check this below link.
How to Use Excel UserForm as Date Picker
I hope this may solve your issue.
Bishawajit, on behalf of ExcelDemy