This drop-down calendar is only available in Microsoft Excel 2007 and 32-bit versions of Excel 2010, 2013, and 2016. Use a third-party add-in for newer Excel versions.
Step 1 – Enable the Developer Tab in the Ribbon
If there’s a Developer tab on the ribbon on the top, you can skip this step.
Steps
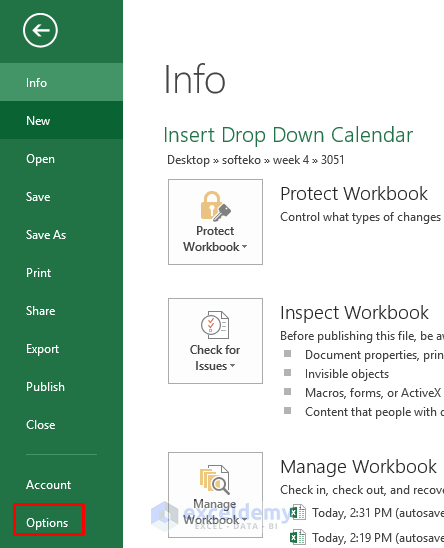
- Click on the File tab.
- Select Options.
- That will open up the Excel Options dialog box. Select Customize Ribbon.
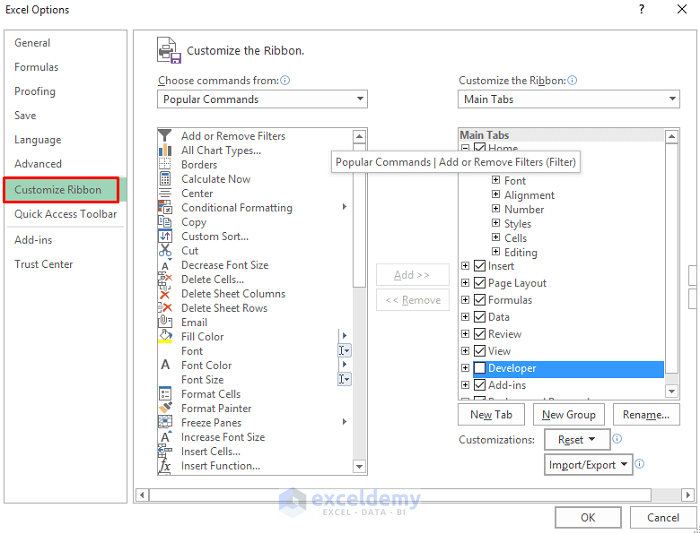
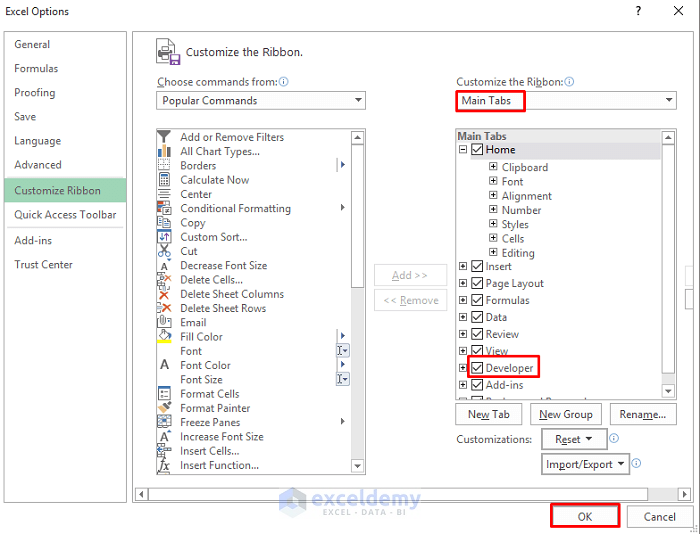
- Select Main Tabs from the drop-down on the top-right, and in the Main Tabs, check the Developer option box.
- Click on OK and close Excel Settings.
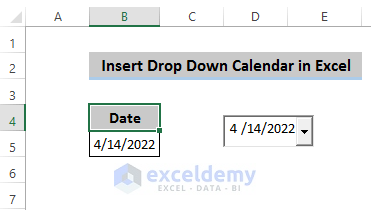
Step 2 – Insert a Drop-Down Calendar
Steps
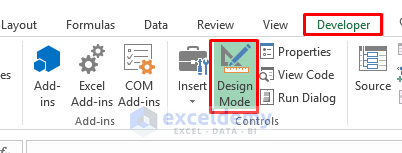
- Select the Developer tab.
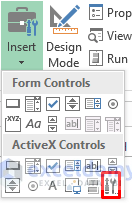
- From the Controls group, select the Insert option.

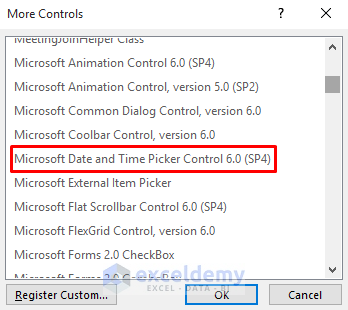
- In the Insert option, click on More Controls from ActiveX Controls.
- A More Controls dialog box will appear.
- Select Microsoft Date and Time Picker Control 6.0 (SP4).
- Click on ‘OK’.
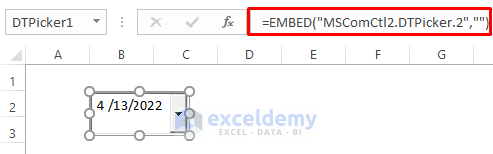
- Now, click on any cell where you want to put this.
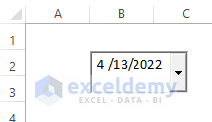
- After inserting the drop-down calendar, you’ll see an EMBEDDED formula in the formula bar.
Read More: How to Insert Static Date in Excel
Step 3 – Customize the Drop-Down Calendar
Steps
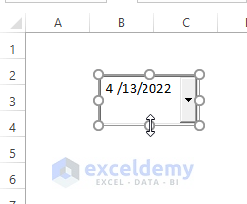
- You can customize your drop-down calendar by simply dragging it.
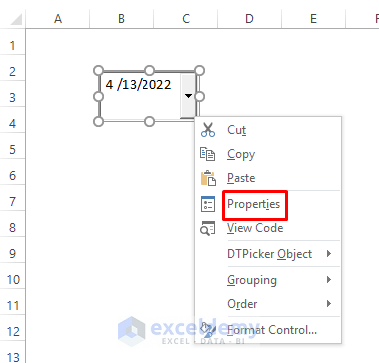
- You can alter the Properties of your drop-down calendar by right-clicking on the drop-down calendar. You have to keep the Design Mode on.
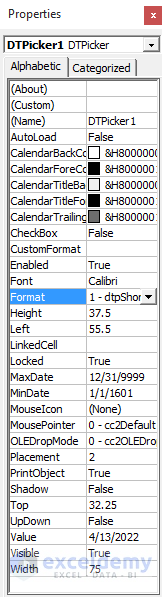
- In the Properties dialog box, you can change the height, width, and some more things.
- You can put the drop-down calendar into any place by just dragging it to that place.
Step 4 – Link the Drop-down Calendar to a Cell in the Excel
Steps
- From the Developer tab, turn on the Design Mode.
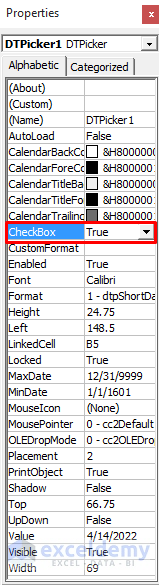
- Right-click on the drop-down calendar, and from the Context Menu, select Properties.

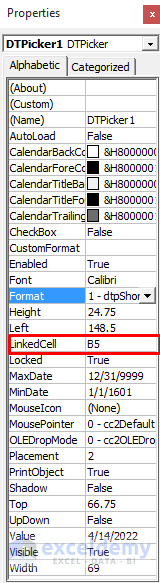
- In the Properties dialog box, put any cell reference in the LinkedCell option.
- Turn the Design Mode off and select any date in the drop-down calendar. It will appear in that referred cell.
- A warning dialog box may appear. Click on OK.
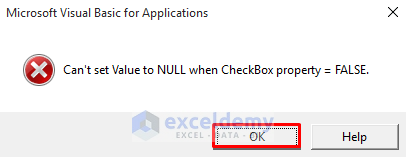
- Change the Checkbox value from False to True in the Properties dialog box to accept null values.
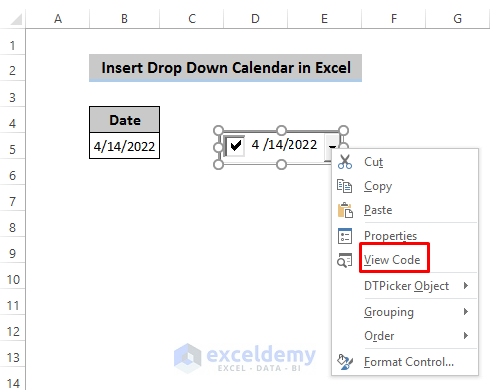
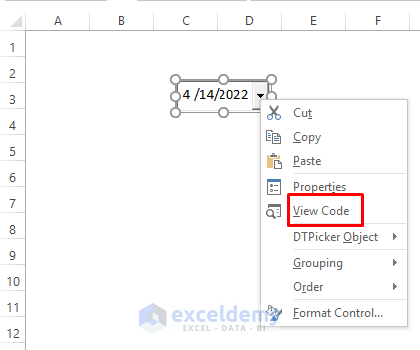
- If you want to see the VBA code associated with this, right-click on the drop-down calendar and select View Code.
Read More: How to Remove Time from Date in Excel
Insert a Drop-down Calendar in an Entire Column
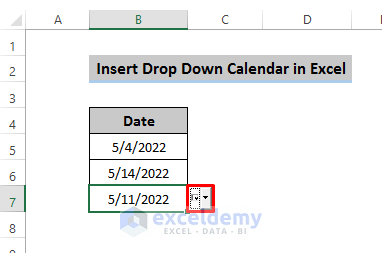
Case 1 – Drop-Down Calendar for a Single Column
Steps
- Insert a drop-down calendar in a cell.
- Right-click on the drop-down calendar and select View Code.
- When you open the view code option, a visual basic interface will appear with existing code.
- Delete the code and insert the following:
Sub Worksheet_SelectionChange(ByVal Target As Range)

  With Sheet3.DTPicker1
    .Height = 20
    .Width = 20
    If Not Intersect(Target, Range("B5:B7")) Is Nothing Then
      .Visible = True
      .Top = Target.Top
      .Left = Target.Offset(0, 1).Left
      .LinkedCell = Target.Address
    Else
      .Visible = False
    End If
  End With

End Sub- Turn off the Design Mode.
- Select any cell within the given cells in the VBA code, and you will find the drop-down calendar in every cell within the cell range.
Explanation of the VBA code:
With Sheet3.DTPicker1
    .Height = 20
    .Width = 20
This code denotes that you need to select the sheet name where you want to apply this code and the date picker number. You can also modify the height and width values.
 If Not Intersect(Target, Range("B5:B7")) Is Nothing Then
      .Visible = True
This code denotes that if you select any cell within this range, the drop-down calendar will be visible in every cell within this range.
 .Top = Target.Top
      .Left = Target.Offset(0, 1).Left
      .LinkedCell = Target.Address
Top property denotes the top belongings value of a specified cell.
Left property denotes the next right cell of the specified cell.
LinkedCell connects the drop-down calendar with the specified cell.
Else
 .Visible = False
This denotes if you select any other cell than this given cell, the drop-down calendar won’t be visible.
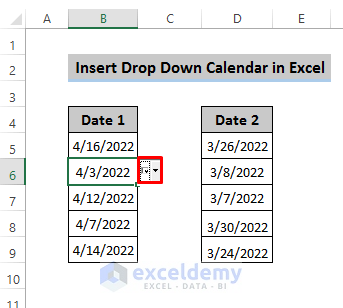
Case 2 – Drop-Down Calendar for Multiple Columns
Steps
- Insert multiple drop-down calendars from the Developer tab.
- Place these drop-down calendars in your desired position by dragging them.
- We would like to insert a drop-down calendar in column B and column D. Right-click on the drop-down calendar and select View Code.
- Copy the following code and paste it into that sheet.
Private Sub Worksheet_SelectionChange(ByVal Target As Range)
  With Sheet5.DTPicker1
    .Height = 20
    .Width = 20
    If Not Intersect(Target, Range("B5:B9")) Is Nothing Then
      .Visible = True
      .Top = Target.Top
      .Left = Target.Offset(0, 1).Left
      .LinkedCell = Target.Address
    Else
      .Visible = False
    End If
  End With

  With Sheet5.DTPicker2
    .Height = 20
    .Width = 20
    If Not Intersect(Target, Range("D5:D9")) Is Nothing Then
      .Visible = True
      .Top = Target.Top
      .Left = Target.Offset(0, 1).Left
      .LinkedCell = Target.Address
    Else
      .Visible = False
    End If
  End With
End Sub- That will create two drop-down calendars in column B and column D in a given range. You can put any date from the drop-down calendar in that range.
Note:
You have to change CheckBox from False to True to avoid any error messages.
Read More: Formula for Weekly Dates in Excel
Download the Practice Workbook
Related Articles
<< Go Back to Insert Date | Date-Time in Excel | Learn Excel
Get FREE Advanced Excel Exercises with Solutions!

re: M365 -how can we create a drop-down calendar wth this version?
Thanks in advance,
Aaron
Thank you, Aaron, for your query. To create a drop-down calendar in Microsoft 365 version, you can use the Mini Calendar and Date Picker add-in. To learn how to use the add-in, you can follow this article. I hope, it helps.
Regards
Aniruddah