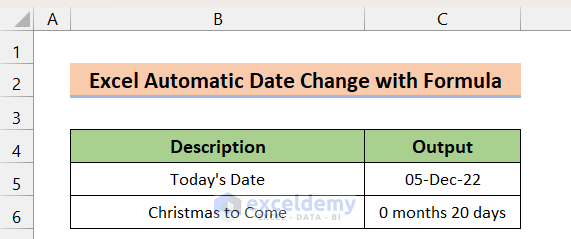
We have two simple examples. We need an automatically update the present date and we need to calculate the time remaining to the next Christmas.
Method 1 – Using a Formula with the TODAY Function to Change the Date Automatically
Steps:
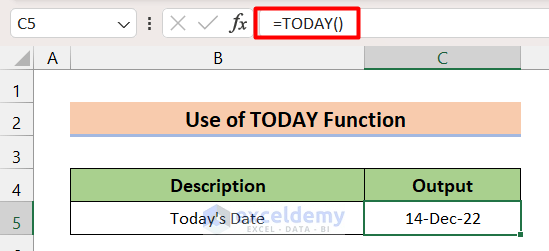
- Insert today’s date in cell C5 which will be updated automatically in the future as the date gets changed.
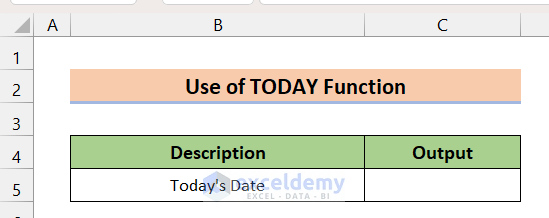
- Use the following formula in cell C5 and press Enter.
=TODAY()- We will see the current date. This article was written on 5th December 2022, so our result is 5-Dec-22.

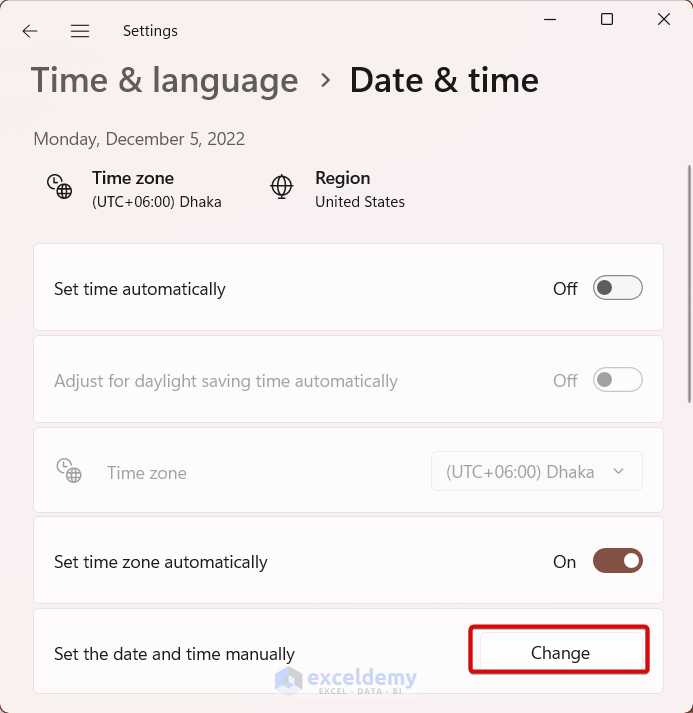
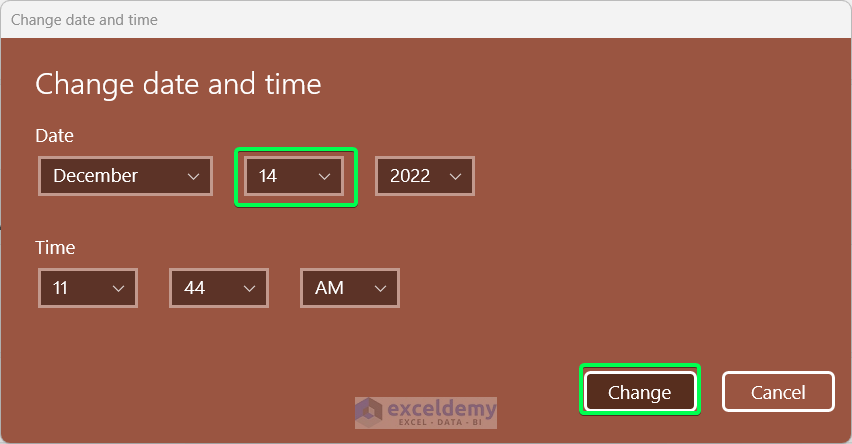
- To verify if this date will be updated in the future, we can manually change the current date on the PC. For this, we are changing the date from 5th December 2022 to 14th December 2022 on my computer. Go to Settings then to Time & Language, choose Set the date and time manually, and click Change.
- Set the desired date and time and click Change.
- If we reload the Excel file again, the date is showing 14-Dec-22.
Read More: How to Insert Date in Excel Formula
Method 2 – Using the NOW Function for Automatic Change of Date
Steps:
- In cell C5, use the following formula and press Enter.
=NOW()- This function is also giving the current date.
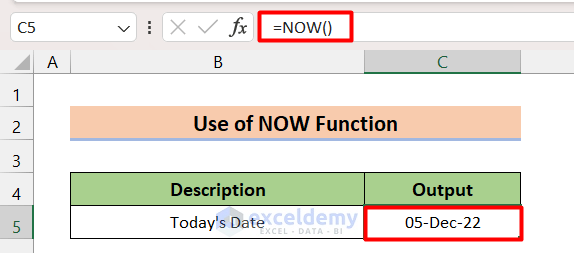
- As the NOW function returns a dynamic value, it will also get updated automatically like the TODAY function.
Method 3 – Applying a Formula Combination
Steps:
- In cell C5, use the following formula and press Enter.
=DATE(YEAR(TODAY()),MONTH(TODAY()),DAY(TODAY())) - You will get the today’s date as a result.
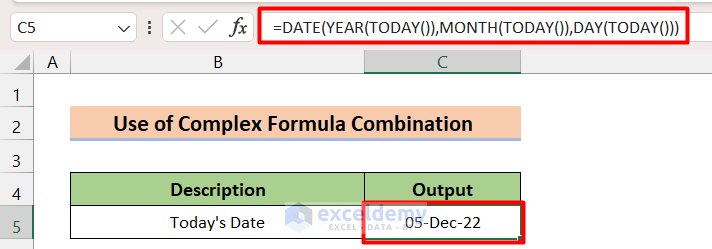
- As this formula has the dynamic function TODAY, the result will also get automatically updated.
How Does the Formula Work?
The YEAR function fetches the year value from the result of TODAY. The MONTH and DAY functions fetch the month and day values respectively from the result of TODAY. Then the DATE function returns the date.
Note: Instead of the TODAY function, we can also use the NOW function to get a similar result.
Read More: How to Insert Current Date in Excel
Method 4 – Change of Date Based on the Adjacent Cell Value
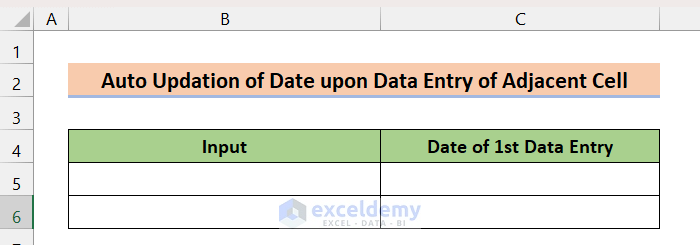
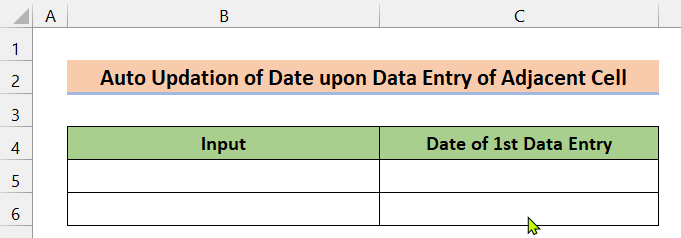
Case 4.1 – Auto-Update Date upon Data Entry in Adjacent Cell
We have an Input column and a Date of first Data Entry column. The Input column cells are empty. We want the date when we enter the values into those cells for the first time.
Steps:
- In cell C5, use the following formula and press Enter.
=IF(B5<>"",IF(C5<>"",C5,NOW()),"")- Use the Fill Handle to autofill the cell C6.
- If we enter something in cells B5 and B6, Excel will automatically display the current date on cells C5 and C6, respectively.
- Even if you further change the values in B5 or B6, the Dates on C5 or C6 will be unchanged as it is not the first time you are entering the value.
How Does the Formula Work?
- IF(C5<>””,C5,NOW())
C5<>“” implies Is C5 Not Empty. If it is True (Not empty), it will return C5. Otherwise, it will return present time (NOW).
- IF(B5<>””,IF(C5<>””,C5,NOW()),””)
If B5 is not empty, then it will return the Present Date and time. Otherwise, it will return a blank cell.
Case 4.2 – Auto-Update Date When the Adjacent Cell Value Gets Changed
Steps:
- In cell C5, use the following formula and press Enter.
=IF(B5<>"",IF(AND(C5<>"",CELL("address")=ADDRESS(ROW(B5),COLUMN(B5))),NOW(),IF(CELL("address")<>ADDRESS(ROW(B5),COLUMN(B5)),C5,NOW())),"")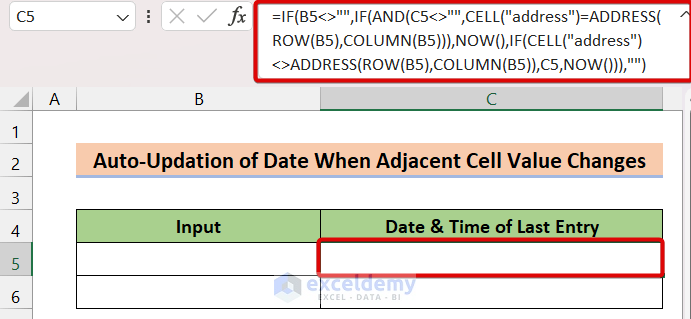
How Does the Formula Work?
IF(B5<>"",IF(AND(C5<>"",CELL("address")=ADDRESS(ROW(B5),COLUMN(B5))),NOW(),IF(CELL("address")<>ADDRESS(ROW(B5),COLUMN(B5)),C5,NOW())),"")
The ADDRESS function returns the address for a cell based on a given row and column number. This formula uses the CELL function to get the reference of the last edited cell, and if it’s the same as the one to the left of it, it updates the date-time value.
- Use the Fill handle to autofill to C6.
- When we enter anything in cell B5, the current date will be shown on cell C5.
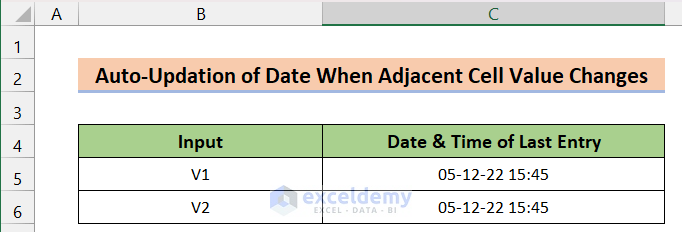
- If we change the input, the Date value will also change.
If you find an error while applying the formula you should check whether Iterative calculation is enabled. Go to File > Options > Formulas. Check the Enable Iterative Calculation and set the Maximum Iteration to 1.
Read More: How to Insert Dates in Excel Automatically
Method 5 – Calculating a Date Difference Automatically
Let’s say an HR wants to find how long employees have been in the company.
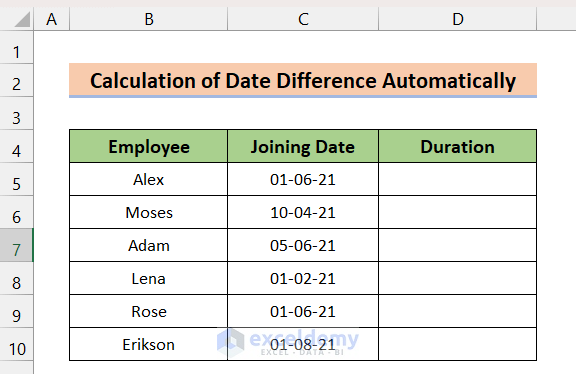
Steps:
- In cell D5, insert the following formula and click Enter.
=DATEDIF(C5,TODAY(),"m")&" months " &DATEDIF(C5,TODAY(),"md")&" days"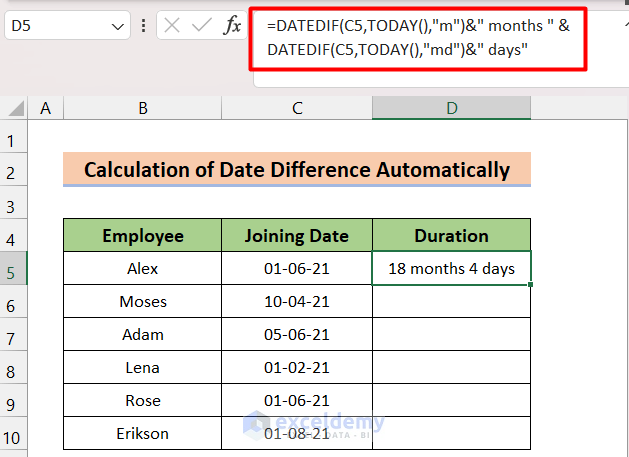
- If you use the Fill Handle to AutoFill the rest of the cell, you will get the duration for each employee.
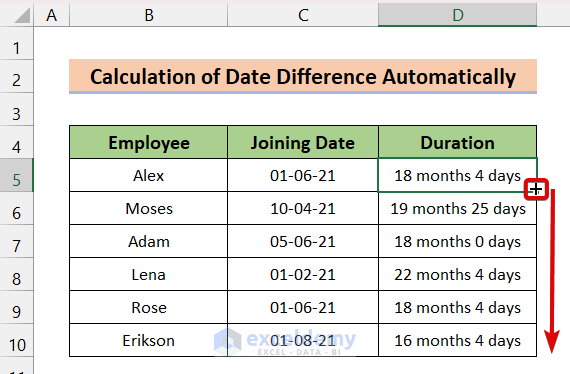
- As this formula has the dynamic function TODAY in it, Excel will update the date automatically.
How Does the Formula Work?
- DATEDIF(C5,TODAY(),”m”)&” months ” &DATEDIF(C5,TODAY(),”md”)&” days”
We have used a couple of DATEDIFs that find the difference between the Joining Date and TODAY. First DATEDIF calculates the difference in month format (as we have used “m”) and the second one calculates the difference in day format.
Things to Remember
- If you do not find the result in the proper date format, you can change the formatting of the cell and set the date format you wish to display.
Download the Practice Workbook
Further Readings
- Automatically Enter Date When Data Entered in Excel
- How to Auto Populate Date in Excel When Cell Is Updated
- How to Insert Day and Date in Excel
- How to Get the Current Date in VBA
<< Go Back to Insert Date | Date-Time in Excel | Learn Excel
Get FREE Advanced Excel Exercises with Solutions!

Error: “There are one or more circular references where a formula refers to its own cell either directly or indirectly. This might cause them to calculate incorrectly. Try removing or changing these references or moving the formulas to different cells.”
Hello Etrek,
This error occurs when a formula refers to its own cell directly or indirectly, which creates a circular reference. To resolve this, check the formulas in your worksheet and ensure they don’t refer back to their own cell. You may need to adjust the formula or move it to a different cell to break the circular reference. For more help, check Excel’s circular reference troubleshooting guide.
Regards
ExcelDemy