The datepicker feature of Microsoft Excel is only available for the Windows 32-bit version.
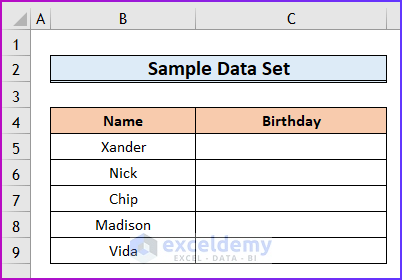
This is the sample dataset.
Method 1 – Use a Calendar Template
Steps:
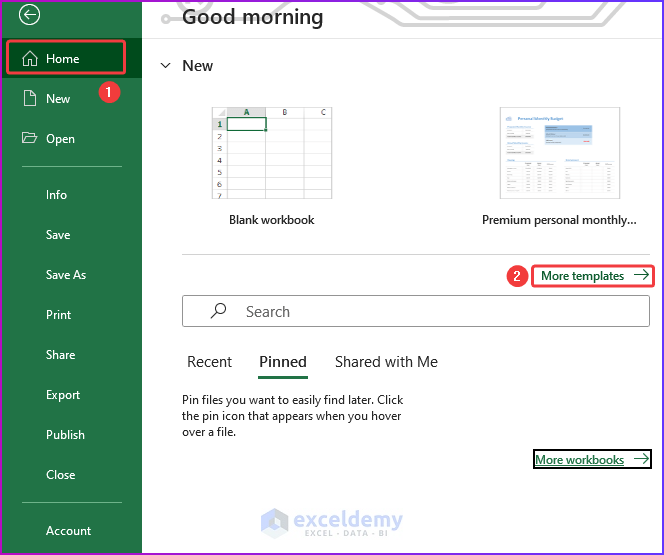
- Open a new Excel file and go to the Home tab.
- In Home, select More templates.
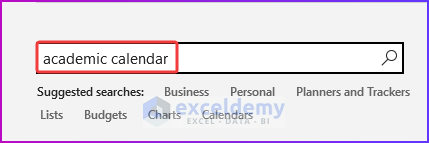
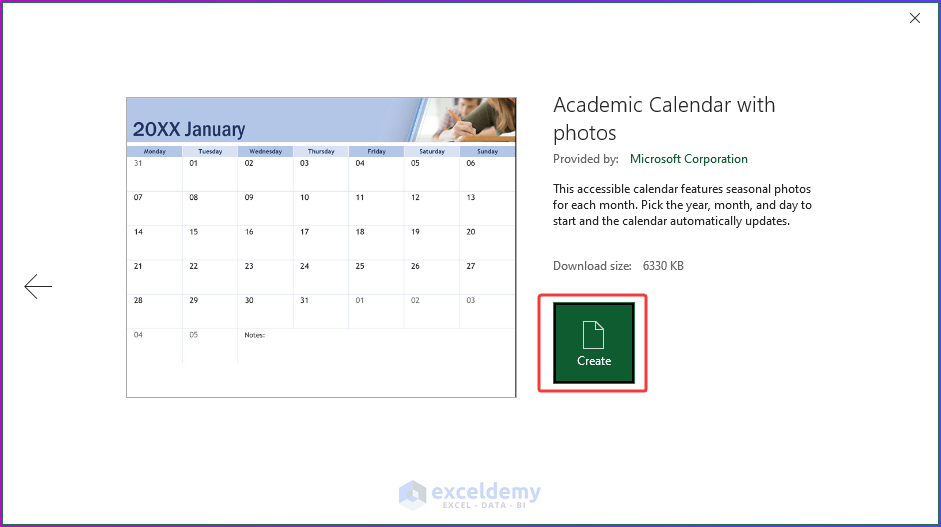
- Search for a template, here an academic calendar, and press Enter.
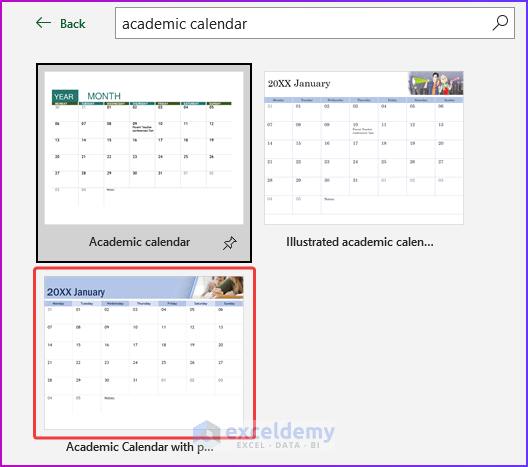
- Select a template.
- Give permission to create the calendar.
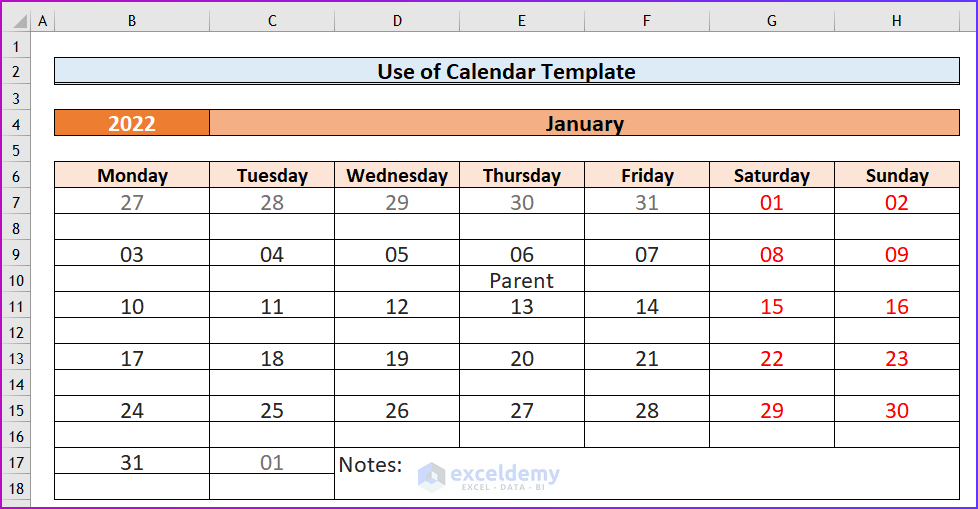
- The calendar template will be displayed in your Excel sheet. You can modify it, as shown below.
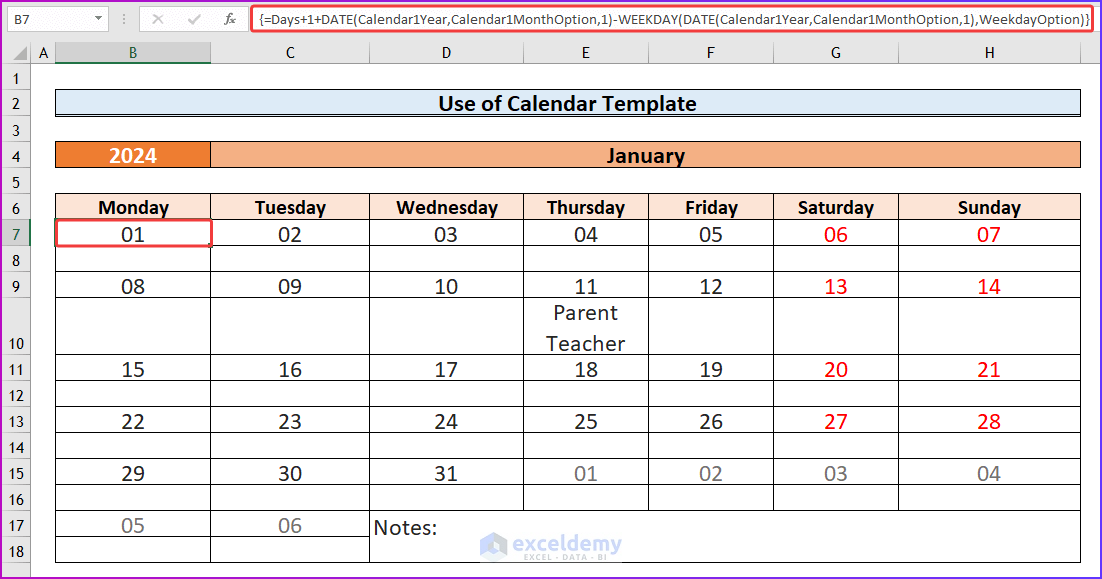
- Click the first date of the month to see the formula used to create dates in the formula bar.
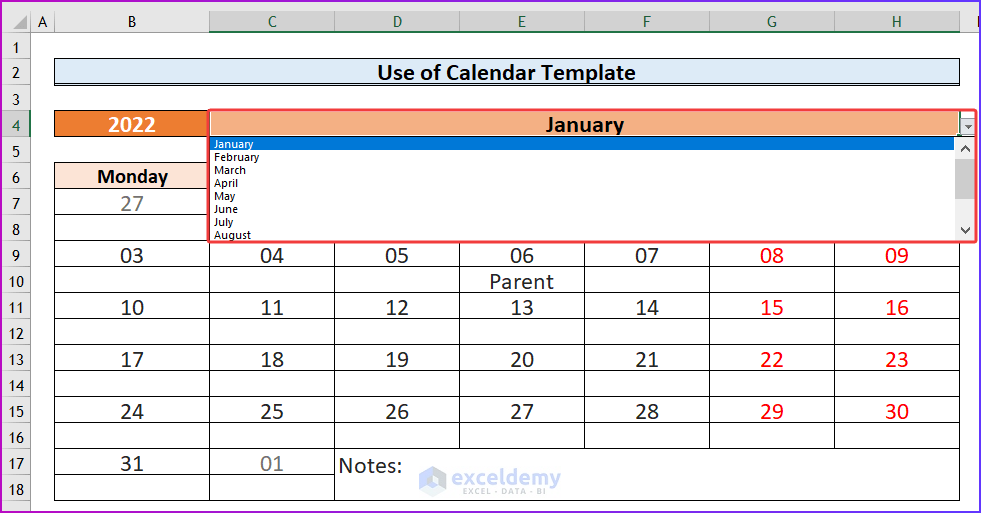
- In the month dropdown, change the months and the date will also change.
- Change the year. This is the output.
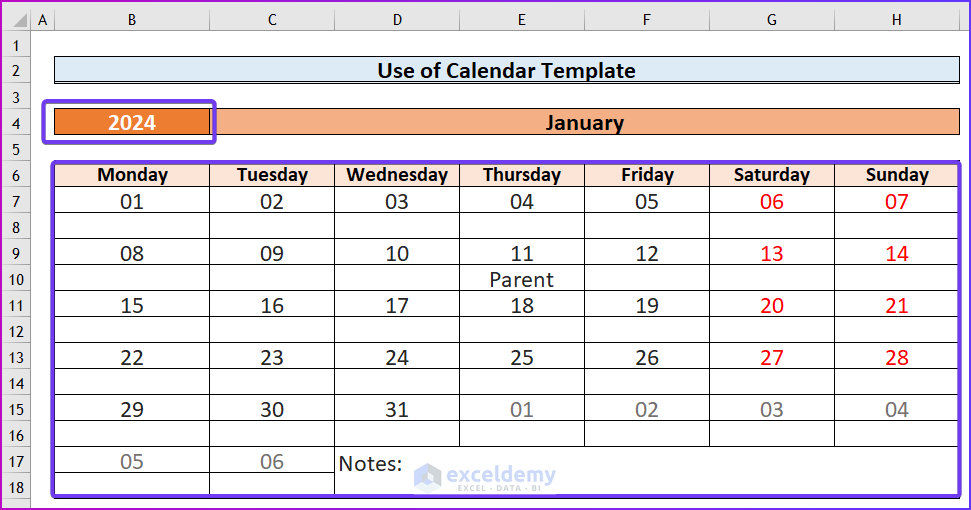
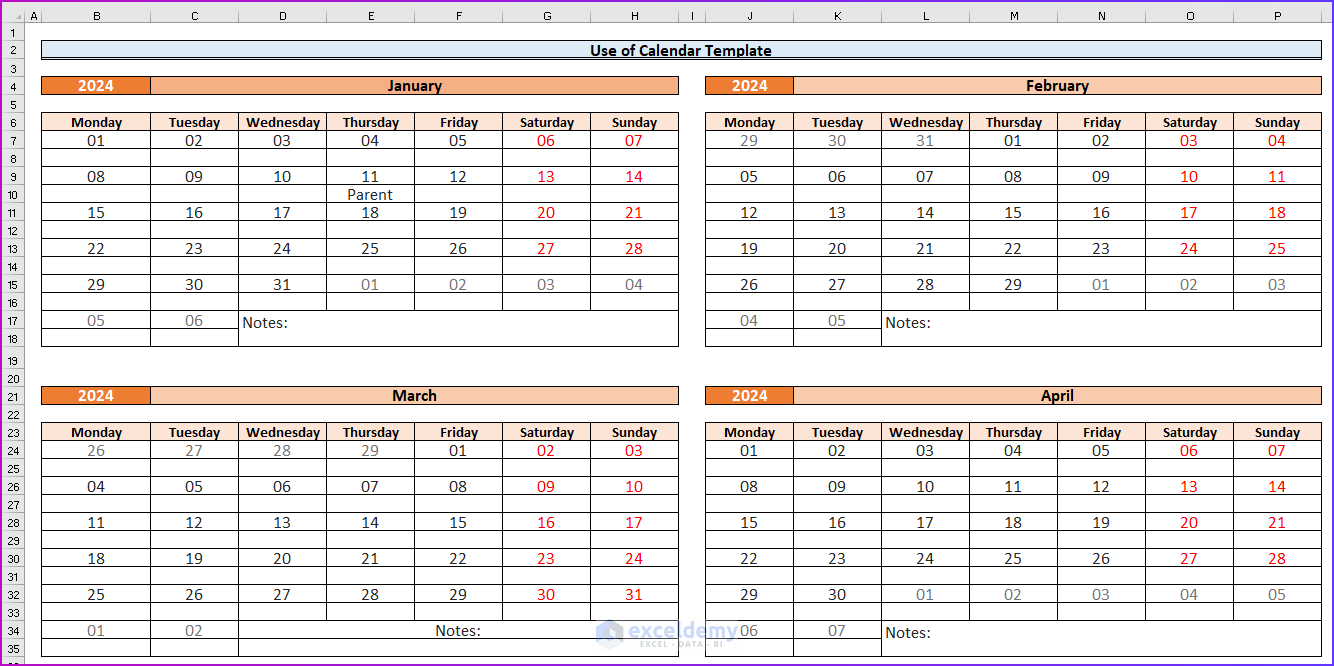
This is the final output.
Read More: How to Use Excel UserForm as Date Picker
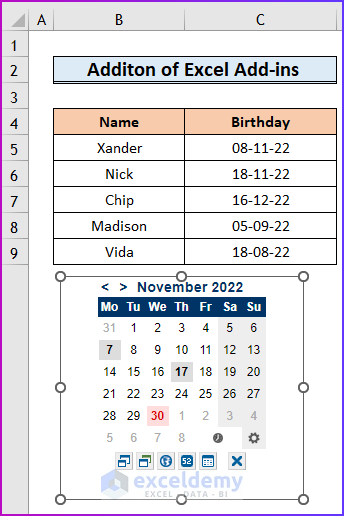
Method 2 – Using Excel Add-ins
Steps:
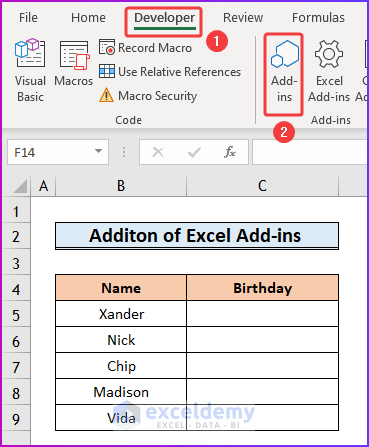
- Go to the Developer tab. If you don’t see the Developer tab, click this link to display the Developer tab on the ribbon.
- In Add-ins, select Add-ins.
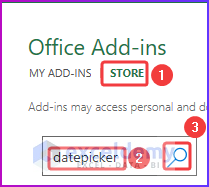
- The Office Add-ins wizard will open.
- Go to STORE, enter datepicker and press Enter.
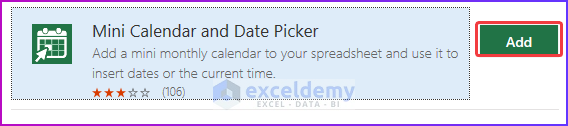
- The Mini Calendar and Date Picker add-ins will be displayed.
- To use this feature, click Add.
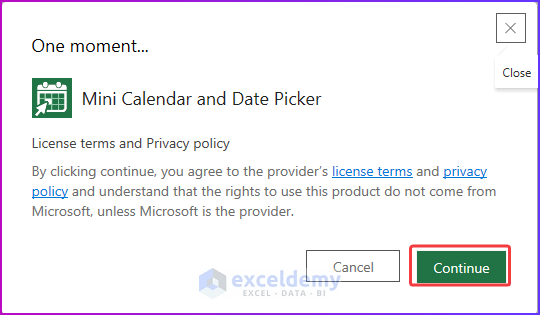
- Click Continue to proceed.
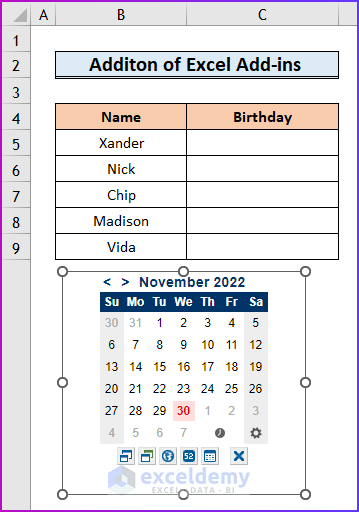
- A mini floating calendar will be displayed in your workbook.
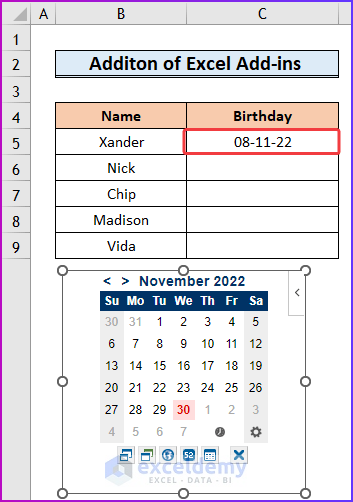
- To insert a date from the calendar, select any cell and click the date.
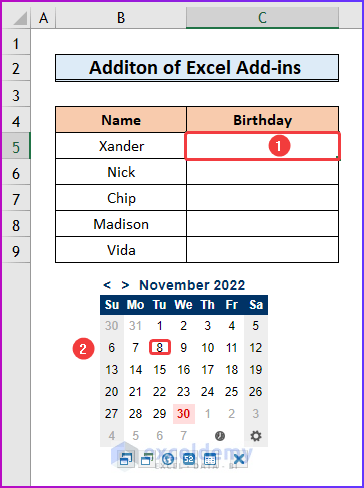
- This is the output.
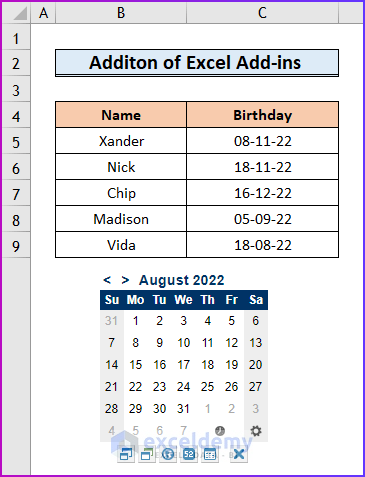
- Follow the same procedure in other cells.
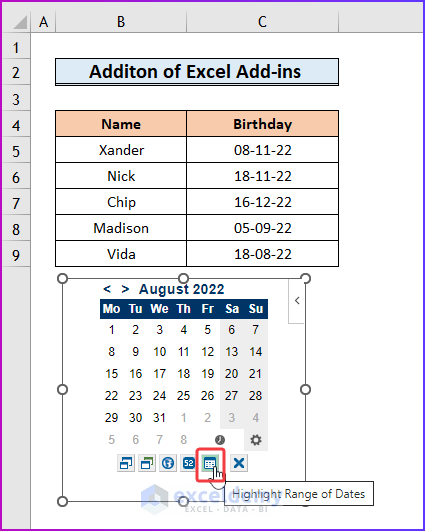
- To highlight dates, click Highlight Range of Dates.
- Enter the cell range and click OK.
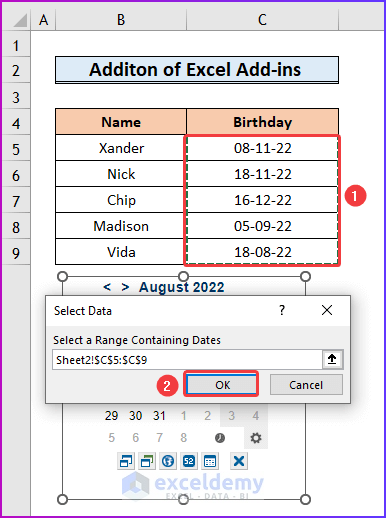
- This is the output.
Read More: How to Use Date Picker in Excel 64-Bit
Things to Remember
- If you use the calendar template, your workbook will automatically be saved as a macro-enabled file.
- Change your datepicker in the second method by selecting the icons at the bottom of the calendar.
Download Practice Workbook
Download the free Excel workbook here.
Related Articles
- Insert Drop Down Calendar in Excel Without Date Picker
- [Solved!] Datepicker Not Showing in Excel
- Excel Date Picker for Entire Column
- How to Insert Calendar in Excel Cell
<< Go Back to Excel Date Picker | Learn Excel
Get FREE Advanced Excel Exercises with Solutions!

Simple, well explained and useful, Araf! Thanks!
Hello Joel,
You are most welcome.
Regards
ExcelDemy