Sometimes, we want to manage our data in a customized way and print them on different pages. For this reason, we insert page breaks between different rows and columns in Microsoft Excel. If you faced the problem to insert a page break in between two columns, this article will help you to solve that problem. For example, we have chosen rows 39 and 40 for this purpose. In this article, we will learn how to insert page break between rows 39 and 40 in Excel. Let’s get started!
How to Insert Page Break Between Rows 39 and 40 in Excel: 3 Suitable Ways
We can insert page break between rows 39 and 40 in 3 suitable ways. The first method is by using the View tab, the second method is by using Page Layout option and the third method is by using VBA code. Each of the methods is easy and effective ways and has its own pros and cons. Now we will learn these 3 methods to insert page break between rows 39 and 40 when we have a dataset that contains more than 40 rows.
1. Use of View Tab to Insert Page Break Between Rows 39 and 40 in Excel
Using the View tab is the easiest and most efficient way to insert a page break between rows 39 and 40. In this way, you can easily control your page break from the Page Break Preview option. Since Microsoft Excel creates a default page break for a certain number of rows, you can modify that default page break in this method. To insert a page break between rows 39 and 40 using the View tab, we have to follow the steps below.
Steps:
- First, click on the View tab on your ribbon.

- Secondly, click on the Page Break Preview option as shown below.
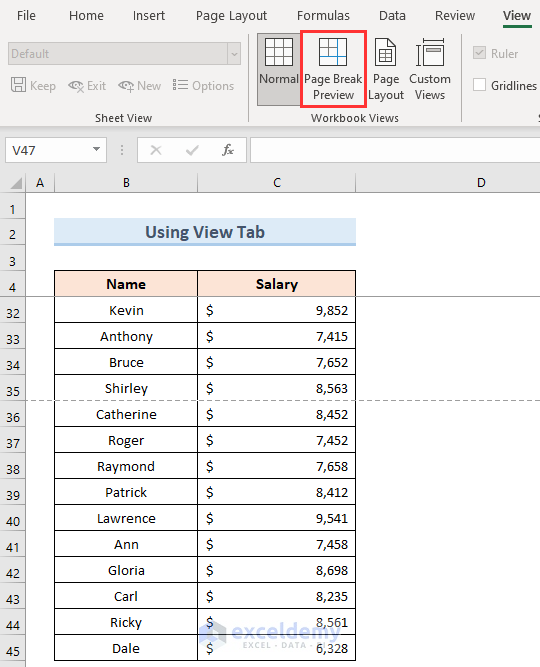
- As a result, a page break preview will be shown on the left corner of your screen which will contain the default page break like the below one.
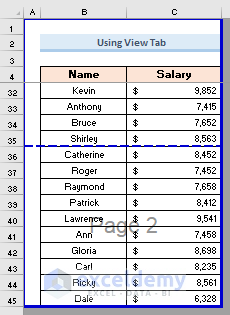
- After that, place your mouse on the default page break and drag it down between rows 39 and 40.
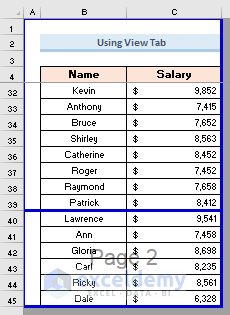
- Furthermore, click on the Normal option to display the dataset on a normal screen.

- As a result, we will see a page break in between rows 39 and 40 like the image below as we wanted.

Read More: How to Use Page Break in Excel
2. Using Page Layout Tab
In order to insert a page break between rows, using the Page Layout tab is one of the most common approaches in Excel. It is also an easy and effective way to do the task. Now we will learn how to insert page break between rows 39 and 40 using the Page Layout tab. Follow the steps below to do the job.
Steps:
- First, select the row above which you want to have the page break. In this case, we will choose row 40.
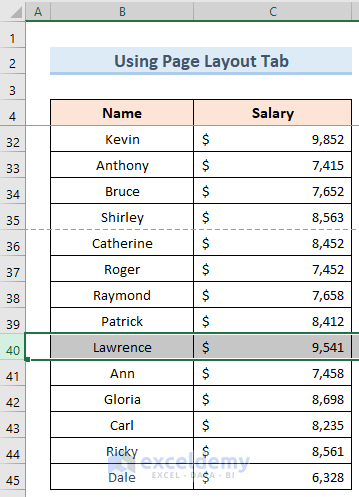
- Next, go to the Page Layout tab.
- After that, click on the Breaks option.
- Furthermore, from the drop-down list, select the Insert Page Break command.
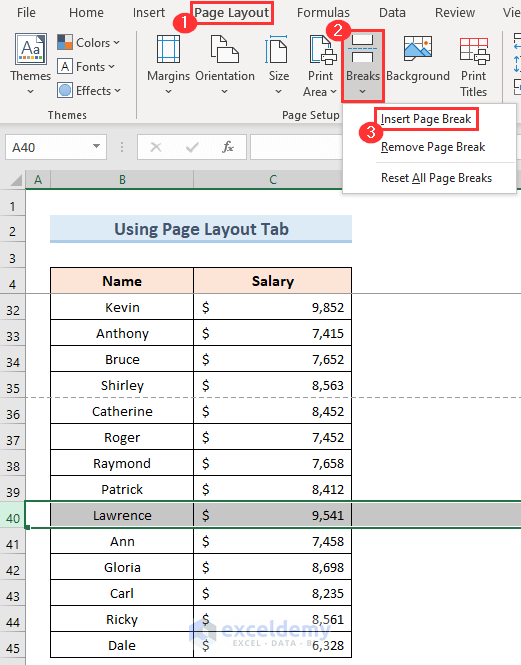
- Finally, you will see a horizontal page break in between row 39 and row 40 as shown below.

Read More: How to Insert Page Break Between Rows in Excel
3. Applying VBA Code
We can also apply VBA code to insert page break between rows. It is also a convenient way to do the task. We have to follow the steps below to insert a page break between rows 39 and 40 applying the VBA code.
Steps:
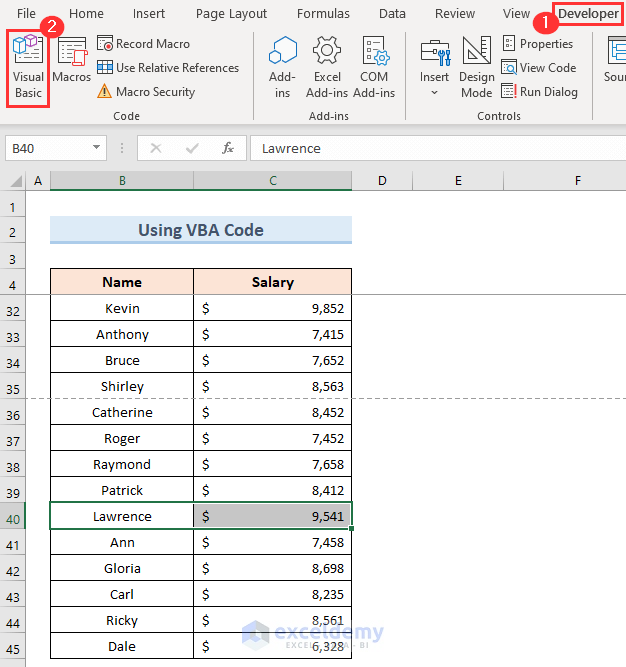
- First, select the cells (B40:C40) above which you want to insert the page break.
- Secondly, go to the Developer tab.
- Next, click on the Visual Basic tab.
- After that, a VBA code window will appear.
- Thirdly, in the code window, click on the Insert tab.
- Next, select the Module option from the drop-down list.
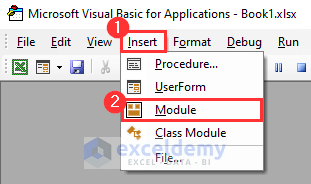
- Now, insert the VBA code into the Module as shown below.
Option Explicit
Sub InsertPageBreak()
'Declaring the data types of the variables'
Dim selectionedrange As Range
Dim currentCellvalue As Range
'Assigning value to the variables'
Set selectionedrange = Application.Selection.Columns(1).Cells
ActiveSheet.ResetAllPageBreaks
'Running the for loop'
For Each currentCellvalue In selectionedrange
If (currentCellvalue.Row > 1) Then
If (currentCellvalue.Value <> currentCellvalue.Offset(-1, 0).Value) Then
ActiveSheet.Rows(currentCellvalue.Row).PageBreak = _
xlPageBreakManual
End If
End If
Next currentCellvalue
End Sub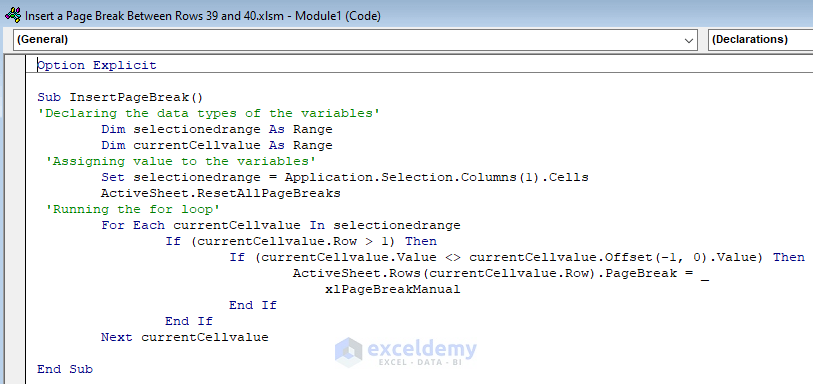
- Furthermore, to run the program, click on the Run command or press F5.

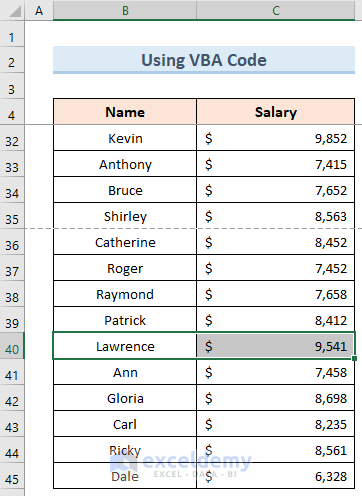
- Finally, we will see a page break in between rows 39 and 40 like the below one.

VBA Code Breakdown
- The name of the function that we will use here in VBA is InsertPageBreak.
- Here, we will take two Range type variables namely: selectedrange and currentCellvalue.
- Then, we will assign the range to the selected cells as selectedrange=Application.Selection.Columns(1).Cells.
- ResetAllPageBreaks, this will reset all the page breaks if they exist.
- We will write If (currentCellvalue.Value <> currentCellvalue.Offset(-1, 0).Value) with If statement to meet the criteria for breaking the page according to our selected range.
- Finally, we will use xlPageBreakManual command to break the page in a manual way.
Read More: How to Insert Page Break Based on Cell Value with Excel VBA
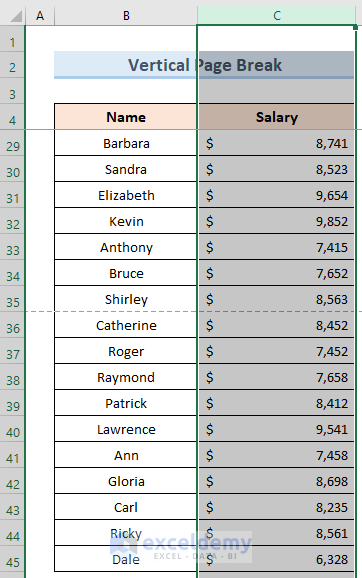
How to Insert a Vertical Page Break in Excel
We can also insert a vertical page break between columns in Excel. In order to do so, we can follow the steps below:
Steps:
- Firstly, we will select the column before which we want to have the page break. In this case, we are choosing column C.
- Secondly, go to the Page Layout tab.
- Thirdly, click on the Breaks option.
- At last, from the drop-down list select the Insert Page Break command.
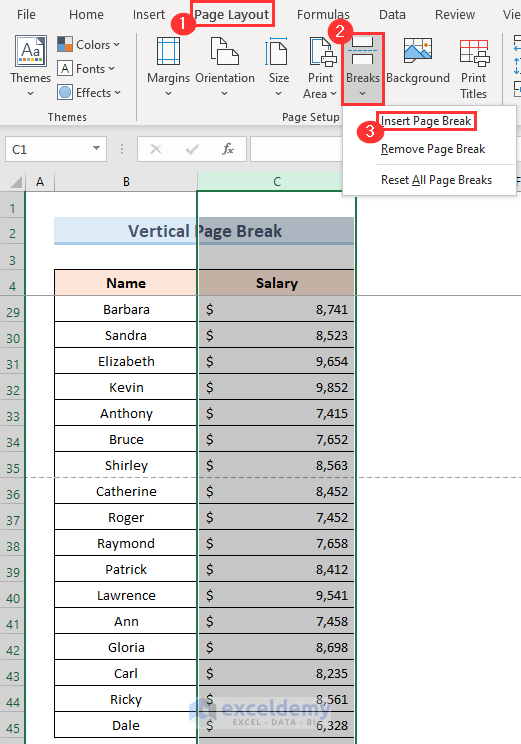
- Finally, we will see the vertical page break in between column B and column C as shown below.

Read More: How to Insert a Page Break in Excel
Things to Remember
- Using the View tab to insert a page break between rows is the easiest and most convenient way to perform the task for a beginner. It gives you the freedom to customize the page break wherever you need it.
- Inserting page break by using the Page Layout option and the VBA code will contain the Excel default page break in your dataset. If you want to customize it further, you can use the View tab method to customize it in the way you want.
Download Practice Workbook
You can download the Excel workbook from here.
Conclusion
Hence, follow the above-described methods. Thus, you can easily learn how to insert page break between rows 39 and 40 in Excel. Hope this will be helpful. Don’t forget to drop your comments, suggestions, or queries in the comment section below.
Related Articles
<< Go Back to Page Break | Page Setup | Print in Excel | Learn Excel
Get FREE Advanced Excel Exercises with Solutions!
