If you want to edit tooltip in Excel, you have come to the right way. Here, we will walk you through 2 easy methods to do the task smoothly.
What Is Tooltip?
A tooltip is a small window in Excel, which usually provides a short explanation about the capability of that tool. Typically, these windows provide information about the data in connected cells or what needs to be entered into them.
How to Edit Tooltip in Excel: 2 Easy Methods
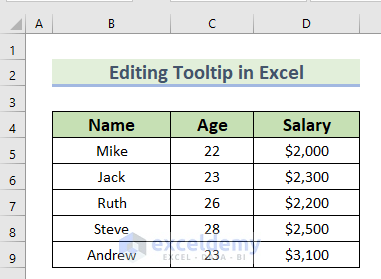
In the following dataset, you can see that we have the Name, Age, and Salary columns. After that, using this dataset, we will go through 2 easy methods to edit tooltip in Excel. To do so, we will use Excel 365. You can use any available Excel version.
1. Using Data Validation Feature to Edit Tooltip in Excel
In this method, we will add a tooltip in a cell. After that, we will edit the tooltip using the Data Validation feature.
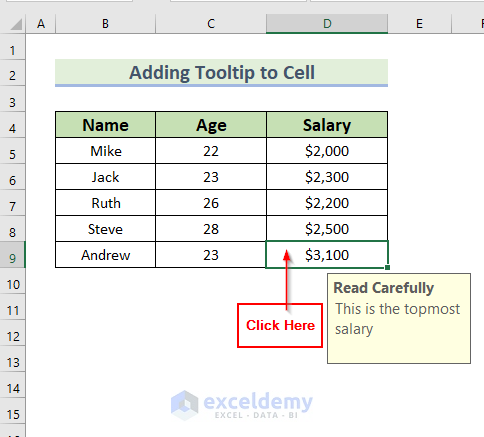
Step-1: Adding Tooltip to a Cell
- In this step, we will add a tooltip to a cell. We will go through the following steps to do the task.
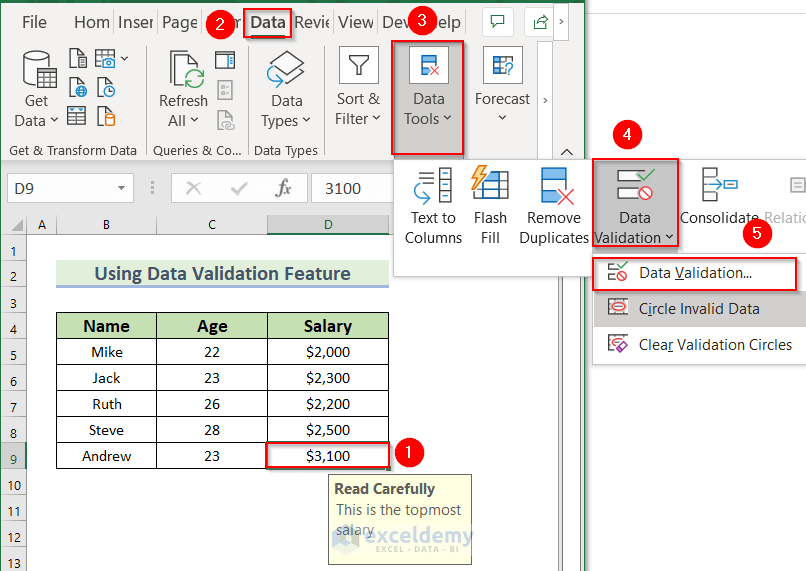
- First of all, we will select the cell to add a tooltip to it.
- Here, we selected cell D9 since we want to add a tooltip to this cell.
- Then, go to the Data tab >> go to the Data Tools group.
- Furthermore, from the Data Validation group >> select Data Validation.

- At this point, a Data Validation dialog box will appear.
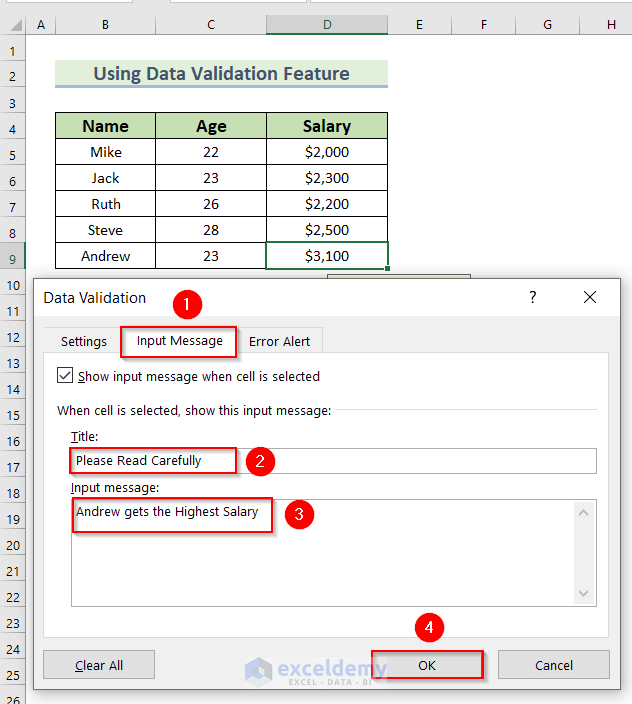
- Then, select Input Message.
- Moreover, in the Title box, we will type Read Carefully.
- Here, you can type anything you want.
- Along with that, in the Input message box, we type This is the topmost salary.
- Here, you can type any message in the Input message box.
- Then, click OK.

- After that, click on cell D9.
- You can see the toolbox with the title and message.
- Hence, we have created a toolbox for call D9.
Step-2: Using Data Validation Feature to Edit Tooltip
In this step, we will use the Data Validation feature to edit tooltip in Excel.
- First of all, we will click on cell D9 since it has the tooltip.
- Then, go to the Data tab >> go to the Data Tools group.
- Furthermore, from the Data Validation group >> select Data Validation.
- At this point, a Data Validation dialog box will appear.
- Afterward, select Input Message.
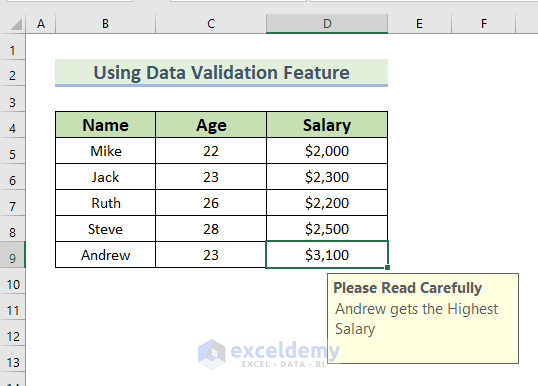
- After that, in the Title box, we will type Please Read Carefully.
- Here, you can type anything you want.
- Along with that, in the Input message box, we type Andrew gets the Highest Salary.
- Here, you can type any message in the Input message box.
- Then, click OK.
- Therefore, you can see the modified tooltip to cell D5.
Read More: How to Create Dynamic Tooltip in Excel
2. Applying Edit Hyperlink Option to Modify Tooltip in Excel
In this method, we will use the Edit Hyperlink option to edit tooltip in Excel. This method is helpful when you add a tooltip using the Link option. Here, first, we will show you how you can add a tooltip using the Link option, and then we will describe how to edit the tooltip.
Step-1: Adding Tooltip Using Link Option
- In this step, we will demonstrate how you can add a tooltip using the Link option.
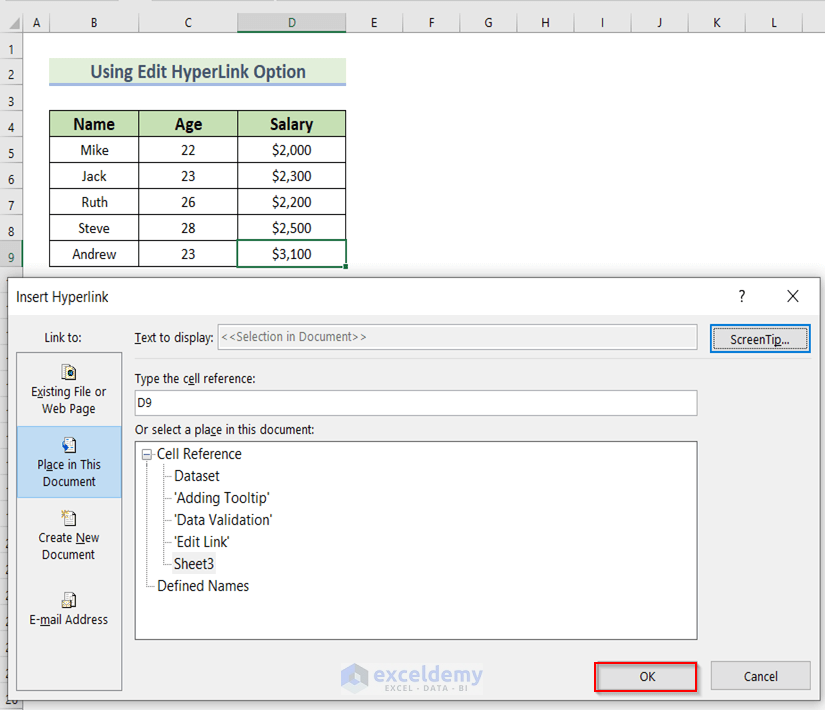
- First of all, we will right-click on cell D9 >> select Link from the Context Menu.

- At this point, an Insert Hyperlink dialog box will appear.
- Then, in the Type the cell reference box, we will type D9.
- Furthermore, click on ScreenTip.

- Then, a Set Hyperlink ScreenTip dialog box will appear.
- Moreover, we will type This is the Highest Salary in the ScreenTip text box.
- Here, you can type anything in the ScreenTip text box according to your needs.
- In addition, click OK.

- Along with that, click OK in the Insert Hyperlink dialog box.
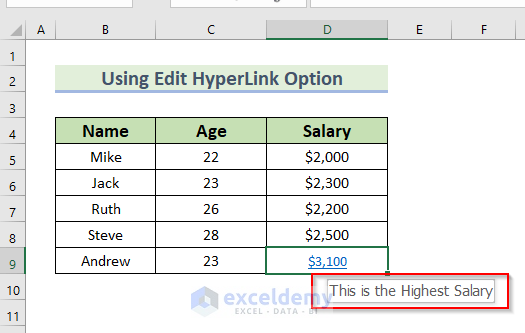
- After that, when you hover your mouse over cell D9, you will see the tooltip.
Read More: How to Display Tooltip on Mouseover Using VBA in Excel
Step-2: Editing Tooltip
In this method, we will edit the tooltip using the Edit Hyperlink option.
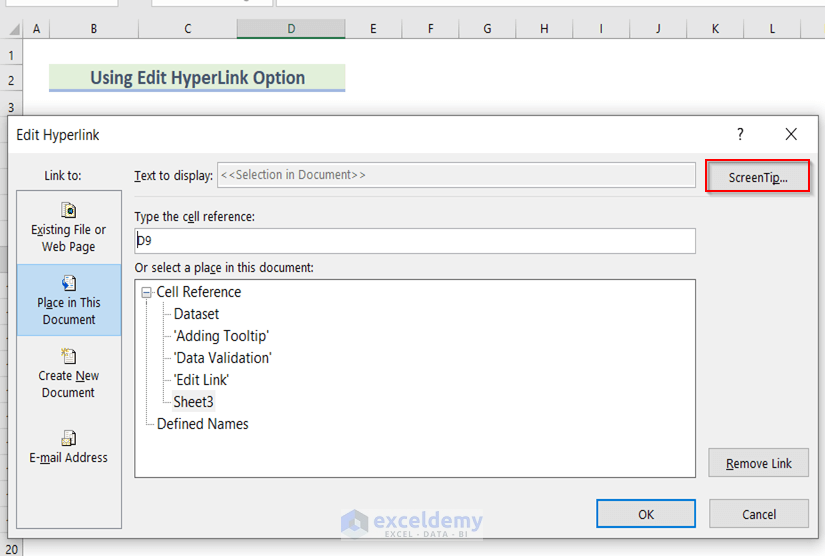
- In the beginning, we will right-click on cell D9 >> select Edit Hyperlink from the Context Menu.
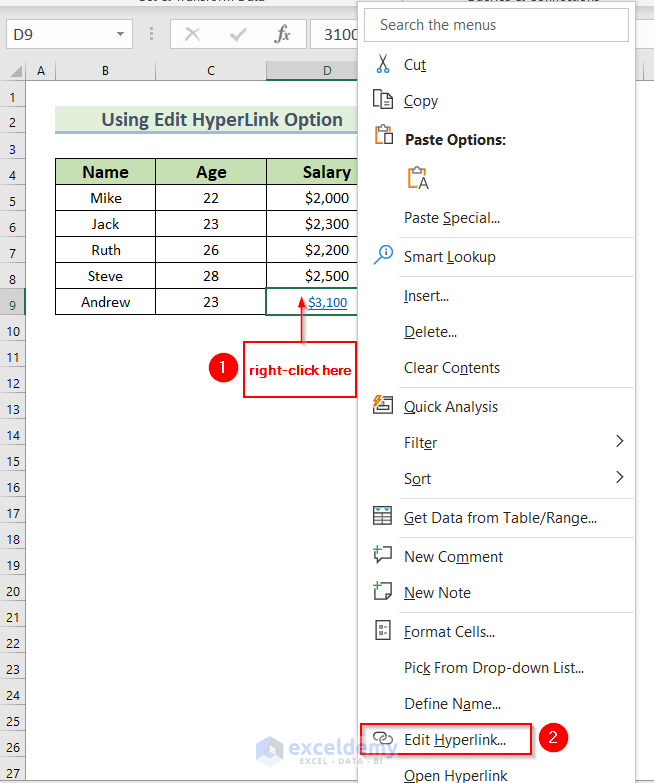
- At this point, an Insert Hyperlink dialog box will appear.
- Then, click on ScreenTip.
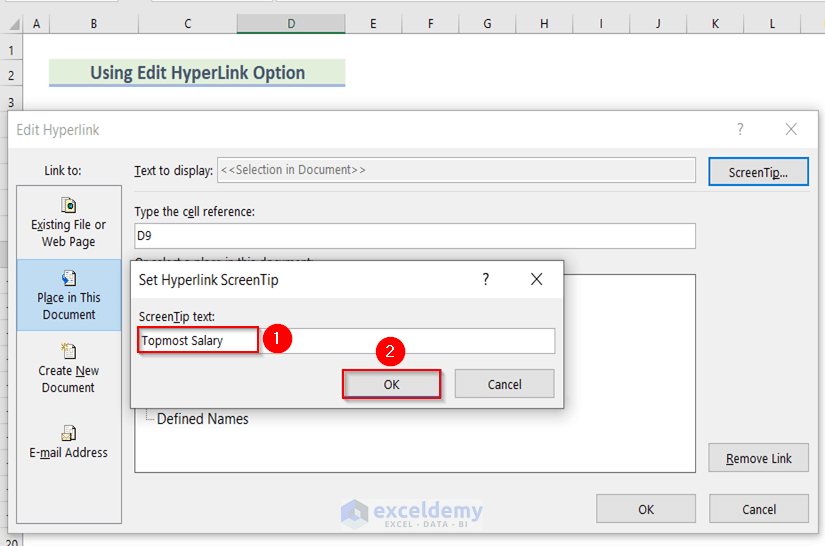
- Then, a Set Hyperlink ScreenTip dialog box will appear.
- Moreover, we will type Topmost Salary in the ScreenTip text box.
- Here, you can type anything in the ScreenTip text box according to your needs.
- In addition, click OK.
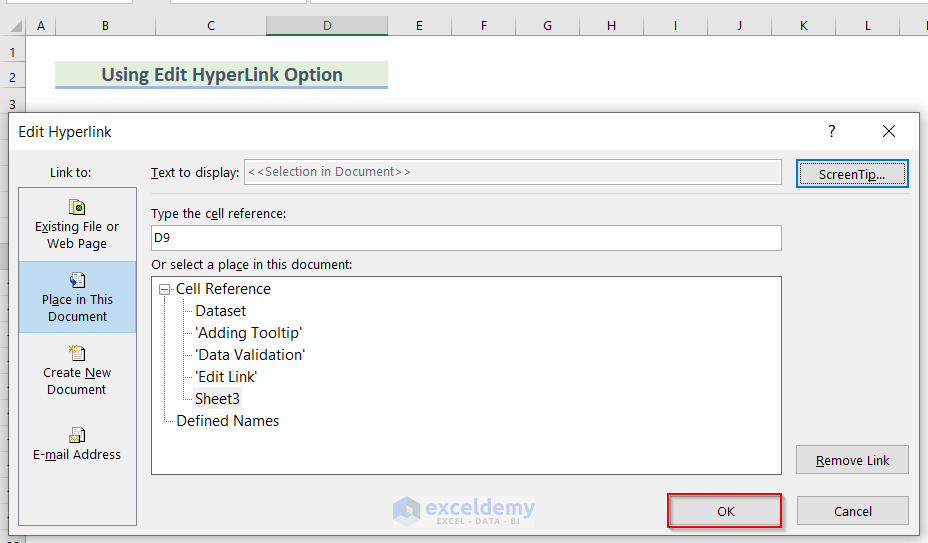
- Moreover, click OK in the Insert Hyperlink dialog box.
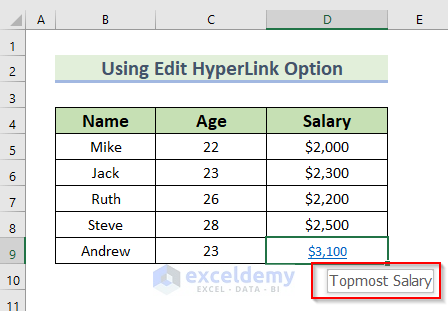
- Therefore, when you hover your mouse over cell D9, you will see the edited tooltip.
Read More: How to Remove Tooltip in Excel
Practice Section
You can download the above Excel file and practice the explained methods.

Download Workbook
You can download the following Excel file and practice while reading this article.
Conclusion
Here, we show you 2 easy methods to edit tooltip in Excel. Thank you for reading this article. We hope it was helpful. If you have any queries, please let us know in the comment section.
Related Articles
- How to Add Tooltip to UDF in Excel
- How to Create Tooltip in Excel Chart
- How to Insert Excel Tooltip on Hover
- How to Show Full Cell Contents on Hover in Excel
- Excel Button Tooltip
<< Go Back to Excel Tooltip | Learn Excel
Get FREE Advanced Excel Exercises with Solutions!
