Method 1 – Use VBA Code to Display Tooltip on Mouseover for Text
Steps:
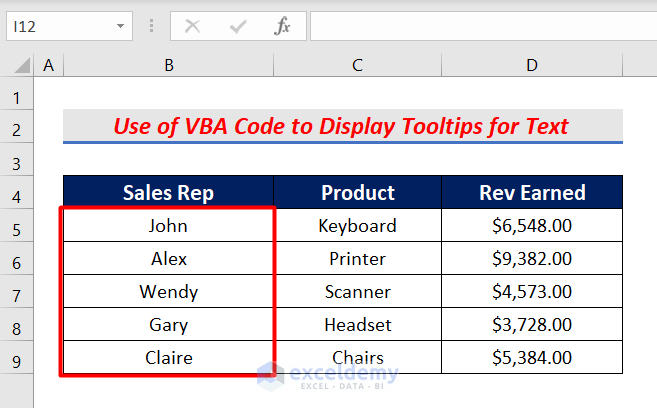
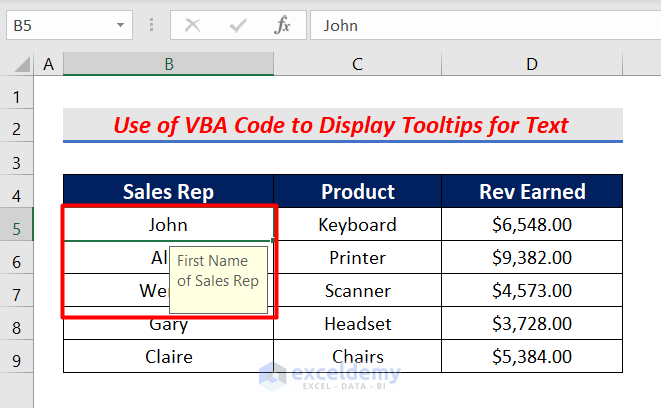
- Display tooltips for the Sales Rep To do it, press Alt+F11 .
- Open the Microsoft Visual Basic window.
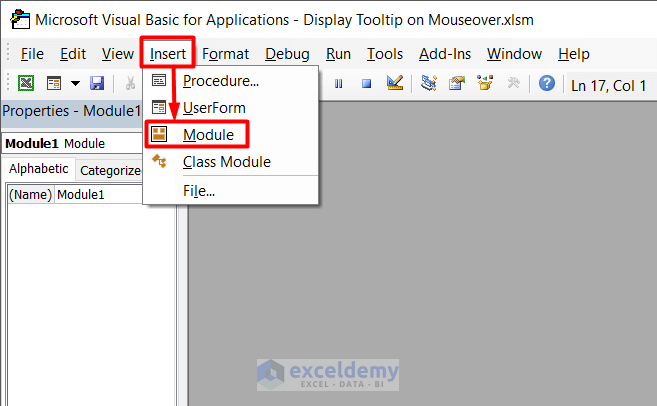
- Click on Module under the Insert tab.
- Module 1 (Code) window will appear. Copy the following VBA code from below and paste it into the window.
Sub Text()
Dim x As Range
 For Each x In Range("B5:B9")
    With x.Validation
        .Delete
        .Add Type:=xlValidateInputOnly, AlertStyle:=xlValidAlertStop, _
            Operator:=xlBetween
        .IgnoreBlank = True
        .InCellDropdown = True
        .InputMessage = "First Name of Sales Rep"
        .ShowError = True
    End With
Next x
End Sub
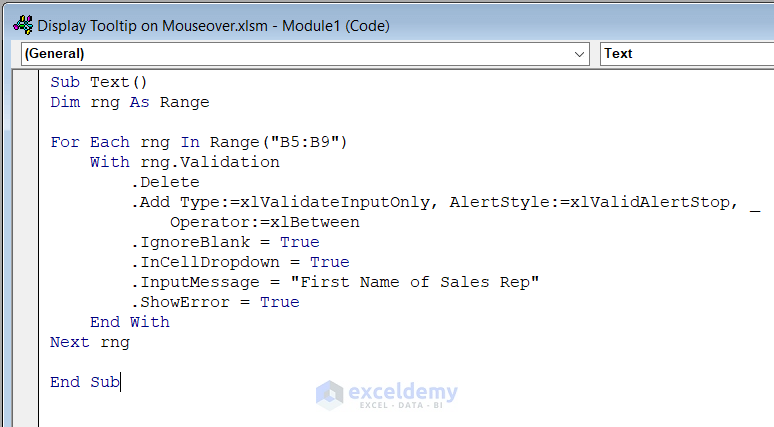
- We wrote the Input Message “First Name of Sales Rep”. You can type your desired message here.
- Press F5 to run the code and go back to your Excel worksheet and click any one of the Sales Rep The Input Message will appear as a tooltip.
Method 2 – Apply VBA Code to Display Tooltip on Mouseover for Shapes
Steps:
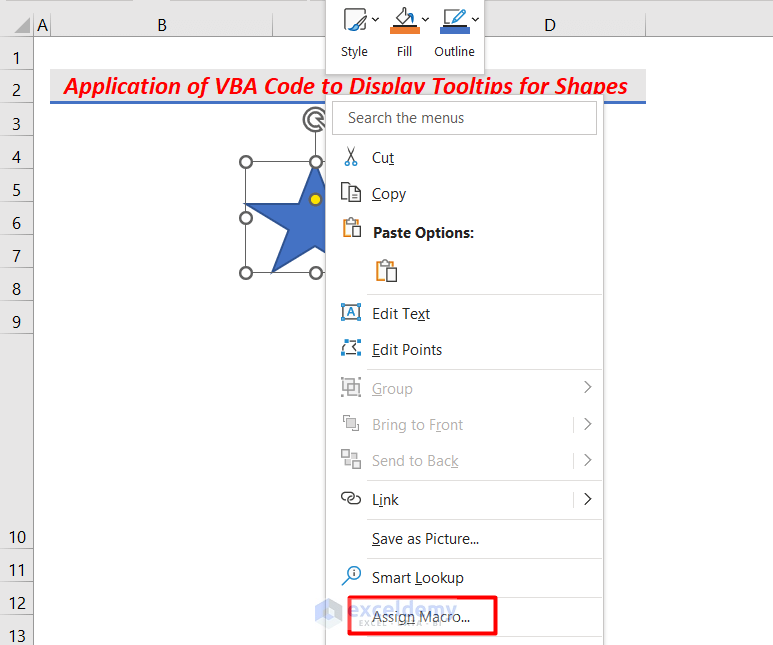
- Select the shape and click the right button on your mouse.
- Click Assign Macro.
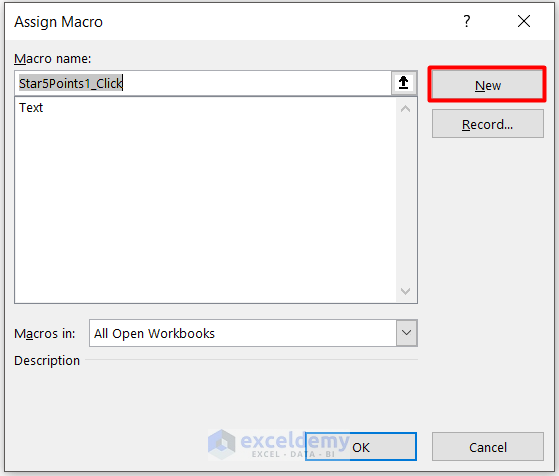
- A pop-up box will open. Now click New.
- A new window to write code will appear.
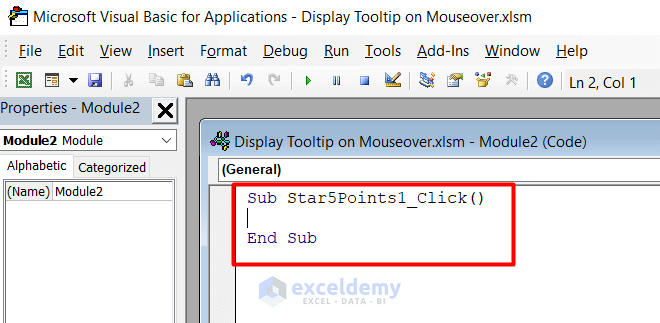
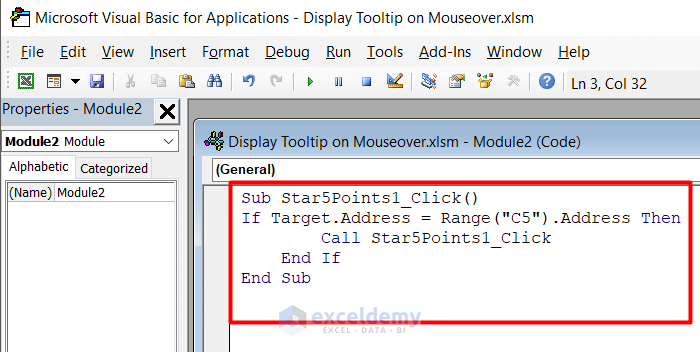
- Type the following code in that window to assign the shape to a macro.
Sub Star5Points1_Click()
If Target.Address = Range("C5").Address Then
        Call Star5Points1_Click
    End If
End Sub
- Insert another Module from the Insert tab.
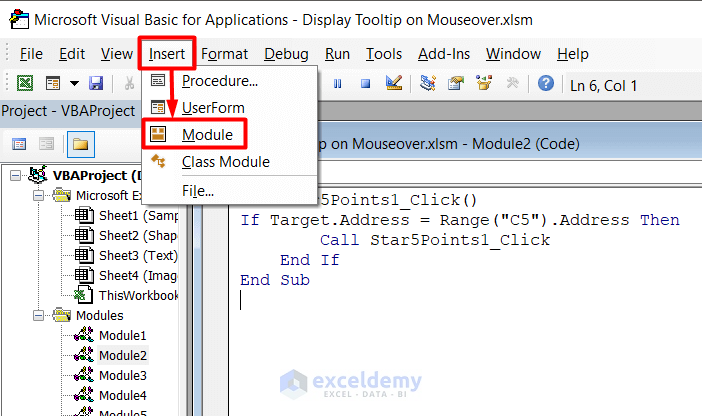
- Copy-paste the following formula into the window.
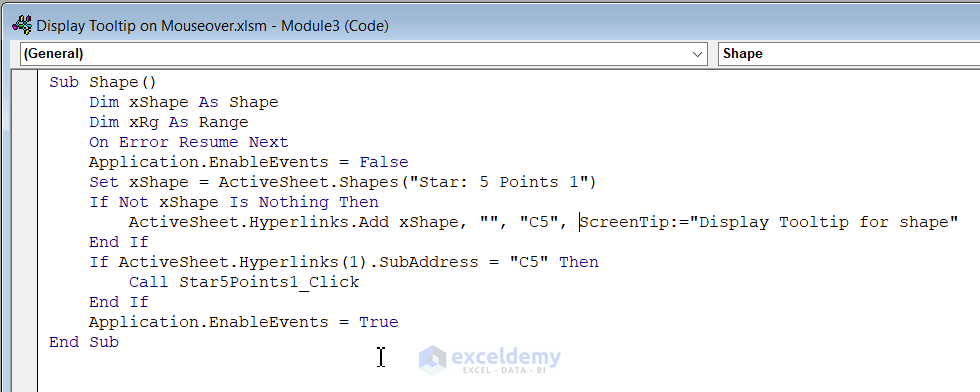
Sub Shape()
    Dim x As Shape
    Dim y As Range
    On Error Resume Next
    Application.EnableEvents = False
    Set x = ActiveSheet.Shapes("Star: 5 Points 1")
    If Not x Is Nothing Then
        ActiveSheet.Hyperlinks.Add x, "", "C5", ScreenTip:="Display Tooltip for shape"
    End If
    If ActiveSheet.Hyperlinks(1).SubAddress = "C5" Then
        Call Star5Points1_Click
    End If
    Application.EnableEvents = True
End Sub
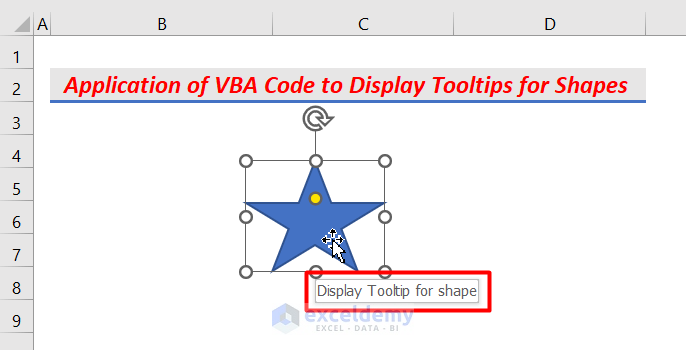
- Press F5 to run the code.
- Hover your mouse over the shape and the tooltip will be visible.
Method 3 – Run an Excel VBA Code to Display Tooltip on Mouseover for Image
Steps:
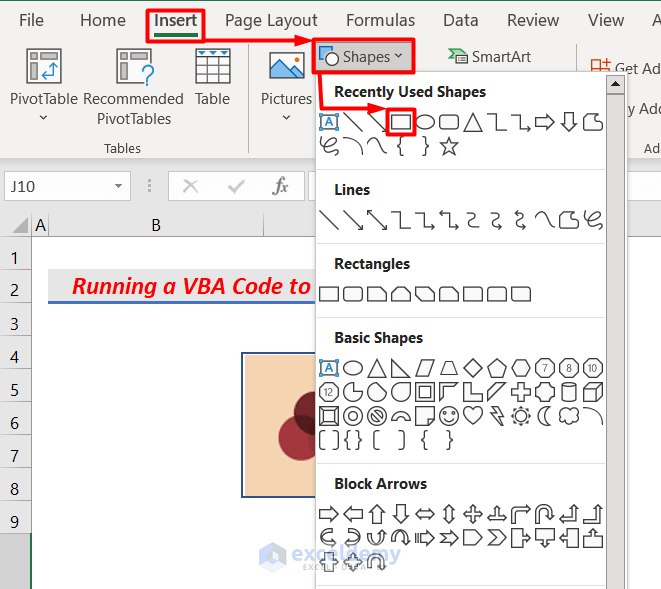
- Go to the Insert tab and click Shapes.
- Select Rectangle.
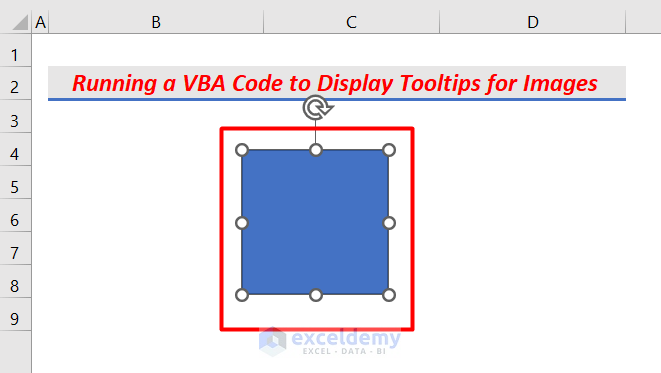
- Your cursor will look like a “+” sign. Drag your cursor to create a shape around your image.
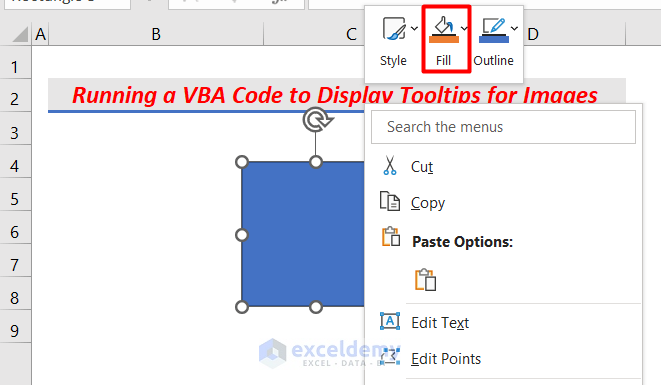
- The shape will have a default fill color. To remove the color, right-click on the image and select Fill.
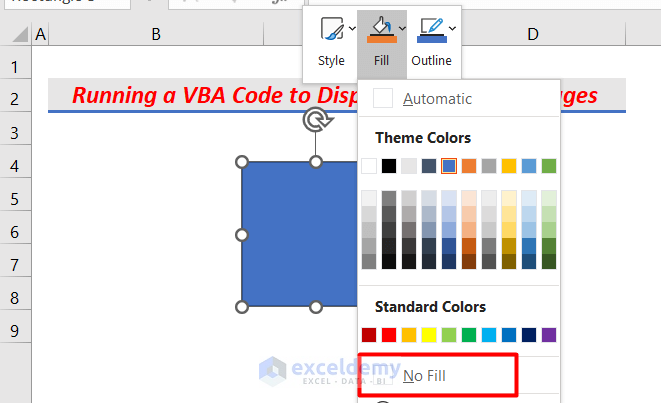
- Click No Fill to make the image visible inside the shape.
- Double-click inside the shape. It will open a window to write code.
- Write down the following code there.
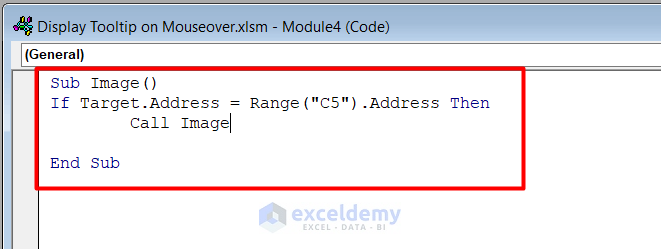
Sub Image()
If Target.Address = Range("C5").Address Then
        Call Image
End Sub
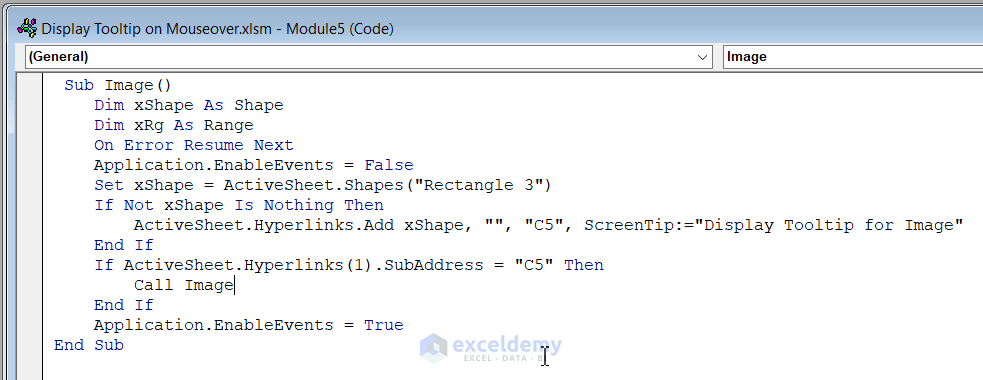
- Insert another Module from the Insert tab and copy-paste the following formula there.
Sub Image()
    Dim x As Shape
    Dim y As Range
    On Error Resume Next
    Application.EnableEvents = False
    Set x = ActiveSheet.Shapes("Rectangle 3")
    If Not x Is Nothing Then
        ActiveSheet.Hyperlinks.Add xShape, "", "C5", ScreenTip:="Display Tooltip for Image"
    End If
    If ActiveSheet.Hyperlinks(1).SubAddress = "C5" Then
        Call Image
    End If
    Application.EnableEvents = True
End Sub
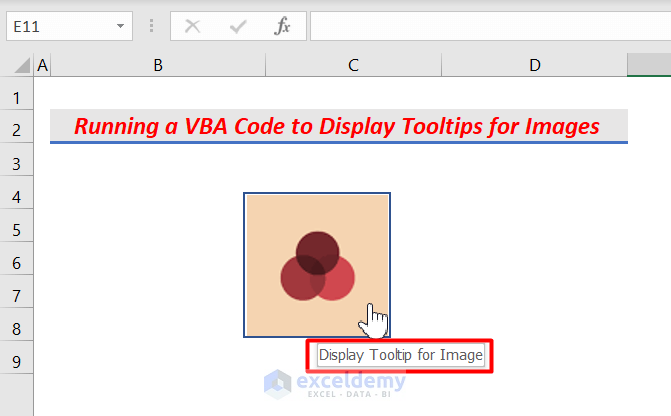
- Press F5 to run the code and go back to the Excel sheet.
- Hover your cursor over the image, it will show your desired tooltip.
Notes
- Write the tooltip in the code, you want to show while hovering over the text, shape, or image.
- Assign the shape before running the VBA code; the code will not run.
Download Practice Workbook
Download this practice workbook for practice while you are reading this article.
Related Articles
- How to Edit Tooltip in Excel
- How to Create Tooltip in Excel Chart
- How to Remove Tooltip in Excel
- How to Show Full Cell Contents on Hover in Excel
- How to Insert Excel Tooltip on Hover
- Excel Button Tooltip
<< Go Back to Excel Tooltip | Learn Excel
Get FREE Advanced Excel Exercises with Solutions!
