Sometimes, we have to deal with large datasets and we try to print the whole dataset on a single page in Microsoft Excel. For this purpose, we need to extend the print area before printing. Are you having trouble extending print area in Excel? This tutorial will help you to learn how to extend print area in Excel in 5 suitable ways. Let’s get started!
How to Extend Print Area in Excel: 5 Suitable Ways
There are 5 suitable ways to extend the print area in Excel. The methods are by using the Page Break Preview option, applying increased row height, using Margin feature, utilizing Orientation option, and inserting paper size. Now we will see examples of how to solve this problem by these 5 methods.
1. Use of Page Break Preview Option
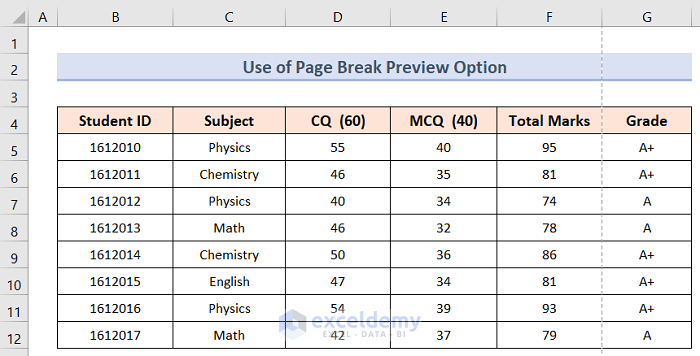
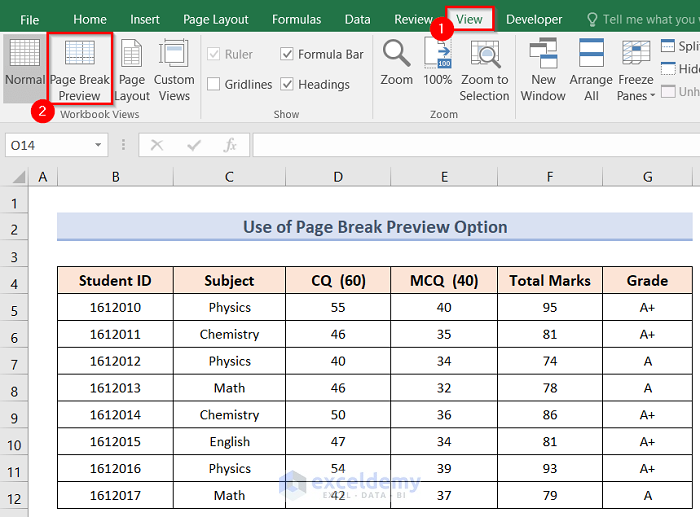
To demonstrate this method, we have taken a dataset like below where we have Student ID numbers of 8 students, their subject-wise Total Marks, and Grade. Now we will print the whole dataset on a single page using the Page Break Preview option.
To apply this method, follow the steps below:
Steps:
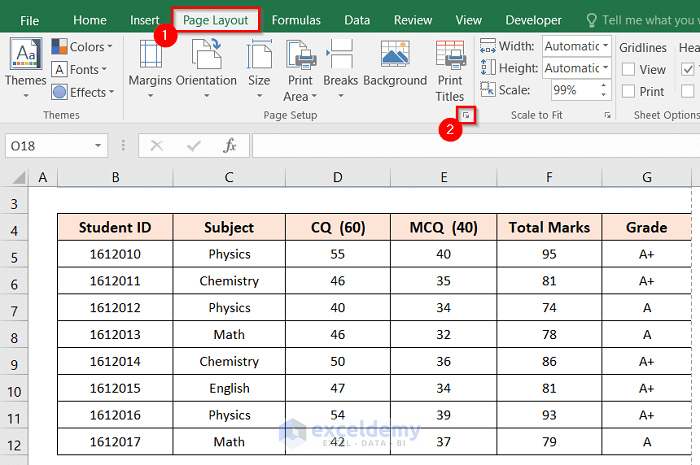
- First, go to the Page Layout tab.
- Second, click on the Page Setup option as shown below.
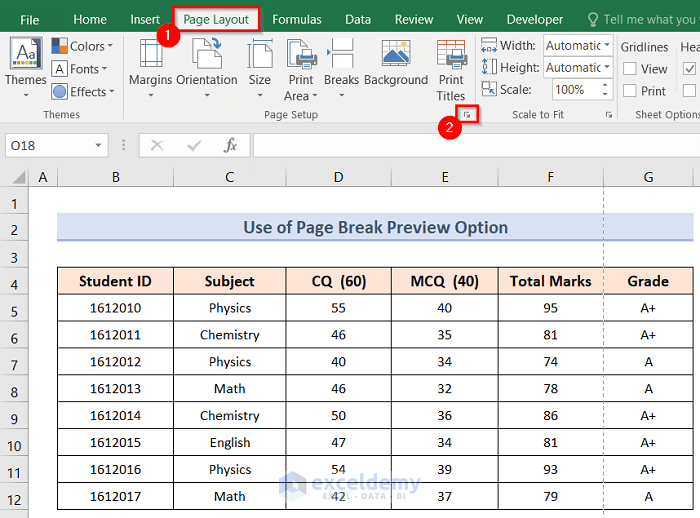
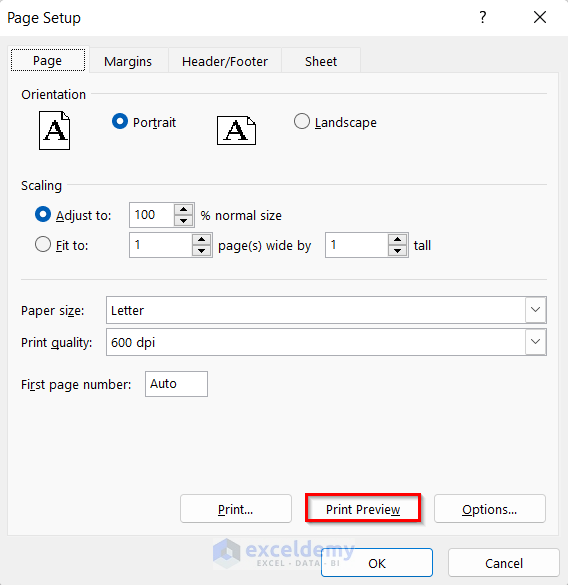
- As a result, it will open the Page Setup window like the below one.
- Third, click on the Print Preview option.
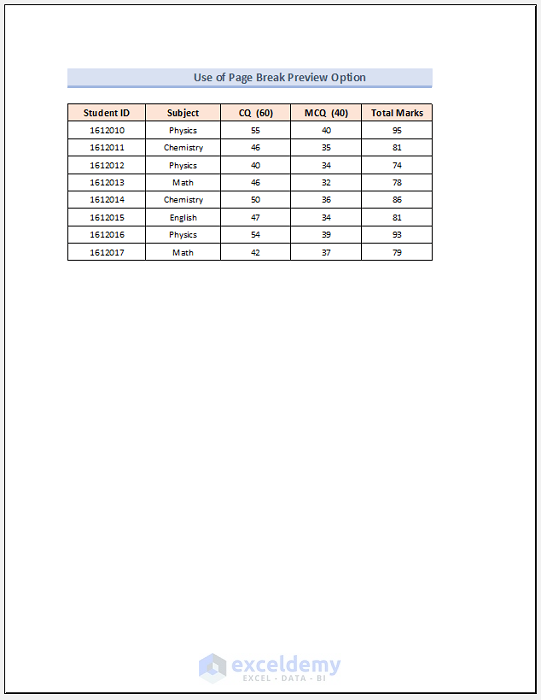
- Consequently, you will see a preview like the below image where the Grade column is absent due to the default page break option.
- Now, click on the Back option as shown below to go back to your dataset.
- After that, click on the View tab on your ribbon.
- Furthermore, click on the Page Break Preview option as shown below.
- As a result, a page break preview will be shown on the left corner of your screen which will contain the default page break like the below one.
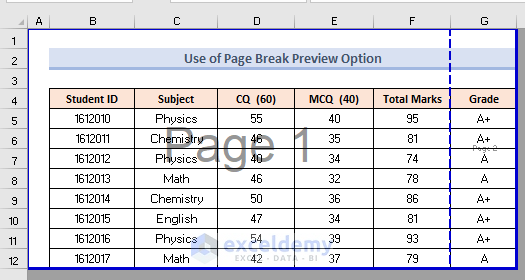
- After that, place your mouse on the default page break and drag it to the right at the end of column G as shown below.
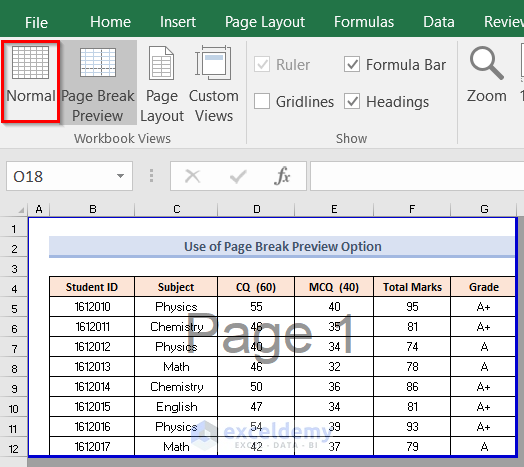
- Furthermore, click on the Normal option to display the dataset on a normal screen.
- Subsequently, go to the Page Layout tab.
- Then, click on the Page Setup option as shown below.
- As a result, it will open the Page Setup window like the below one.
- Next, click on the Print Preview option.

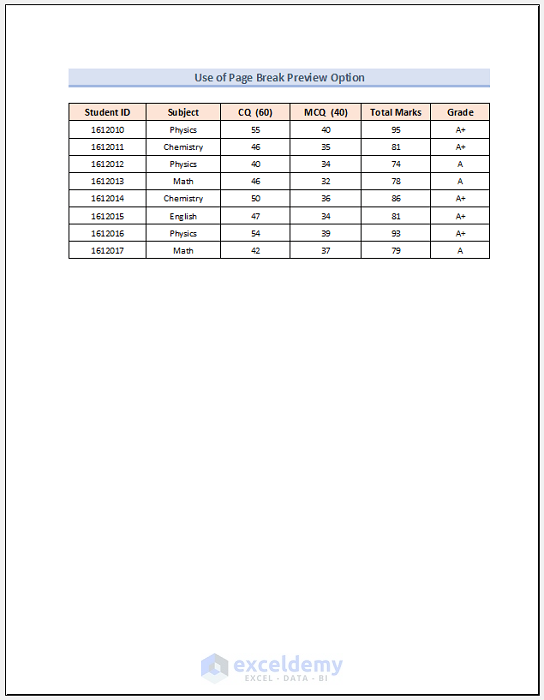
- Hence, you will now see a preview where your full dataset will be printed in an extended print area like the image below.
Read More: How to Change Print Area in Excel
2. Applying Increased Row Height
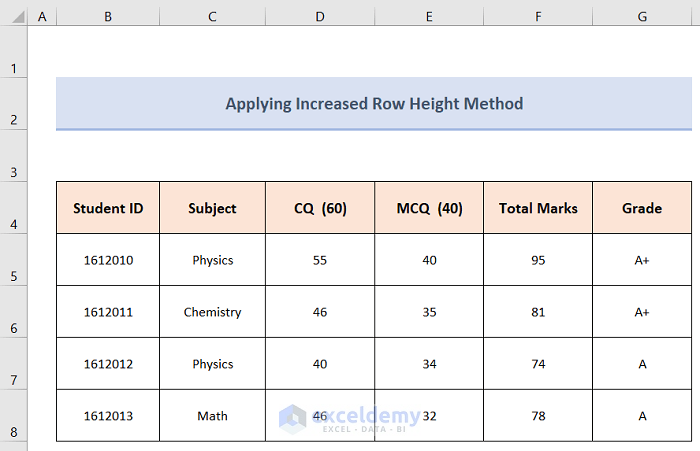
We can extend print area in Excel by increasing the Row Height of our dataset. For this example, we have taken a dataset of Student ID numbers of 4 students and their subject-wise Total Marks and Grade like below. In order to apply this method, follow the steps below:
Steps:
- To start with, go to the Page Layout tab.
- Second, click on the Page Setup option as shown below.
- As a result, it will open the Page Setup window like the below one.
- Third, check the Fit to 1 page option and click on the Print Preview option as shown below.

- Consequently, you will see a preview like the below image where the print area is comparatively smaller.

- Now, click on the Back option as shown below to go back to your dataset.

- Furthermore, select rows 1:8 >> go to the Home tab >> click on the Format drop-down >> click on Row Height as shown below.
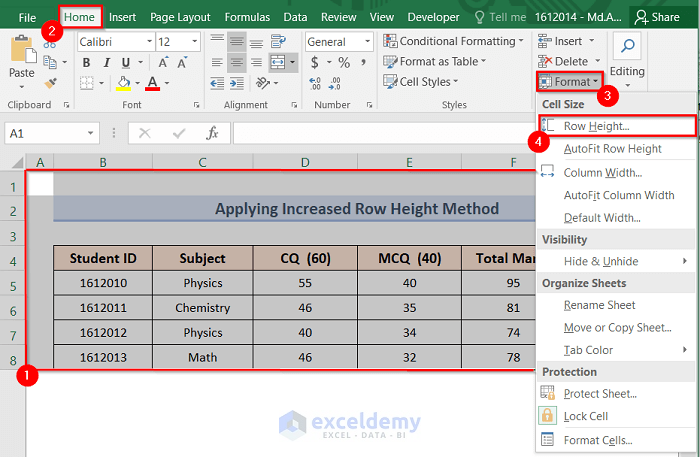
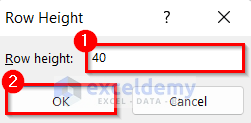
- Next, type 40 in the Row height field box.
- After that, click OK.
- As a result, you will see the increased row height of rows 1:8 like the image below.
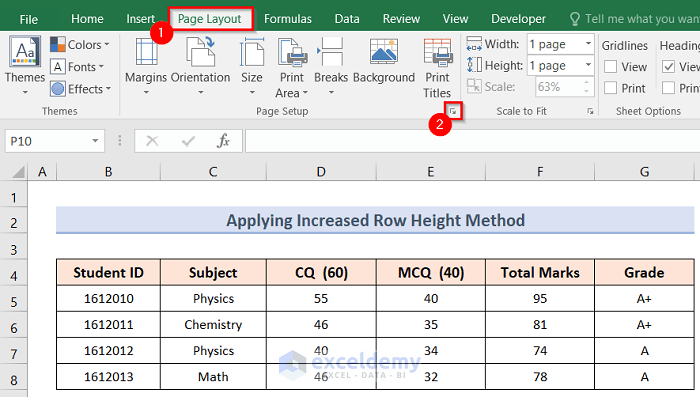
- Subsequently, go to the Page Layout tab.
- Then, click on the Page Setup option as shown below.
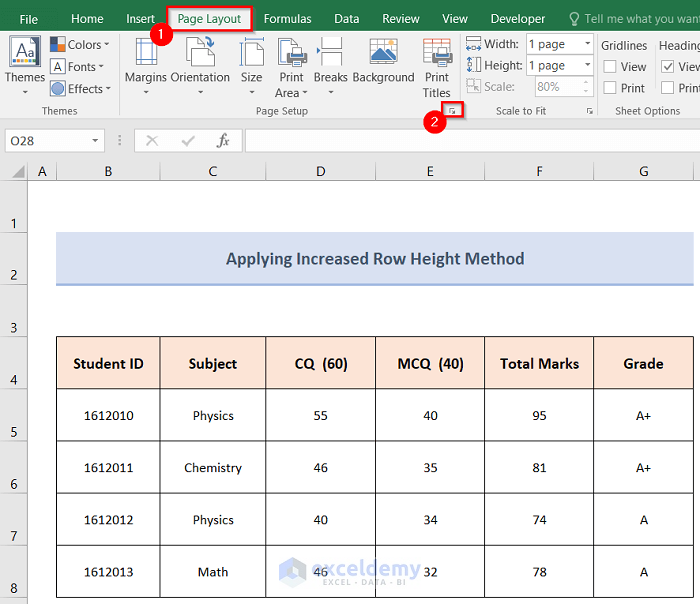
- As a result, it will open the Page Setup window like the below one.
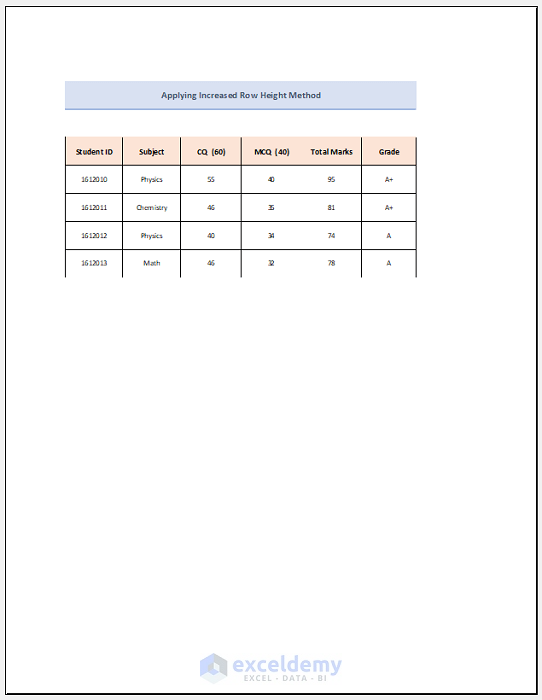
- Furthermore, check the Fit to 1 page option and click on the Print Preview option as shown below.

- Hence, you will now see a preview where your full dataset will be printed in an extended print area like the image below.
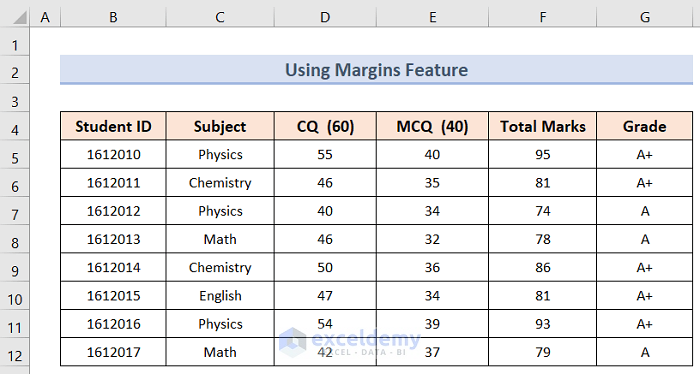
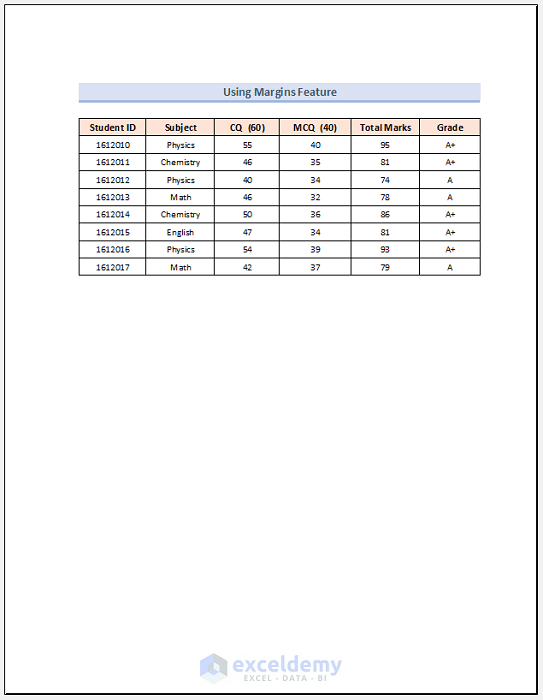
3. Using Margins Feature
We can also use the Margins feature to extend the print area in Excel. We have taken the same dataset as the Page Break Preview method for this example.
To apply this method, follow the steps below.
Steps:
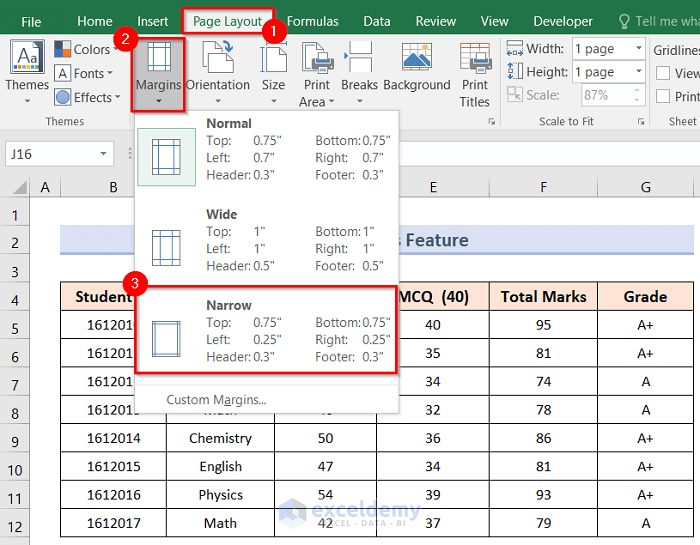
- To begin with, go to the Page Layout tab.
- After that, click on the Margins drop-down.
- Third, select Narrow from the drop-down as shown below.
- Next, click on the Page Setup option as shown below.
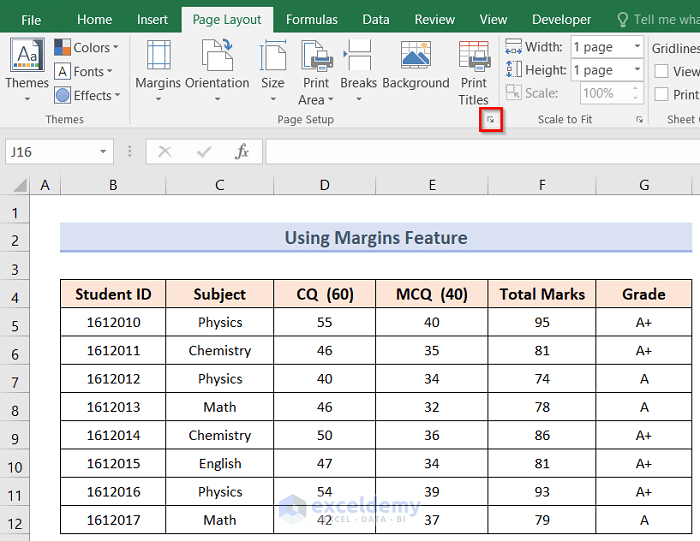
- As a result, it will open the Page Setup window like the below one.
- Furthermore, check the Fit to 1 page option and click on the Print Preview option as shown below.
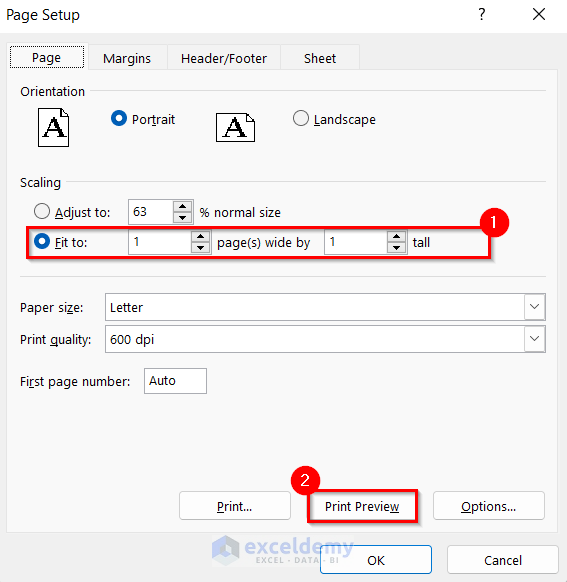
- Hence, you will now see a preview where your full dataset will be printed in an extended print area like the image below.
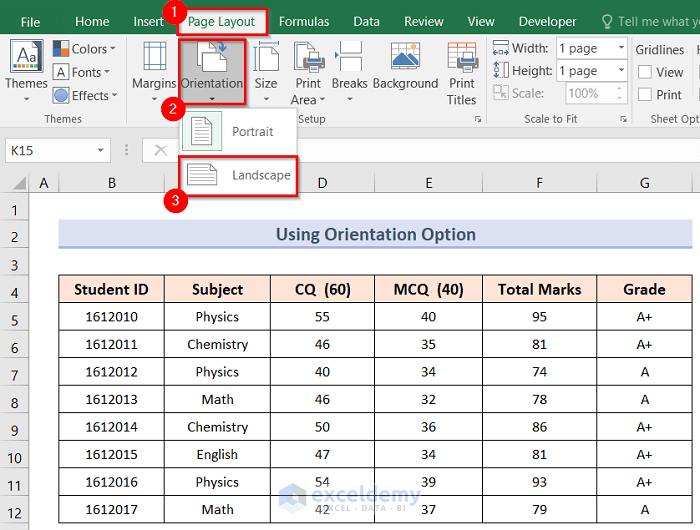
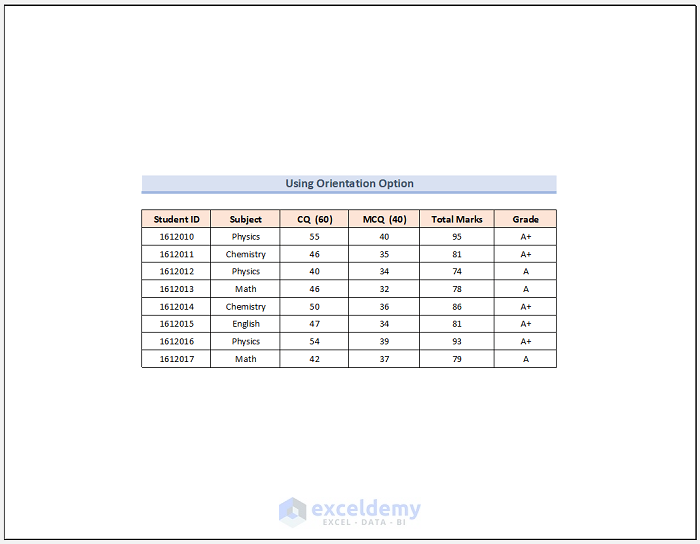
4. Utilizing Orientation Option
Utilizing Orientation option is another way to extend print area in Excel. We have taken the same dataset as before for this example. To apply this method, follow the steps below.
Steps:
- Firstly, go to the Page Layout tab.
- Secondly, click on the Orientation drop-down.
- Thirdly, select Landscape from the drop-down as shown below.
- Next, click on the Page Setup option as shown below.

- As a result, it will open the Page Setup window like the below one.
- Furthermore, check the Fit to 1 page option and click on the Print Preview option as shown below.

- As a consequence, you will now see a preview where your full dataset will be printed in an extended print area like the image below.
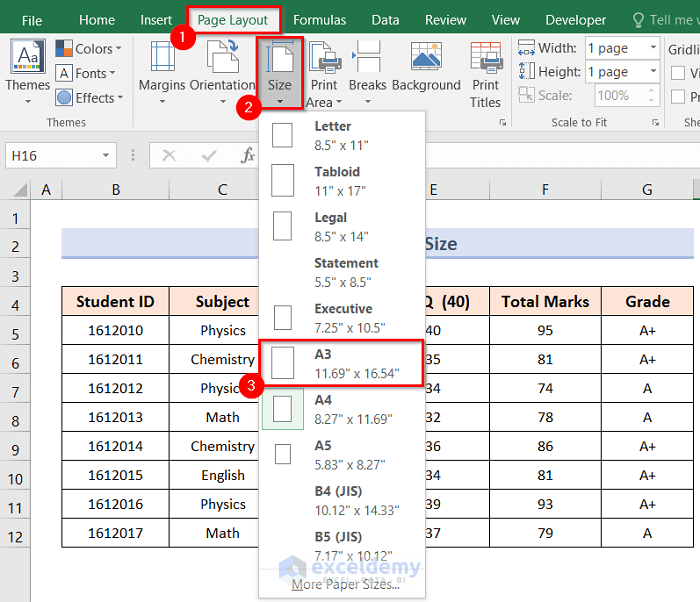
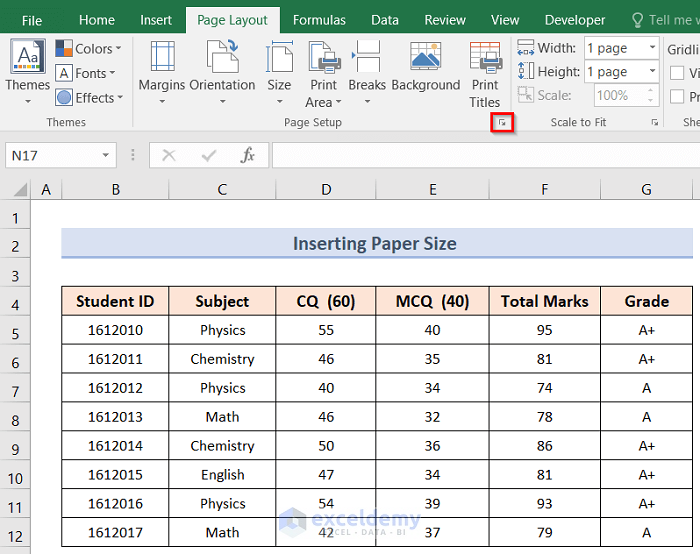
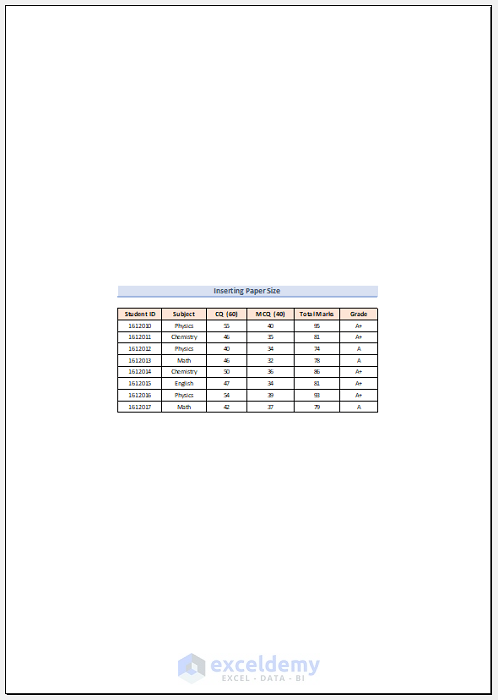
5. Adjusting Paper Size
Adjusting Paper Size can be another way to extend print area in Excel. We have taken the same dataset as the Page Break Preview method for this example. To apply this method, follow the steps below.
Steps:
- First of all, go to the Page Layout tab.
- Second of all, click on the Size drop-down.
- After that, select A3 from the drop-down as shown below.
- Next, click on the Page Setup option as shown below.
- As a result, it will open the Page Setup window like the below one.
- Furthermore, check the Fit to 1 page option and click on the Print Preview option as shown below.

- Hence, you will now see a preview where your full dataset will be printed in an extended print area like the image below.
Things to Remember
- Page Break Preview option will be helpful if you face any page break-related problems while printing.
- Increased Row method will increase your dataset size and extend the print area.
- Margin feature, Orientation option, and Paper Size option will increase your total area of printing.
Download Practice Workbook
You can download the Excel workbook from here.
Conclusion
Hence, follow the above-described methods. Thus, you can easily learn how to extend print area in Excel. Hope this will be helpful. Don’t forget to drop your comments, suggestions, or queries in the comment section below.
Related Articles
- How to Show Print Area in Excel
- How to Clear Print Area in Excel
- How to Delete Extra Pages in Excel
- [Solved:] Print Area Is Grayed Out in Excel
- [Fixed!] Excel Set Print Area Not Working
<< Go Back to Print Area | Page Setup | Print in Excel | Learn Excel
Get FREE Advanced Excel Exercises with Solutions!
