A print area is a set of cells that will be printed out in full. Set a print area to only contain your selection if you don’t want to print the complete spreadsheet. On a sheet with a designated print area, only that area will be printed when you press Ctrl+P or click the Print button. In a single worksheet, you can choose numerous print areas, and each one will print on a separate page. The print area is also saved when the workbook is saved. Later, if you change your mind, you can alter it or clear the print area. In this article, we will show you how to clear print area in Excel.
How to Clear Print Area in Excel: 2 Handy Approaches
In some circumstances, we might designate a worksheet’s print area for printing. However, if a worksheet has numerous sheets, each of which has a distinct print area, we need to simultaneously clear all the print areas across all the sheets. We will demonstrate to you how to clear the print area in Excel by utilizing the Page Layout tab and applying VBA Code in the following two methods. Let’s suppose we have a sample data set.

1. Utilizing Page Layout Tab to Clear Print Area in Excel
This first technique explains how to use Excel’s Page Layout tab to clear the print area.
Step 1:
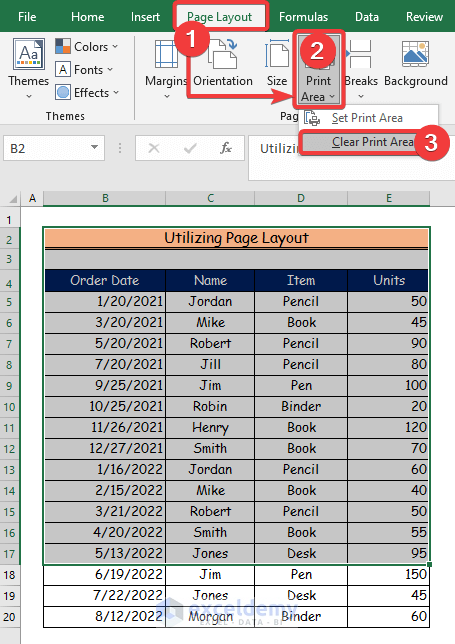
- At the start of the section, select the range of the data set that you want to print.
- Here, we will select the range of cells from B2 to E17.
- Now, go to the Page Layout tab first.
- Then, choose the Print Area command.
- Finally, click on the Clear Print Area option.
Step 2:
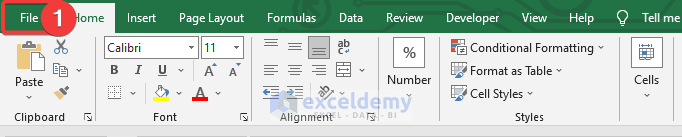
- Now, navigate to the File tab.
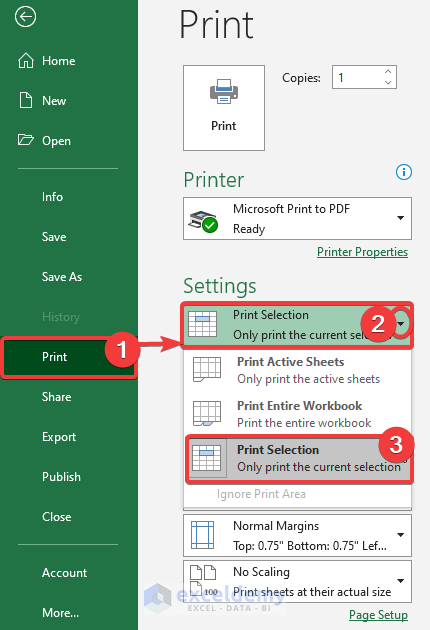
Step 3:
- Firstly, select the Print tool.
- Secondly, click on the Print Selection which is marked by the number 2 with a red circle.
- Thirdly, choose the ‘Only print the current selection’ option.
Step 4:
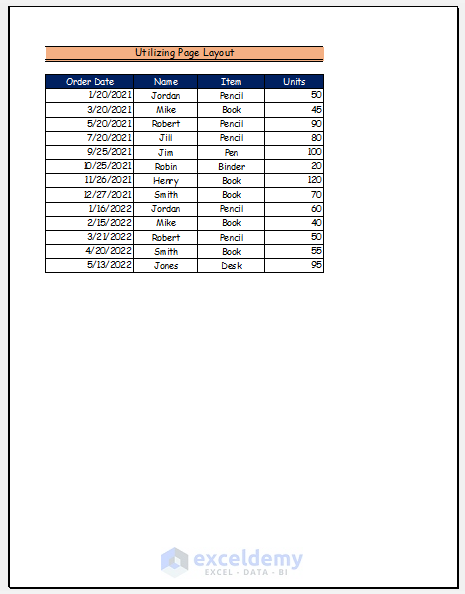
- Here, this is the print area that needs to be printed, and the required region runs from cell B2 to cell E17.
2. Applying VBA Code to Clear Print Area in Excel
In this final lesson, we’ll use the Developer tab to develop a VBA code that will clear the print area in Excel.
Step 1:
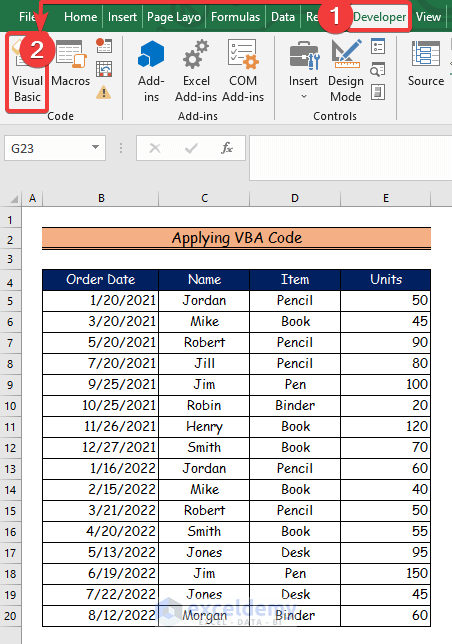
- At first, we will open the Developer tab.
- Then, we will select the Visual Basic command.
Step 2:
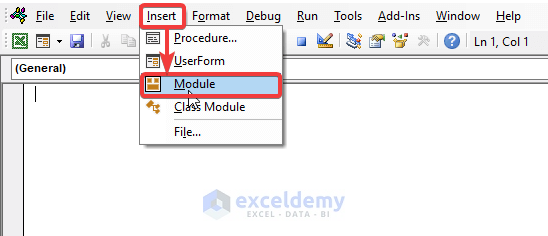
- Here, the Visual Basic window will open.
- After that, from the Insert option, we will choose the new Module to write a VBA code.
Step 3:
- Now, paste the following VBA code into the Module.
- To run the program, click the “Run” button or press F5.
Sub Clear_Print_Area()
    'Declaring Variables
    Dim Mysheet As String
    'Retrieving activesheet name
    Mysheet = ActiveSheet.Name
    'Selecting print area
    ActiveSheet.PageSetup.PrintArea = "B2:E15"
    'Displaying the printpreview
    ActiveSheet.PrintPreview
End Sub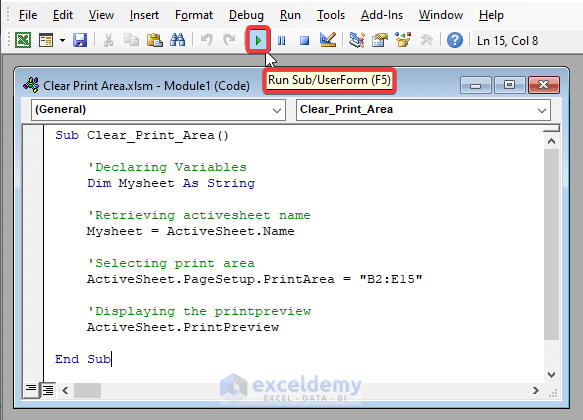
VBA Code Breakdown
- Firstly, we will call our subject Clear_Print_Area().
- Secondly, we declare the variable as Dim Mysheet As String.
- Thirdly, we retrieve the active sheet as Mysheet = ActiveSheet.Name.
- Then we select the print area in the activesheet as ActiveSheet.PageSetup.PrintArea = “B2:E15”.
- Finally, after running the program, the print preview will be displayed as ActiveSheet.PrintPreview.
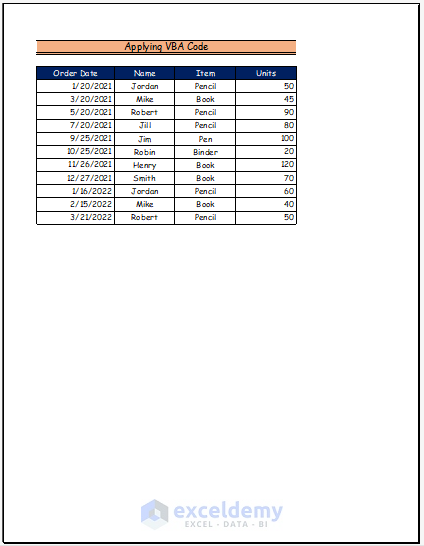
Step 4:
- Finally, this is the print area that we need to print by setting the specified area from B2 cell to E15 cell.
Download Practice Workbook
You may download the following Excel workbook for better understanding and practice it by yourself.
Conclusion
In this article, I’ve covered 2 handy methods of how to clear print area in Excel. I sincerely hope you enjoyed and learned a lot from this article. If you have any questions, comments, or recommendations, kindly leave them in the comment section below.
Related Articles
- How to Change Print Area in Excel
- How to Show Print Area in Excel
- How to Extend Print Area in Excel
- How to Delete Extra Pages in Excel
- [Solved:] Print Area Is Grayed Out in Excel
- [Fixed!] Excel Set Print Area Not Working
<< Go Back to Print Area | Page Setup | Print in Excel | Learn Excel
Get FREE Advanced Excel Exercises with Solutions!
