Excel Table is an interesting feature of Microsoft Excel. A table is a group of cells with data for a particular use. In Excel, we can use data from a certain table by calling that table only. In this article, we will discuss the different operations of each row in a table with Excel VBA.
How to Create a Table in Excel
First, we need to know how to make a Table in Excel. There are lots of ways to create a table in Excel. We are showing the easiest way in this section.
Step 1:
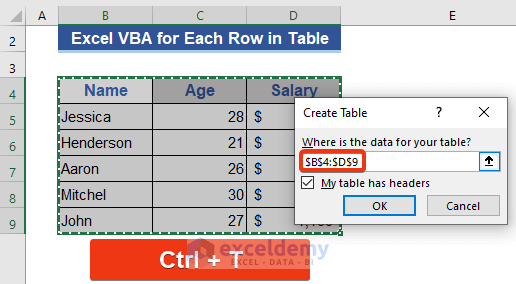
- First, select all the cells which will be included in the table.
- Now, press Ctrl+T.
- Create Table dialog box will appear.
- Our selected range will show there.
- Mark on My table has headers option.
Step 2:
- Finally, press OK.

The name of the table will show on the name bar. We can modify the name from here.
Excel VBA Code for Each Row in a Table (Add, Overwrite, Delete, etc.): 5 VBA Examples
We will show 5 VBA examples that explain the different operations of each row of the Excel table.
1. Add a New Row in an Excel Table with VBA Code
We will show how to add new rows to an Excel table in this example.
Step 1:
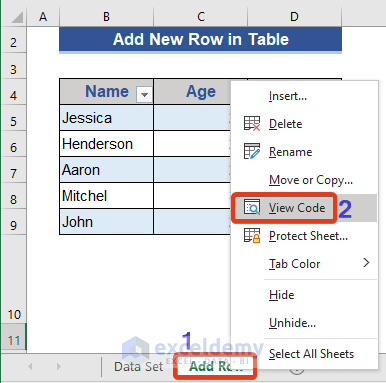
- First, go to the Sheet Name section that will be found at the bottom border of each sheet. Press the right button of the mouse.
- Choose the View Code option from the list.
Step 2:
- Now, the VBA window will appear. Choose Module from the Insert tab.
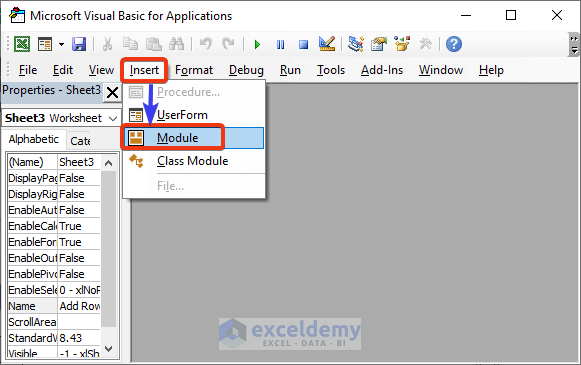
- The VBA command module will come finally. We will write the VBA code on this window.

Step 3:
- Copy and paste the following VBA code into this window.
Sub VBA_table_1()
Dim t_name As ListObject
Set t_name = ActiveSheet.ListObjects("Exceldemy_2")
t_name.ListRows.Add
t_name.ListRows.Add 4
End Sub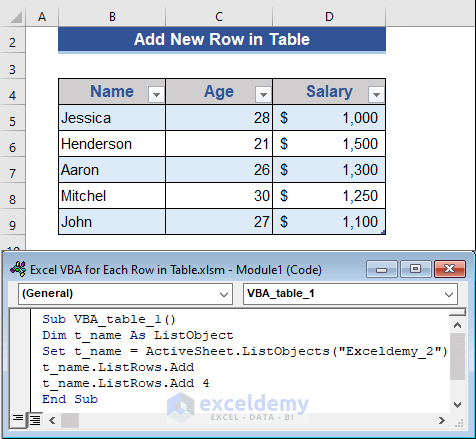
Step 4:
- Finally, run the code by pressing the F5 button.

We can see that two rows are added to the dataset. t_name.ListRows.Add, this command adds a new row at the bottom of the table and t_name.ListRows.Add 4, command adds a new row at the 4th row.
2. Add a Row with Data in an Excel Table
We will add new rows with data in this example. Data and rows will insert at the same time in the table.
Step 1:
- Enter the VBA command module by pressing the Alt+F11 keys.
- Put the following VBA code on the command module.
Sub VBA_table_2()
Dim t_name As ListObject
Set t_name = ActiveSheet.ListObjects("Exceldemy_3")
Dim new_row As ListRow
Set new_row = t_name.ListRows.Add
With new_row
    .Range(1) = "Tony"
    .Range(2) = 29
    .Range(3) = 1220
End With
End Sub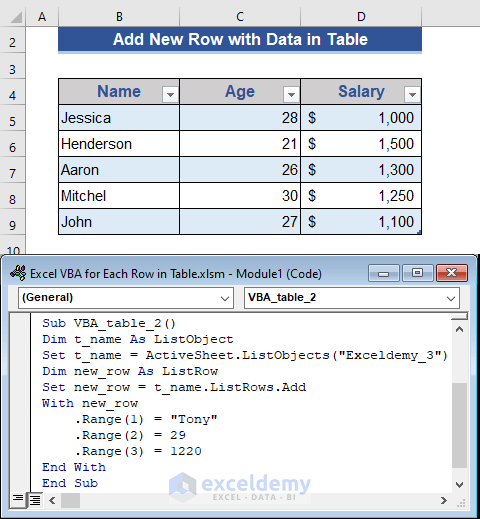
Step 2:
- Hit F5 to run the VBA code.

We can see that a new row with data has been included here.
Read More: Excel VBA: Insert Data into Table
3. Overwrite Previous Data in an Existing Row in Excel Table
This example will show how to overwrite data of an existing row of a table with Excel VBA.
Step 1:
- Enter the VBA command module by pressing Alt+F11.
- Put the following VBA code here.
Sub VBA_table_3()
Dim t_name As ListObject
Set t_name = ActiveSheet.ListObjects("Exceldemy_5")
With t_name.ListRows(3)
    .Range(1) = "Tony"
    .Range(2) = 29
    .Range(3) = 1220
End With
End Sub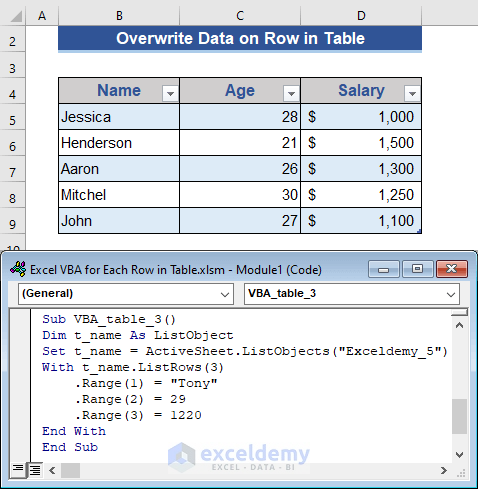
Step 2:
- Run the VBA code by pressing F5.

We successfully overwrote the data of Row 3 from table Exceldemy_5.
4. Delete a Row in a Table with Excel VBA Macro
From the previous examples, we learned how to add rows to a table. Now, we will see how to delete rows from the Excel table.
Step 1:
- Hit Alt+F11 keys to enter the VBA command module.
- Copy the VBA code below and paste it onto the VBA command module.
Sub VBA_table_4()
Dim t_name As ListObject
Set t_name = ActiveSheet.ListObjects("Exceldemy_6")
t_name.ListRows(2).Delete
End Sub
Step 2:
- Hit the F5 button to run the code.

Here, we can see that 2nd row of the table has been deleted.
5. Show Values of Each Cell in a Column in Excel Table
By this example, we can view each row of a certain column.
Step 1:
- Press Alt+F11 and enter the VBA command module.
- Write the following VBA code here.
Sub VBA_table_5()
Dim table_1 As ListObject
Dim row_1 As ListRow
Set table_1 = ActiveSheet.ListObjects("Exceldemy_7")
For Each row_1 In table_1.ListRows
MsgBox ("Age :" & Intersect(row_1.Range, table_1.ListColumns("Age").Range).Value)
Next row_1
End Sub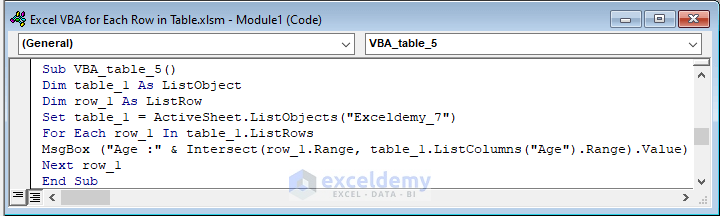
Step 2:
- Run the VBA code by pressing F5.
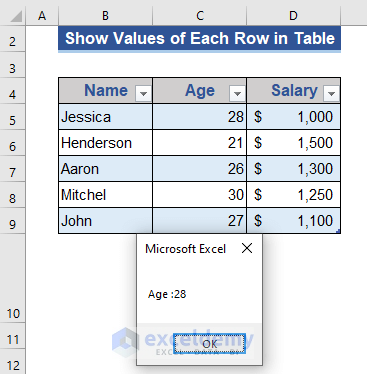
The first row of the Age column is shown in the result.
Step 3:
- Now, click OK repeatedly to view the rest of the results.

Results are shown sequentially.
Download Practice Workbook
Conclusion
In this article, we described how to evaluate each row in a table with Excel VBA. We also showed how to add the column to a table. I hope this will satisfy your needs.
Related Articles
- Reference Table Column by Name with VBA in Excel
- How to Use Table Reference with Excel VBA
- Excel VBA to Create Table from Range
- How to Compare Two Tables for Differences with Excel VBA
- How to Create a Table with Headers Using Excel VBA

