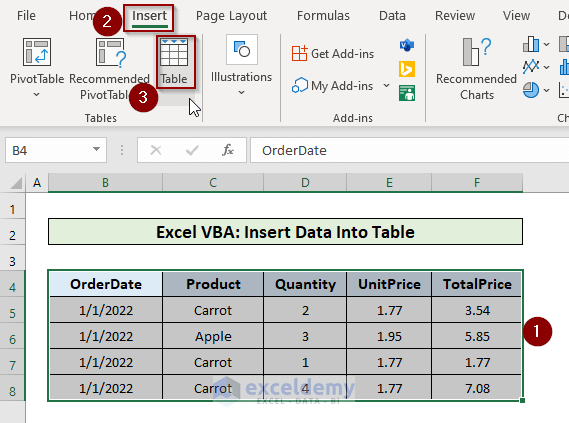
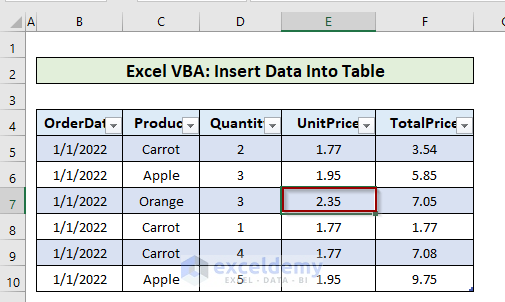
The sample sale list of a shop contains details like the order date, product name, quantity, unit price, and total price.

How to Create a Table in Excel
- Select the whole dataset.
- Go to the Insert tab from the Excel Ribbon.
- Click on the Table option.
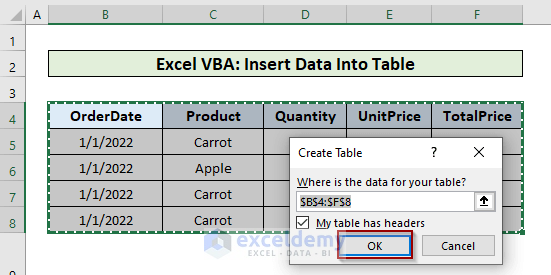
- Finally, click the OK button in the Create Table window.
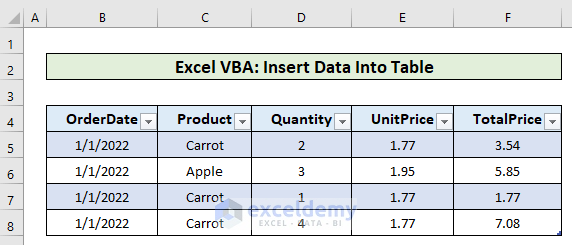
- The dataset has successfully been converted into an Excel table.
VBA functions and properties are used to insert data into an Excel table.
The following section describes how to open and write code in the visual basic editor.
Write Code in Visual Basic Editor
Go to the Developer tab from the Excel Ribbon.
- Click the Visual Basic option.

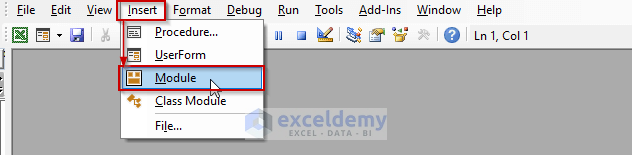
- In the Visual Basic for Applications window, click the Insert dropdown to select the New Module
Now that a new module is opened, insert the relevant code and press F5 to run.
Example 1 – Insert Data at the Last Row of a Table Using VBA in Excel
In this example, a VBA code is used to add a new row at the bottom of the table and then insert data into that.
Sub InsertDataIntoTable()
Dim tableName As ListObject
Set tableName = ActiveSheet.ListObjects("Table1")
Dim addedRow As ListRow
Set addedRow = tableName.ListRows.Add()
With addedRow
    .Range(1) = "1/1/2022"
    .Range(2) = "Apple"
    .Range(3) = 5
    .Range(4) = 1.77
End With
End Sub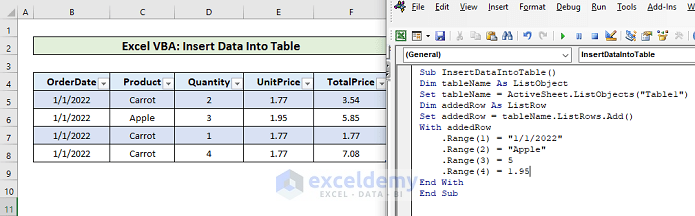
Press F5 to run the code.
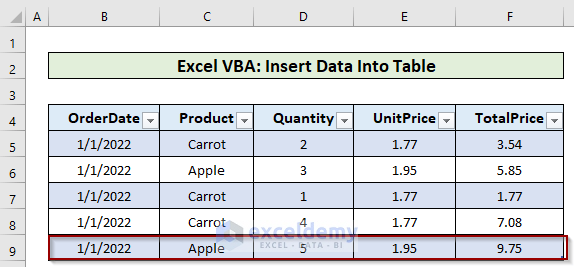
A new row of data has been inserted at the bottom of the existing table.
Code Explanation:
- The ListObjects object of VBA Excel is used to grab the table with its name.
- Each of the ListObject objects is a table on the worksheet. To get the table name, click on the table >> click on the Table Design tab in the Excel Ribbon.

- ListRows.AddMethod is used to add a new row in the table. This method takes two arguments: Position and AlwaysInsert.
By entering an integer number, the relative position of the newly added row in the table is specified.
In this example, the position argument has been left blank. As a result, a new row has been added at the bottom of the table.
- Finally, we set data in each of the cells of the newly added row.
- In this case, the data were .Range(1) = “1/1/2022” as OrderDate, .Range(2) = “Apple” as Product, .Range(3) = 5 as Quantity, .Range(4) = 1.77 as Unit Price.
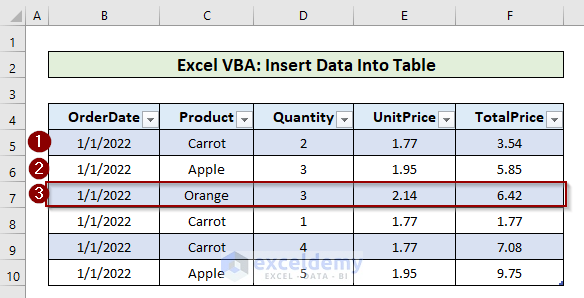
Example 2 – Run a VBA Code to Insert Data at a Specific Row of a Table in Excel
To add sale data for Orange in row number 3 of the existing table, copy and paste the following code into the visual code editor.
Sub InsertDataIntoTable()
Dim tableName As ListObject
Set tableName = ActiveSheet.ListObjects("Table1")
Dim addedRow As ListRow
Set addedRow = tableName.ListRows.Add(3)
With addedRow
    .Range(1) = "1/1/2022"
    .Range(2) = "Orange"
    .Range(3) = 3
    .Range(4) = 2.14
End With
End Sub
Running the code by pressing F5 inserted the sale data for Orange in the 3rd row relative to the table.
Read More: Excel VBA Code for Each Row in a Table
Method 3 – Insert and Overwrite Data into a Table Using VBA in Excel
ListObject.ListRows property is used instead of ListRows.Add property to overwrite existing data.
The ListObject.ListRows property also takes row number (Integer value) as its argument.
To change the unit price of the Orange from 2.14 to 2.35 copy and paste the following code below in the visual basic editor.
Sub InsertDataIntoTable()
Dim tableName As ListObject
Set tableName = ActiveSheet.ListObjects("Table1")
Dim addedRow As ListRow
Set addedRow = tableName.ListRows(3)
With addedRow
    .Range(1) = "1/1/2022"
    .Range(2) = "Orange"
    .Range(3) = 3
    .Range(4) = 2.35
End With
End Sub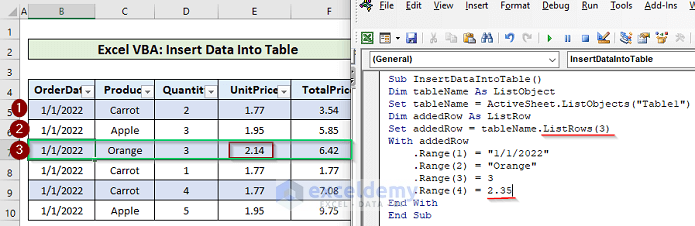
Run the code by pressing F5 and see the difference.
The code has changed only the unit price of the data at row number 3 relative to the table.
Method 4 – Run a VBA Code to Insert Data into an Excel Table Based on User Input
- Copy and paste the following code into the visual code editor.
Sub InsertDataIntoTable()
Dim tableName As ListObject
Dim A, B, C, D, tName  As String
    tName = Application.InputBox(Prompt:="Name of the Table: ", Type:=2)
    A = Application.InputBox(Prompt:="Order Date: ", Type:=2)
    B = Application.InputBox(Prompt:="Product Name: ", Type:=2)
    C = Application.InputBox(Prompt:="Quantity: ", Type:=2)
    D = Application.InputBox(Prompt:="Unit Price: ", Type:=2)
Set tableName = ActiveSheet.ListObjects(tName)
Dim addedRow As ListRow
Set addedRow = tableName.ListRows.Add()
With addedRow
    .Range(1) = A
    .Range(2) = B
    .Range(3) = C
    .Range(4) = D
End With
End Sub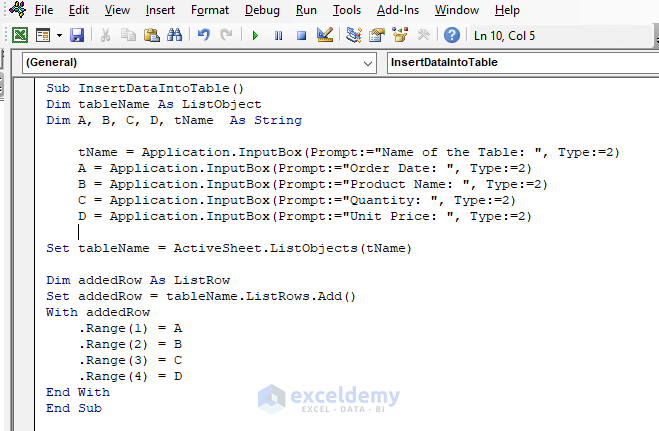
- Press F5 to run the code.
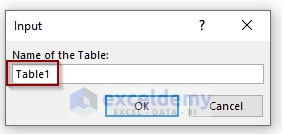
- Put the name of the table in the input box (Table1, in this example) and hit OK.
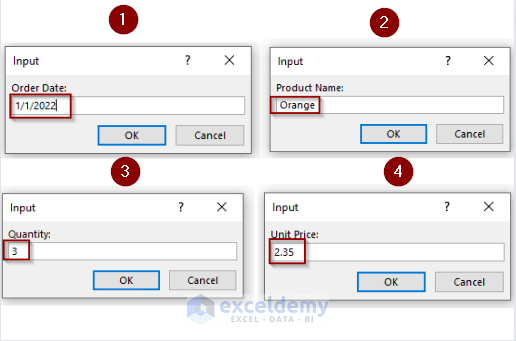
- Then put the values for Oder Date, Product Name, Quantity, and Unit Price in the input boxes that appeared sequentially. In this example, the values used are 1/1/2022, Orange, 3, and 35.
- As a result, a new row with the inserted data has been added at the bottom of the table.

Notes
When adding a new row with data using VBA code, the format, and formulas get carried to the new row automatically. In this example, the TotalPrice column outputs the product of the columns Quantity, and Unit Price. Only the Quantity and Unit Price values; the new row was inserted with the product of these two values in the Total Price column.
Download Practice Workbook
Conclusion
Now, we know how to insert data into an Excel table using VBA code. Hopefully, it would help you to use these methods more confidently. Any questions or suggestions don’t forget to put them in the comment box below.
Related Articles
- Reference Table Column by Name with VBA in Excel
- How to Create a Table with Headers Using Excel VBA
- How to Use Table Reference with Excel VBA
- Excel VBA to Create Table from Range


Good brother . help ful .
Nice Brother….
I appreciate your knowledge.
Actually my problem is different can you give me suggestions
Dear Ajij Nadaf,
We will love to give you suggestions. kindly share your problem.
Regards
ExcelDemy
hi and thank you so much
I run code no.4 but this error “subscript out of range” for this line:
Set tableName = ActiveSheet.ListObjects(tName)
Hello KAZEM,
Greetings! We appreciate you contacting us and leaving a comment on our Excel blog post with your query. We appreciate your interest and are available to help.
The “subscript out of range” error frequently happens when the active sheet does not contain the table with the specified name.
Please double-check the table name you entered into the InputBox when prompted by the tName variable. Verify again that the table name corresponds to the one on your worksheet.
Additionally, make sure the table is on the active sheet and not on another sheet. The table is assumed to be present by the code in the active sheet.
You can try the following troubleshooting steps if the problem continues:
You should be able to fix the “subscript out of range” error by making sure these things are correct.
I sincerely hope you find this useful.
Regards
Al Ikram Amit
Team ExcelDemy
What if we want to do the same thing, but with multiple rows of data, not 1?
Dear Ben,
Thank you for your comment. We really appreciate you for contacting with us.
In order to insert multiple rows of data, you can try the below VBA code.
Using the Array statement inside the VBA code, you can add as many rows you want inside your table.
Thanks & Regards
Wasim Akram
Team Exceldemy