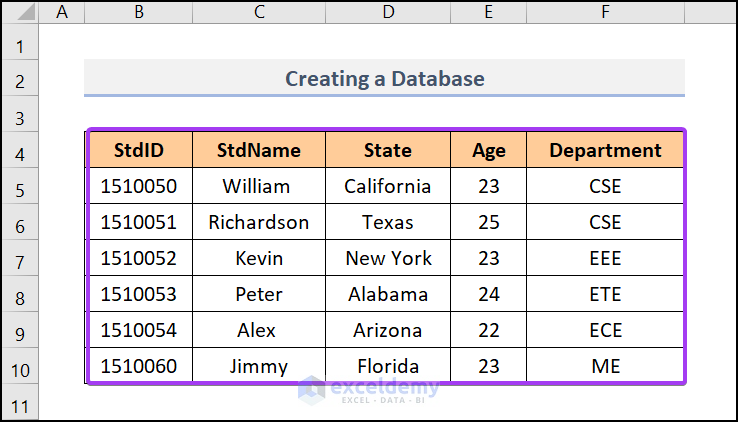
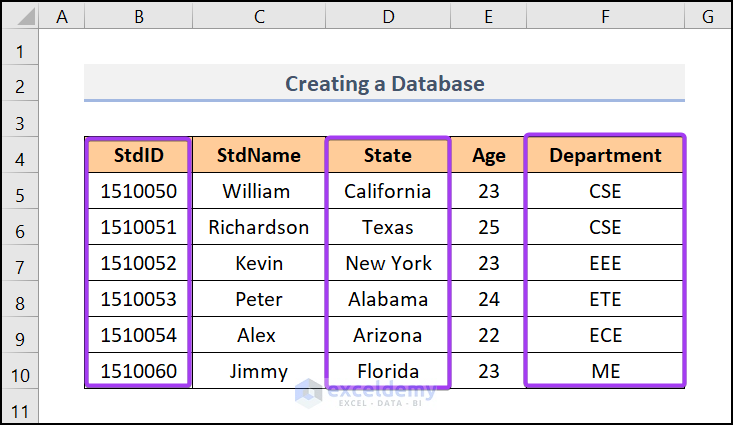
Step 1- Enter Data
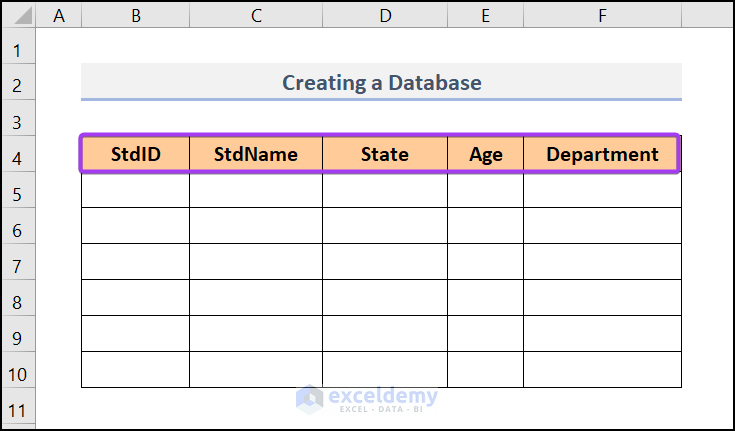
The fields in this database are StdID, StdName, State, Age, and Department.
Insert the data:
StdID: 1510060,
StdName: Jimmy,
State: Florida,
Student’s Age: 23,
Department: ME
Step 2 – Don’t Leave Any Row Blank
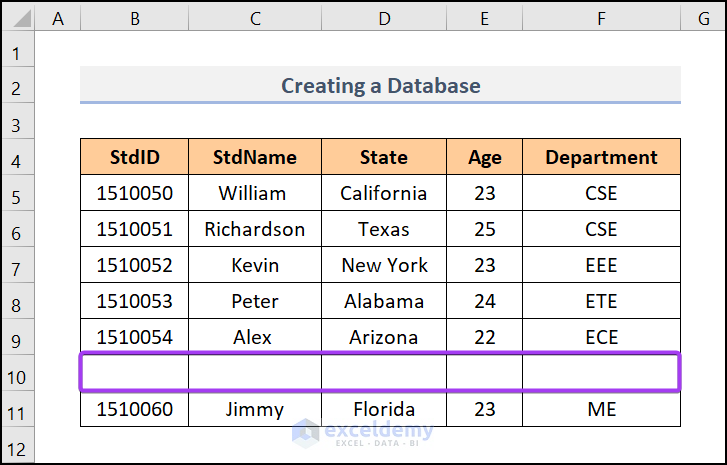
The database can have neither blank rows nor blank columns.
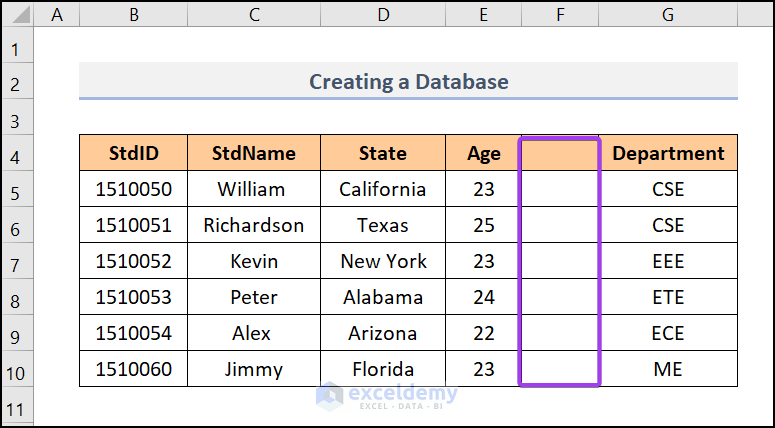
Step 3 – Fields and Records
All rows are Records.

All columns are Fields. The headings of the columns are Field Names.
Read More: How to Create Student Database in Excel
Step 4 – Create the Excel Table
- In the Insert tab, click Table.
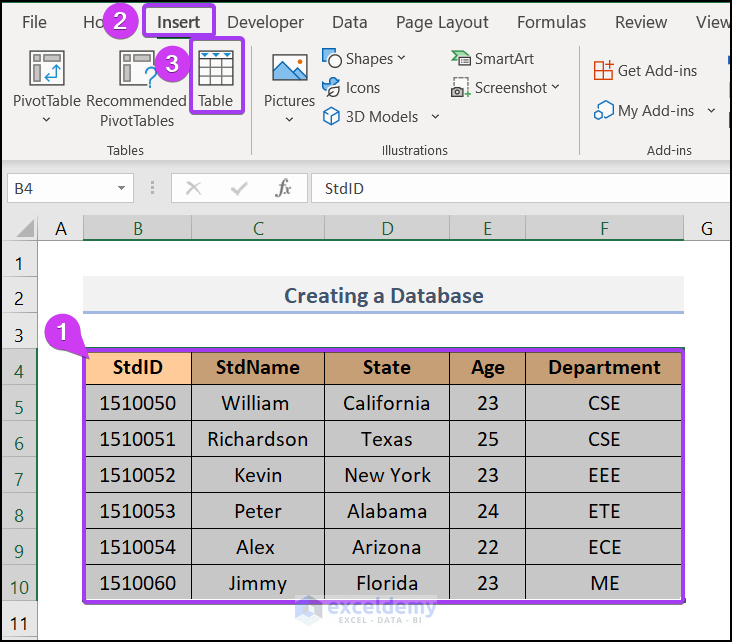
- In Create Table select $B$4:$F$10.
- Check My table has headers.
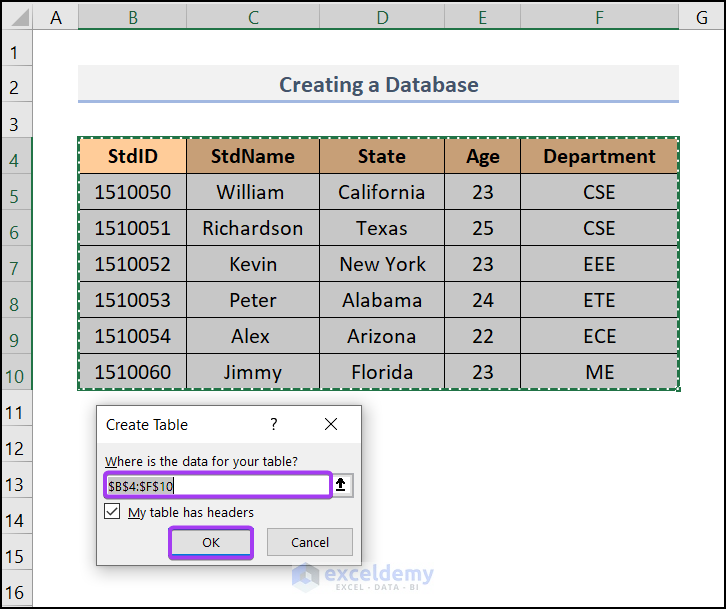
The table is created.
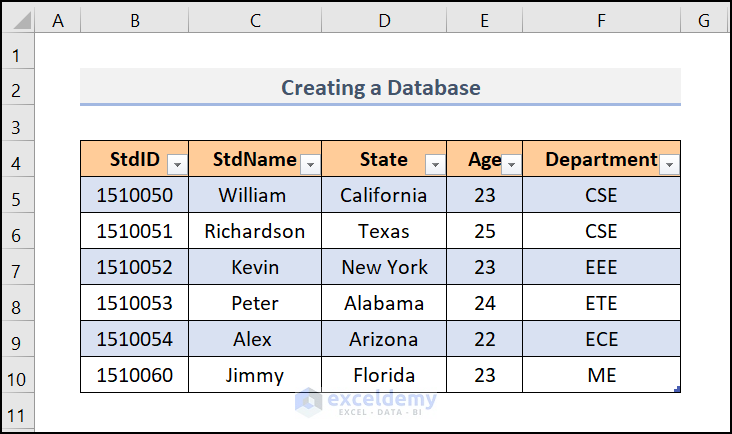
Filter data by clicking the drop-down arrow in the column you want to filter.
Step 5 – Use Database Tools
Database tools improve data analysis and interpretation.
Step 6 – Expand the Database
Add more fields and records to your database.
Step 7 – Complete Database Formatting
To format cells in a database, use Cell Styles, Format As Table or Format Cells. Custom Number Format is also an option.
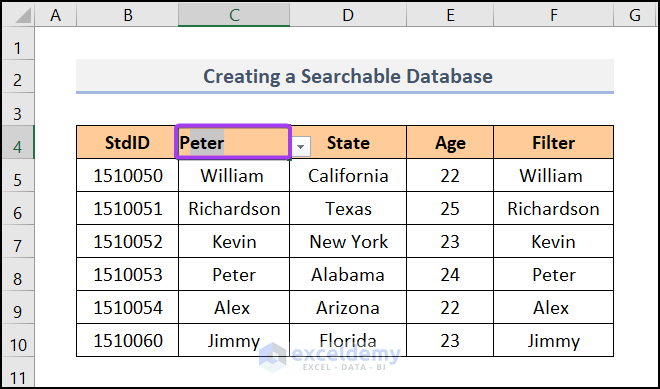
Create a Searchable Database in Excel
Steps:
- Select F5 and enter the following formula.
Formula Breakdown:
SEARCH function→ searches for a value.
ISNUMBER function→ returns TRUE if the output of the SEARCH is a number and False if it isn’t.
FILTER function→ filters the output value.
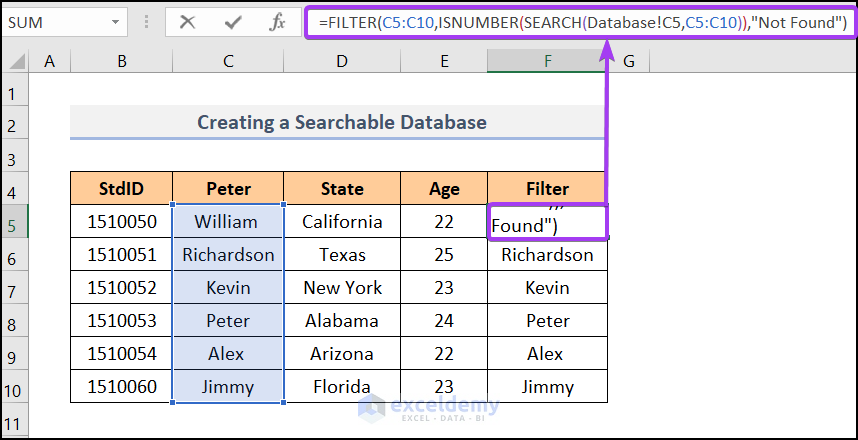
- Press ENTER and use the Fill Handle tool.
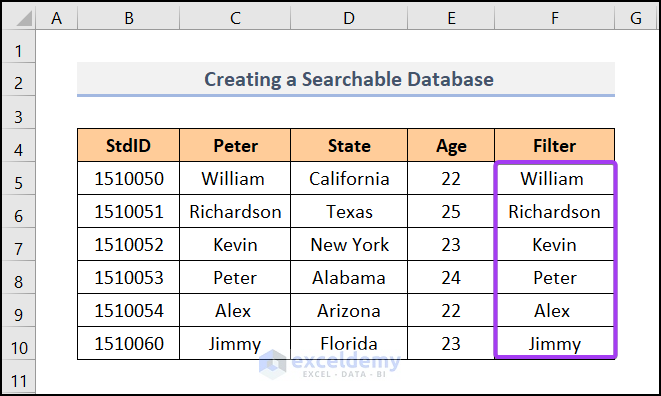
The output is displayed:
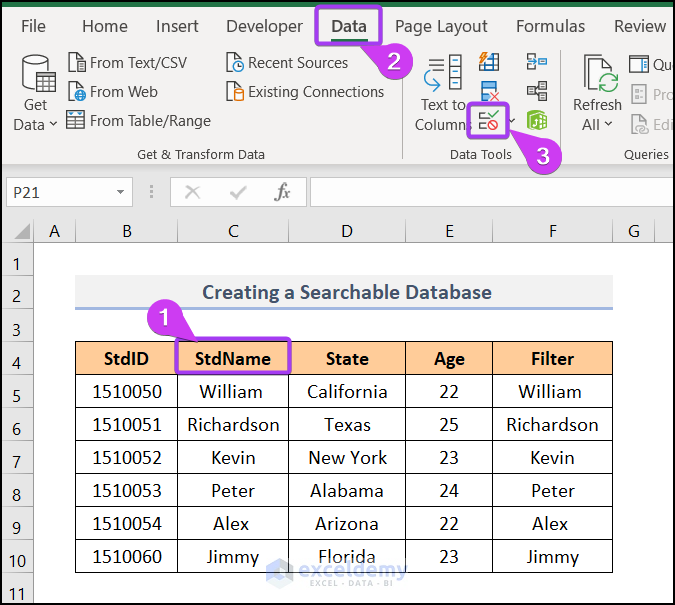
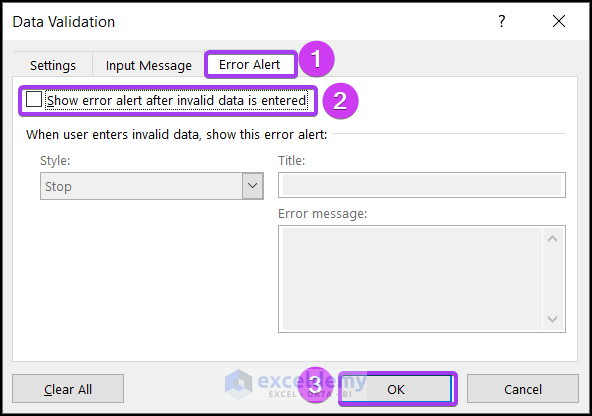
- Select C4, go to the Data tab >> Data tools >> Data Validation.
- In the Data Validation dialog box, select Settings >> List in the Allow section >> enter your Filtered cell in the Source box and enter the following formula:
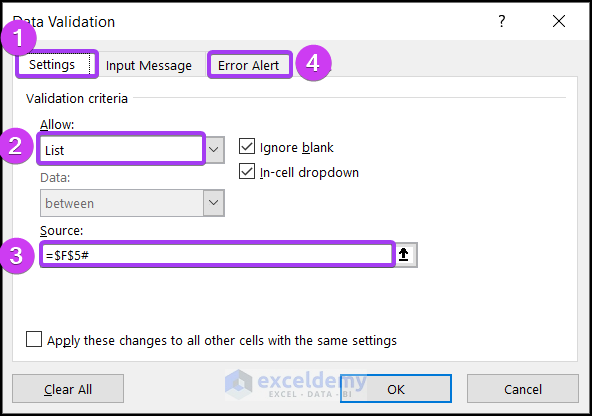
- In the Error Alert tab, uncheck the box Show error alert after invalid data is entered.
- Click OK.
A searchable database is created.
Read More: How to Create a Library Database in Excel
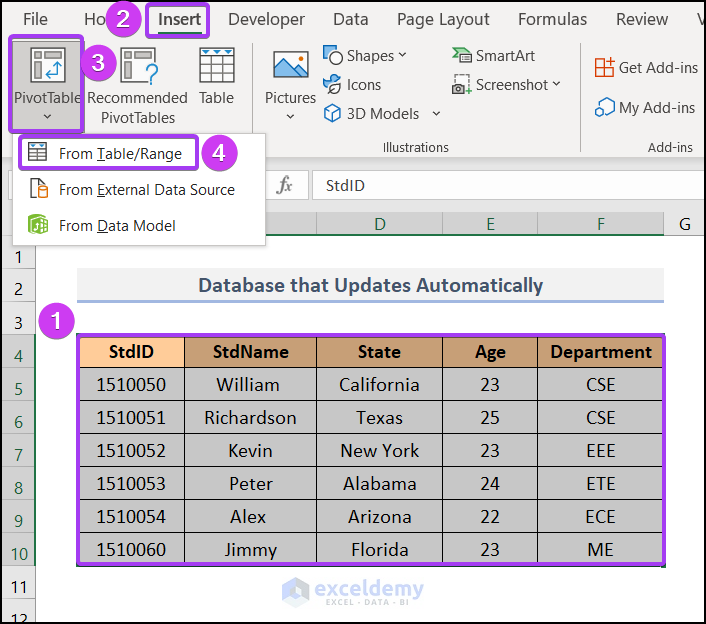
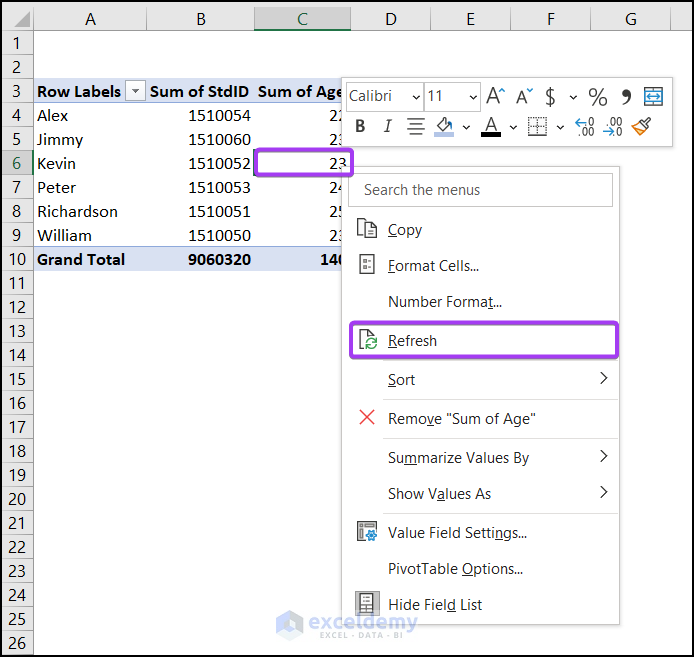
Create a Database that Updates Automatically in Excel
Steps:
- Select all data. Go to the Insert tab >> select PivotTable >> From Table/Range.
A Pivot Table will be created.
- Select the columns you want to update.
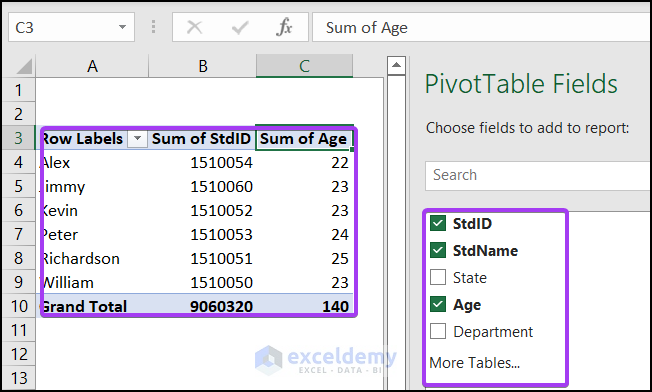
- Right-click any cell and Refresh. The Pivot Table will automatically update.
Read More: How to Create a Client Database in Excel
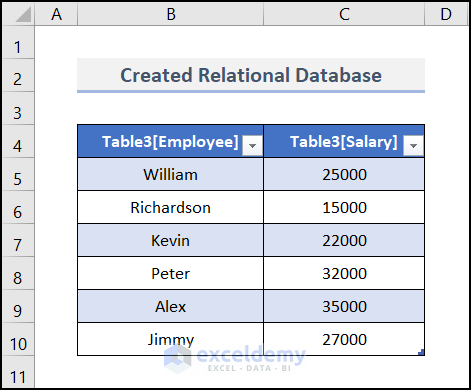
Create a Relational Database in Excel
Steps:
- Select the entire range Dataset2.

- Go to the Insert tab >> PivotTable >> From Table/Range.
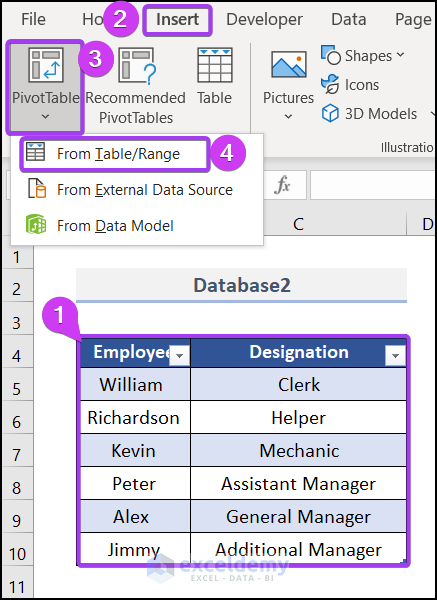
- Go to another sheet Dataset1, here, and create a table.
Note: You can use CTRL + T to create a table.
- Select the field you want to relate to in Pivot Table. Designation and Salary from two different worksheets were selected here.
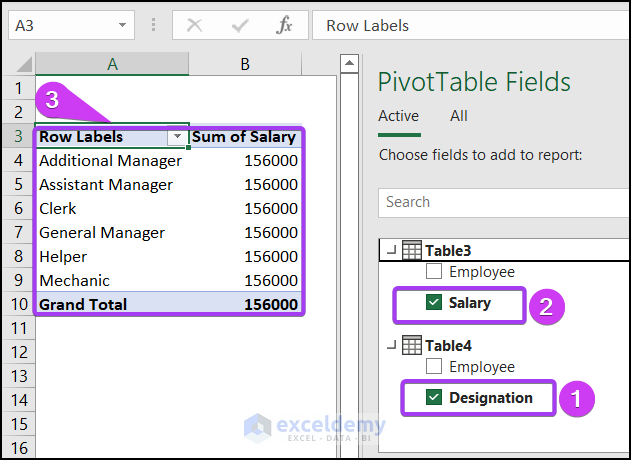
- In the PivotTable Fields, choose All and click CREATE.
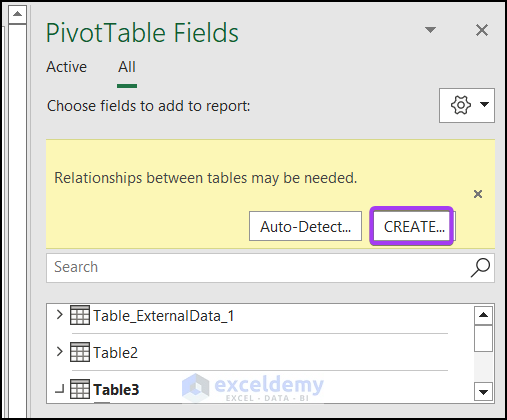
A relational database will be created.
Practice Section
Practice here.
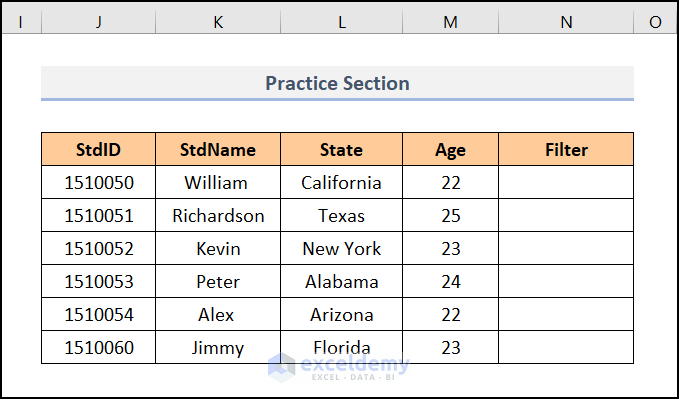
Download the following workbook and practice.
Related Articles
<< Go Back To Database in Excel | Learn Excel
Get FREE Advanced Excel Exercises with Solutions!

Hi Kawser
Ofcourse you can use excel as database, but the strength of joining 2 or more fields in separate tables is really in the database model. Also using 2 million rows in a table is to slow in excel.
But maybe i’m on the advantaged side, as i know both programs very well.
If you can prove that i’m wrong i’ll be very interested.
Nope, Jan. You’re absolutely right. Excel can be used as a database when your database is not heavy and need a small load of query on it.
Thank you so much Dr. Kawser!
Hai.
Very good, thanks
Hi Dr.Kawser,
We have a very large excel file We would like to treat it as a database by using queries.SO I read we need to connect MS access to treat Excel as DB to connect using DB connector.
Is there any alternative to not use MC Access.
hi I am trying to create a database with patients information where I can open a stats sheet and by entering maybe the patients registration number I can maybe press ctrl +m and pull the other information that pertains to the patient from the database can u help please
Hi Sherry,
If you can send us the resources, we can help you. Thanks.
I have raw data with titles and need to turn into a database. The data has patient addresses, emails and phone numbers. can you advise on how you assisted Sherry?
I will gladly help if I am able. [email protected] Thanks.
Thank very much
I need this note so that I can print it out
Hello Joseph Jabatie,
You are welcome. You can get the notes or Excel workbook from the Download section.
Regards
ExcelDemy