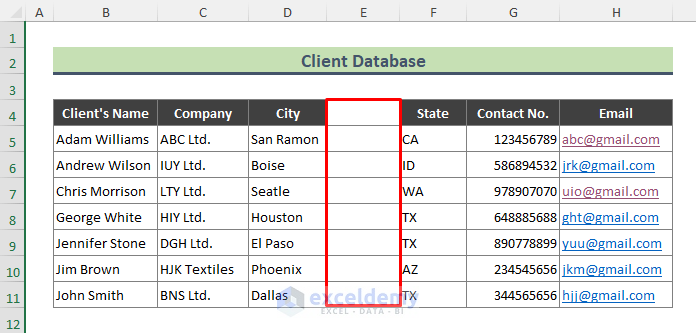
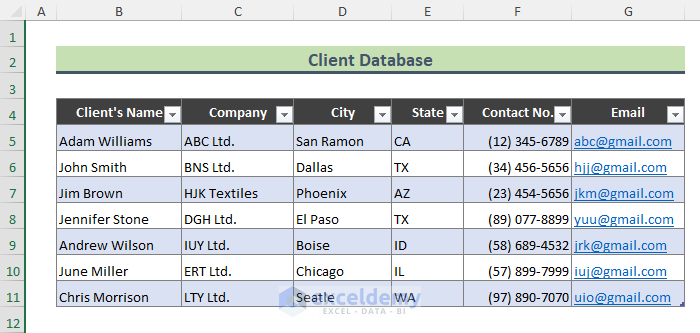
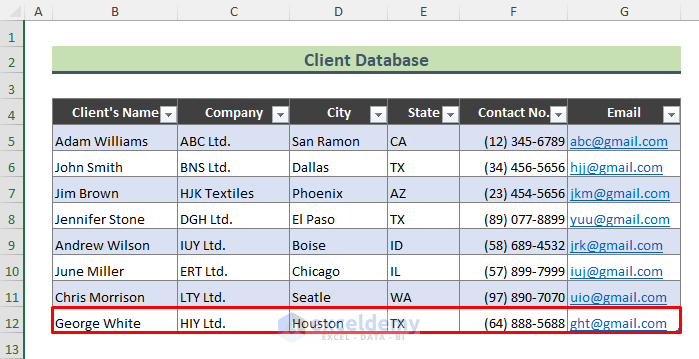
Step 1 – Create a Column or Field Headers
- Enter the name of the fields that you want to include in the client database. Here, Client’s Name, Company, City, State, Contact No., Email.
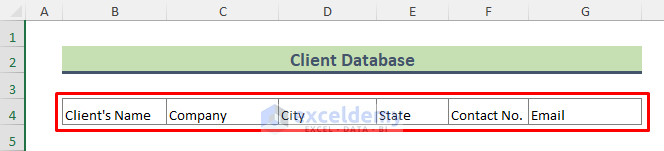
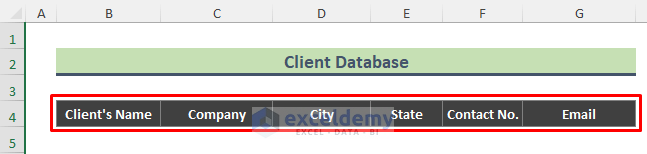
- Select the field names.
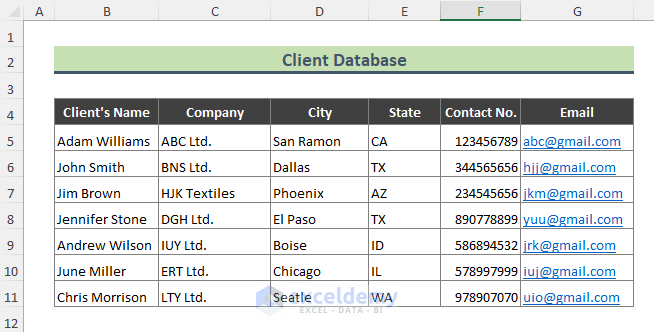
Step 2 – Enter Data into Rows/Records
- Enter the data into rows (7 records. here).
Note:
- Don’t leave any row empty.
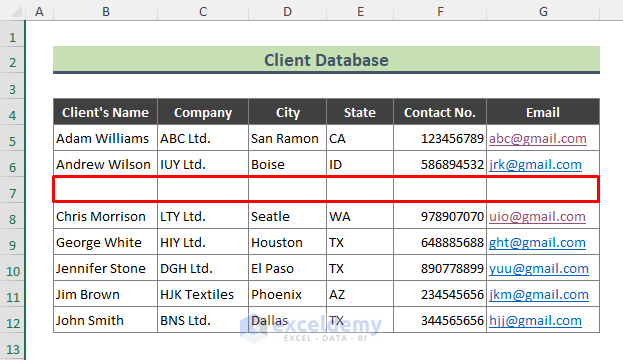
- Don’t keep an entire column empty.
Blank rows or columns will divide the dataset and disconnect information.
Read More: How to Create an Employee Database in Excel
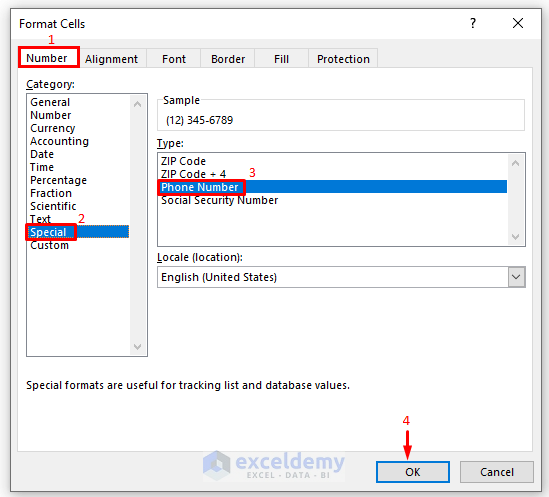
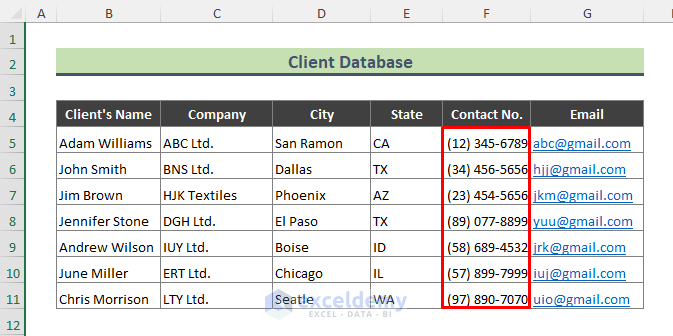
Step 3 – Format the Data in Records

- Press Ctrl + 1 or right-click the selection to open the Format Cells dialog box.
- In Number, select Special.
- Select Phone Number in Type and click OK.
- The Contact No. field is formatted. You also can format data using the Format Cells option.
Read More: How to Create Student Database in Excel
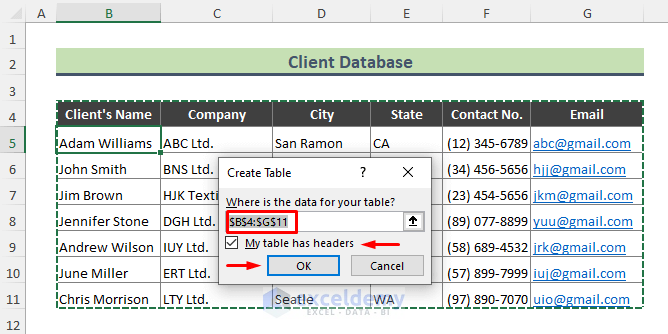
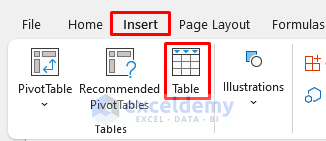
Step 4 – Create a Table from Client Data
- Select any cell in the data range and press Ctrl + T.
- In Create Table, enter the table range and check My table has headers.
- Click OK.
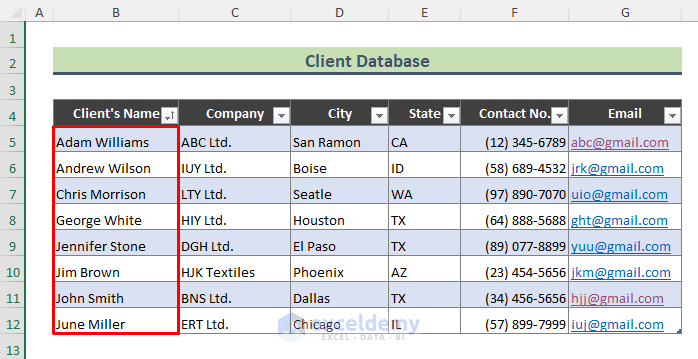
This is the output.
Note:
You can convert the data range into a table selecting: Insert > Table.
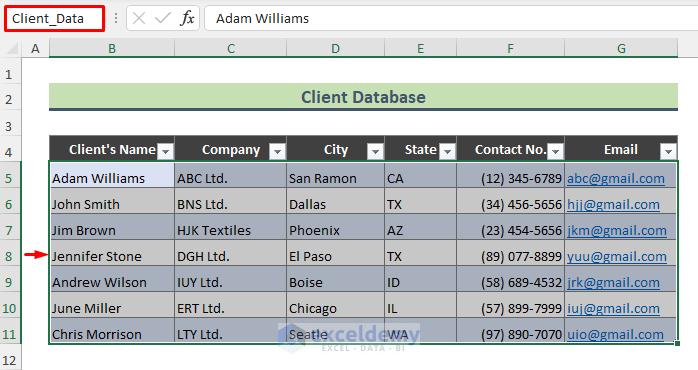
Step 5 – Naming the Table/Database
- Select the table and go to Name Box.
- Rename the table as Client_Data.
Step 6 – Add More Records to the Client Database
- Enter data in any cell of a new row, and press Enter.
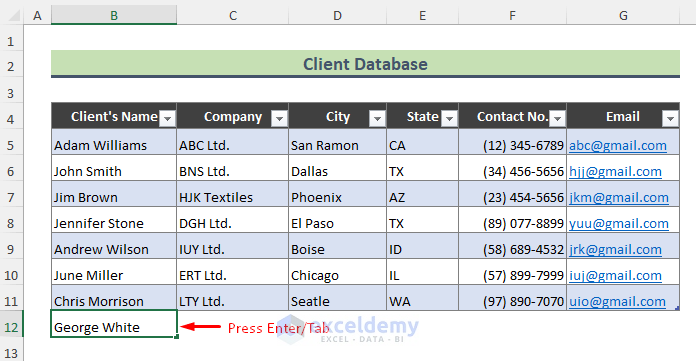
The row will automatically be included in the table/database.
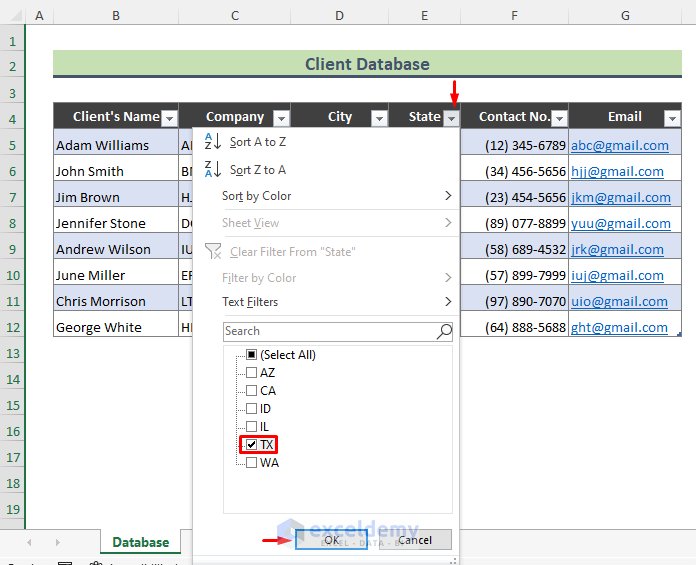
Appy the Excel Sort & Filter Options in Client a Database
Steps:
- To filter client data by TX: click the filtering drop-down menu in State.
- Check TX and click OK.
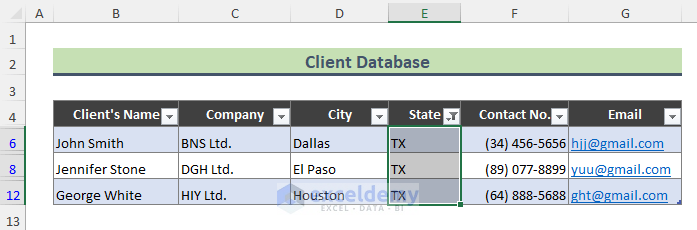
This is the output.
- To sort the Client’s Name field alphabetically: click the drop-down menu in Client’s Name.
- Click Sort A to Z.
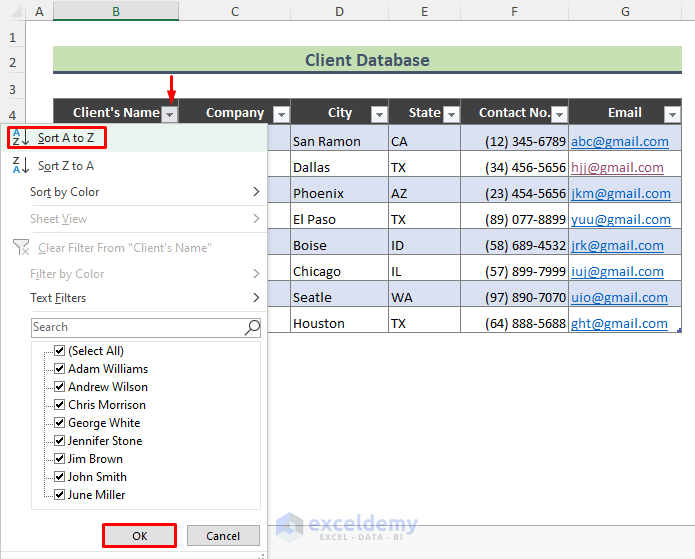
This is the output.
Download the practice workbook.
Related Articles
- How to Create a Relational Database in Excel
- How to Create a Recipe Database in Excel
- How to Create a Library Database in Excel
<< Go Back To Database in Excel | Learn Excel
Get FREE Advanced Excel Exercises with Solutions!
