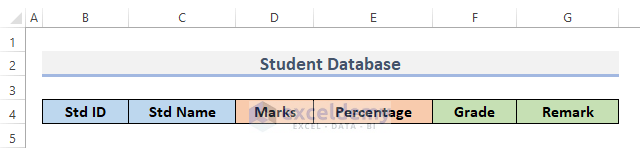
Step 1 – Enter Data Headers
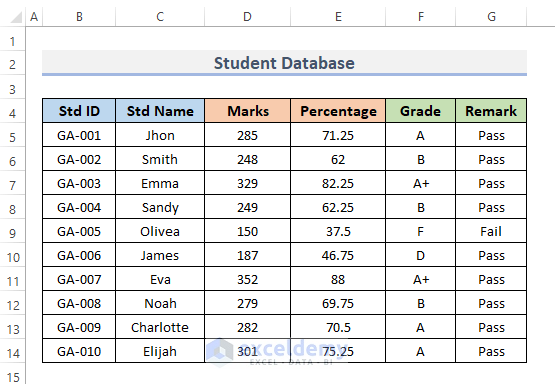
- Our database contains some Student ID as Std ID, Student Name as Std Name, total Marks, Percentage of those marks, Grade, and Remarks.
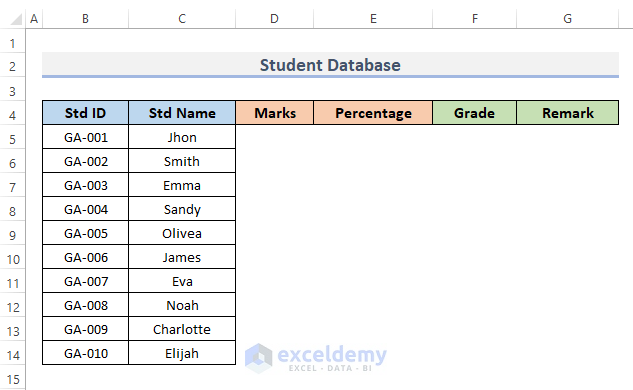
Step 2 – Input Student Data Correctly
- Enter the information of each student accurately. Don’t leave rows empty.
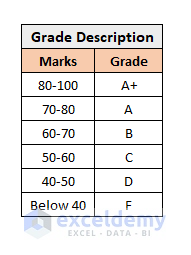
Step 3 – Make the Grade Distribution Description
- We put the mark range in one column and the grade for each mark range in another column to make it more understandable. Put this table somewhere on the side or in a different sheet.
Step 4 – Use the Excel SUM Function to Aggregate Total Marks for Each Student
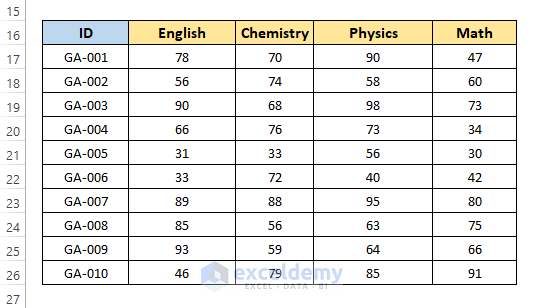
- We made another dataset which holds the Student ID, marks of English out of 100, marks of Chemistry out of 100, marks of Physics out of 100, and marks of Math out of 100.
- Select the cell where you want to put the formula combining the SUM function. We selected cell D5.
- Use the following formula.
=SUM(C17:F17)- Press Enter to see the result.
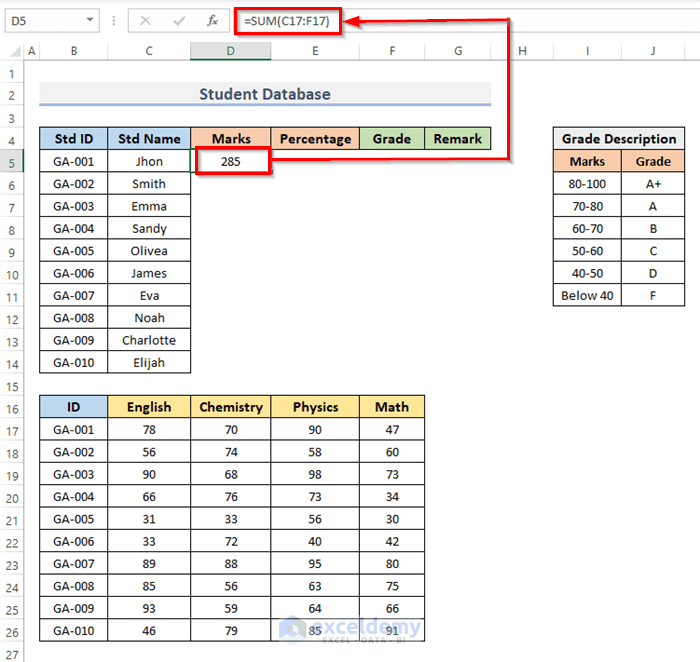
- Drag the Fill Handle down to duplicate the formula over the range or double-click on the Plus (+) symbol.
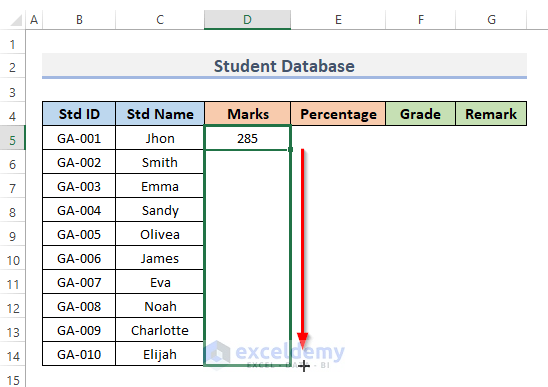
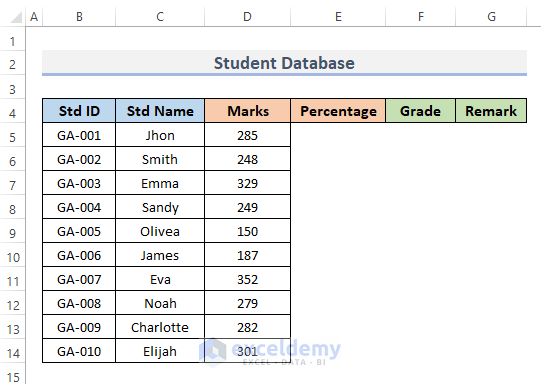
- We can see the total marks of each student in column D.
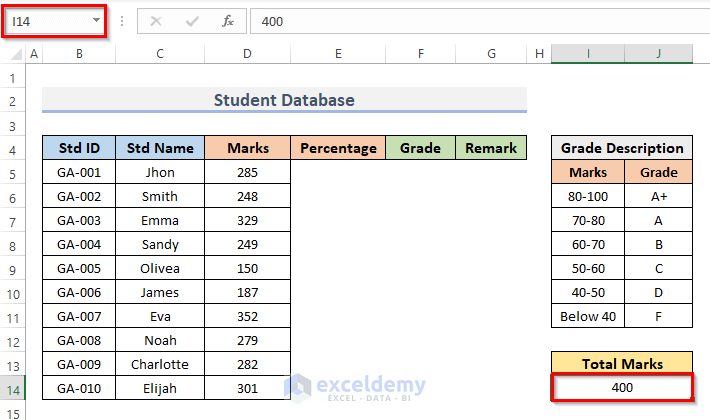
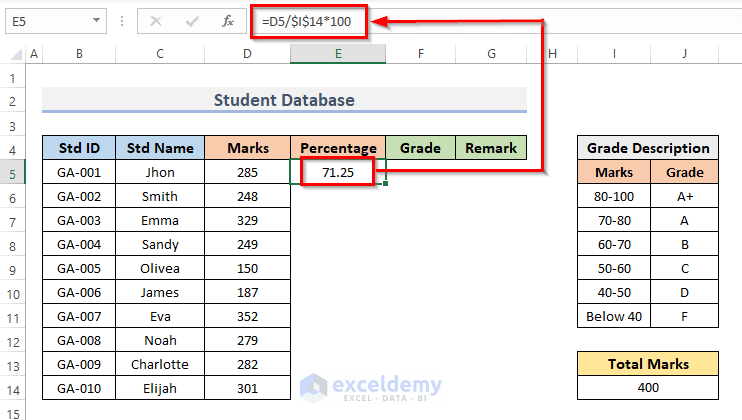
Step 5 – Find out the Percentage
- Put the total possible marks in a separate cell such as I14. This is the manual sum of the maximum values from each subject.
- Select cell E5 and use this formula.
=D5/$I$14*100- Press Enter.
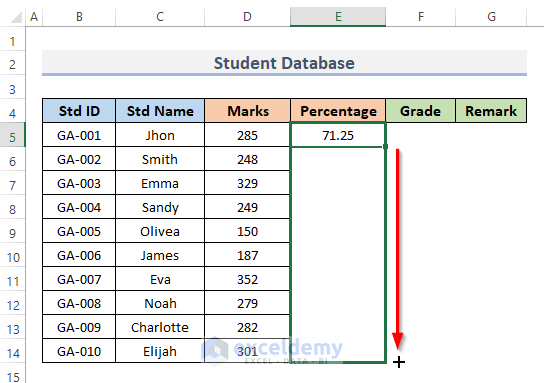
- AutoFill the column.
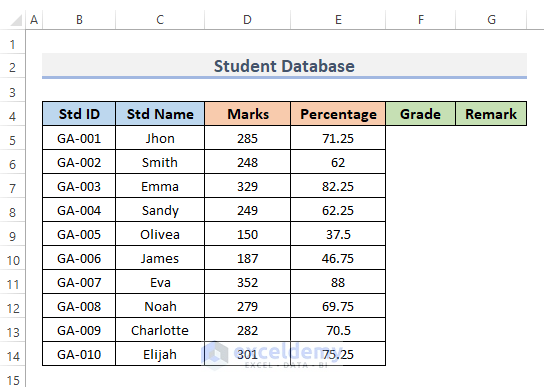
- We will find get percentage of marks of each student. This is a decimal number stored in the General format rather than Percentage.
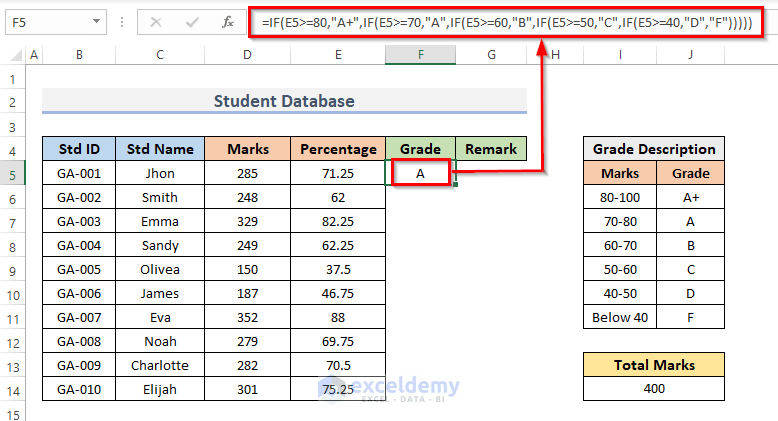
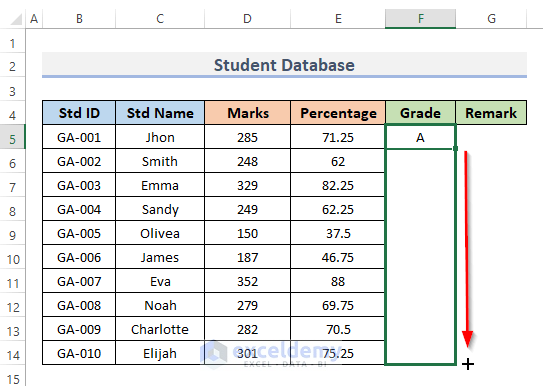
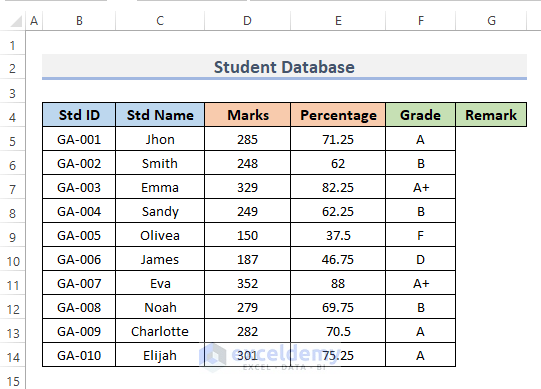
Step 6 – Get the Grade for Each Student
We will use the percentage to calculate the total grade.
- Choose the cell where you want to put the formula for finding the grade.
- Enter the following formula:
=IF(E5>=80,"A+",IF(E5>=70,"A",IF(E5>=60,"B",IF(E5>=50,"C",IF(E5>=40,"D","F")))))- Hit the Enter key.
- Drag the Fill Handle down or double-click on the Plus (+) icon.
- We will get all the grades of each student into the database.
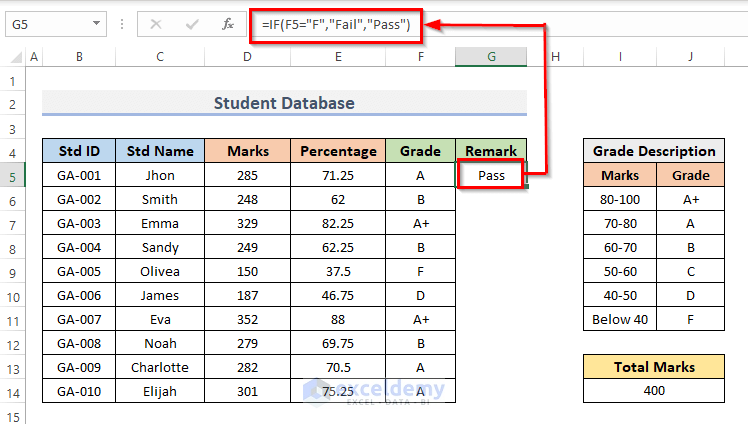
Step 7 – Obtain Remarks
- Select cell G5.
- Insert the formula below.
=IF(F5="F","Fail","Pass")- Hit Enter to see the result.
- Drag the Fill Handle down or double-click on the Plus (+) sign to AutoFill the range.
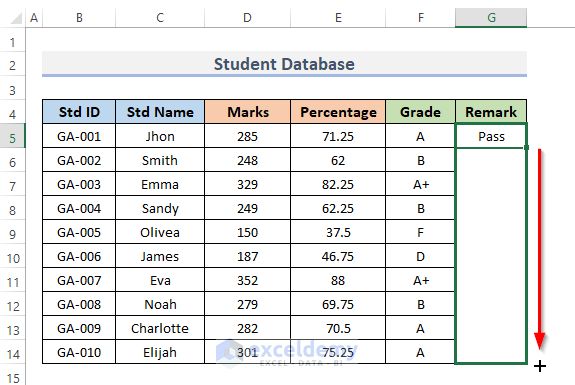
- We’ll get the remarks for each student.
Read More: How to Create a Recipe Database in Excel
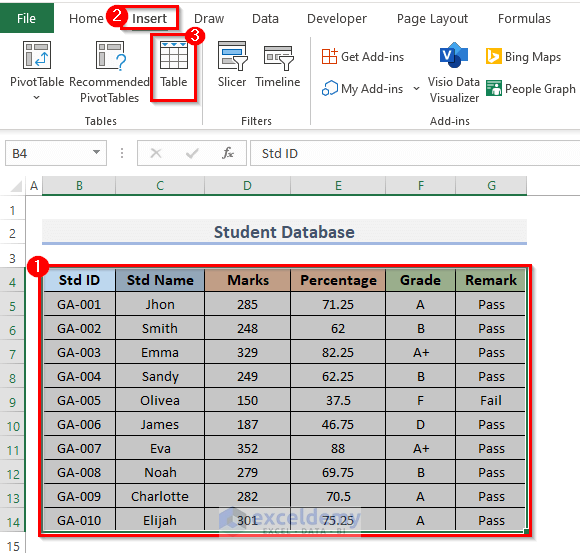
Step 8 – Create a Table
- Select the dataset.
- Go to the Insert tab from the ribbon.
- From the Tables category, click on Table.
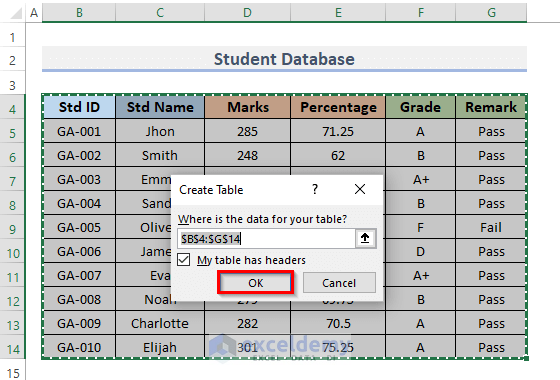
- This will open a Create Table dialog box.
- Check the My table has headers box.
- Click on the OK button.
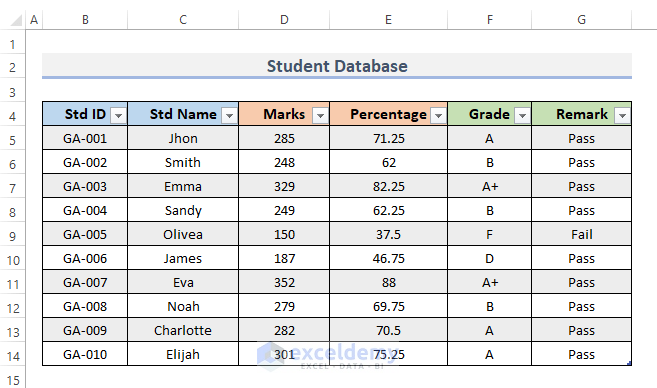
- This will create a table for your database.
- You can easily modify the table.
The Final Template of a Student Database in Excel
This is the final template of the student database.

Read More: How to Create a Library Database in Excel
Download the Template
Related Articles
- How to Create a Relational Database in Excel
- How to Create a Client Database in Excel
- How to Create an Employee Database in Excel
<< Go Back To Database in Excel | Learn Excel
Get FREE Advanced Excel Exercises with Solutions!

It is god advantage
Great post! The step-by-step guide was really helpful for me as I was trying to organize my student records. I especially appreciated the tips on using formulas for efficiency. Thank you for sharing!
Hello,
You are so welcome. Thanks for your feedback and appreciation. Glad to hear that the step by step guide is helpful to you. Keep learning Excel with ExcelDemy!
Regards
ExcelDemy