Watch Video – Create a Library Database in Excel
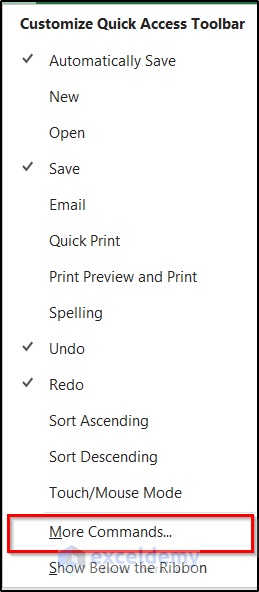
Step 1 – Enable Form in Quick Access Toolbar
- Go to the quick access toolbar on the top of the Excel tab and click on the downward-facing arrow at the end of it.

- Click on More Commands from the drop-down menu.
- The Excel Options box will open up. On the left of it, select Quick Access Toolbar.
- Select All Commands under the Choose commands from option.
- Choose Form as the command from the list below as shown in the figure below.
- Once selected, click on Add.
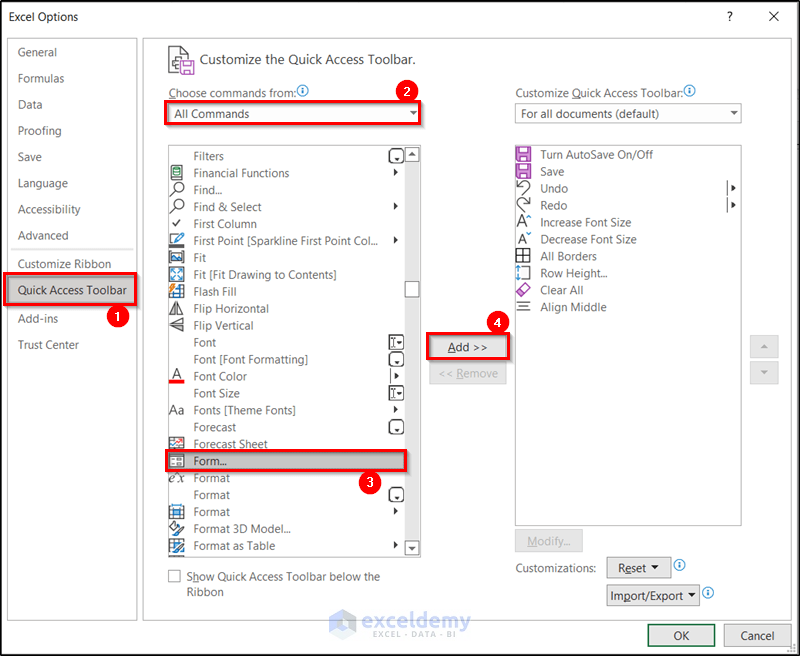
- Click on OK.
You will now have the form feature available in the quick access toolbar.

Step 2 – Create Headers for Dataset
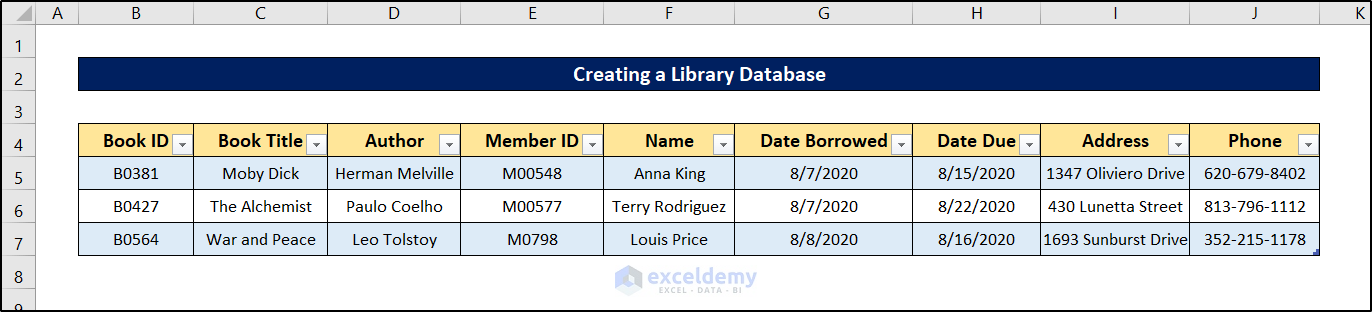
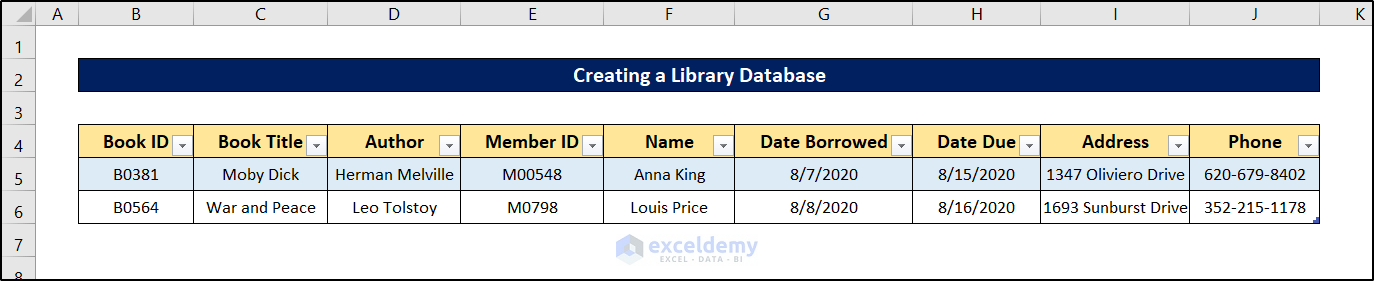
Once you have enabled the form, it is now time to set up the database. First, we have to create headers for our database. This is very important as it helps when you track down data later on in the database.
So enter suitable headers in this step to create your library database in Excel. We have selected the following headers for the demonstration.

Let’s make some modifications to make the headers stand out.

Step 3 – Input First Entry
Let’s enter the first row of data manually so that it becomes a chart that can be converted into a table later on.

Make sure that stuff like date or phone number is in your desired format, if you have one, in this step.
Step 4 – Insert Table
- Select a cell anywhere within the dataset.
- Go to the Insert tab on your ribbon.
- Select Table from the Tables group.
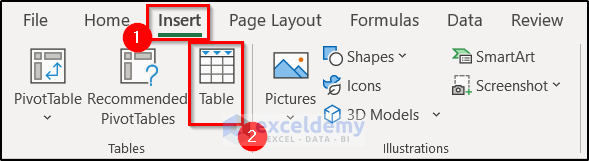
- In the Create Table box that appeared, make sure the My table has headers option is selected.
- Click OK.

The range will now be converted into a table with filter buttons.

Read More: How to Create a Relational Database in Excel
Step 5 – Create New Entries
- Select a cell anywhere in the table.
- Choose the form you have added on the quick access toolbar in the first step.
- A box will now open up with the name of the spreadsheet. To add a new entry, click on New.
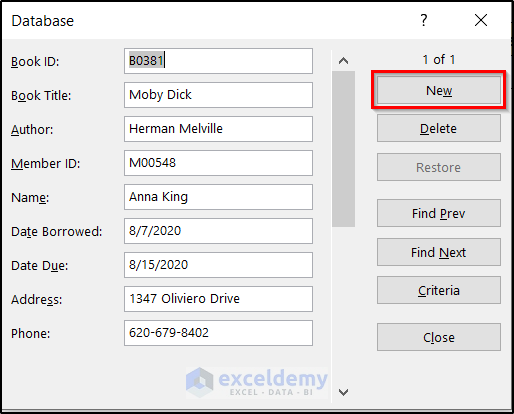
- Now you will be able to add new entries in the empty field.
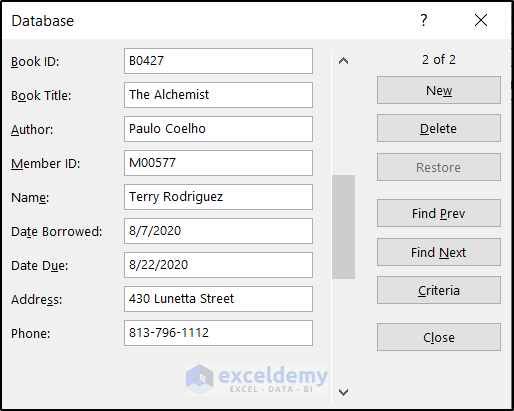
- You can click on New again to keep adding new entries to the table. For example, we have added another entry in the following figure.
- Once you are done entering, click Close. You will notice the database will get automatically updated.
If you want to update the database, later on, follow this step from the beginning.
Step 6 – Modify Existing Records
- Select any cell within the table.
- Click on the form on the quick access toolbar.
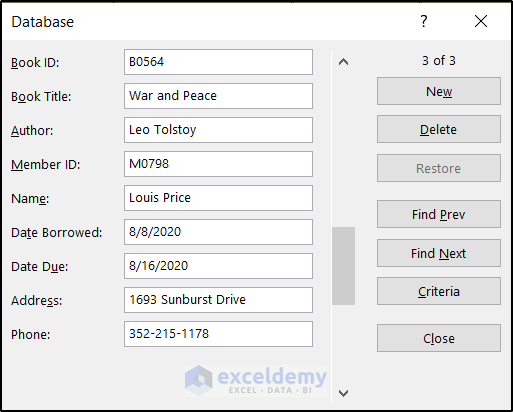
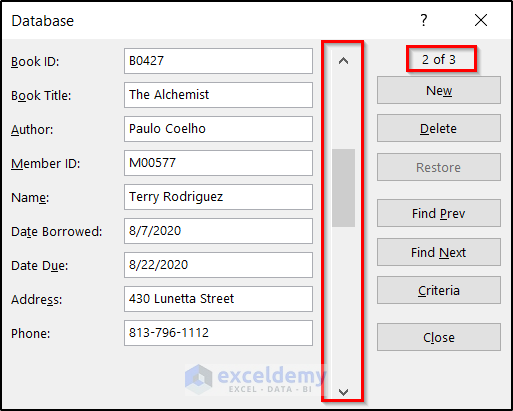
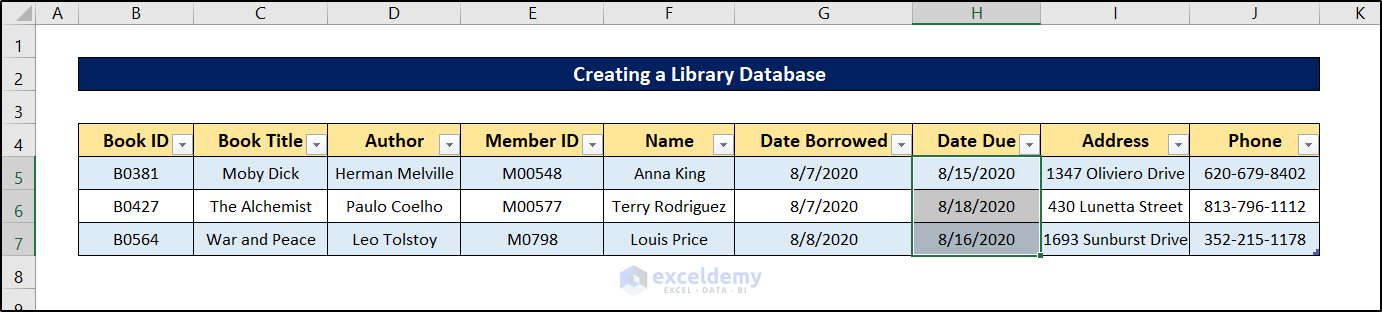
- Move up or down to go to the second entry in the form.
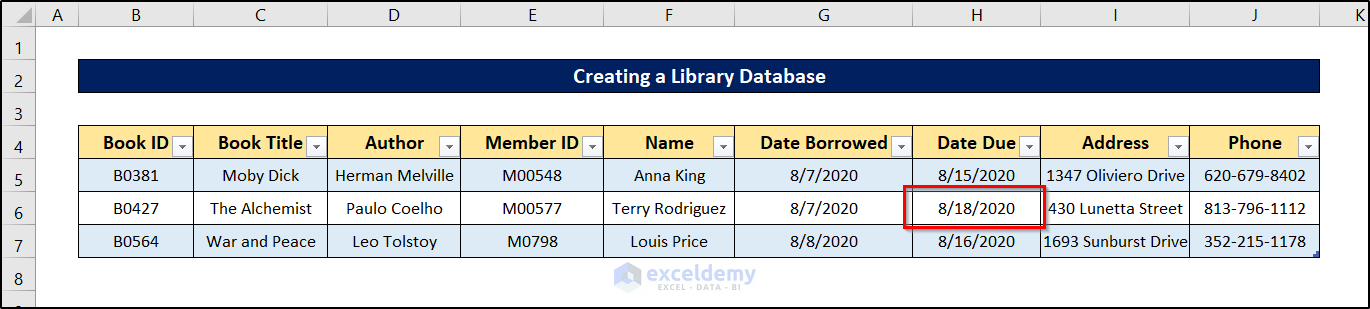
- Change your desired values. Here, we are changing the due date to 8/18/2020.
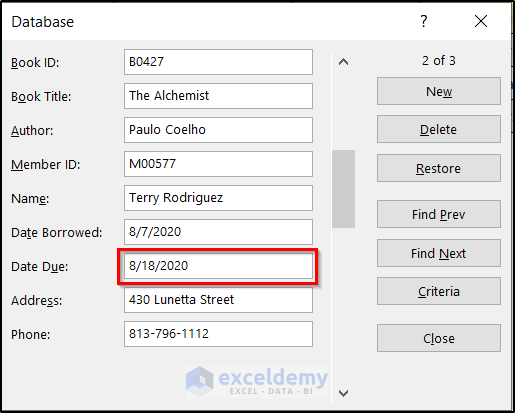
- Click on Close.
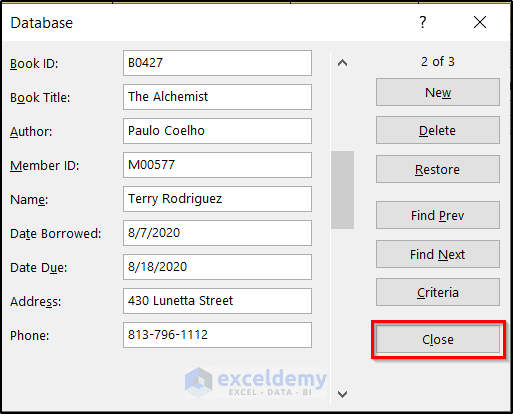
You will now see the due date of the second entry of the database will get updated.
Step 7 – Remove Existing Records
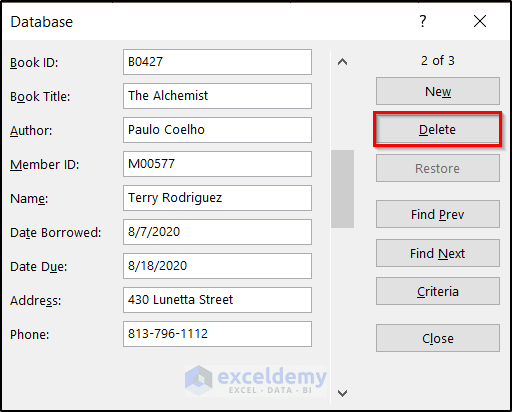
- Select a cell in the database.
- Choose the form you created from the quick access toolbar.
- Navigate to the entry you want to remove. As we are removing the second entry for the demonstration, we are choosing the second one.
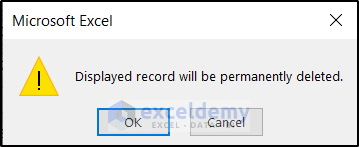
- Click on Delete.
- Select OK in the warning box.
You will see the (previously entered) second entry is not in the database anymore.
Step 8 – Restrict Particular Data Entries
Let’s assume in our library, everybody has to return books by August 2020. So no due date entries will be valid after 31st August.
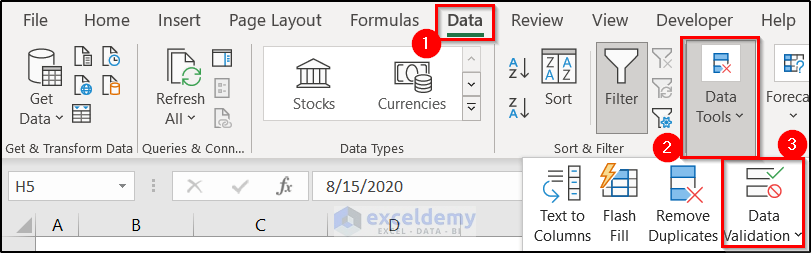
- Select the due date column.
- Go to the Data tab on your ribbon.
- Select Data Validation from the Data Tools group.
- Select the Settings tab on the Data Validation box.
- Choose Date in the Allow options.
- In the End date box, enter the value 8/30/2020.
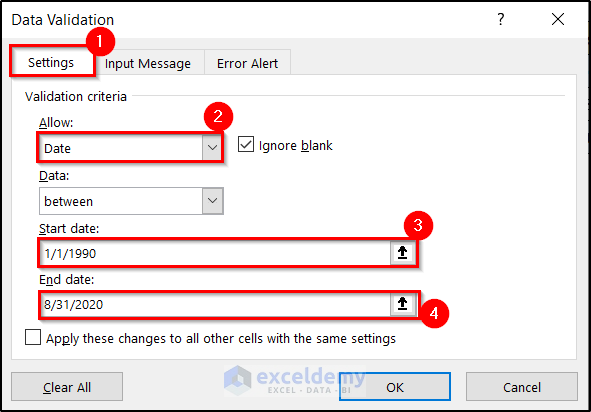
- Click on OK.
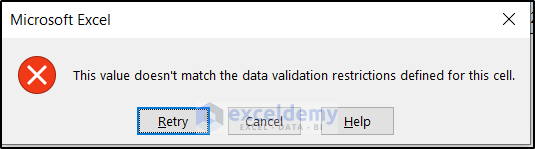
Now no due date can’t be entered that is past August 2020. If you try to add one, either through the form or manually, you will see the following error message.
You can download the workbook used for the demonstration from the link below.
Related Articles
- How to Create Student Database in Excel
- How to Create a Client Database in Excel
- How to Create an Employee Database in Excel
- How to Create a Recipe Database in Excel
<< Go Back To Database in Excel | Learn Excel
Get FREE Advanced Excel Exercises with Solutions!

Hi. I found your video interesting.
I want to create a library data base for media (books) connected to the names of approximately 800 users for a school. Is there a way to upload data about books and users from excel worksheets and have the form immediately updated without entering each book name etc and each user name individually?
I am trying to reset up a book library that has not been organised for many years. I have approximately 1 000 books.
I really need help.
I am from Johannesburg, South Africa.
Hello Errol,
Great to hear that you found the video interesting. You will need to use VBA code and several steps to create a form in Excel for a library database that updates with data from worksheets, step by step procedures:
Create the worksheets (Books and Users). Design the form with text boxes and buttons. Then run the VBA code.
Step 1: Organize Data in Worksheets
Books Worksheet: Include columns such as Book ID, Title, Author, Genre, etc.
Users Worksheet: Include columns such as User ID, Name, Class, etc.
Step 2: Create the Form
Insert Form Controls.
Use Insert > Form Controls to add text boxes and buttons for input.
Step 3: Add VBA Code to Handle Data
Open the VBA Editor (Alt + F11).
Insert a New Module and copy paste the following code.
Importing Books
Importing Users
Adding New Book
Adding New User
This setup will allow you to efficiently manage your library database, importing data from worksheets and updating forms without manual entry for each record.
Regards
ExcelDemy