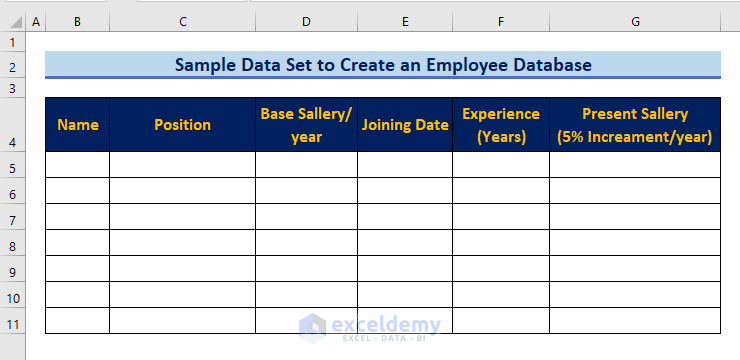
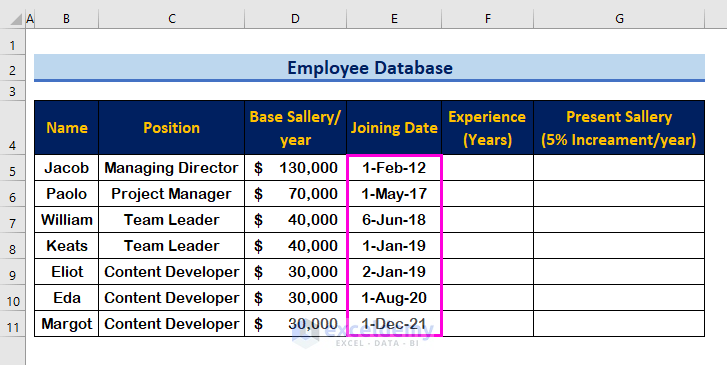
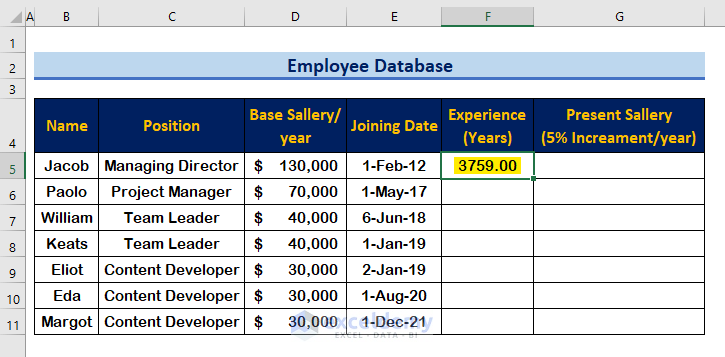
The following database showcases sample fields.
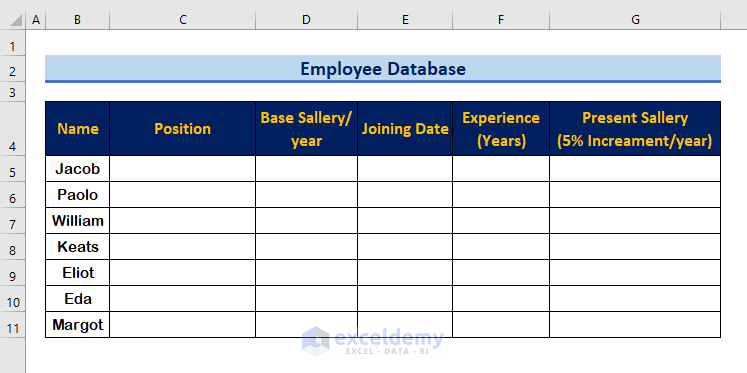
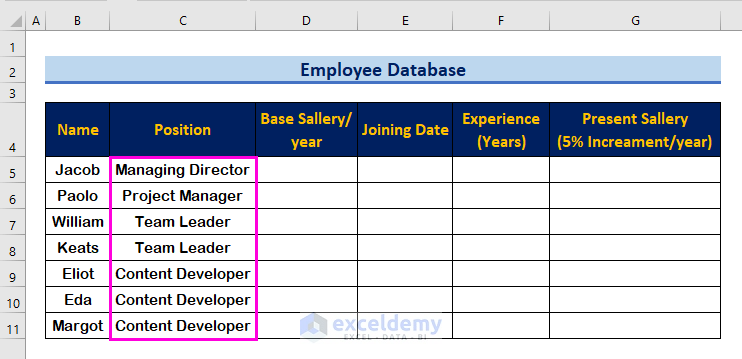
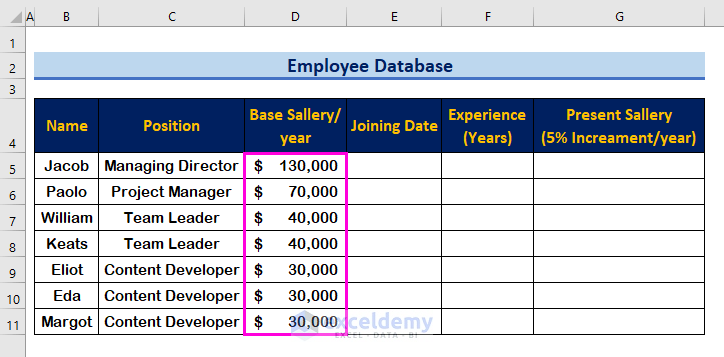
Step 1 – Insert Basic Details to Create an Employee Database
- Enter each employee’s name.
- Enter the employee’s position.
- Enter the base salary.
- Enter the joining date.
Step 2 – Use TODAY Function to Count Experience
- Enter the following formula.
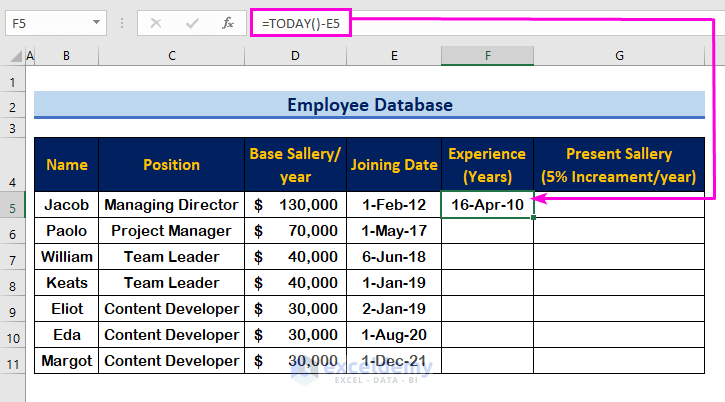
=TODAY()-E5)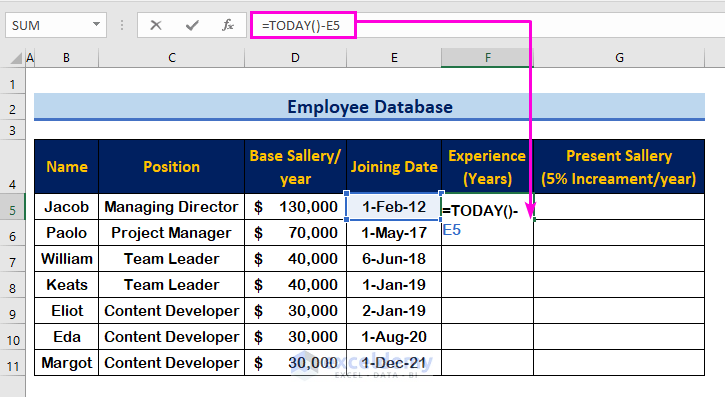
The result will be displayed in Date format.
- Select Number on the ribbon and change the format to Number.
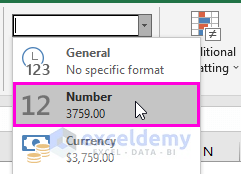
The result will be displayed in days.
- To convert days into years, enter the following formula.
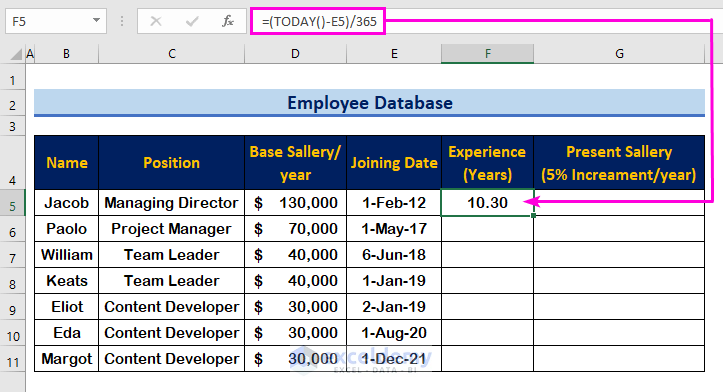
=(TODAY()-E5)/365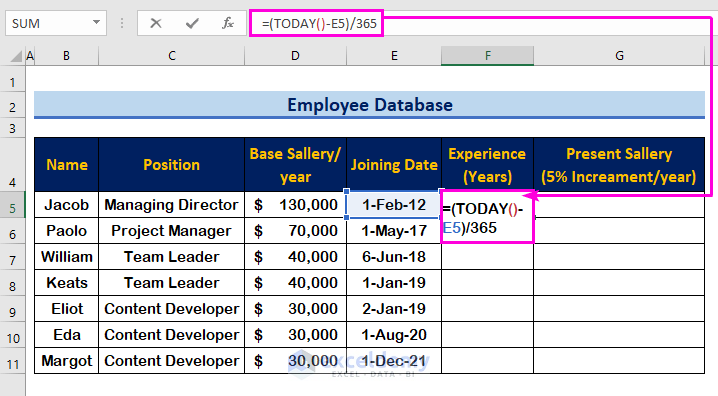
The result will be displayed in F5 as 10.30.
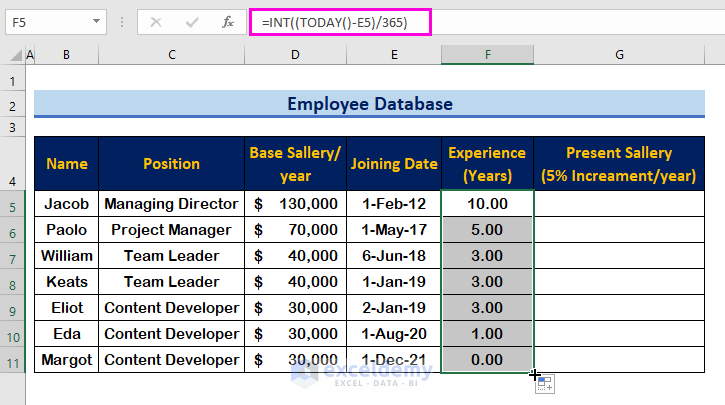
- To count the number of complete years, enter the following formula.
=INT((TODAY()-E5)/365)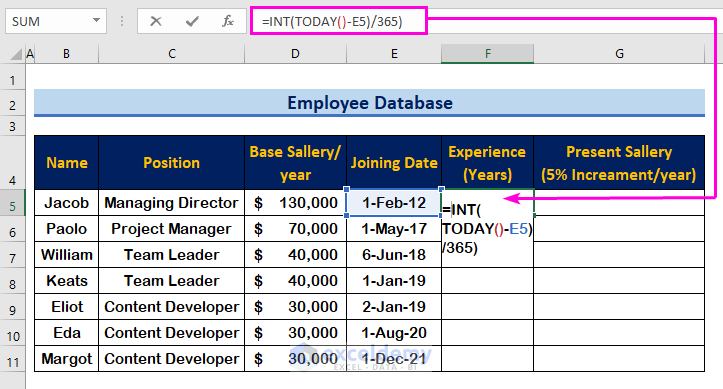
- Press Enter to see the result (10.00).

- Use the Fill Handle Tool across the cells you want to fill.
Step 3 – Insert a Formula to Calculate the Present Salary
- For a 5% increment per year, insert the following formula to calculate the present salary.
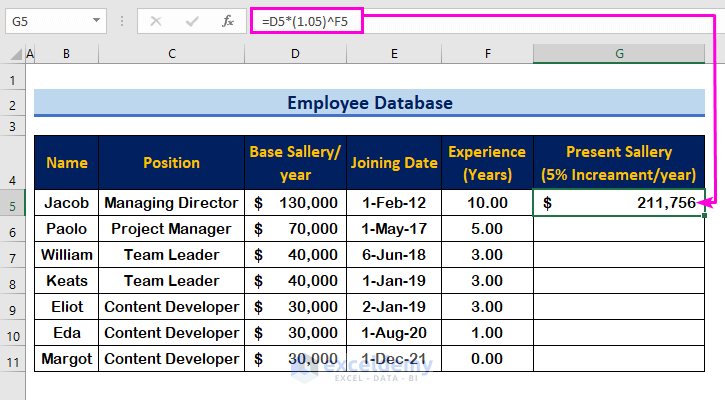
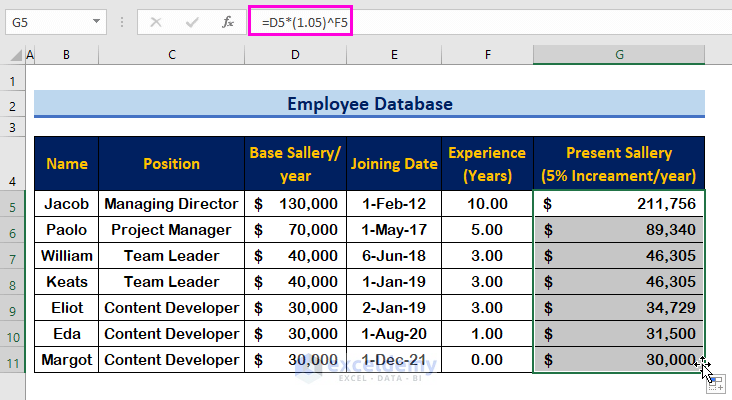
=D5*(1.05)^F5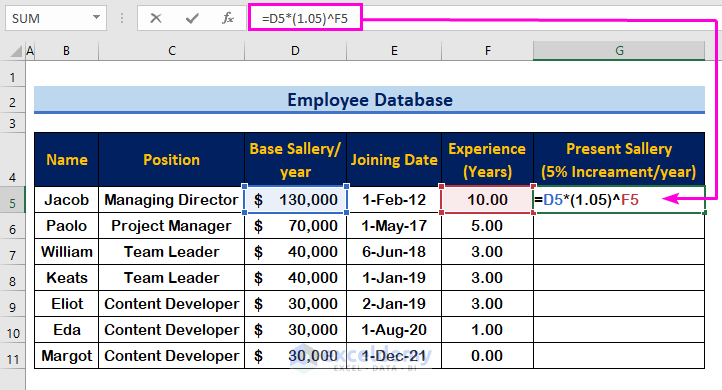
- Press Enter.
- Use the Fill Handle Tool across the cells you want to fill.
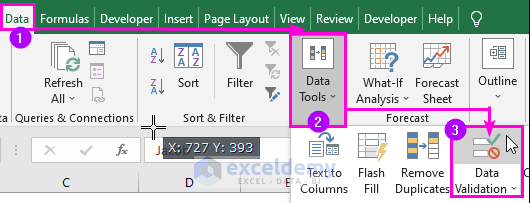
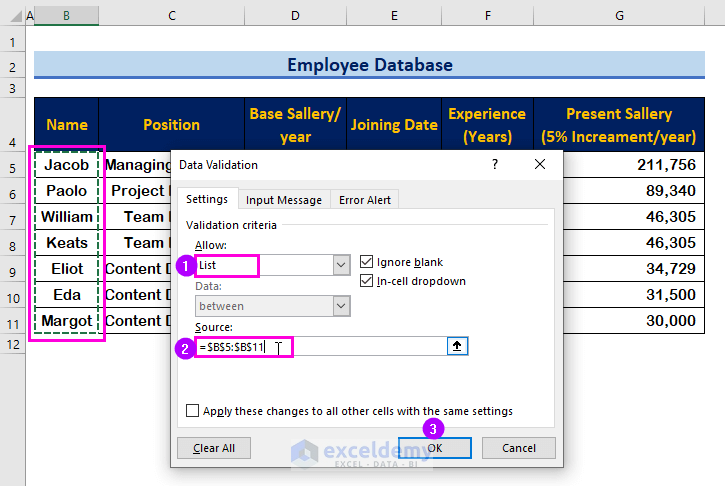
Step 4 – Insert a Drop-Down List
- Click Data.
- Select Data Tools.
- Click Data Validation.
- In the Allow box, choose List.
- To create a drop-down list with the employees’ names, select the range B5:B11.
- Click OK.
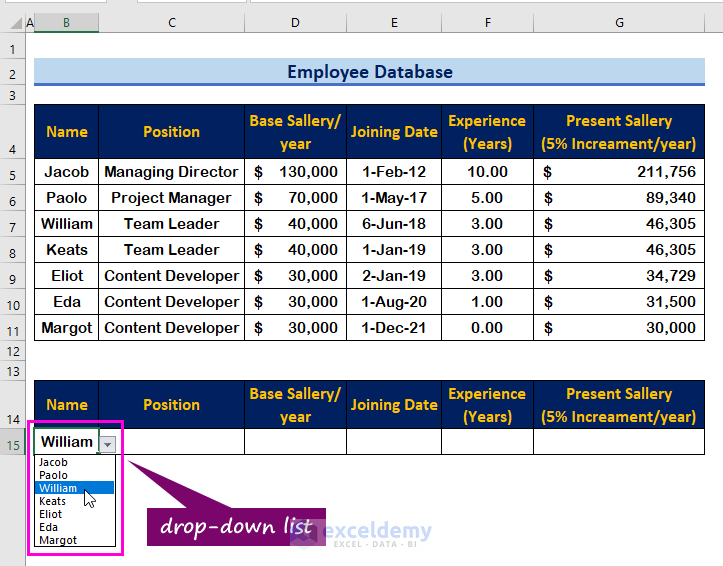
The drop-down list will be created.
Read More: How to Create Student Database in Excel
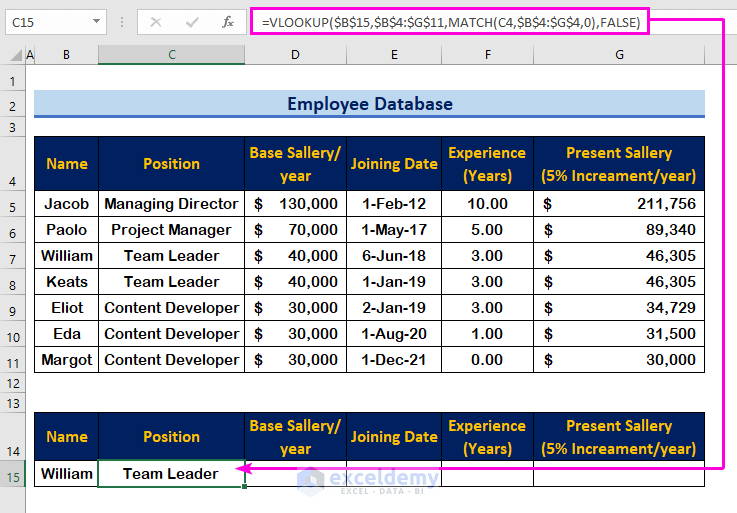
Step 5 – Apply the VLOOKUP Function to Create an Employee Database in Excel
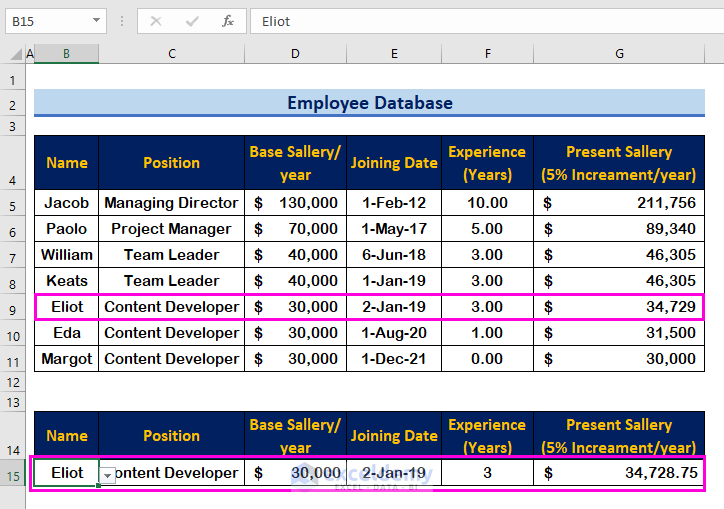
- Enter the following formula in C15 to find the position an employee in the drop-down list in B5.
=VLOOKUP($B$15,$B$4:$G$11,MATCH(C4,$B$4:$G$4,0),FALSE)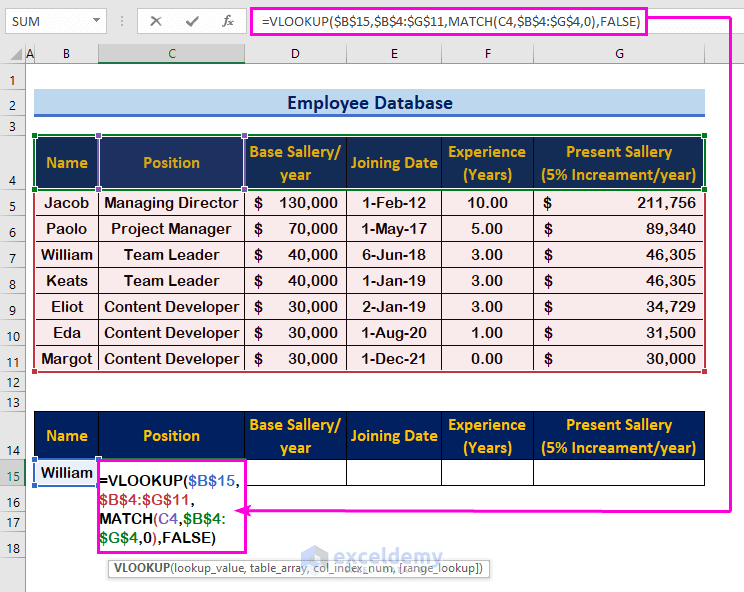
- Press Enter to see the position (Team Leader) of the employee (William).
- Drag the AutoFill Tool from the left to the right to fill the cells.
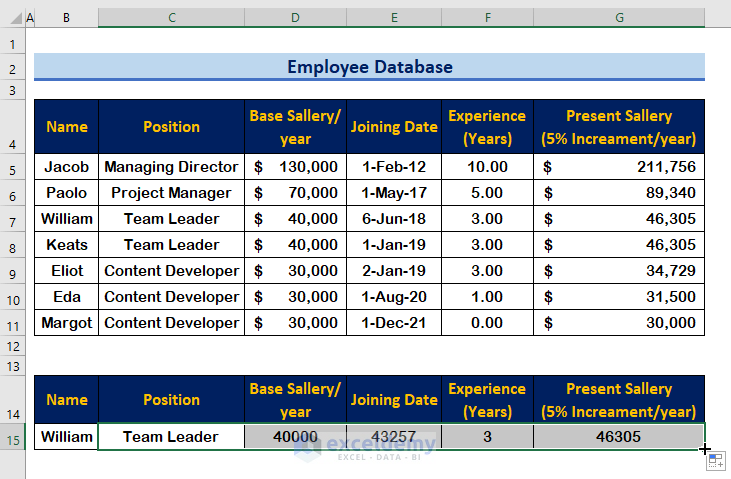
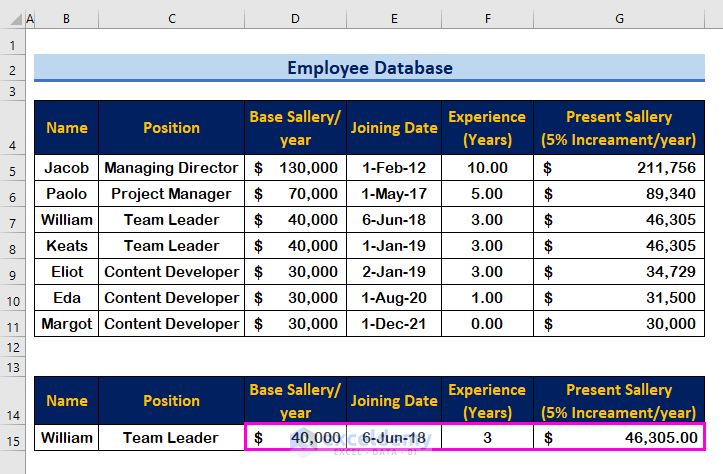
- Select currency ($) and date format.
- Choose an employee’s name from the drop-down list.
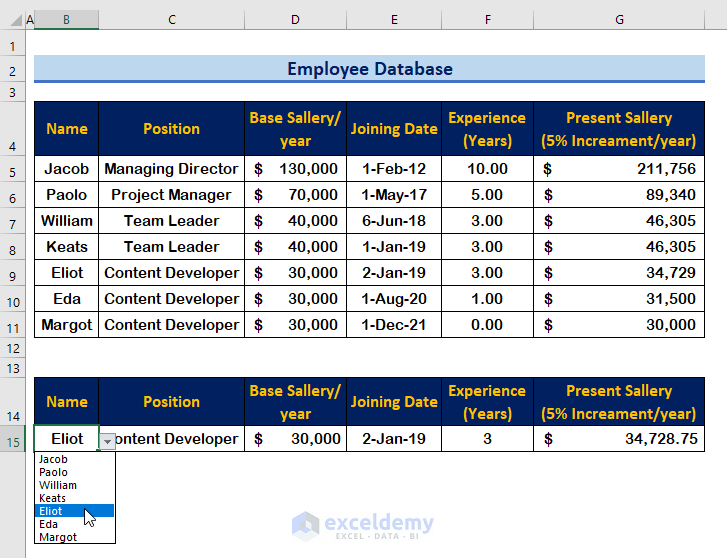
All fields (i.e., positions, salaries, and experiences) change, matching the employee’s name.
Read More: How to Create a Recipe Database in Excel
Download Practice Workbook
Download this practice workbook to exercise.
Related Articles
- How to Create a Relational Database in Excel
- How to Create a Library Database in Excel
- How to Create a Client Database in Excel
<< Go Back To Database in Excel | Learn Excel
Get FREE Advanced Excel Exercises with Solutions!
