What Is a Data Entry Form in Excel?
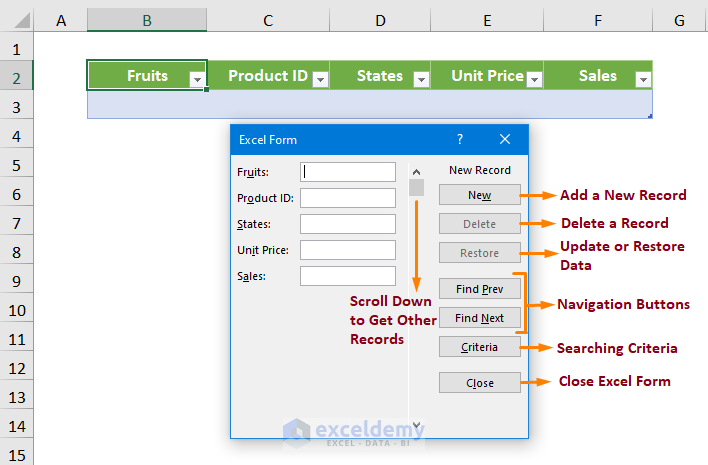
An Excel Data Form is a handy tool that simplifies data entry by allowing you to input one complete record at a time, without the need to scroll horizontally between columns. The below screenshot represents the interface of the Excel Form.
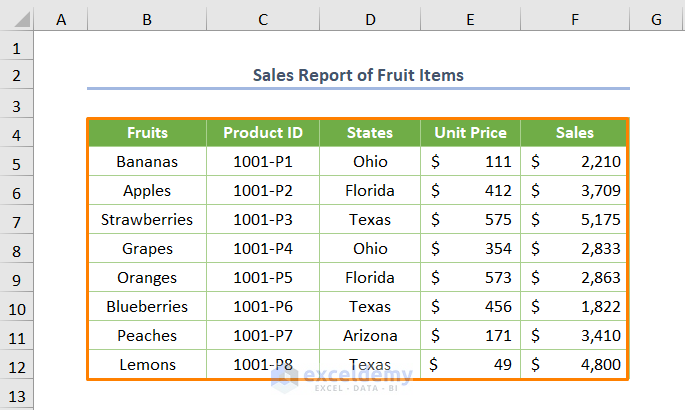
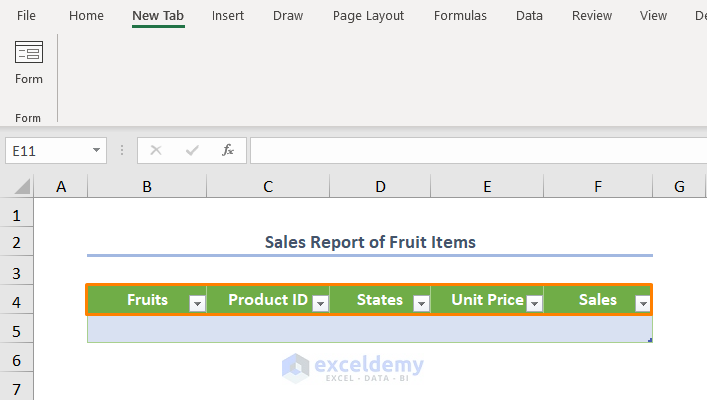
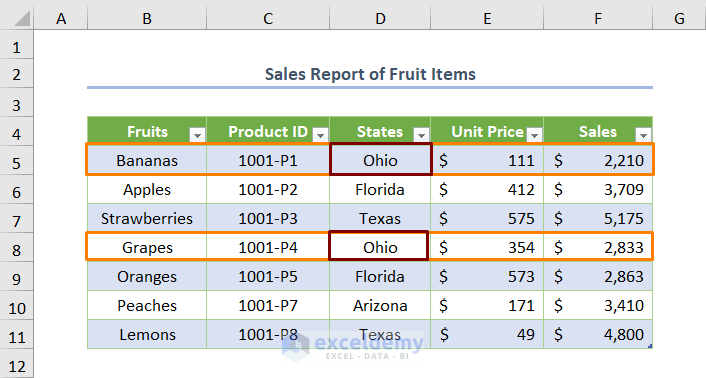
Step 1 – Insert Dataset with Column Headings
- Ensure your existing dataset includes column headings (e.g., Fruits, Product ID, States, Unit Price, and Sales).
- Column headings are essential for using the Excel Form.
Step 2 – Create an Excel Table
- Select the entire dataset (including column headings) or place the cursor in any cell within the dataset.
- Press CTRL + T to create an Excel table (Alternatively, go to the Insert tab > Table).
- In the Create Table dialog box, check the box for My table has headers.
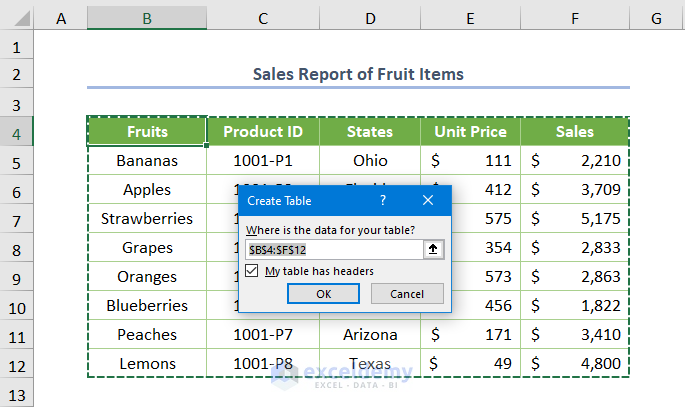
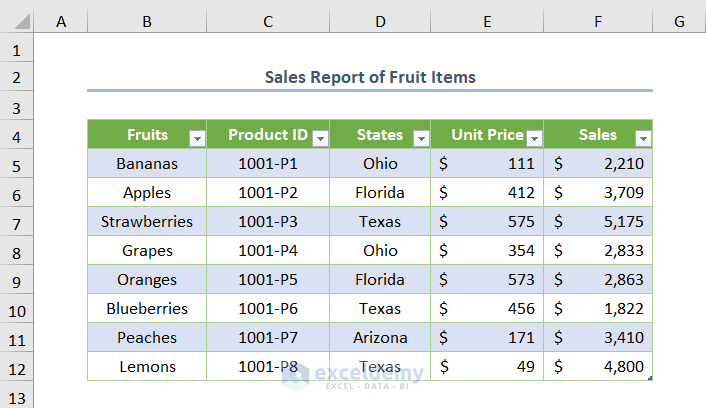
- Click OK to create the table.
Step 3 – Add Forms to Ribbon or QAT (Quick Access Toolbar)
- By default, Excel doesn’t provide the Form command in the ribbon.
- To add it:
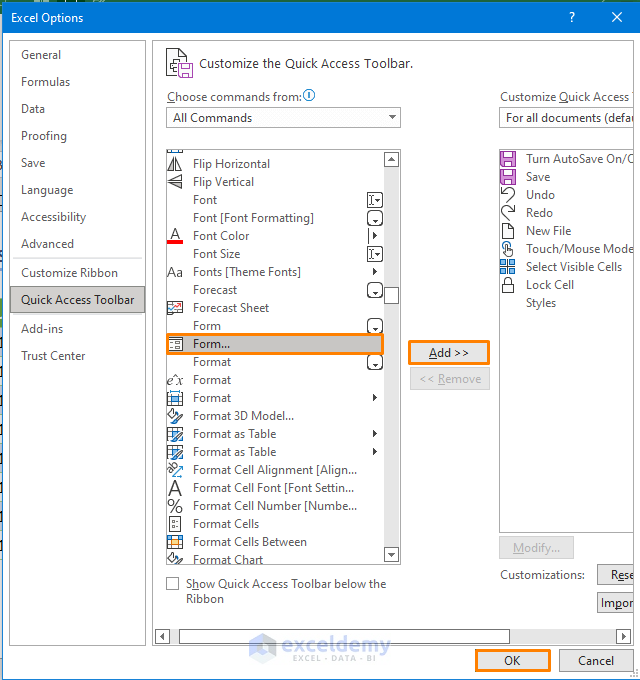
- Go to File > Options or right-click the blank space in the Excel ribbon and choose Customize the Ribbon.
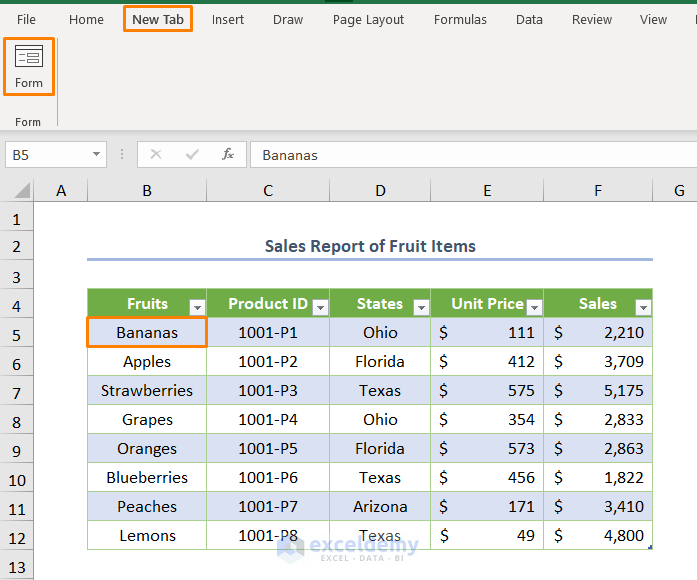
- In the Excel Options dialog, click the New Tab option.
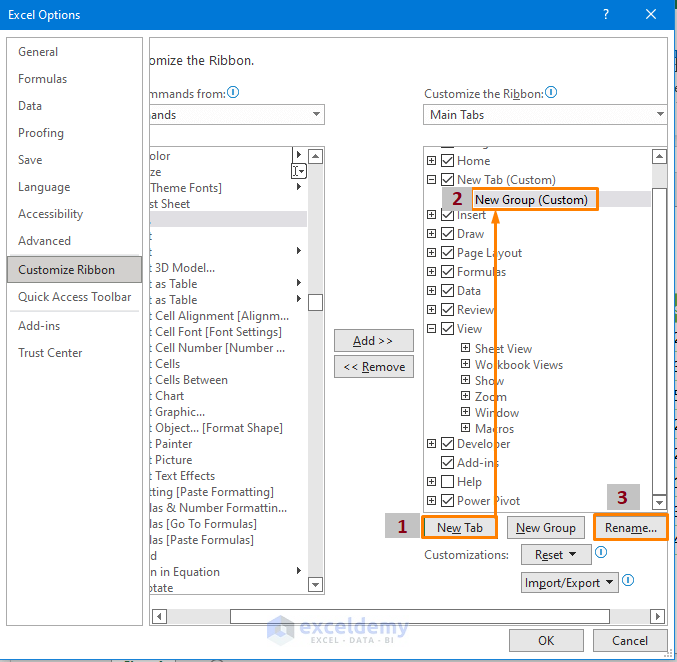
-
- Rename the new group as Form and select it.
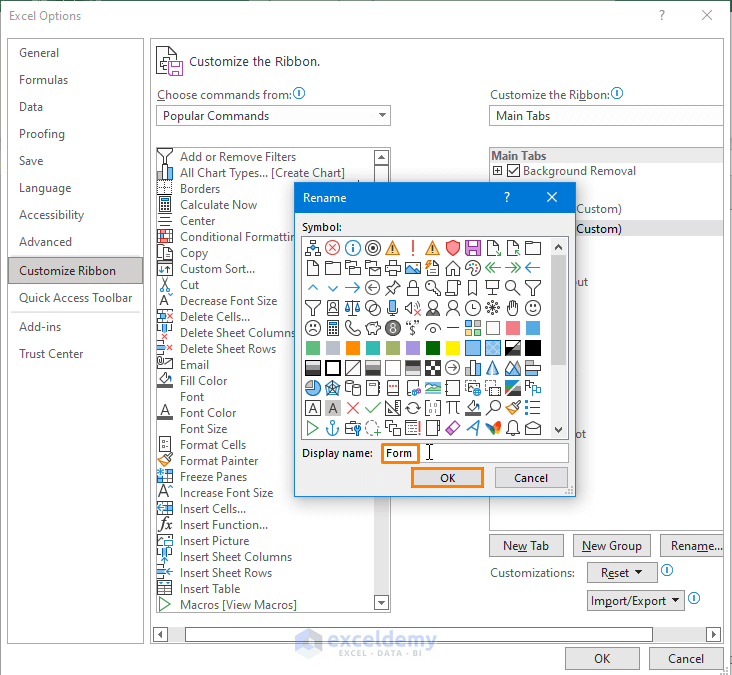
-
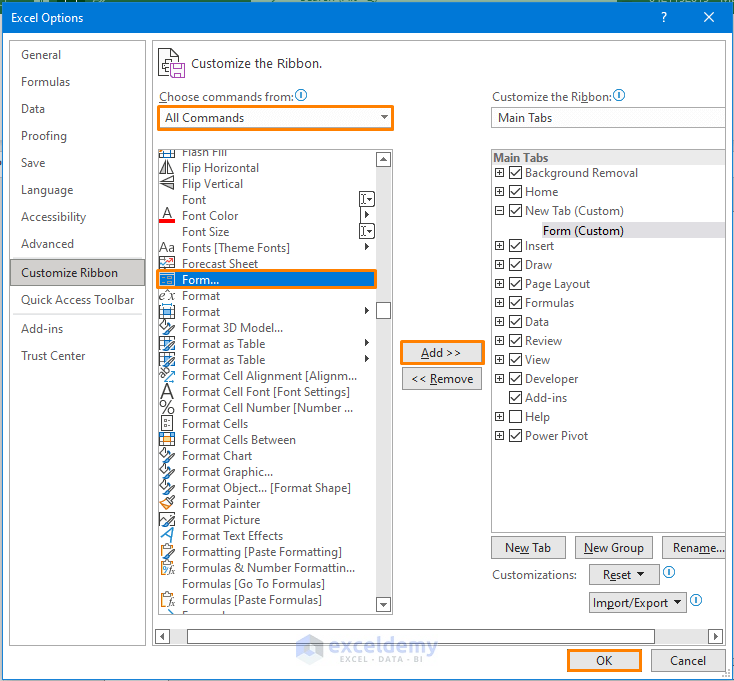
- From the Choose commands from dropdown, pick All Commands.
- Add the Form command to the group.
- Alternatively, add the Form command to the QAT:
- Customize the QAT (upper side of the ribbon).
- Choose More Commands.
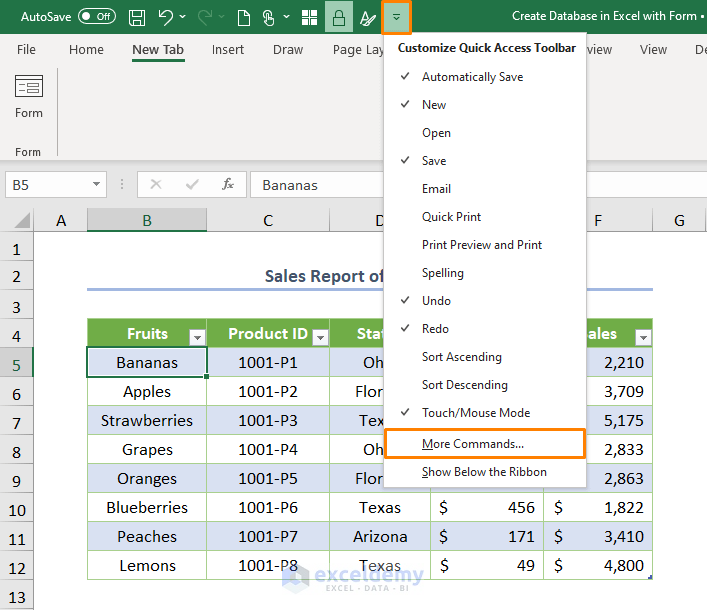
-
- Select the Form command from the All Commands list.
- Press Add and OK.
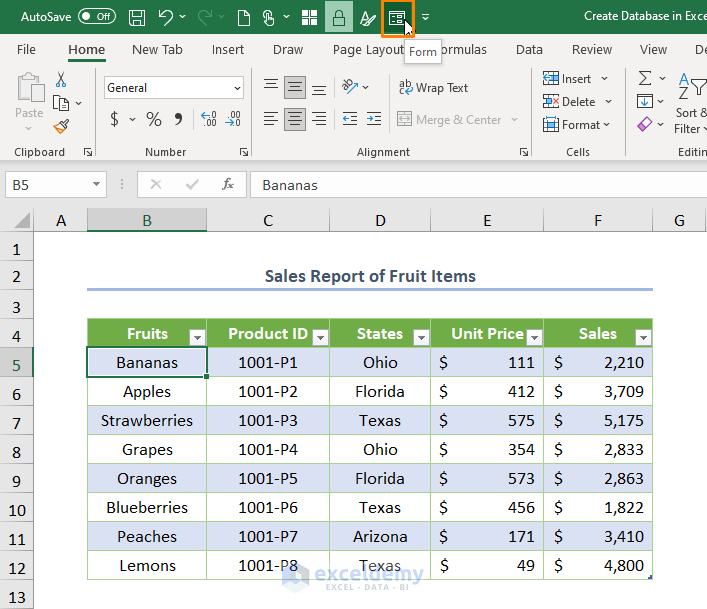
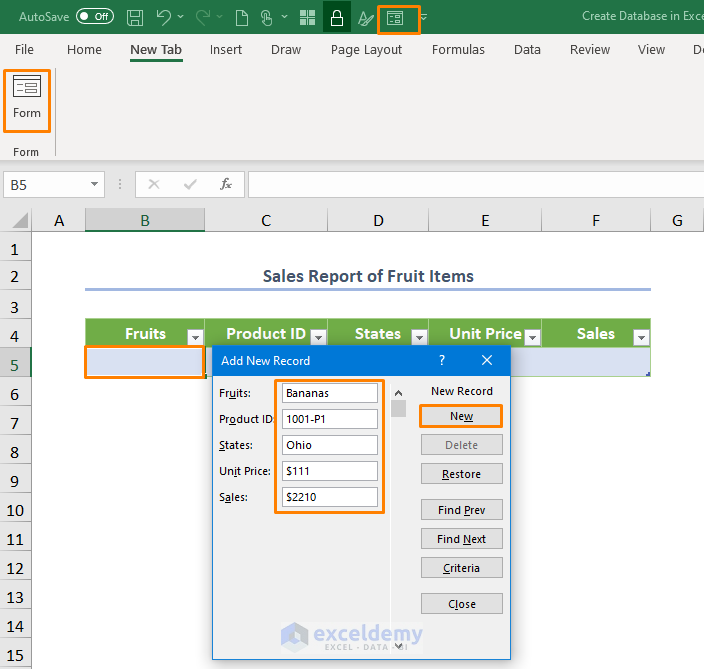
The Form command will be in the QAT as depicted in the below image.
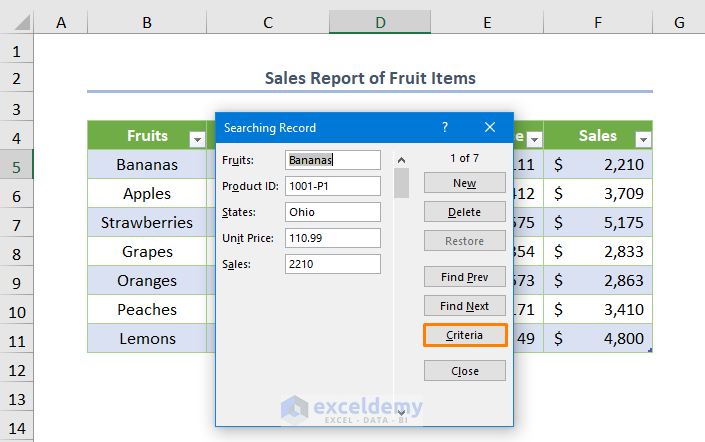
Step 4 – Input Data Using the Form
- Choose any cell within the table.
- Access the Form command from the New Tab or QAT.
- The entire table is automatically added to the Excel Form.
- For example, if you’re observing the first record (e.g., Bananas), the Form will display it.
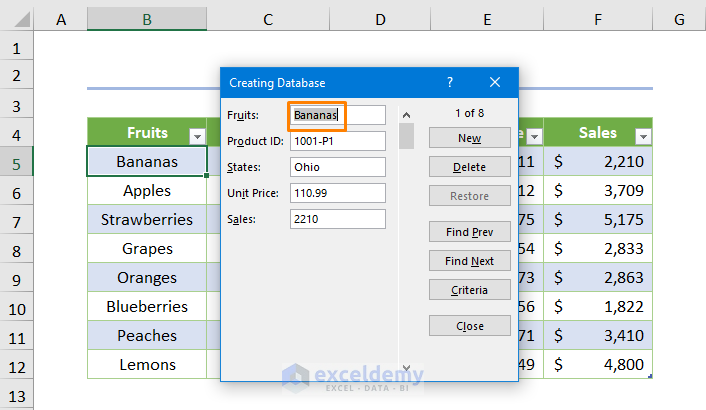
Regardless of the cell you choose, the Form shows the first record.
Read More: How to Create a Simple Database in Excel VBA
Essential Tips
When you create a database in Excel with Form, you should know about these basic things that would be beneficial for you.
Tip 1 – To Add a New Record
When creating a database with the Form:
- To add a new record:
- Insert column headings and convert them into an Excel Table (press CTRL + T).
-
- Select any cell within the table and use the Form command.
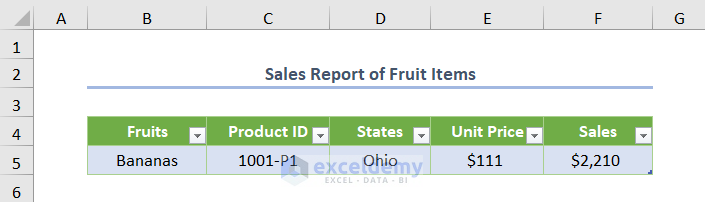
- Manually enter data for each field (e.g., Fruits: Bananas) and click New.
You can add a new record easily.
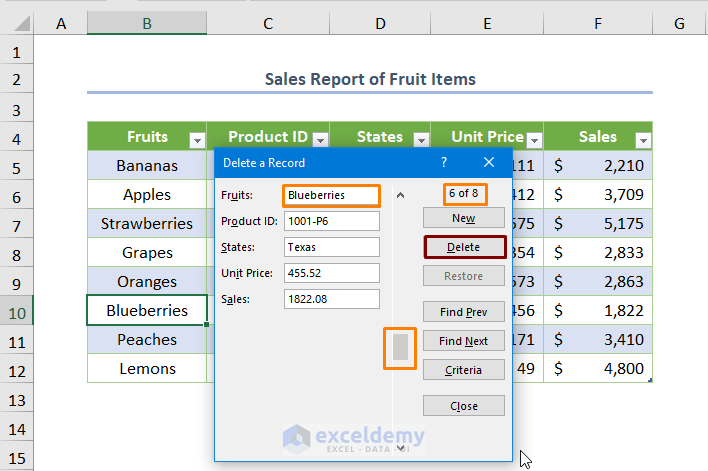
Tip 2 – To Delete a Record
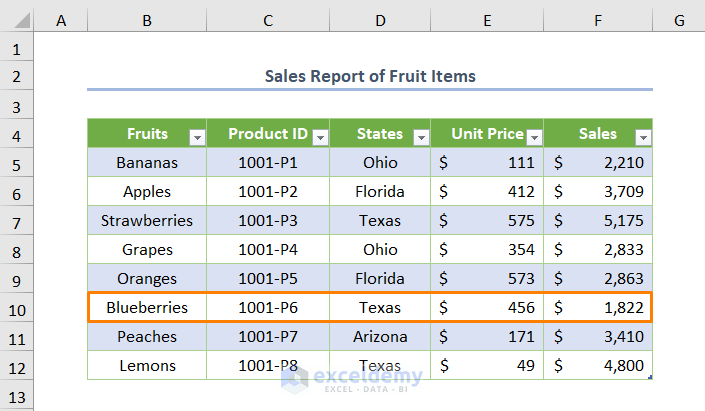
- Locate the record (e.g., Blueberries at B10:F10 cells).
- Scroll down after activating the Form command to find the desired record.

- Click the Delete button.
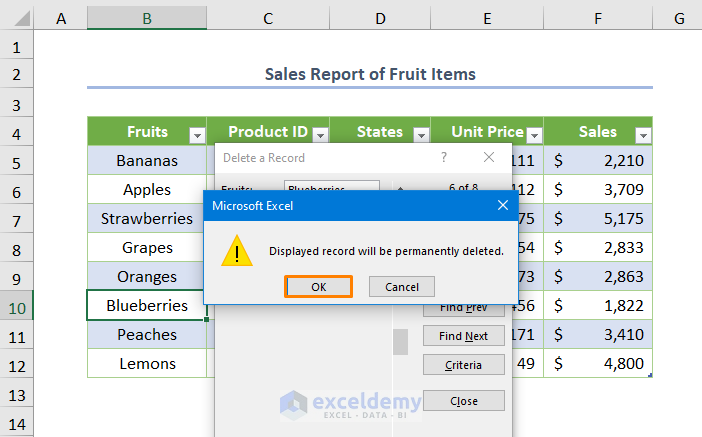
- You’ll get the following message. Press OK.
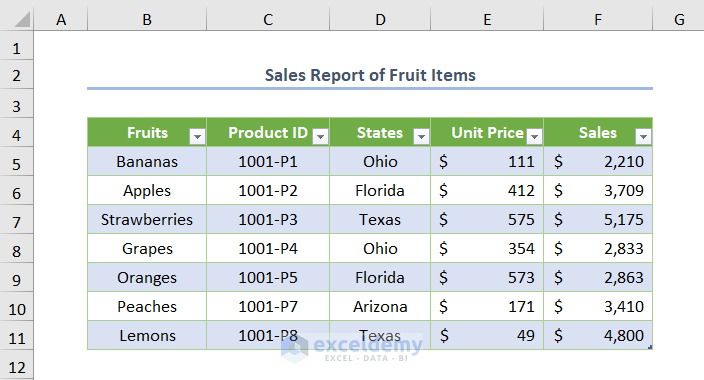
The record has been deleted.
Tip 3 – Updating or Editing a Record
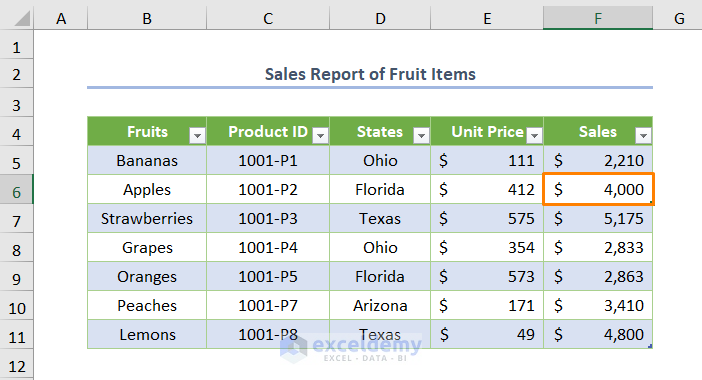
- Suppose you want to update the Sales value in cell F6 to $4000.
- Go to the second record (2 of 7).
- Type $4000 in the Sales box and press ENTER.

Note: If the Restore button doesn’t work, simply press ENTER.
Read More: How to Create a Database That Updates Automatically in Excel
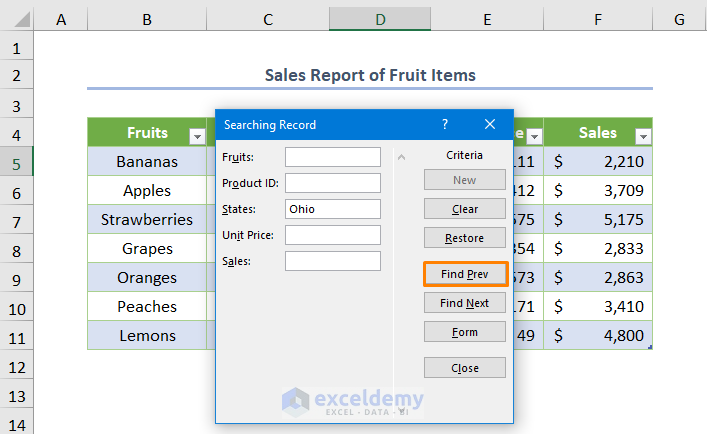
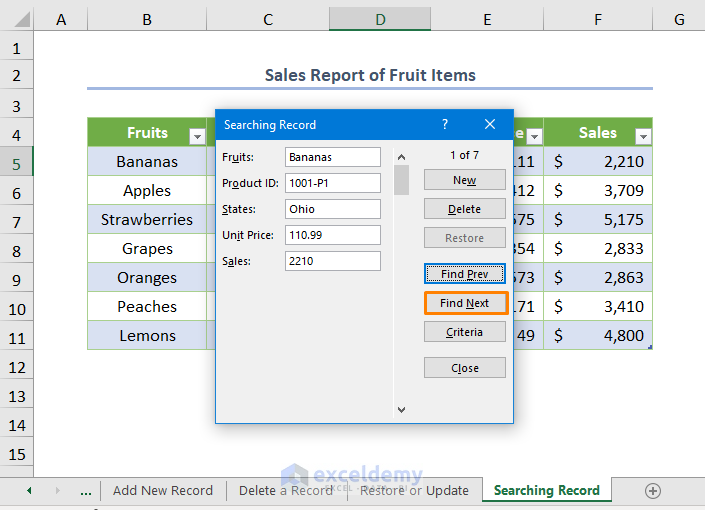
Tip 4 – Searching with Criteria within Database Using Form
To find a specific record (e.g., the State of Ohio):
- Click the Criteria button.
- Type Ohio in the box next to the States field.
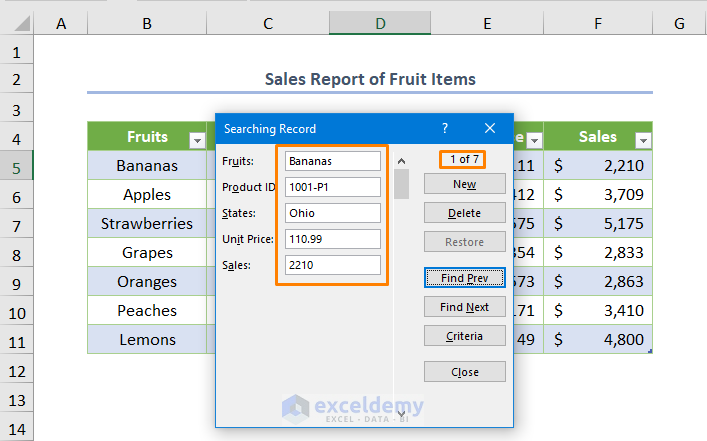
- Choose the Find Prev button to locate the previous record (1 of 7).
- To find the next record, select the Find Next button (4 of 7).

Read More: How to Create a Searchable Database in Excel
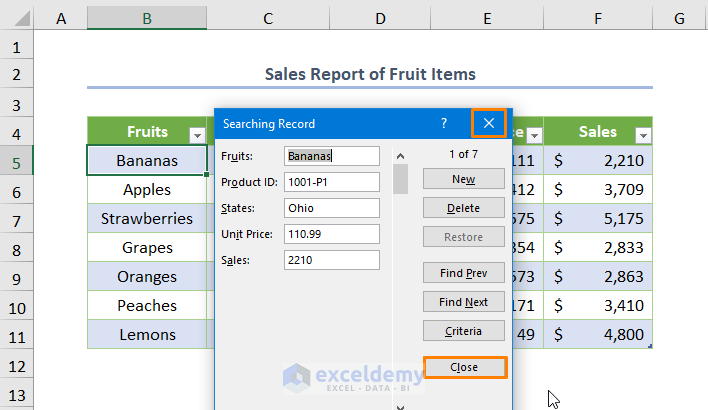
Tip 5 – Closing Excel Form
- To close the Excel Form:
- Click the Close icon in the upper right corner of the interface.
- Alternatively, press the Close button (Esc key).
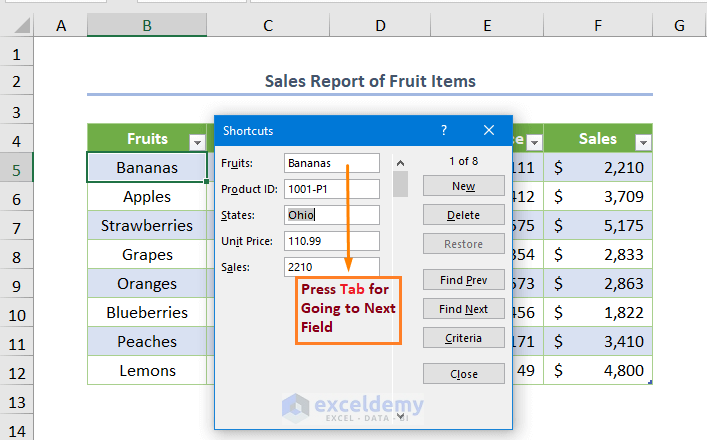
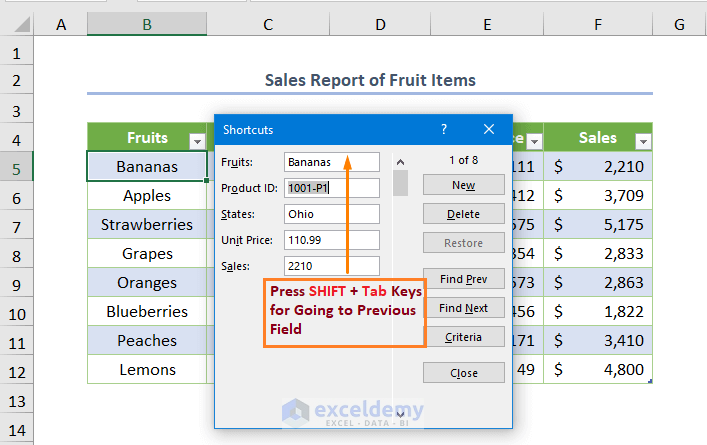
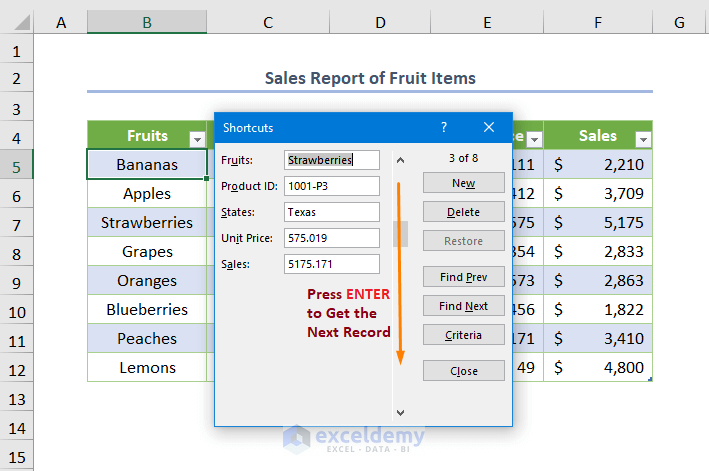
Tip 6 – Keyboard Shortcut to Creating a Database in Excel Form
While working in the Excel Form:
- Press TAB to move to the next field sequentially.
- Use SHIFT + TAB to go to the previous field.
- Press ENTER to navigate to the next record without scrolling down.
You can download the practice workbook from here:
Related Articles
<< Go Back To Database in Excel | Learn Excel
Get FREE Advanced Excel Exercises with Solutions!

