In this article, I will show you how to change page margins to wide in Excel. While working on an Excel workbook, sometimes you may need to plot any dataset on paper to make a printout copy. In Excel, you can easily plot any dataset on a page. But there are some issues to be fixed while plotting on papers in Excel. You need to set margins before printing the dataset. I hope this will make you more expert in Excel. Follow the procedures of two methods. Moreover, I have added necessary illustrations with every step of the procedures.
How to Change Page Margins to Wide in Excel: 2 Effective Ways
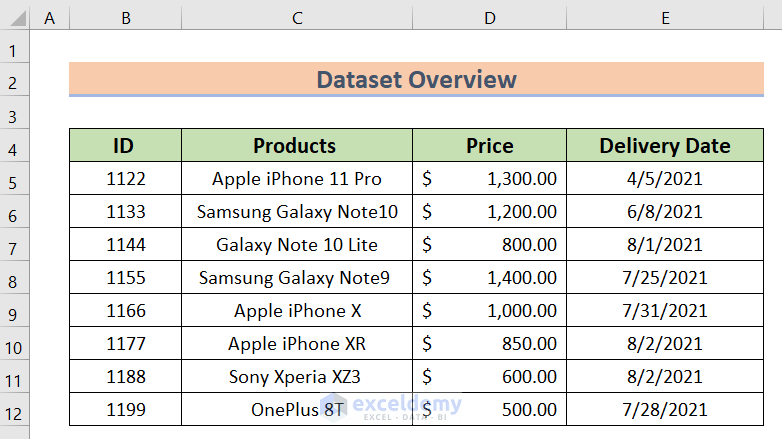
In this article, I will consider the following dataset to change page margins to wide in Excel. In this dataset, you can see that there are four columns, B, C, D, and E called ID, Products, Price, and Delivery Date. The dataset ranges from B4 to E12. Though the dataset has the least work here, I will use this dataset where it is needed. From here, I will describe the procedures step by step. Follow the steps one by one.
1. Use Page Layout Tab to Change Page Margins to Wide in Excel
This is the first method of this article. Here I will use the Page Layout tab to change page margins in Excel. This is an easy way. Follow the instructions carefully. However, I have added images with every step for your better understanding.
Steps:
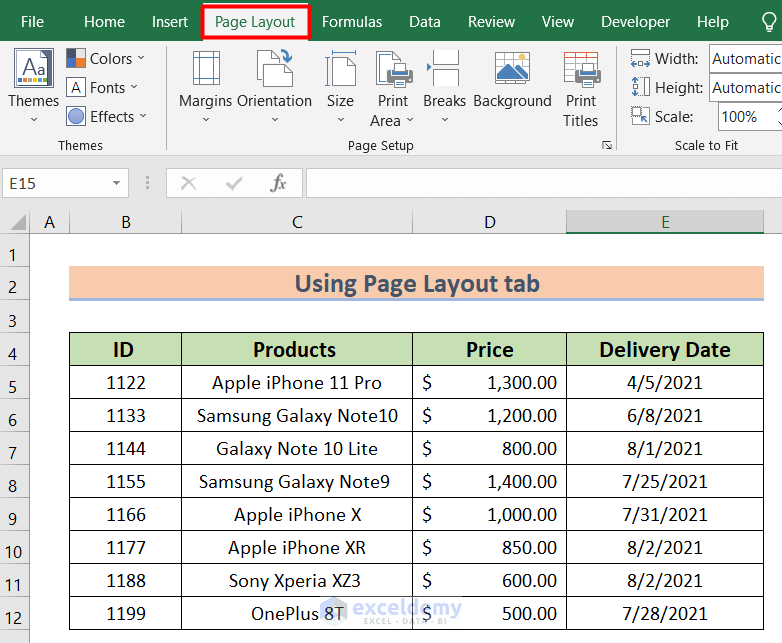
- First, select the Page Layout tab on your toolbar.
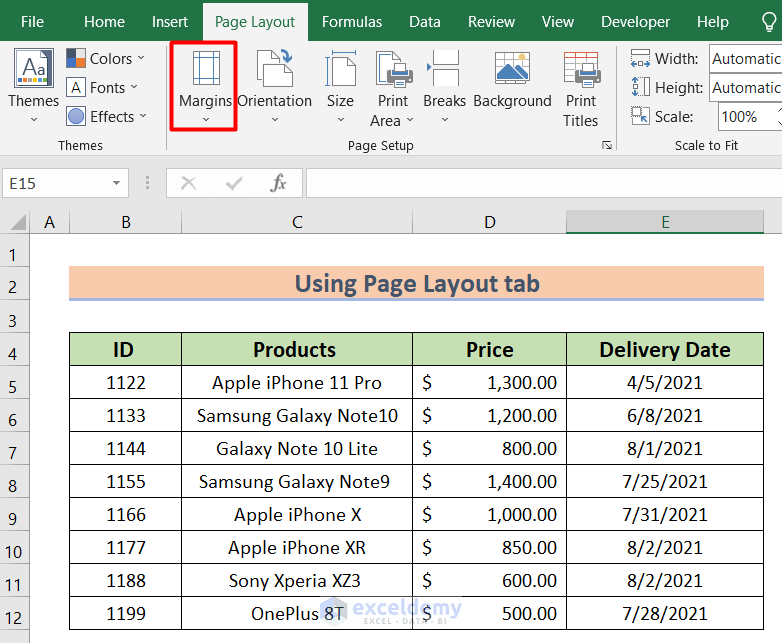
- Then, select the Margins option under the Page Layout option.
- Meanwhile, a pop-up window will appear.
- Then, select the wide option from the pop-up window.
- After selecting this option, Excel will plot the dataset on a paper with a wide margin.

This is how you can change page margins in Excel by using the Page Layout tab.
Read More: How to Apply Margin Setting in Excel
2. Change Page Margins to Wide in Excel by Using Print Option
This is the last method of this article. I will show you the procedures for changing page margins to wide in Excel using the Print option. Follow the step-by-step procedures of this method.
Steps:
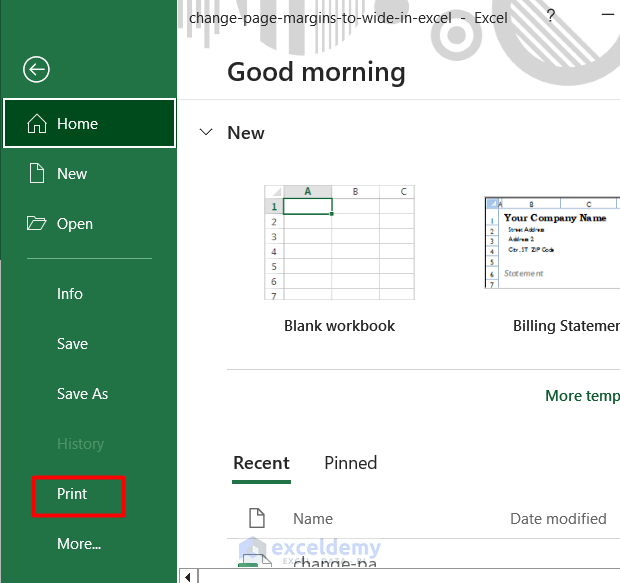
- First, select the File option in your toolbar.

- Then, select the Print option.
- Under the print option, you will find the margins option. Click on it.

- After that, select the Wide Margin.

- Then, you will find a preview of how the dataset will be printed on a page.
- By following these steps, Excel will add a wide margin to your page.

This is how a page margin can be changed to wide in Excel by using the Print option.
Things to Remember
You can also change the margins to a normal or narrow shape.
Download Practice Workbook
Please download the workbook to practice yourself.
Conclusion
In this article, I have explained the procedures to change page margins to wide in Excel. I hope you have learned something new from this article. Now, extend your skill by following the steps of these methods. I hope you have enjoyed the whole tutorial. If you have any queries, feel free to ask me in the comment section. Don’t forget to give us your feedback.
Related Articles
- How to Add Margin in Excel
- How to Change Margins in Excel
- Perform Commands to Center the Selected Worksheets in Excel
- How to Remove Print Margins in Excel
- [Fixed!] Excel Margins Disappeared
- [Fixed] Excel Margins Not Printing Correctly
<< Go Back to Adjust Margin | Page Setup | Print in Excel | Learn Excel
Get FREE Advanced Excel Exercises with Solutions!
