Microsoft Excel is one of the most important and capable computer applications. We can do endless computations on any dataset using Excel’s features and tools. This post will cover two practical methods to implement margin settings in Excel. Therefore, using these two practical approaches, you should apply the Margin Setting in Excel.
How to Apply Margin Setting in Excel: 2 Handy Approaches
The blank area that exists between the data on the worksheet and the left, right, top, and bottom borders of the printed page is referred to as the margin. We may use page margins at the top and bottom for various purposes, including headers, footers, and page numbers. Even though Excel for the Web doesn’t let you set page margins, the Page Layout tab has some alternatives for setting up documents.
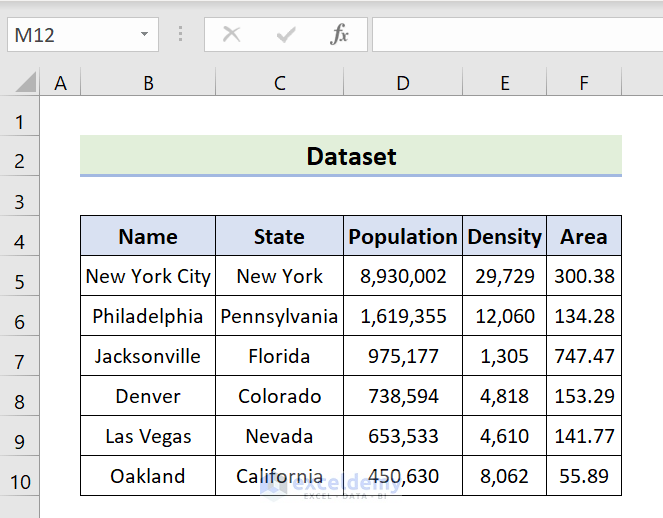
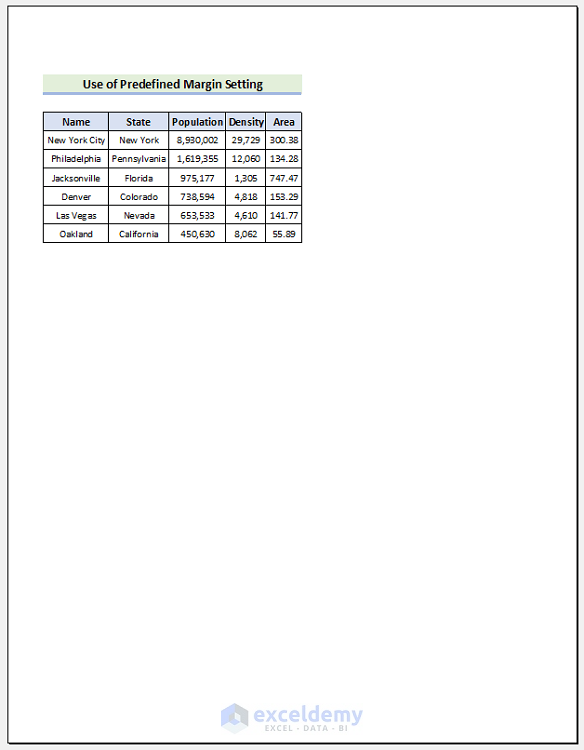
The following dataset is an example; it contains columns labeled Name, State, Population, and Density. We will utilize these two handy approaches in implementing margin settings for this dataset. I’m writing this blog using Microsoft Excel 365, which I have yet to mention. Nevertheless, you can use any other edition that affords the most significant degree of convenience.
1. Use Predefined Margin Setting in Excel
Excel allows us to have some predetermined margins. The main advantage of using this margin is that it saves time. We can use a predefined margin in two ways. One way we can use predefined margin settings is from the Print Option. Another option is to use the Page Layout Tab.
1.1 Through Print Option in File Menu
Excel has 3 preset margin configurations. The Normal, Wide, and Narrow margin options are available. Not only can we modify the margin, but we also can see the output at the same time. Follow these steps to use the predefined margin settings from the Print option in Excel.
STEPS:
- First, select the active sheet.
- Second, go to File.
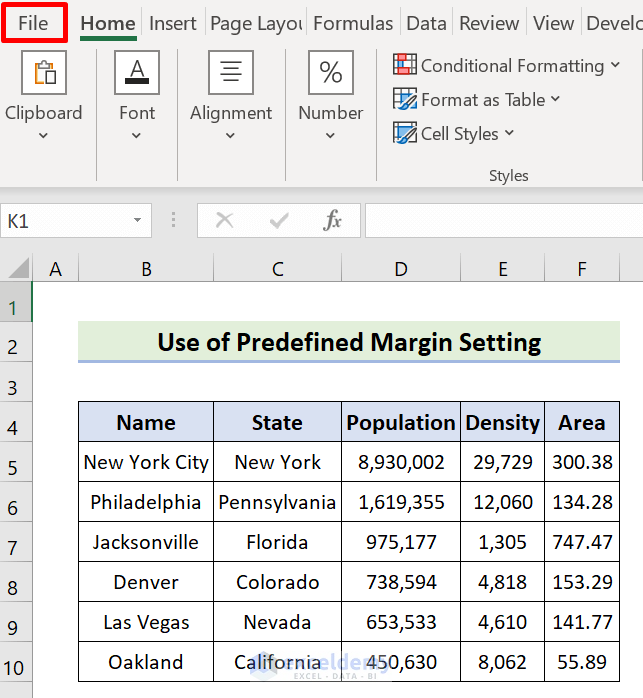
- After that, click Print, then Normal Margin Setting.
- As a result, three options for Margin Settings will pop up.

- For demonstration, select Normal.
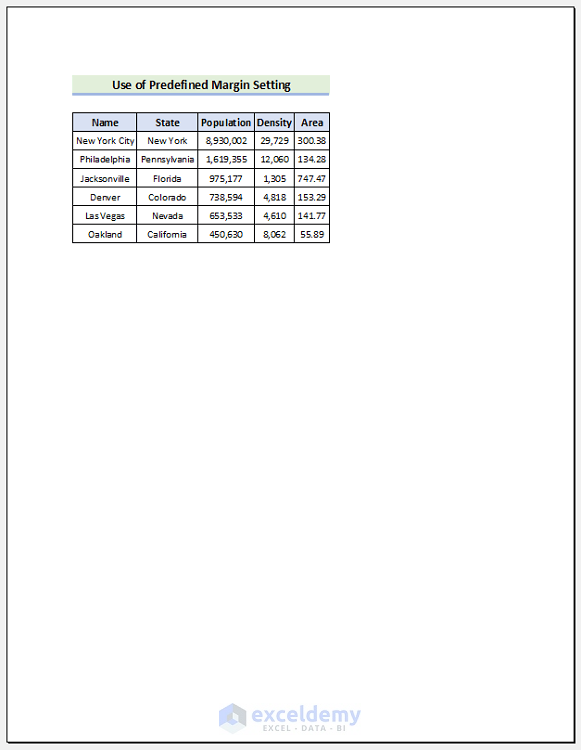
- As a result, you’ll see the intended outcome on the preview pane.
- For selecting Wide, the expected return output is as follows.
- The intended return output for choosing Narrow is shown below.
1.2 From Page Layout Tab
Using the Page Layout Tab is an exciting and easy way to get the same thing as before. However, we need help seeing the demonstration and the changes we make. Follow the instructions below to apply margin settings via the Page Layout Tab.
STEPS:
- First, select the active sheet.
- Second, navigate to Page Layout, then Margins.
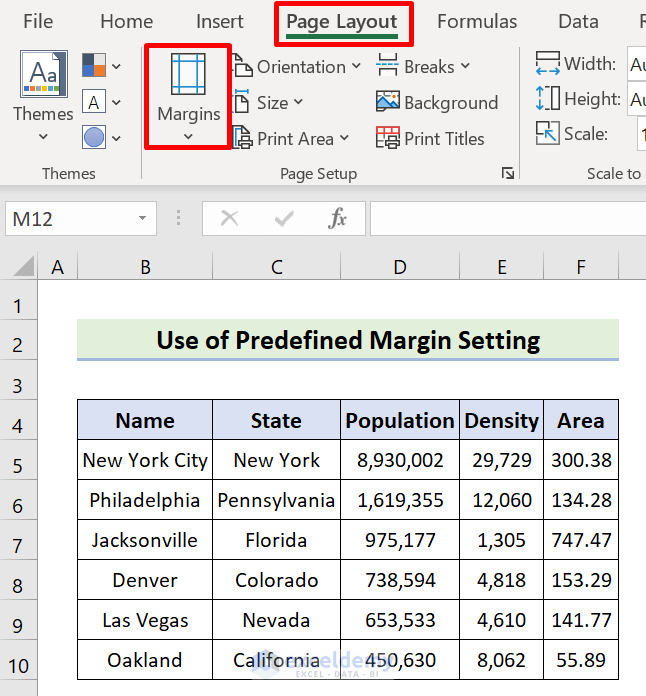
- Consequently, three predefined Margin Settings options will pop out.
- Now, choose from Normal, Wide, or Narrow to achieve the desired margin.

Read More: How to Change Page Margins to Wide in Excel
2. Apply Custom Margin Setting in Excel
Default margin settings are not enough sometimes. That’s why custom margins are possible in Excel. To properly align an Excel worksheet on a printed page, you may adjust the margins, define custom margins, or center the worksheet horizontally or vertically. The Page Layout Tab allows us to utilize specified margin values. Use the Print Option as an alternative.
2.1 From Print Option in File Menu
Implementing Custom Margin Settings through the print option has significant advantages mentioned earlier. It is satisfactory to see how our changes affect the document. To apply custom margin values using the Print Option, follow the steps below.
STEPS:
- First, pick the sheet that you will use.
- Second, go over to File.
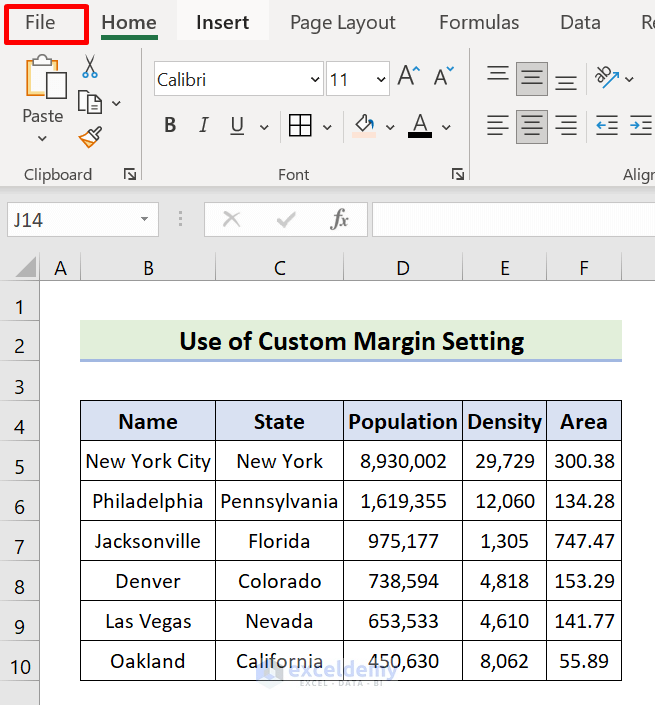
- Now, click Print, followed by Normal Margin, then tap Custom Margins.

- Consequently, the Page Setup window comes up.
- Make the desired changes.
- Here, we will change the Left margin to 2 as well as the Top margin to 2.
- Hit OK.

- Consequently, click Print Preview to get the desired output, as seen below.

2.2 Through Page Layout Tab
Using the Page Layout Tab to apply custom margin values is an exciting and common continuing intention. However, we need assistance perceiving the modifications we make. You can use the Print Option’s procedures below to set your margins.
STEPS:
- First, select the active sheet to start.
- Second, choose Page Layout and then Margins.
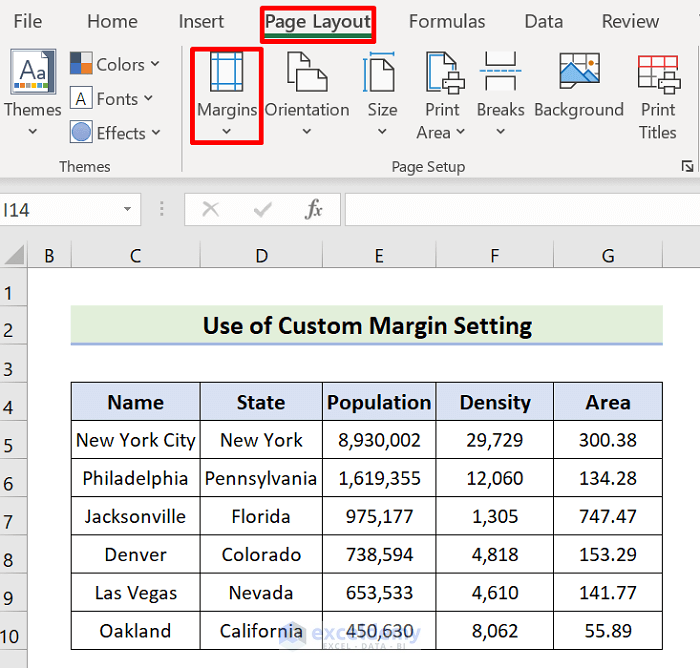
- Due to this, the Custom Margin Settings option will become available.
- Now, select Custom Margins.

- Without a doubt, the Page Setup Icon is more efficient for getting the Page Setup window.
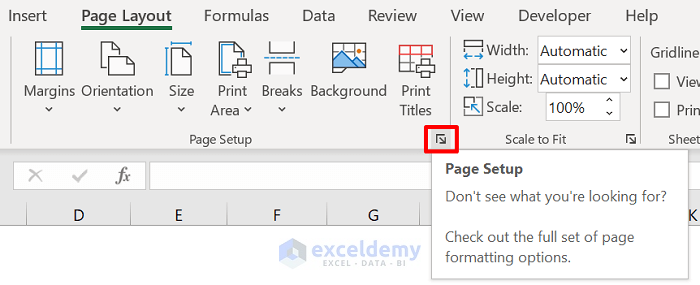
- As a result, the Page Setup box appears.
- After making the required adjustments, press OK.

Read More: How to Change Margins in Excel
Download Practice Workbook
You are welcome to download a free copy of the sample workbook located just below; we utilized it during the whole session.
Conclusion
You can now alter the Margin Settings in Excel using the steps above. Let us know if you have other ways to do the task or new ideas. Remember to put your questions, comments, or suggestions below.
Related Articles
- How to Add Margin in Excel
- Perform Commands to Center the Selected Worksheets in Excel
- How to Remove Print Margins in Excel
- [Fixed] Excel Margins Not Printing Correctly
- [Fixed!] Excel Margins Disappeared
<< Go Back to Adjust Margin | Page Setup | Print in Excel | Learn Excel
Get FREE Advanced Excel Exercises with Solutions!
