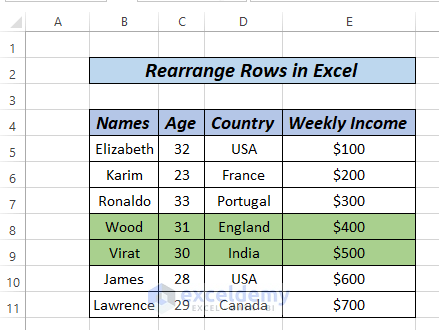
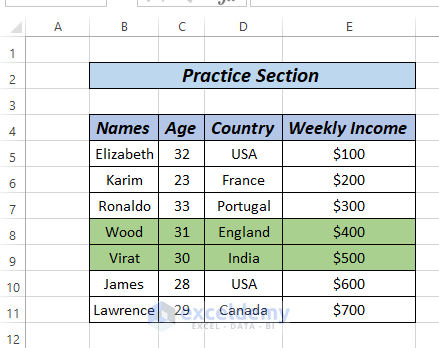
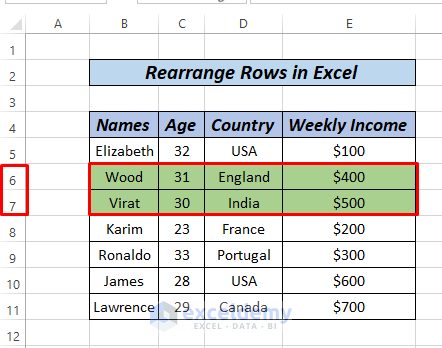
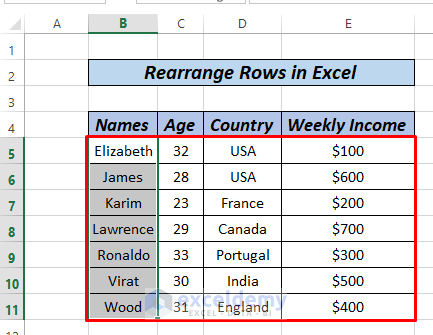
Sometimes, while working in Microsoft Excel we may feel the need to rearrange rows according to our convenience. Suppose, we have a dataset like the image below and we want to move the rows marked green to above or below. In this article, we will learn how to rearrange rows in Excel using 4 simple methods.
How to Rearrange Rows in Excel: 4 Ways
In this article, we will see the use of the Cut and Insert method, the copy method, and the use of the shift key and mouse button to rearrange rows in Excel.
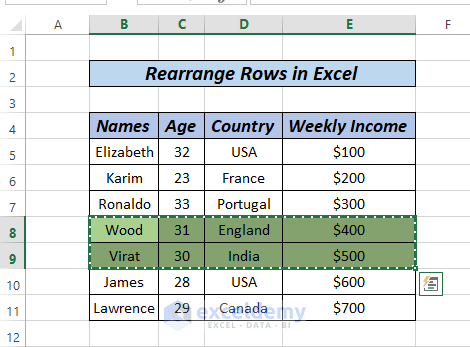
Method 1: Rearrange Rows Using Copy Method
It is the first thought that comes into everyone’s mind. Although it is a time-consuming method, we will have a look at this method just for your better understanding. Here, we will rearrange the rows from 8 and 9 positions to just below row 5.
Steps:
- Select the rows first and press CTRL+C to copy the rows.
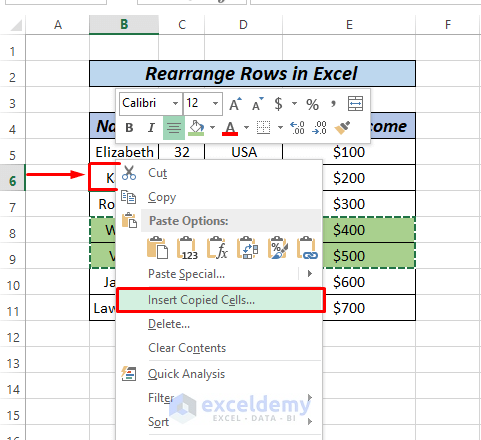
- Now, select cell B6 and right-click the mouse button, and click Insert Copied Cells.
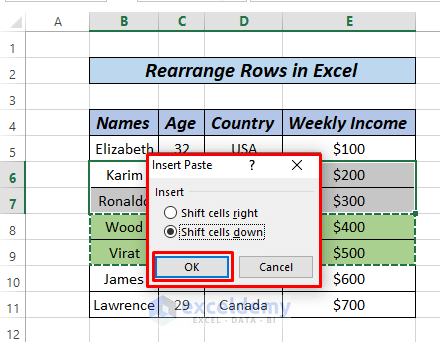
- As a result, a dialogue box will pop up, and select OK, the rows will be copied. For rows, Shift cells down will be selected automatically, keep that as it is.
- Finally, select the rows selected previously and right right-click on the mouse button, and delete the rows.

- That’s it, we rearranged the rows.
Read More: How to Move Rows Down in Excel
Method 2: Rearrange Rows by Mouse Button
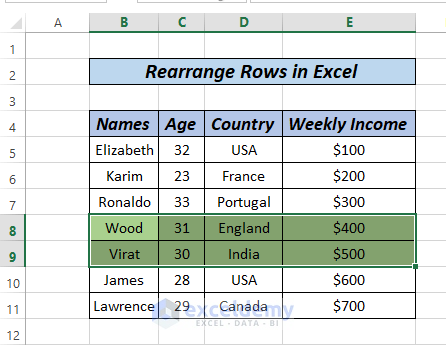
We can easily move rows by the press and hold method using the mouse. Here, we will rearrange the 8 and 9 rows by shifting them from their position to 6 and 7.
Steps:
- Select the rows we want to move.
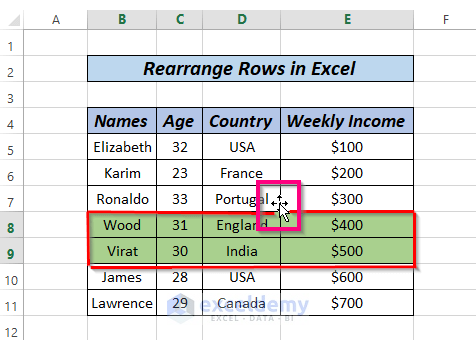
- Now, position the mouse at the position top of the selected borderline so that a moving arrow sign of four directions appears.
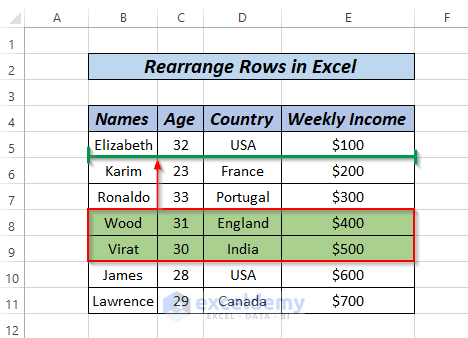
- Then, press and hold the SHIFT key on the keyboard and drag it to the position just below row 5 where a green borderline appears like the image below.
- Finally, release the SHIFT key and Mouse button and, the result will be as in the image below.
Method 3: Cut and Insert Method to Rearrange Rows
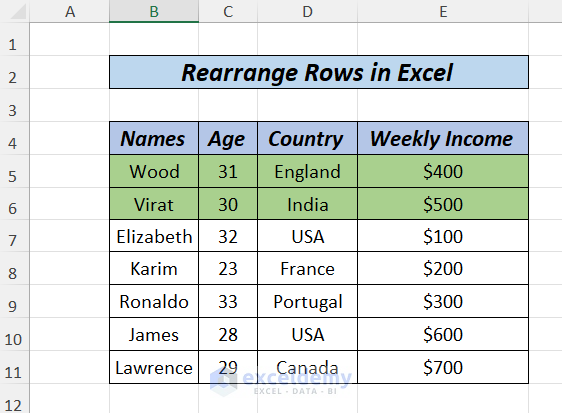
We want to move our two desired rows just below the header. We want these rows to be in rows numbers 5 and 6. Let’s see, how to do it with the cut and insert method.
Steps:
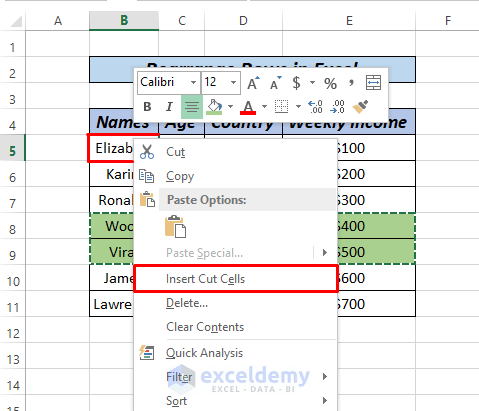
- First, we will select the rows we want and press CTRL+X.
- After that, go to cell B5 and click the right button on the mouse, and click Insert Cut Cells.
- As a result, rows above will be arranged automatically by shifting down.
Read More: How to Move Rows Up in Excel
Method 4: Rearrange Rows by Sorting
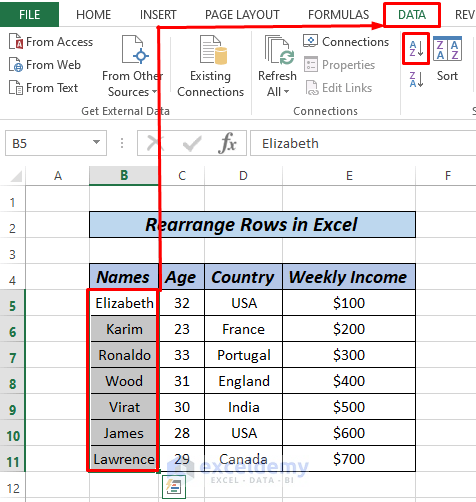
We can also rearrange rows by Sorting. Let’s, sort the data alphabetically.
Steps:
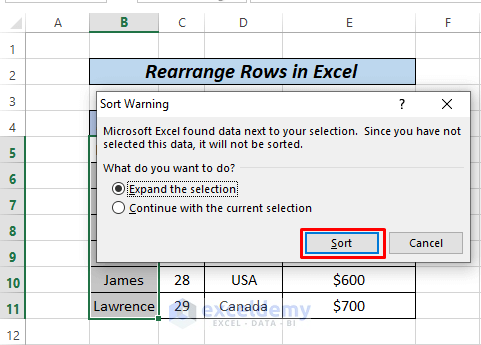
- First, select the columns we want to sort and go to the Data tab, and click the A to Z option as shown in the image.
- Now, a dialogue box will pop up, and select Expand current selection and click Sort.
- Finally, rows will be rearranged as follows.
Practice Section
The single most crucial aspect in becoming accustomed to these quick approaches is practice. As a result, we’ve attached a practice workbook where you may practice these methods.
Download Practice Workbook
Conclusion
That’s all for the article. These are 4 different methods for how to rearrange rows in Excel. Based on your preferences, you may choose the best alternative. Please leave them in the comments area if you have any questions or feedback.
Related Articles
- How to Move Rows in Excel Without Replacing
- How to Move Rows in Excel to Columns
- How to Move Every Other Row to Column in Excel
- Move Row to Bottom in Excel If Cell Contains a Value
- How to Move Row to Another Sheet Based on Cell Value in Excel
<< Go Back to Move Rows | Rows in Excel | Learn Excel
Get FREE Advanced Excel Exercises with Solutions!
