In this Excel tutorial, we will describe how to add, change, format, draw, remove, and create custom styles for cell borders in Excel, and even how to work with Excel cell borders using VBA code. This is the ultimate guide to Excel cell borders. Read the whole guide step by step, you will be a master on this topic.
How to add All Borders to the Excel cells [Click on the image for a detailed view]
- Adding cell borders,
- Changing cell borders,
- Formatting cell borders,
- Customizing cell borders,
- Removing cell borders.
Note: We used Microsoft 365 while preparing the content. However, the following operations are applicable to older versions.
How to Add Cell Borders in Excel
To illustrate our methods, we’ll use the sample dataset below, which contains no borderlines. We will apply borders to this dataset using 5 methods: the Borders command, Format Cells dialog box, Keyboard shortcut, the Draw command, and Excel VBA code.
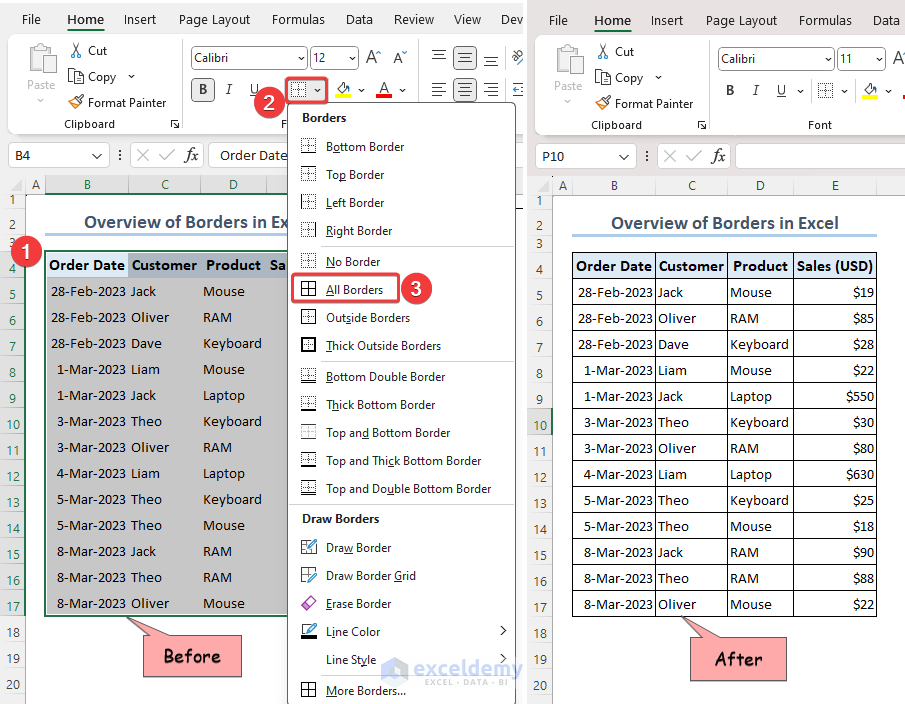
Method 1 – Using the Borders Command
We can easily add borders using the Borders command from the Font group of the Home tab, where there are a variety of border options. We’ll apply the All Borders style for our dataset.
Steps:
- Select the B4:E17 range.
- Click as follows: Home tab >> Font group >> Border drop-down >> All Borders option.
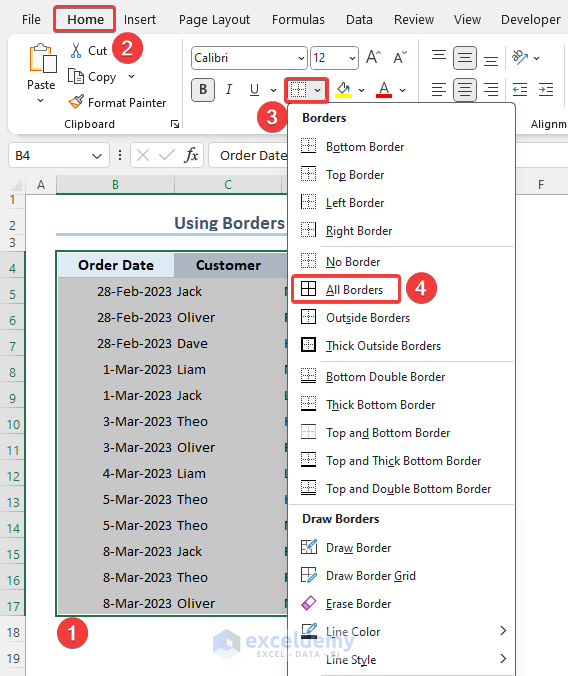
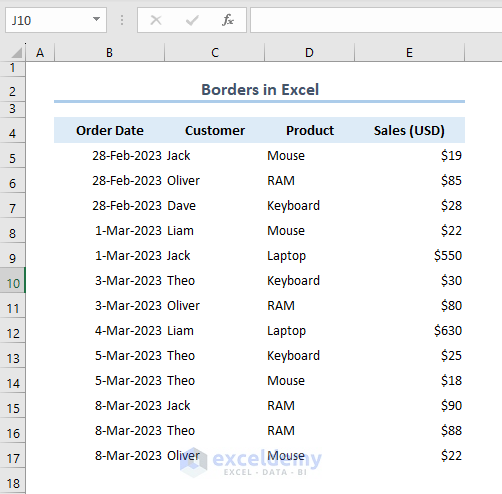
All cells now have borders like in the following image.

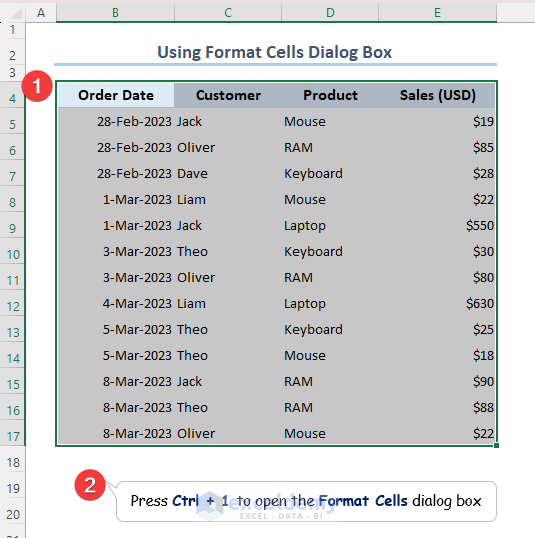
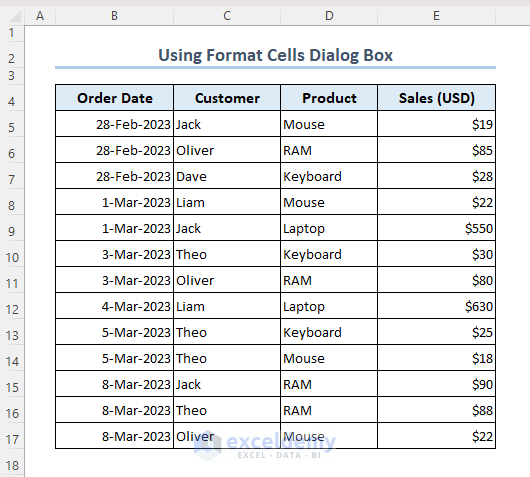
Method 2 – Using the “Format Cells” Dialog Box
We can also add borders using the Format Cells dialog box.
Steps:
- Select the B4:E17 range.
- Press the Ctrl+1 keys to open the Format Cells dialog box.
- Or, open the Format Cells dialog box like this: Home >> Font group of commands >> Click on the drop-down part of the Borders command >> Select the last option in the list More Borders…
The Format Cells dialog box appears.
- Select a Border Line Style (from the Presets, we chose Outline and Inside for both options).
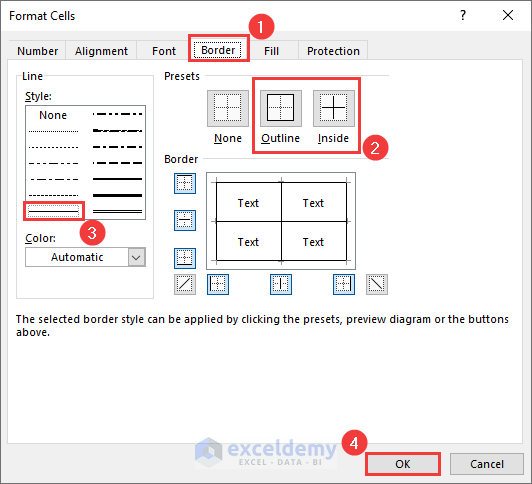
- Click on the OK button.
All the cells now have borders like in the image below:
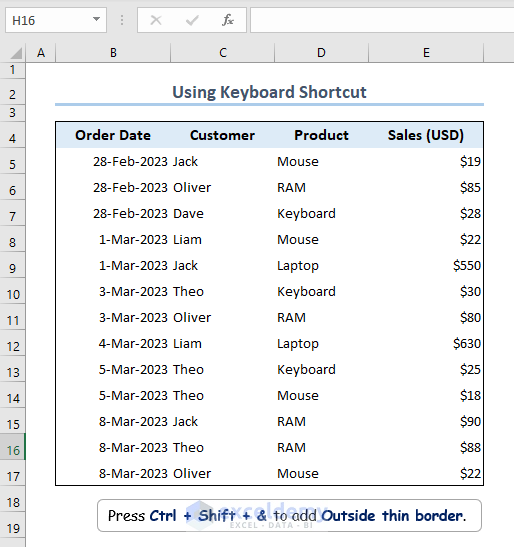
Method 3 – Using Keyboard Shortcut
The shortcut to add borders in Excel is Ctrl + Shift + &. But the keyboard shortcut is only applicable for adding the Outside Thin borders.
Steps:
- Select the range and press the Ctrl + Shift + & buttons sequentially.
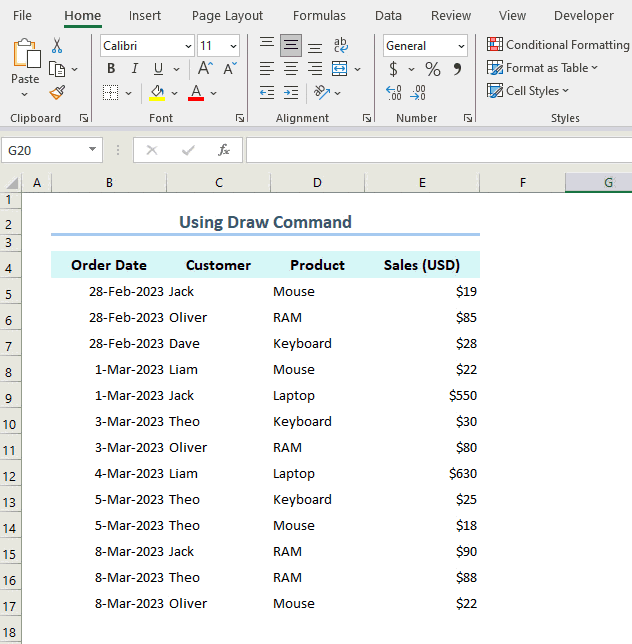
Method 4 – Drawing Borders in Excel Cells Wherever You Need
You can add borders in any position by using the Draw Border command. In this case, drag the Mouse over the desired range area. Using the Draw Border option allows you to add borders in any portion of the dataset.
Steps:
- Go to Home tab >> Font group >> Borders drop-down >> Draw Border option.
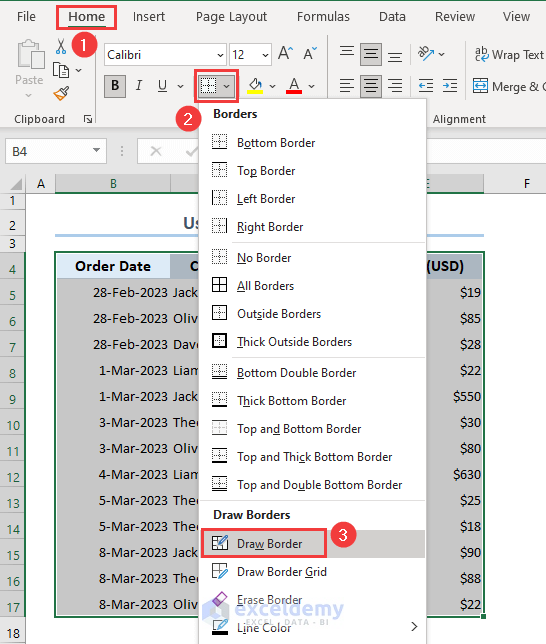
- Add an outside thin border around the B4:E4 range by dragging the pen.
- Similarly, we can add borders between the rest of the cells as desired.
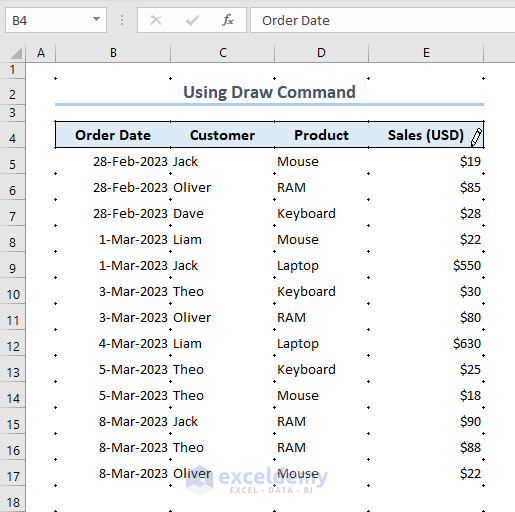
The gif below shows how simple it is to add borders to any cells using this method.
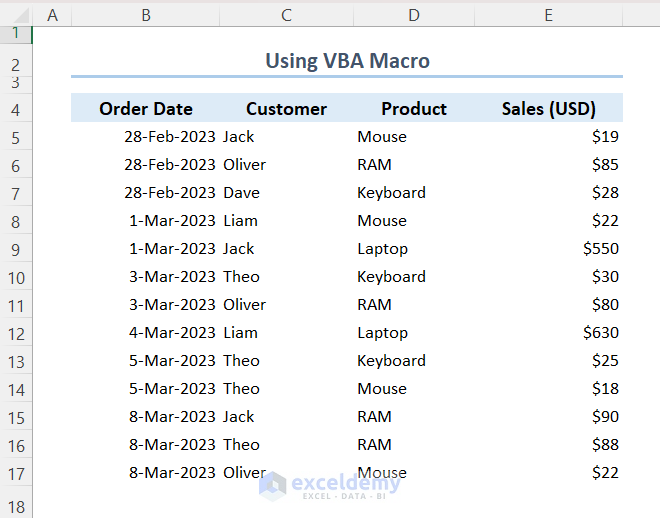
Method 5 – Using VBA Code
To apply borders to a huge dataset, VBA can be an excellent approach. Applying a simple VBA code we can insert borders in multiple worksheets, even in multiple workbooks.
Note: If you’re a new user of Excel, avoid using VBA code.
In the following dataset, we will insert borders using VBA code.
- Enter the following simple VBA code in the Module that will add borders to the B4:E17 range:
Sub Add_Borders()
Set Rng = Range("B4:E17")
For i = 1 To 14     'calling rows from the range under For loop
    For j = 1 To 4      'calling columns from the range under For loop
        Rng.Cells(i, j).BorderAround LineStyle:=xlContinuous, Weight:=xlThin
            'adding thin borders among cells
    Next j
Next i
End Sub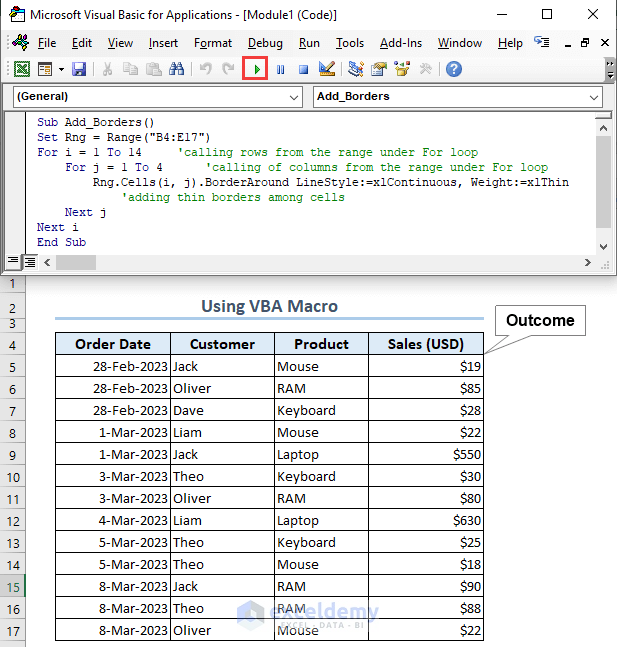
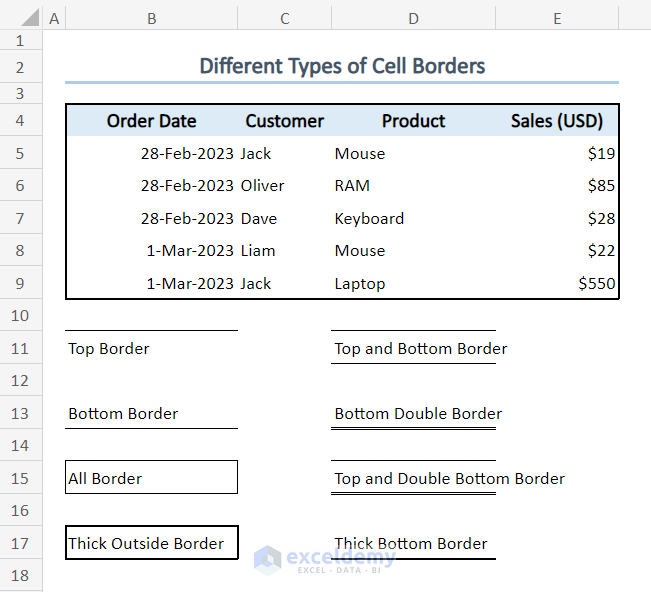
What are the Different Types of Cell Borders Available in Excel?
In the image below, we applied a Thick Outside Border in the B4:E9 range. The available types of borders in Excel are:
- Top Border
- Bottom Border
- Top and Bottom Border
- Bottom Double Border
- All Border
- Top and Double Bottom Border
- Thick Outside Border
- Thick Bottom Border
You may need to apply different types of borders to differentiate between data or to visualize outcomes clearly. Border types for any range can be modified using the Borders command of the Home tab.
How to Format the Cell Borders in Excel?
Cell borders can be formatted in Excel by changing the border line color and adjusting the border line width.
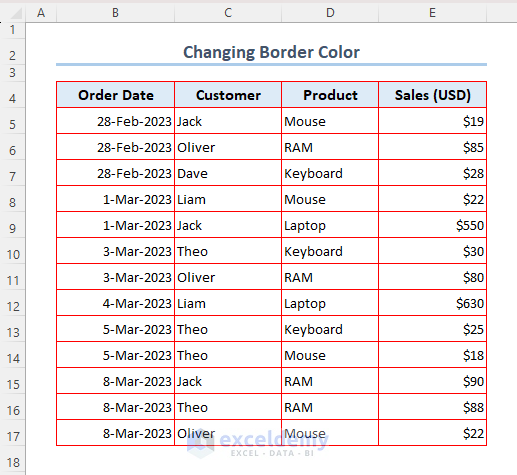
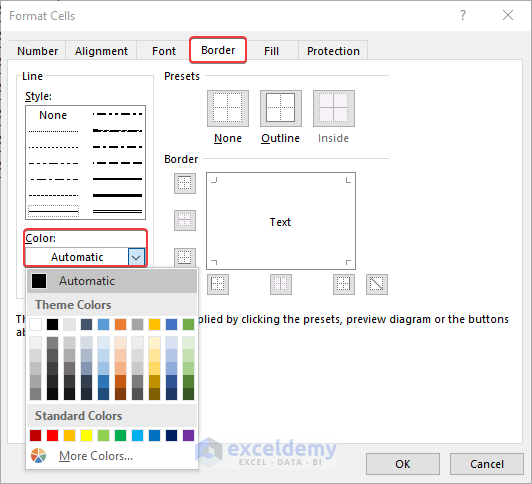
Example 1 – Changing Border Line Color
There are 3 ways to change border color: Borders command, Format Cells, and Excel Options dialog box.
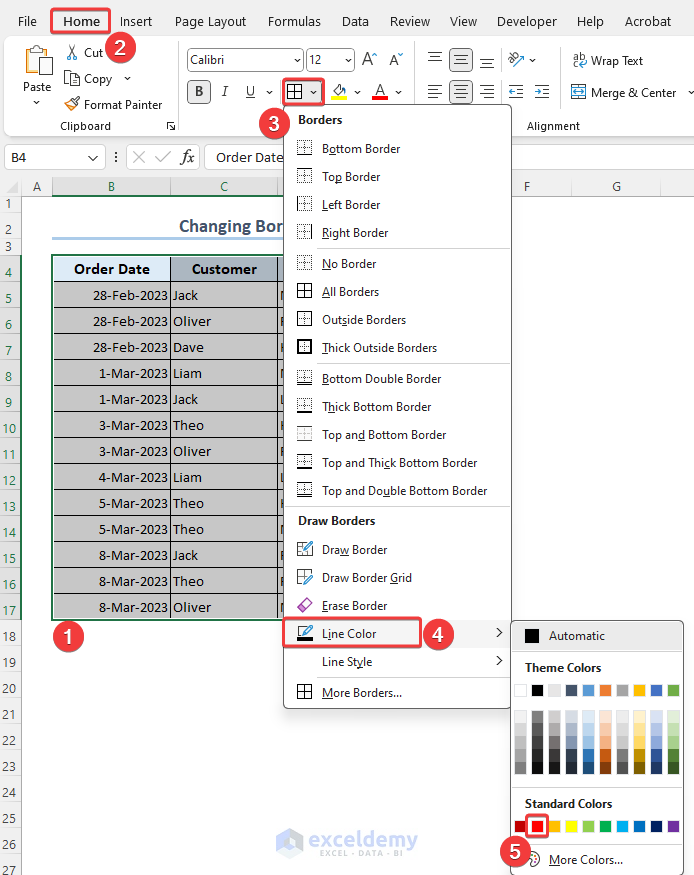
- Select the Line Color from the drop-down list of the Borders icon to change the color of the border.
Alternative: There are 2 other ways to change the border color in Excel:
Using Format Cells Dialog Box
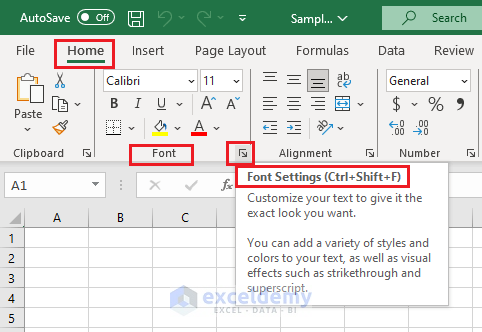
- The keyboard shortcuts to open the Format Cells dialog box in Excel: Ctrl + 1 or CTRL + SHIFT + F.
- Or, click on the Font Settings icon at the bottom right corner of the Home => Font group of commands.
- In the Format Cells dialog box, go to the Border tab then choose your desired color from the Color section.
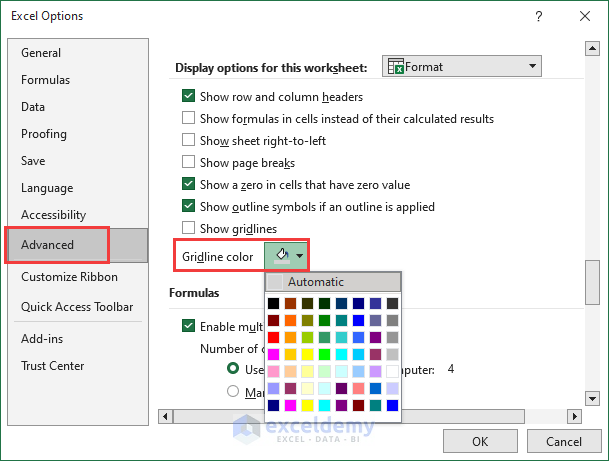
Using Advanced Display Options
- To open the Excel Options dialog box, select as follows: File tab >> Options menu. Or, simply press the Alt + F + T keys.
- Select a color from the Gridline color section.
This will change all the gridlines for the selected worksheet.
The worksheet cell color changes from the default color.
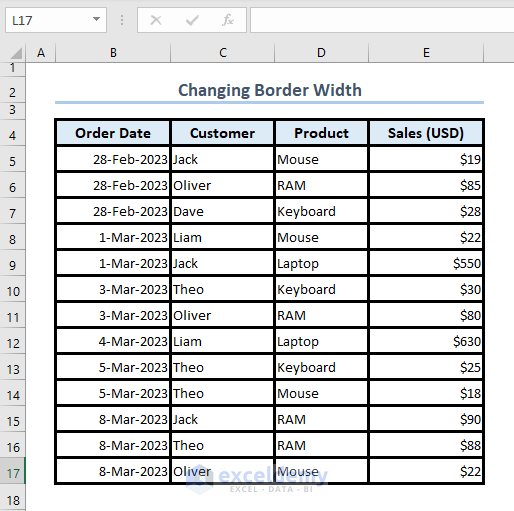
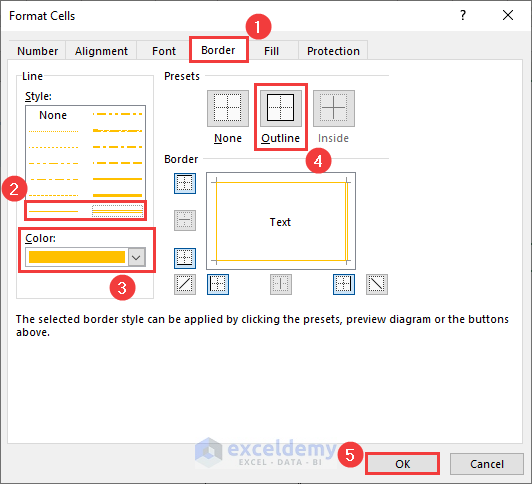
Example 2 – Adjusting Border Line Width
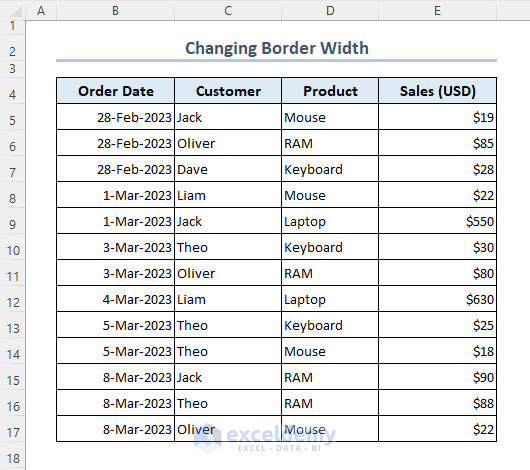
From the Format Cells dialog, we’ll change the borderline width for the following dataset.
- Select the cell range.
- Press Ctrl+1 to open the Format Cells pop-up window.
- Apply some Border => Line => Style like in the following image.
- Click OK.
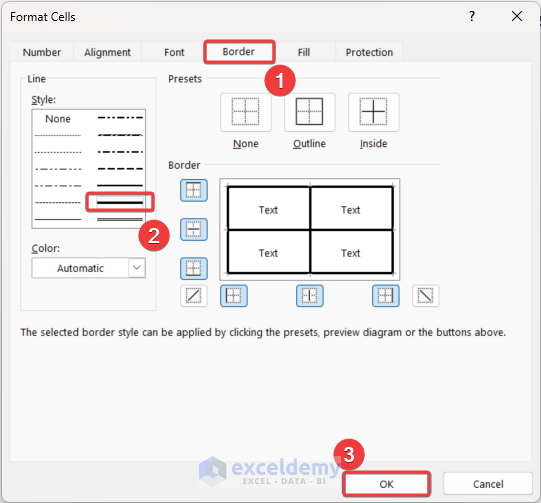
This is the output:
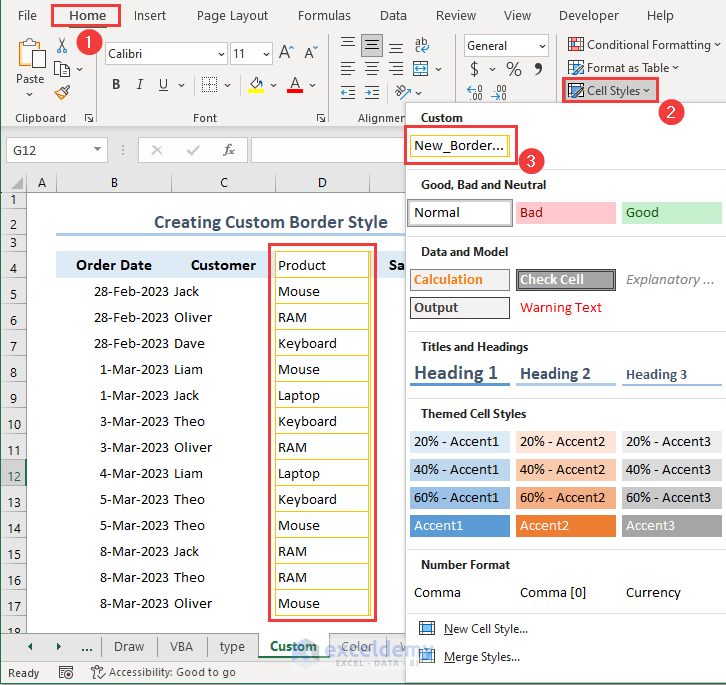
How to Create a Custom Style for Cell Borders in Excel
We can create a customized border style using the Cell Styles command.
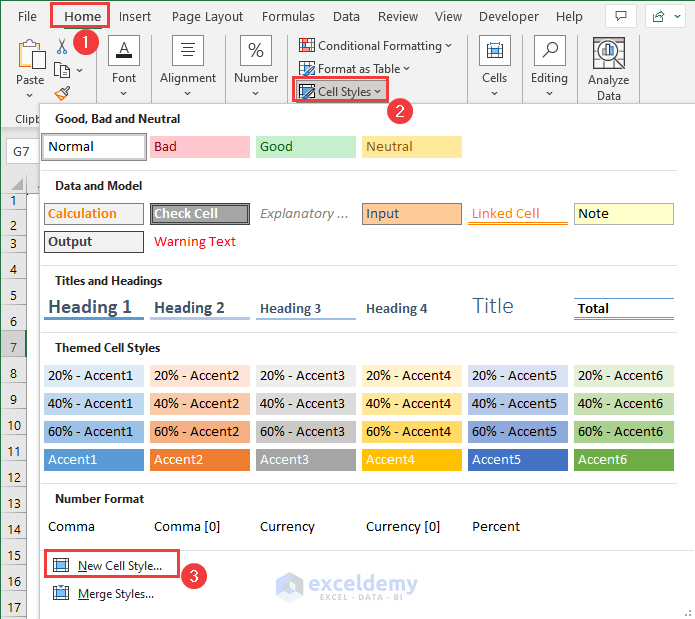
Steps:
- Go to the Home tab >> Cell Style drop-down >> New Cell Style option.
- In the Style dialog box that opens, rename the Style name to New_Border_Style.
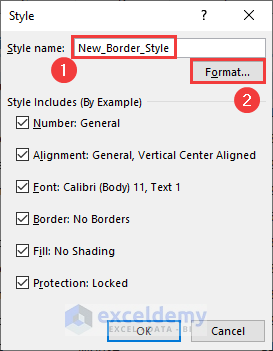
- Click on the Format button to open the Format Cells dialog box.
- Change the border line style, color, and presets of the cell.
- Hit the OK button.
This will create a new custom style for the style name New_Border_Style. This new style can be found under the Home => Styles => Cell Styles drop-down list.
- Select the range and click the New_Border_Style button to add custom-created borders.
How to Remove Cell Borders in Excel
After applying borders, you may want to remove them when they are not necessary or useful anymore. There are 3 quick ways to do so: the No Border command, a keyboard shortcut, and the Erase Border command.
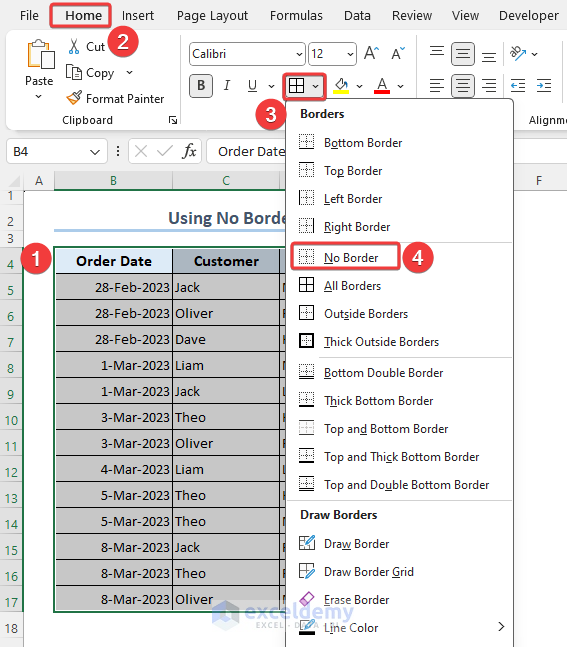
Method 1 – Using No Border Command
You can remove borders by selecting the range and clicking the No Border option. All the borders between the selected cells will be removed.
- Select the B4:E17 range and click as follows: Home tab >> Borders command >> No Border option.
All the borders are removed from the dataset.
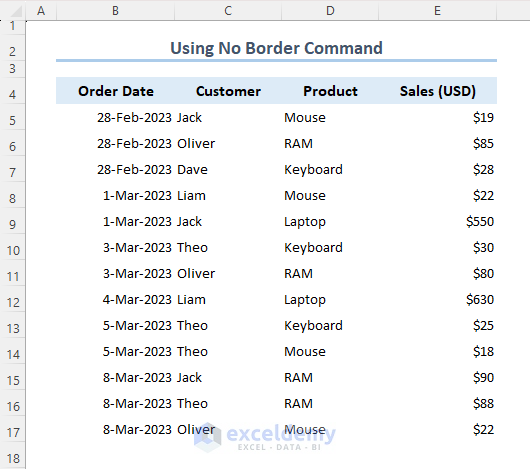
The borders of the cells will be removed.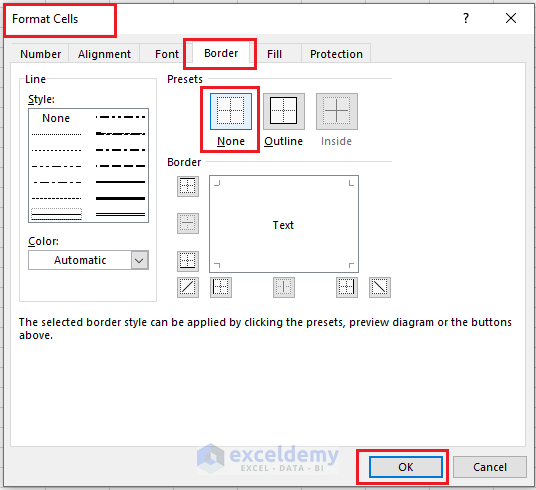
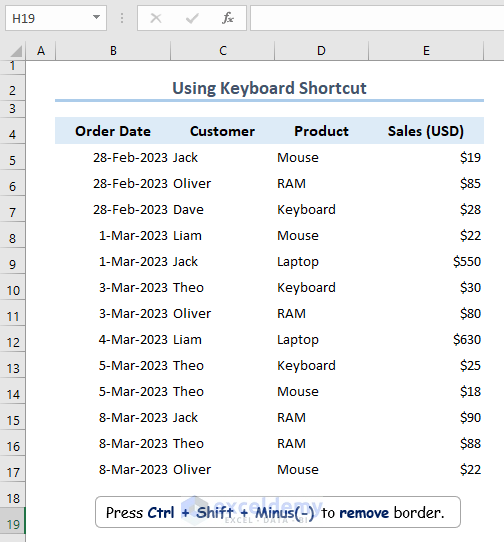
Method 2 – Using the Keyboard Shortcut
The keyboard shortcut to remove borders from Excel cells is Ctrl + Shift + Minus (-). By pressing the keys together, we can erase borders from the dataset.
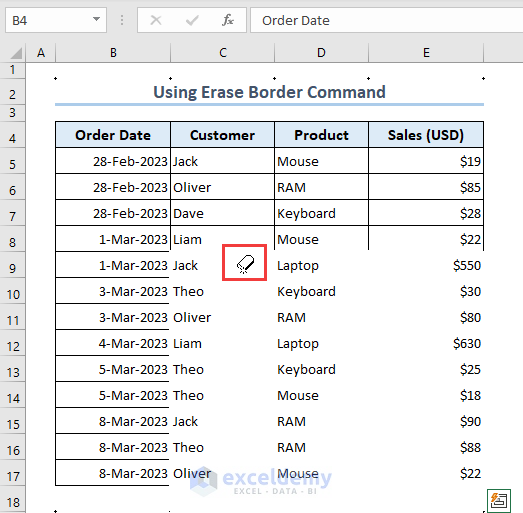
Method 3 – Using Erase Border Command
The Erase Border command will not remove all the borders automatically, but rather according to the selection of cells.
- Select the range and click as follows: Home tab >> Borders drop-down>> Erase Border command.
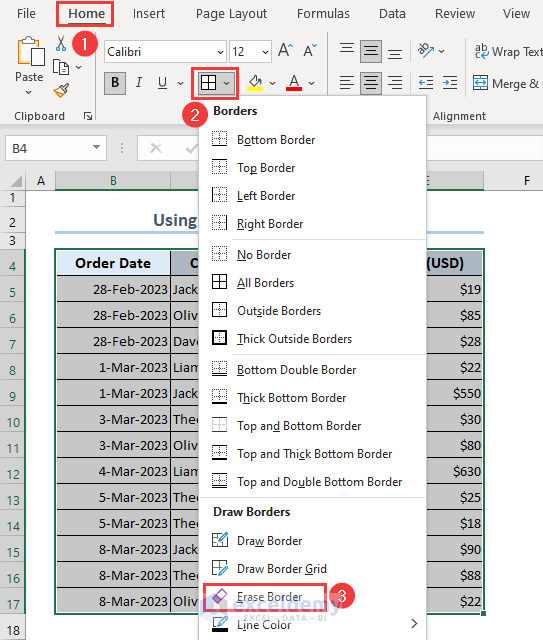
- Drag the Erase icon through the cell borders you want to erase.
- For a better understanding, watch the video below:
Things to Remember
- Click the Borders icon from the Home tab of the Top Ribbon to add and remove borders from a dataset.
- Press Ctrl+1 to quickly open the Format Cells dialog box to add or remove borders.
- Border Line color can be selected from the Borders command, Context menu, and Excel options dialog box.
- Use the Draw Border and Erase Border options to create borders and remove borders in specific cells.
- Use the Cell Styles command for creating custom borders.
Frequently Asked Questions
1. What is the default border in Excel?
Answer: The No Border style is the default border in Excel. However, you can add or change any border style.
2. How to Print with Borders in Excel?
Answer: First, select the Excel worksheet to print. Then, select as follows:
- Go to the Page Layout tab >> Select the Sheet Options command >> Check the Print option under the Gridlines Category.
- Then press Ctrl+P to print with the border formatting.
Download Practice Workbook
More Articles on Excel Cell Borders
- Add Thick Box Border
- Add or Remove Dotted Border
- Apply Borders with Conditional Formatting
- Lock Borders in Excel
- Cancel Moving Border
- Remove Page Border
- [Fixed!] Border Is Not Showing in Excel

