In this Excel tutorial, we will explain how to apply Top and Bottom border.
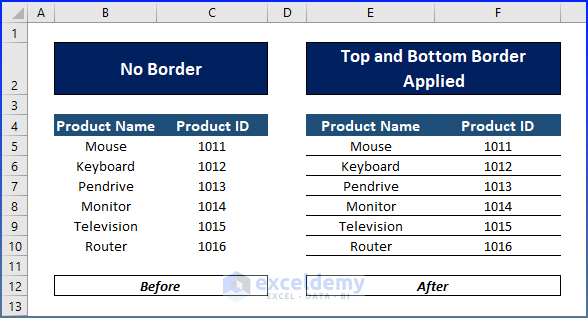
In the image below, the cells on the left don’t have borders, but on the right, borders have been added using the Top and Bottom Border option.
3 Ways to Apply Top and Bottom Border in Excel
Method 1 – Using Top and Bottom Border Option from Borders Command
In the Border drop-down are 3 types of Top and Bottom borders: Top and Bottom Border, Top and Thick Bottom Border, and Top and Double Bottom Border.
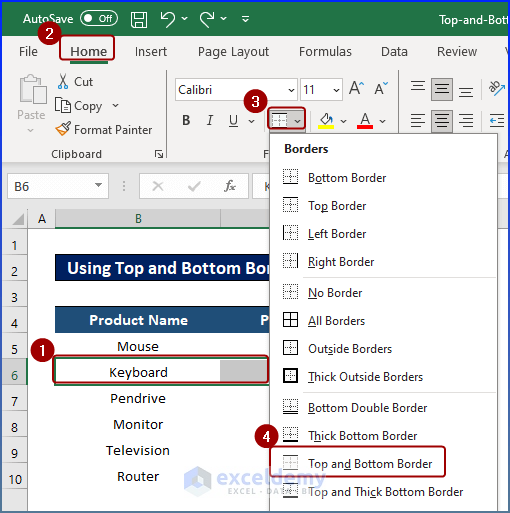
Let’s insert the Top and Bottom Border using the built-in Borders option.
Steps:
- Select the cells where you want to insert borders.
- Go to Home tab > Font group > Border drop-down > Top and Bottom Border.
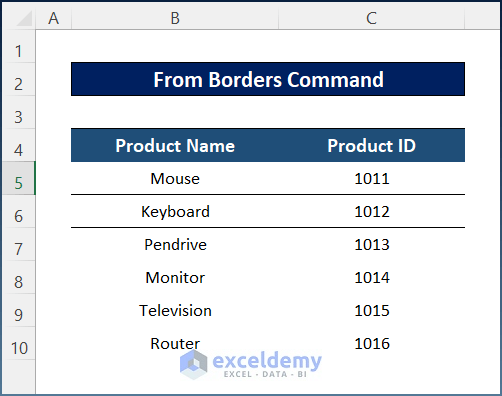
The cell range now contains Top and Bottom Borders like the image below:
You can alternatively select Top and Thick Bottom Border or Top and Double Bottom Border from the Border drop-down, as the following gif demonstrates:
Note: Apply the Top and Thick Bottom Border using the shortcut Alt+H+B+C, and the Top and Bottom Double Border using the shortcut Alt+H+ B+U.
Read More: How to Insert Border in Excel
Method 2 – Using Format Cells Dialog Box
When you use the built-in Border option to add Top and Bottom Border, it only applies borders to the top side of the first cell and the bottom side of the last cell in a range. You can apply Top and Bottom border to all the cells in the range using the Format Cells dialog box.
Steps:
- Select the cells.
- Press Ctrl+1 together to open the Format Cells dialog box.
- In the Format Cells dialog box:
- Go to Border.
- Select top, middle and bottom border in the Border group.
- Click OK.
This will apply the top and bottom border to all the cells in the range.

To add Top and Bottom border quickly, apply the following shortcuts in the Format Cells dialog box:
- For the Bottom Border, press Alt + B
- For Top Border, press Alt + T
Read More: How to Apply All Borders in Excel
Method 3 – Using Draw Border Option
You can draw Top and Bottom borders directly on the worksheet instead of selecting cells first and then choosing from a set of built-in options.
Steps:
Go to Home tab > Font group > Border drop-down > Draw Border.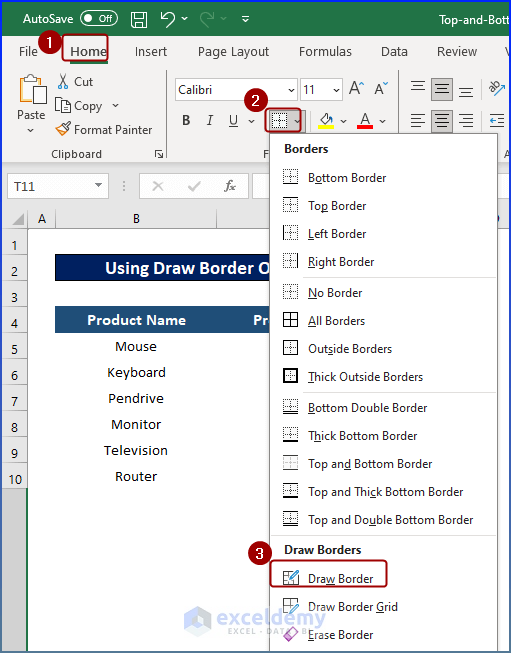
Excel switches to the Draw Border mode automatically, and the cursor becomes a pen.
- Take the pen to the upper side of the cell where you want to apply the border.
- Click on the mouse to apply borders.
- When done, press Esc to disable the border pen.
The gif below explains the process.
Read More: How to Add Thick Box Border in Excel
How to Apply Customized Top and Bottom Border
If you want to apply a unique Top and Bottom border in Excel, modify the Style and Color in the Format Cells dialog box.
Steps:
- Choose the cells where you want to add borders.
- Hit the Ctrl+1 keys to open the Format Cells dialog box.
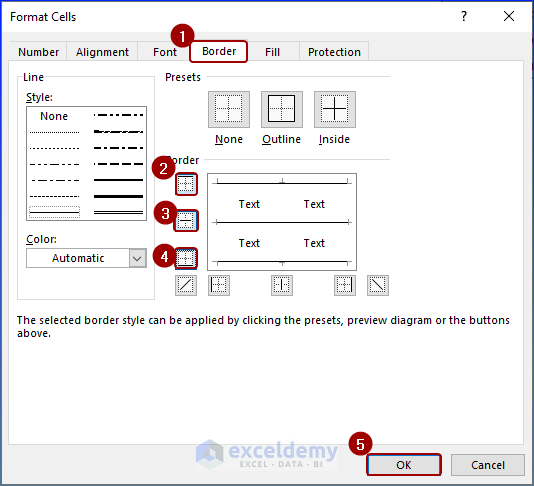
- In the Format Cells dialog box:
- Go to the Border tab.
- Select your desired Style and Color.
- Select the Top and Bottom Border and click OK.

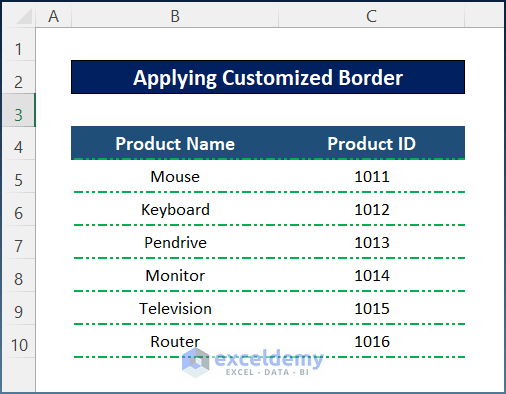
The final output looks like the image below.
Read More: How to Change Border Color in Excel
Download Practice Workbook
Frequently Asked Questions
How to apply the Top and Bottom border with a single command?
Use the shortcut Alt+H+B+D.
How to remove borders from cells in Excel?
Select the cells, open the Format Cells dialog, go to the Border tab, and choose the No Border option.
How to apply top and bottom borders to multiple sheets at once?
Hold down Ctrl (or Shift for adjacent sheets) and click on the desired sheet tabs. Then, apply the borders from the Format Cells dialog box following the steps described above. The changes will be reflected on all selected sheets.
Is it possible to save my custom border settings?
Excel does not provide the option to save custom border settings directly within the border menu. However, you can create a New Cell Style in the Styles group in the Home tab containing your desired settings. This style can be utilized for any future documents you create.
Related Articles
- How to Add or Remove Dotted Border in Excel
- How to Add Cell Borders Inside and Outside in Excel
- How to Apply Bottom Double Border in Excel
- How to Remove Borders in Excel
<< Go Back to Cell Borders in Excel | Excel Cell Format | Learn Excel
Get FREE Advanced Excel Exercises with Solutions!
