What Is Auto Formatting in Excel?
Auto formatting in Excel simplifies the process of making your data visually appealing. It provides ready-made styles for tables, cells, and entire worksheets. You can choose different fonts, colors, borders, shading, and number formats to improve readability. The best part? When you add or modify data, the formatting automatically adjusts to maintain consistency without manual intervention. Excel offers several types of auto formatting:
- AutoFormat: Applies predefined styles to selected ranges.
- AutoFitRow: Adjusts row height to fit content.
- AutoFitColumn: Adjusts column width to fit content.
- AutoCorrect: Fixes common formatting errors automatically.
- Format as Table: Converts a range into a formatted table.
In this guide, we’ll focus on the AutoFormat feature.
Adding AutoFormat to the Quick Access Toolbar
- Click the File tab in Excel.
- Select Options.
- Choose Quick Access Toolbar on the left.
- From the Choose commands from dropdown, select All Commands.
- Scroll down and find AutoFormat.
- Click Add to add it to your Quick Access Toolbar.
- Press OK.
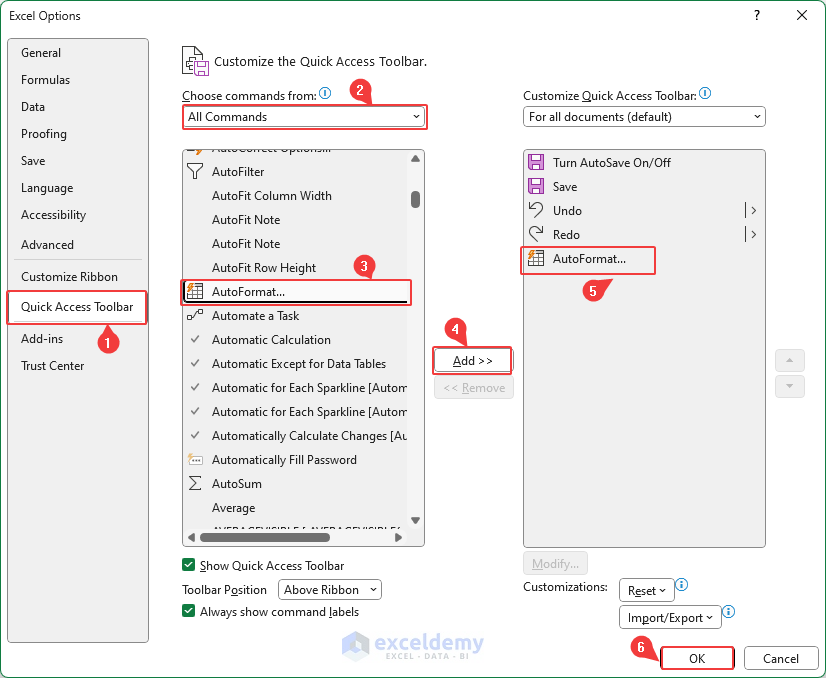
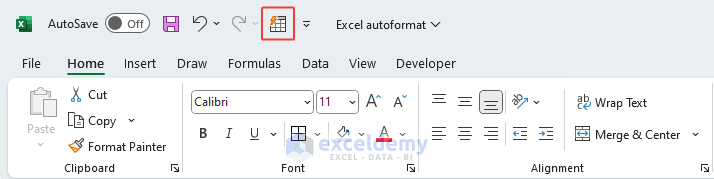
- You’ll find the AutoFormat option in the Excel Ribbon.
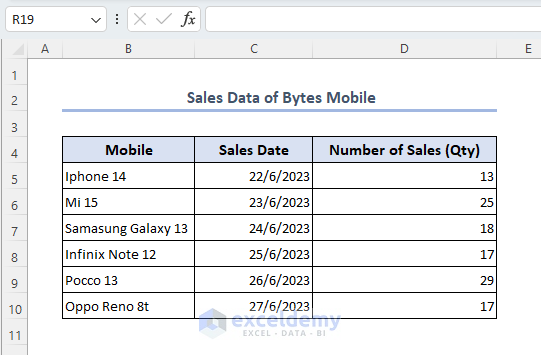
Using AutoFormat – A Practical Example
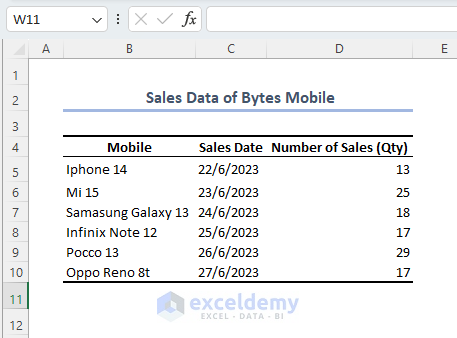
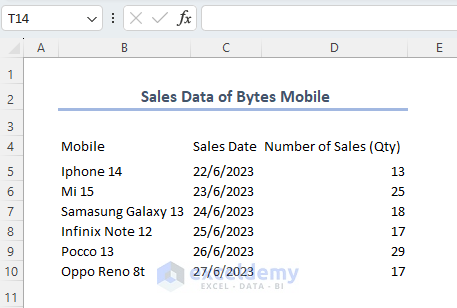
Suppose you have a dataset named “Sales of Bytes Mobile.” Follow these steps:
- Select the dataset.
- Click the AutoFormat option in Excel.
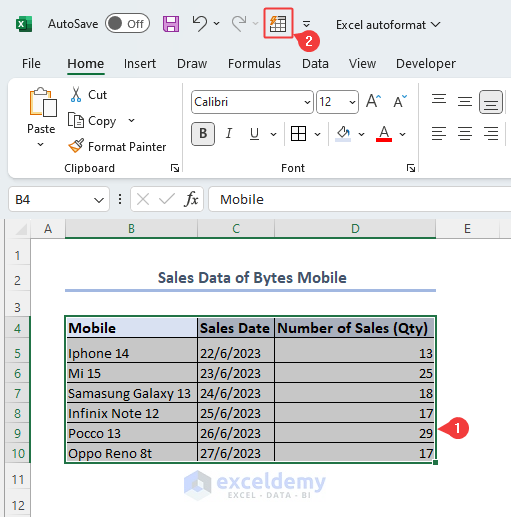
- Choose a formatting style that suits your data.

Your output will reflect the selected formatting.
Customizing Formatting After Adding AutoFormat Options
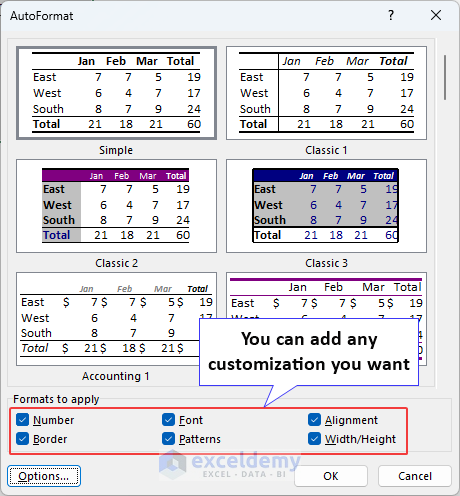
- Click Options… in the AutoFormat dialog.
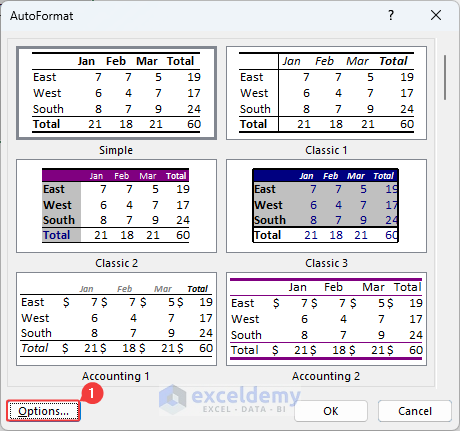
- Customize the formatting options to create your desired style.
Read More: Stop Auto-Formatting Numbers
Undo Auto Formatting
1. How to Remove AutoFormat Feature
- To remove auto formatting, use the keyboard shortcut Alt + H + E + F.
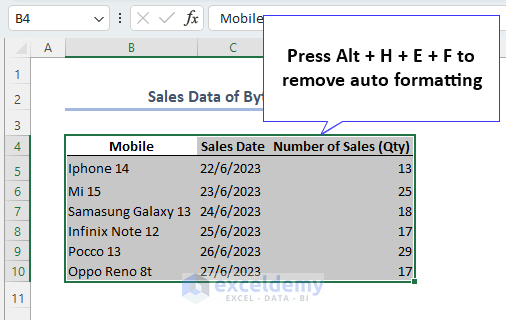
- Alternatively, select None from the AutoFormat window.
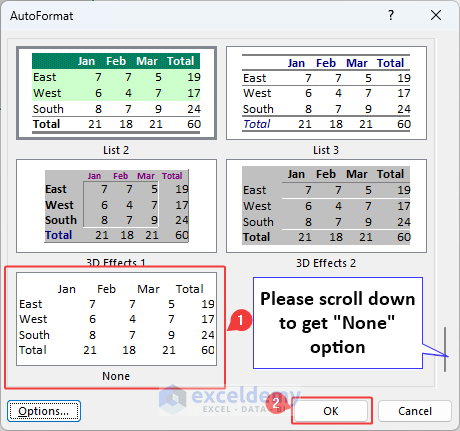
- The dataset will have no formatting.
Read More: [Fixed!] Excel Changing Dates to Random Numbers
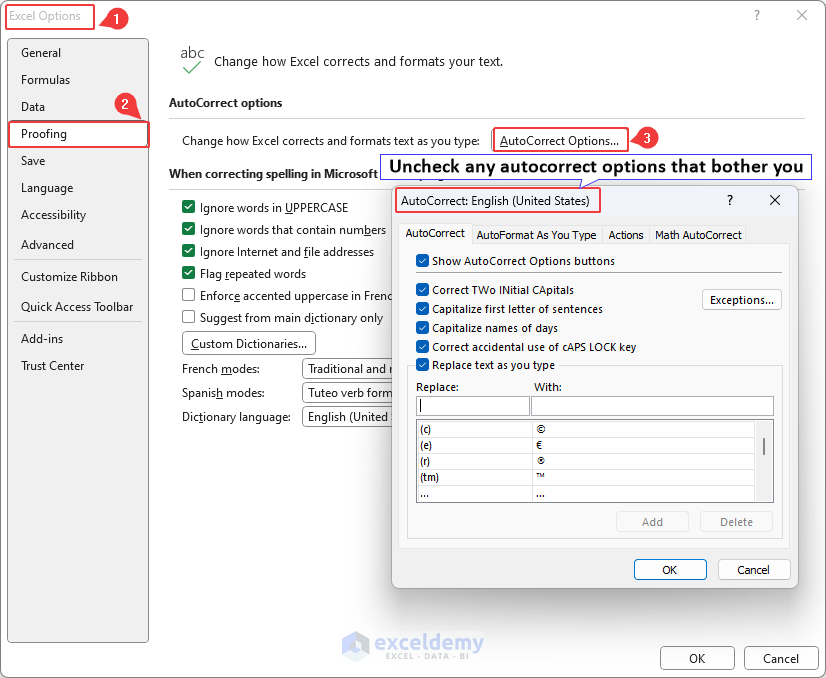
2. Remove Other’s Automatic Formatting
- Use Alt + F + T to access Proofing.
- Select AutoCorrect Options… to manage automatic formatting.
Read More: Stop Excel From Changing Numbers to Dates
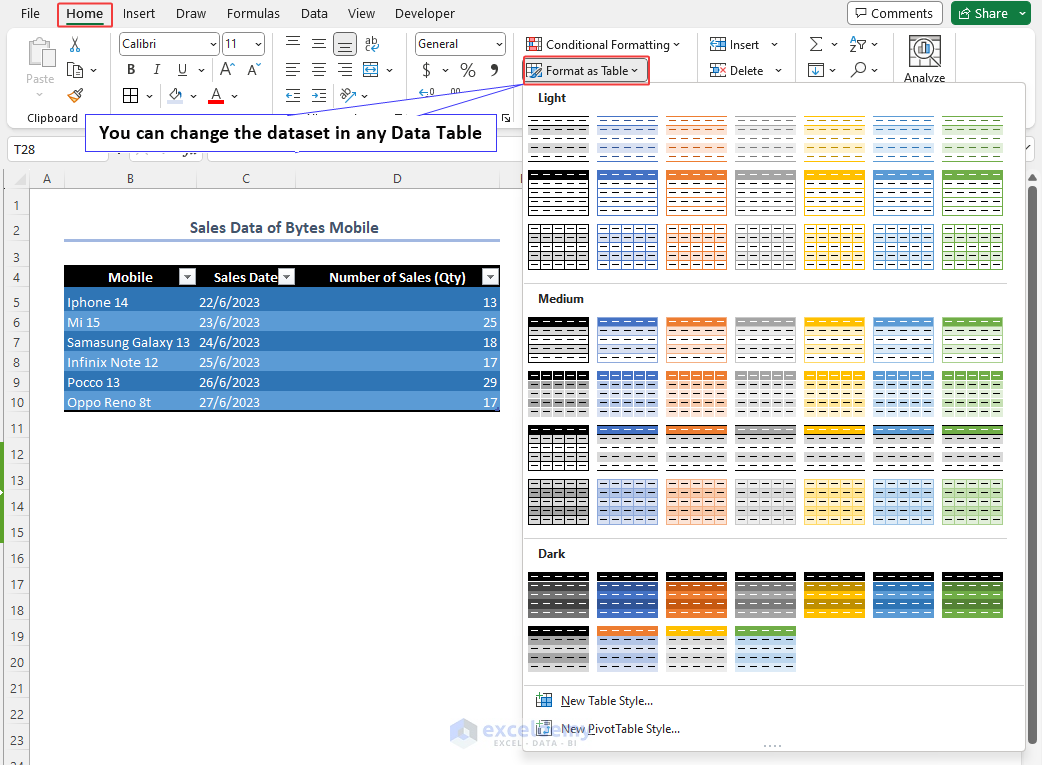
Format as Table – An Alternative
While AutoFormat isn’t directly available in the Excel ribbon, you can manually add it. Alternatively, use Format as Table in the Home tab. Unlike the previous example, this option converts your dataset into a table.
Read More: Stop AutoCorrect for Dates
Things to Remember
- Always select your dataset before accessing the AutoFormatting window.
- Update formatting rules when your data changes to maintain consistency.
- Auto–formatting isn’t dynamic by default, so adjustments may be necessary.
Download Practice Workbook
You can download the practice workbook from here:
Frequently Asked Questions
1. Can I copy auto-formatting from one range to another in Excel?
- Yes, you can copy auto-formatting from one range to another in Excel. Follow these steps:
- Select the range with the desired formatting.
- Go to the Home tab.
- Click the Format Painter button in the Clipboard group.
- Click and drag over the range where you want to apply the formatting.
2. Is there a way to preview auto-formatting before applying it?
- Absolutely! When using features like Format as Table or Conditional Formatting, you’ll usually see a preview section. It shows how the formatting will look based on your selected options. You can make adjustments and see the preview in real time.
3. Can I create my own custom auto-formatting styles in Excel?
- While Excel doesn’t offer a direct way to create custom auto-formatting styles, you can achieve similar results:
- Combine conditional formatting rules.
- Define specific conditions and formatting options.
- This allows you to create your own custom styles that automatically apply to your data.
4. Why does Excel automatically format cells?
- Excel automatically formats cells to enhance data readability and aesthetics.
- It saves time by applying styles automatically, maintaining consistency even when data changes.
- Professional-looking spreadsheets result from this automatic formatting.
Excel Auto Formatting: Knowledge Hub
- [Fixed!] Changing My Numbers to Zero
- [Fixed!] Excel Changing the Last Number to 0
- [Fixed!] Excel Changing My Numbers
- [Fixed!] Excel Changing My Numbers to Decimals
- Stop Changing Numbers to Scientific Notation
- Stop Rounding 16-digit Numbers
- [Fixed!] Excel Cell Format Changes Automatically
- Stop Excel from Auto-Formatting Hyperlinks
<< Go Back to Excel Cell Format | Learn Excel
Get FREE Advanced Excel Exercises with Solutions!
