As can be observed in the animation below, by default Excel changes the format of numbers after they’ve been input. It can become tiresome having to repeatedly reformat numbers to obtain the required format. In this article, we will demonstrate how to stop Excel from auto-formatting numbers.
We’ll use three easy and different ways to stop Excel from auto-formatting numbers: using an apostrophe when entering the value into the cell; altering the format of the cells to preserve the input; and applying VBA code.
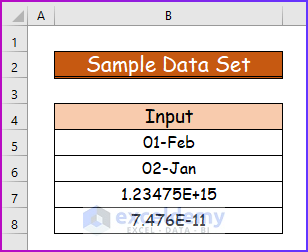
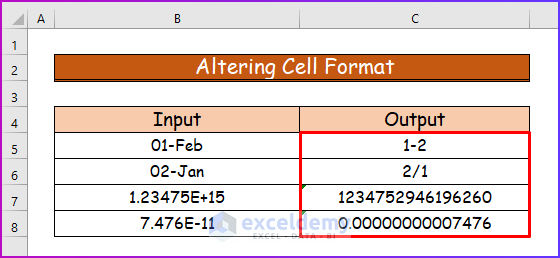
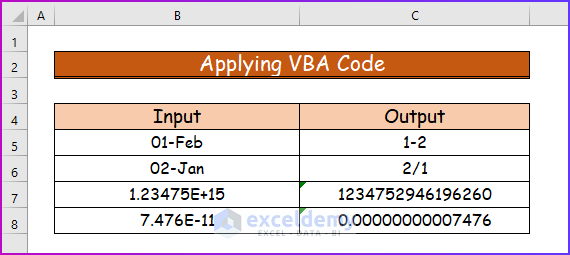
We’ll use the following dataset of some different types of numbers to illustrate the methods.
Method 1 – Using the Apostrophe While Entering Cell Values to Stop Auto Formatting of Numbers
Using an apostrophe before the cell value is the easiest way to tackle this issue. No formulas or use of special features is required.
Steps:
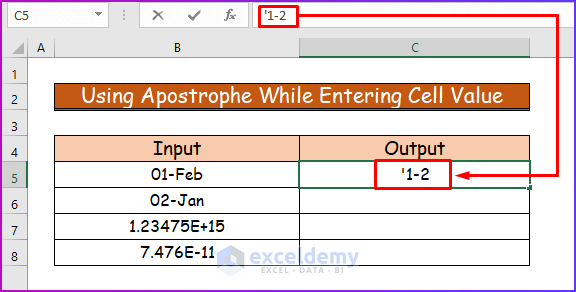
- In cell C5, enter 1-2 as shown in the following image.
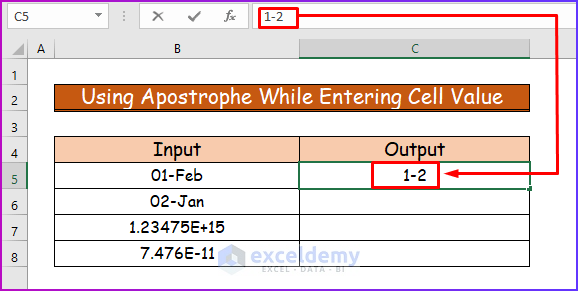
- Press Enter.
Excel automatically formats the input into a date.
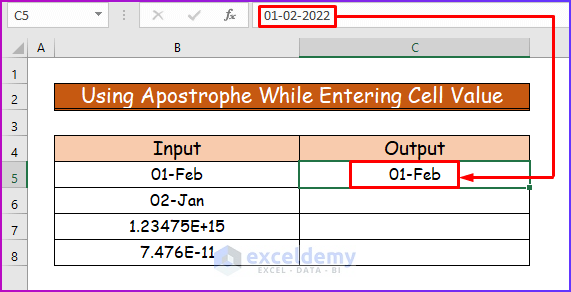
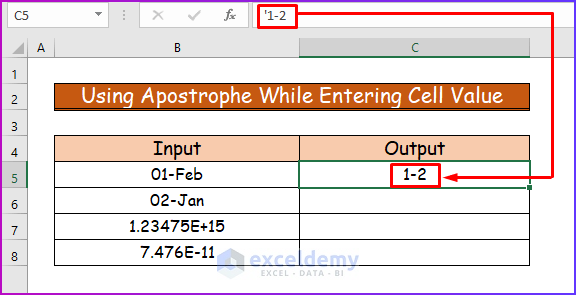
- To preserve the input format, add an apostrophe (‘) before the 1-2.
- Press Enter.
The format of the output is intact.
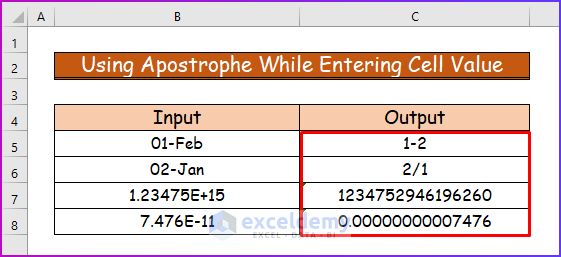
- Use the same technique in the other cells to obtain the desired result.
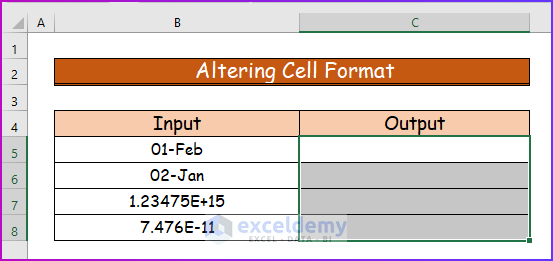
Method 2 – Altering Cell Format to Stop Excel from Auto Formatting
We can also prevent auto-formatting by setting the cell format of the input cell range.
Steps:
- Select the cell range C5:C8.
- Go to the Home tab on the ribbon.
- In the Number group, click on the little arrow in the lower right corner.
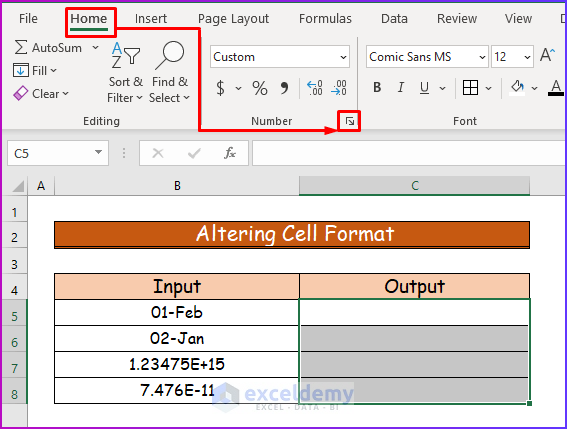
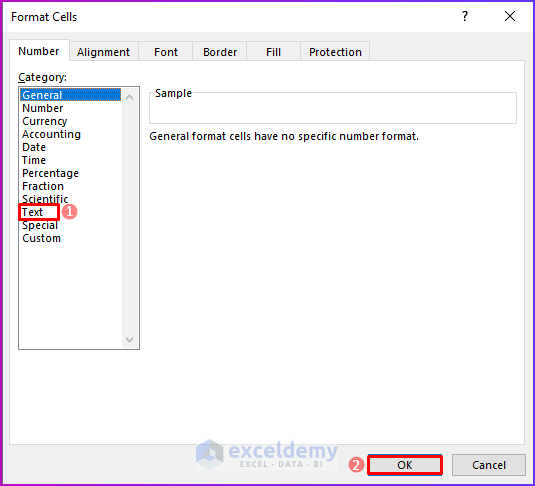
The Format Cells dialog box will open.
- From the Category tab choose Text.
- Click OK.
- Input your desired numbers and their format will remain intact.
Read More: How to Prevent Cell Format Changes Automatically in Excel
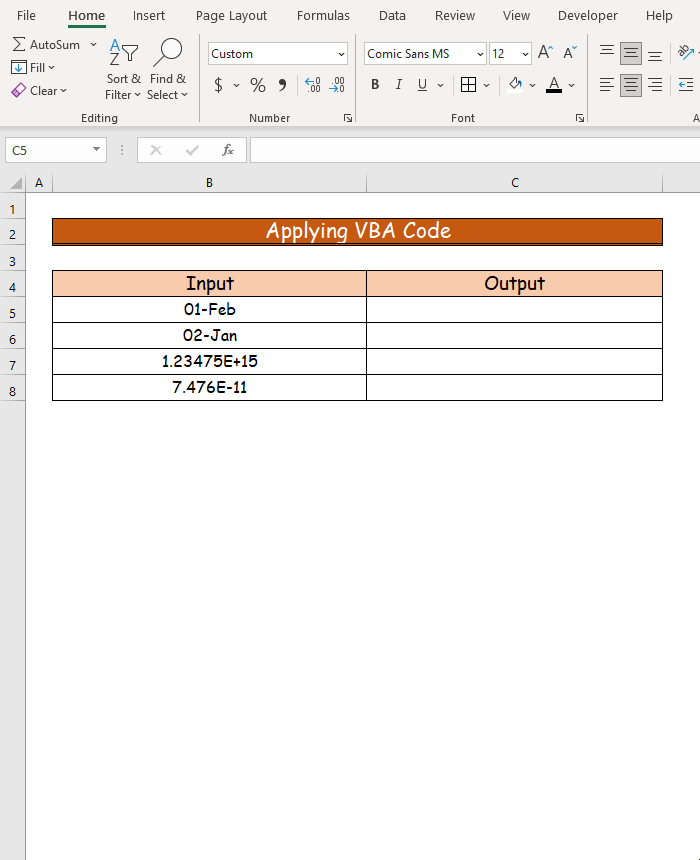
Method 3 – Applying VBA Code to Stop Auto Formatting
As with most things in Excel, we can also use a VBA code to stop auto-formatting.
Steps:
- If you don’t see it on your ribbon,, enable the Developer tab.
- Go to the Developer tab..
- From the Code group, choose Visual Basic.

The VBA window will open.
- From the Insert tab, choose Module.
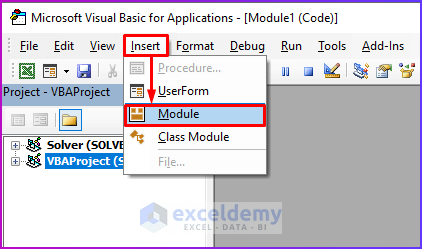
A Module window will open.
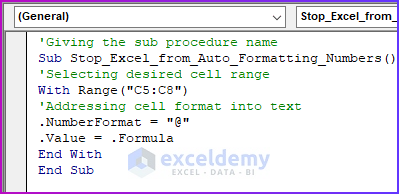
- Copy the following code and paste it into the module:
'Giving the sub procedure name
Sub Stop_Excel_from_Auto_Formatting_Numbers()
'Selecting desired cell range
With Range("C5:C8")
'Addressing cell format into text
.NumberFormat = "@"
.Value = .Formula
End With
End Sub
VBA Breakdown
- We name the Sub Procedure Stop_Excel_from_Auto_Formatting_Numbers.
Sub Stop_Excel_from_Auto_Formatting_Numbers()- We select the cell range, where we want to see the output.
With Range("C5:C8")- We change the format of the cell range into Text.
.NumberFormat = "@"
.Value = .Formula
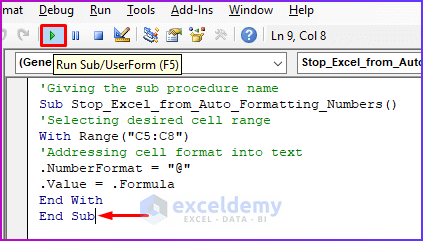
- Save the code in the module.
- Keeping the cursor in the module, press F5 or the Run button to run the code.
- Enter your desired numbers into the cell range C5:C8.
The input formats remain the same after the values are entered.
💡 Notes:
- To stop Excel from changing numbers to date in CSV files, go to Power Query Editor from the Data tab of the ribbon. Import the CSV file into the query and transform the data type from date to text.
- The methods above all work by converting the numbers into text format. The cell values will display as desired as a result, but you won’t be able to apply numeric operations such as adding them, finding the average, etc.
Read More: How to Stop Excel from Changing Last Number to 0
Download Practice Workbook
Related Articles
- Why Excel Is Changing My Numbers to Decimals
- How to Stop Excel from Rounding 16 Digit Numbers
- How to Stop Autocorrect in Excel for Dates
- [Fixed!] Why Is Excel Changing My Numbers?
- How to Stop Excel from Auto Formatting Hyperlinks
- [Fixed!] Excel Changing Dates to Random Numbers
- How to Stop Excel from Changing Numbers to Scientific Notation
- Why Is Excel Changing My Numbers to Zero?
- How to Stop Excel from Changing Numbers to Dates
<< Go Back to Excel Auto Formatting | Excel Cell Format | Learn Excel
Get FREE Advanced Excel Exercises with Solutions!
