Excel has extraordinary autocorrect features. When you type some data in Excel cells, it auto-corrects the data type sometimes which might create problems for us. This happens most frequently with dates. So, in this article, I will show you 3 quick ways to stop the autocorrect in Excel for dates.
How to Stop Autocorrect in Excel for Dates: 3 Quick Ways
Say, you have a dataset of 5 data containing fractions and numbers with hyphens. But, when you type them, the numbers are automatically formatted as Date by Excel.
To avoid this, you can stop the autocorrect in Excel for dates using any of the given ways below.
1. Format Cells as Text to Stop Autocorrect for Dates
You can first stop autocorrect in Excel by formatting the cells in Text format. Follow the steps below to do this.
📌 Steps:
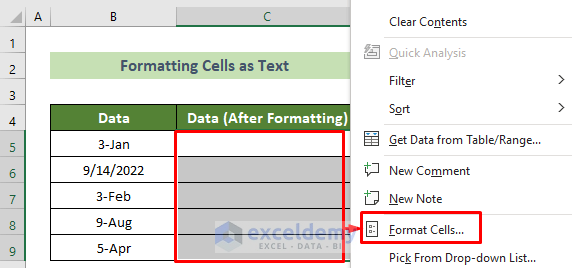
- First, select your cells (C5:C9 here) where you would put your values.
- Afterward, right-click on your mouse and choose the Format Cells… option from the context menu.
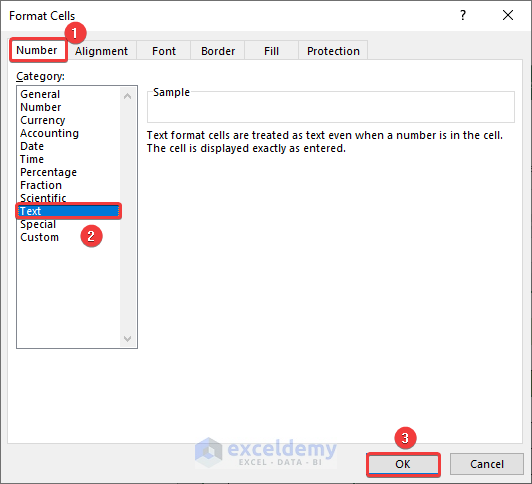
- As a result, the Format Cells dialogue box will appear.
- Subsequently, go to the Number tab >> choose Text from the Category: pane >> click on the OK button.
Thus, your cells are in Text format now. You can put any values now and they will remain as you put them. There will be no autocorrection to date. You can visualize this from the following gif.
Read More: [Fixed!] Excel Changing Dates to Random Numbers
2. Add a Space/ an Apostrophe/ a Zero & a Space Before Number
Another way to stop autocorrect in Excel for dates is to use a space or an apostrophe or a zero and a space before a number. Go through the following steps below to accomplish this.
📌 Steps:
- When entering your data, precede a space before your data, and you’ll see there will be no autocorrection to dates. Rather the data will remain just as you put it.

- Just like the previous step, you can add an apostrophe (‘) before your number to stop autocorrection to dates.
- Last but not least, you can also precede a zero and a space before your number to keep it in its own format.
Note:
You can precede a zero and space for the fraction numbers. Neither the zero nor the space will be shown to you. But if you precede a zero and space before a hyphenated number, then it will show you both the space and zero. So, it is advisable to not use this approach for hyphenated numbers.
3. Format Cells as Fraction to Stop Dates Autocorrection
For stopping fraction numbers to auto-correct into dates, you can also use the Fraction format type. To achieve this target, use the following steps.
📌 Steps:
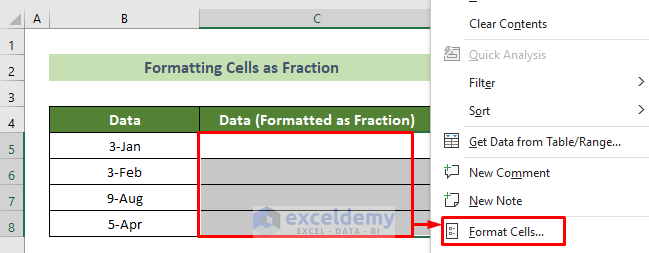
- At the very beginning, select your cells (C5:C8) on where you want to put your numbers.
- Subsequently, right-click on your mouse and choose the Format Cells… option from the context menu.
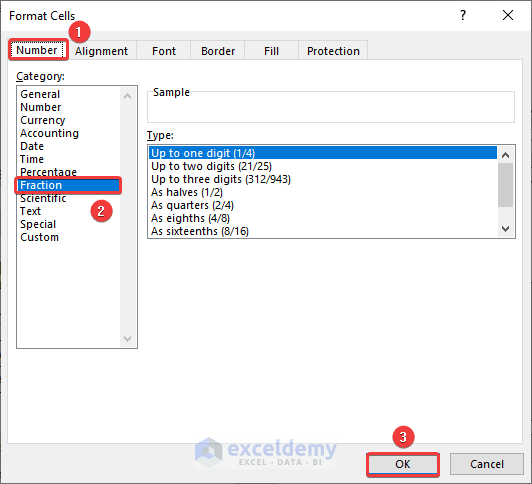
- Consequently, the Format Cells window will appear.
- Following, go to the Number tab >> choose Fraction from the Category: pane >> click on the OK button.
As a result, you can put any fractional number in these cells now. And, it would remain a fraction as you put it.

Note:
You can only stop autocorrection to dates for fractions by this approach. You can not stop auto-correction for hyphenated numbers using this way.
Read More: How to Stop Excel from Auto Formatting Numbers
How to Fix If Excel Is Changing Dates to Numbers
Now, sometimes it might happen that you are putting date values but Excel is changing the dates to numbers. In this regard, you can convert them back to dates again by following the steps below.
Solution:
- First, select the cells (B5:B9 here) where you have put the values.
- Second, right-click on your mouse.
- Third, choose the Format Cells… option from the context menu.

- As a result, the Format Cells window will appear now.
- Afterward, go to the Number tab >> choose the Date option from the context menu >> Click on the OK button.
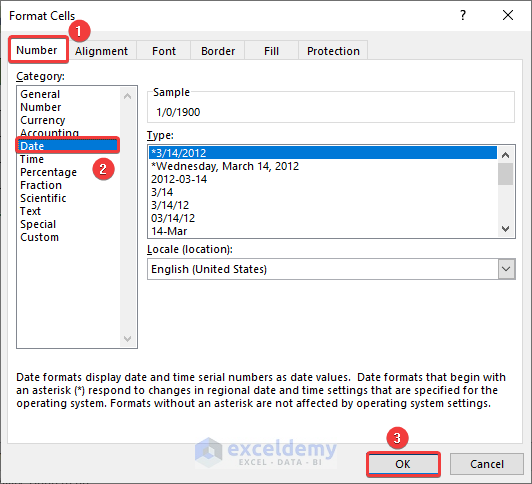
Thus, you will see all the numbers are converted back to dates. And, the result would look like this.

Read More: [Fixed!] Why Is Excel Changing My Numbers?
Download Practice Workbook
You can download our practice workbook from here for free!
Conclusion
So, in this article, I have shown you 3 quick ways to stop the autocorrect in Excel for dates. I suggest you read the full article carefully and practice accordingly. I hope you find this article helpful and informative. You are welcome to comment here if you have any further questions or recommendations.
Related Articles
- Why Is Excel Changing My Numbers to Zero?
- How to Stop Excel from Changing Last Number to 0
- How to Stop Excel from Rounding 16 Digit Numbers
- How to Prevent Cell Format Changes Automatically in Excel
- How to Stop Excel from Auto Formatting Hyperlinks
- How to Stop Excel from Changing Numbers to Dates
- Why Excel Is Changing My Numbers to Decimals
- How to Stop Excel from Changing Numbers to Scientific Notation
<< Go Back to Excel Auto Formatting | Excel Cell Format | Learn Excel
Get FREE Advanced Excel Exercises with Solutions!
