We’re going to use the following dataset, into which we inputted numbers containing more than 15 digits.

If you notice, the inputted number will be in General Number format, which considers the numbers in Scientific form.
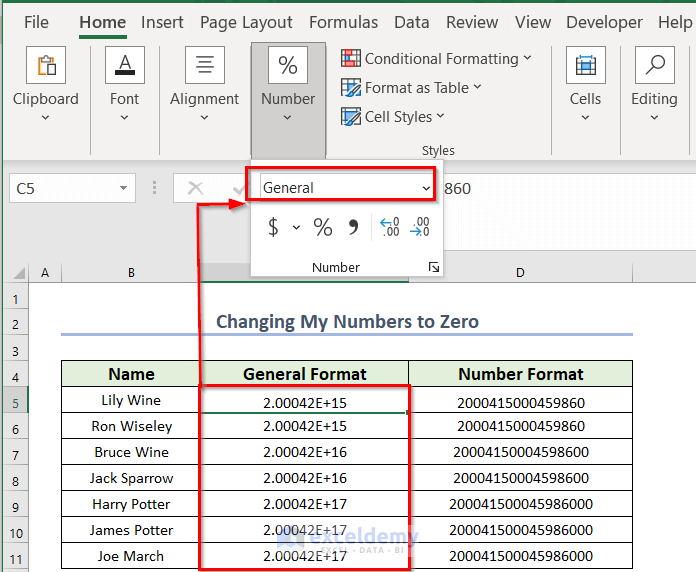
To avoid the scientific form, we used the number format for all those numbers.
Method 1 – Use of Apostrophe Mark
You can see when you have inputted numbers of more than 15 digits, all those digits after 15 digits become zero.
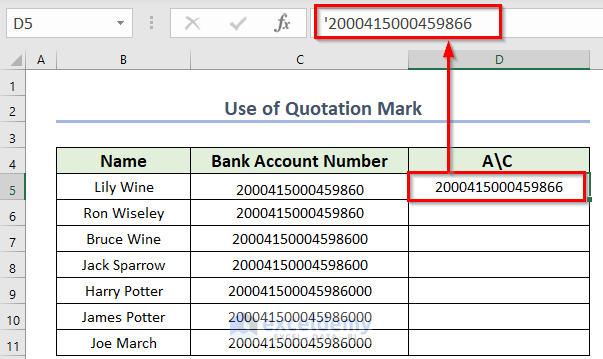
For example, you want to write 2000415000459866, but Excel will consider this 2000415000459860. The last digit becomes zero.
If you want to write 20004150004598678, Excel will consider it as 20004150004598600. The last two digits become zero.
Solution:
- Use the apostrophe(‘) mark before the number. Excel will consider your number in text format, and all those digits will be exactly what you wrote.
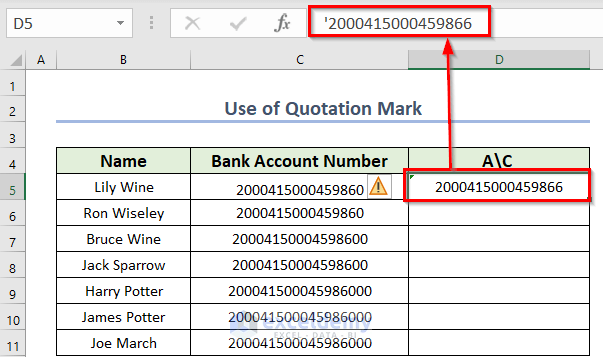
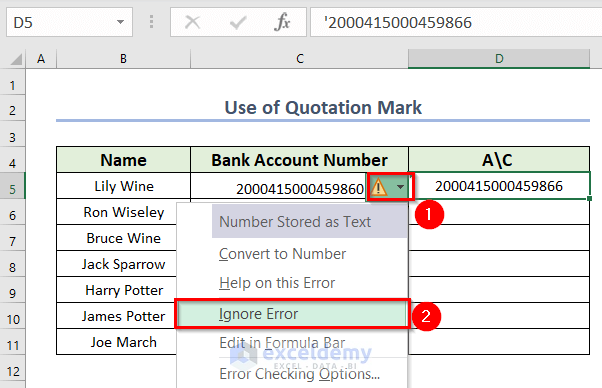
See a warning mark beside your number. To remove the warning mark, follow these steps.
- Click on the Warning mark.
- From the Menu Bar >> choose Ignore Error.
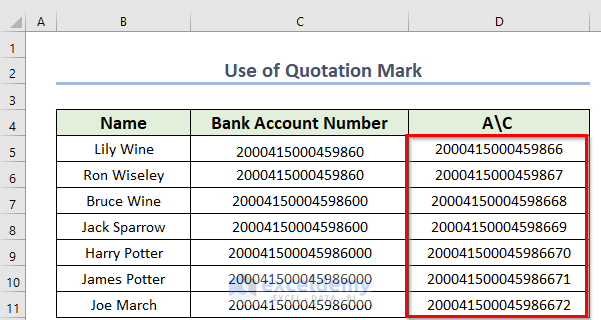
You can see the following result.
- Use the apostrophe mark before all the numbers.
You will get the following numbers.
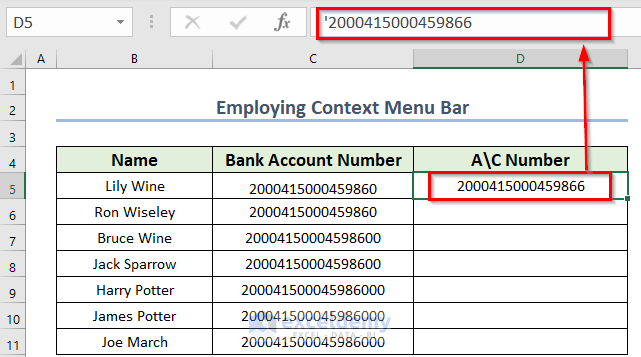
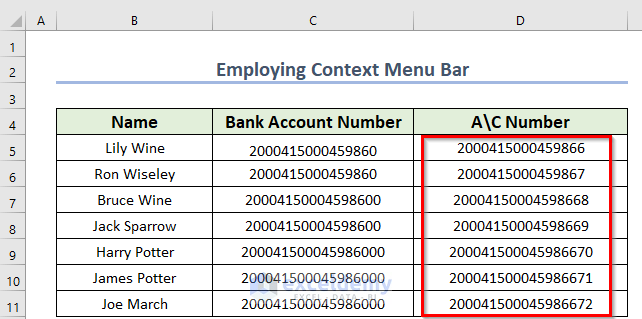
Method 2 – Employing Context Menu Bar
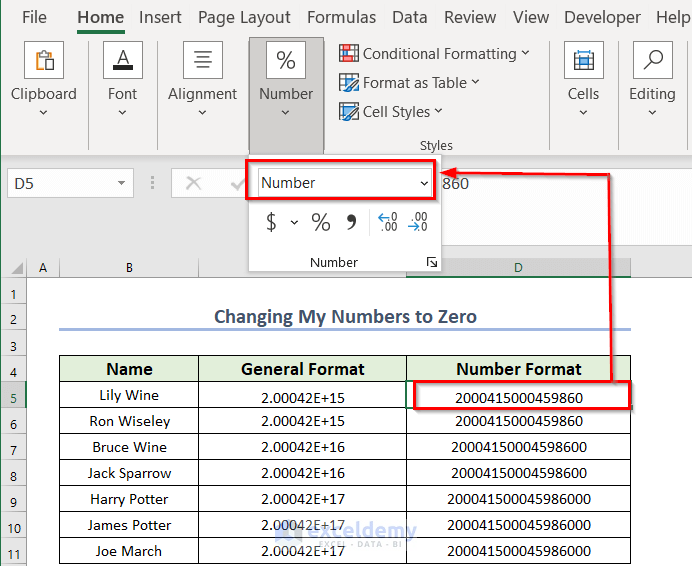
You know that Excel doesn’t count the exact written numbers with more than 15 digits. Excel converts the digits into zero after the 15th term of any number. So, check the solutions below for why Excel is changing my numbers to zero.
Solution:
Use the Context Menu Bar to get the exact inserted numbers that contain more than 15 digits.
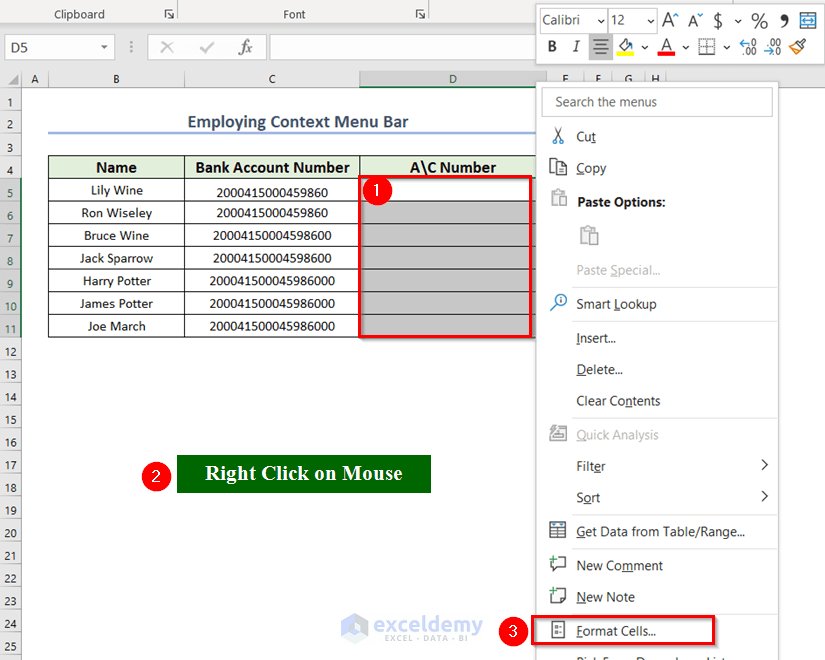
- Select the cells where you want to insert numbers that contain more than 15 digits. We selected the D5:D11 range.
- Right-click on the Mouse. You can also use Excel keyboard shortcuts SHIFT+F10 to open the Context Menu Bar.
- From the Context Menu Bar >> choose the Format Cells option.
Press the CTRL+1 keys to open the Format Cells dialog box directly or you can use the Custom Ribbon to go to the Format Cells command. In the case of using Custom Ribbon, select the data range >> from the Home tab >> go to the Format feature >> choose the Format Cells command.
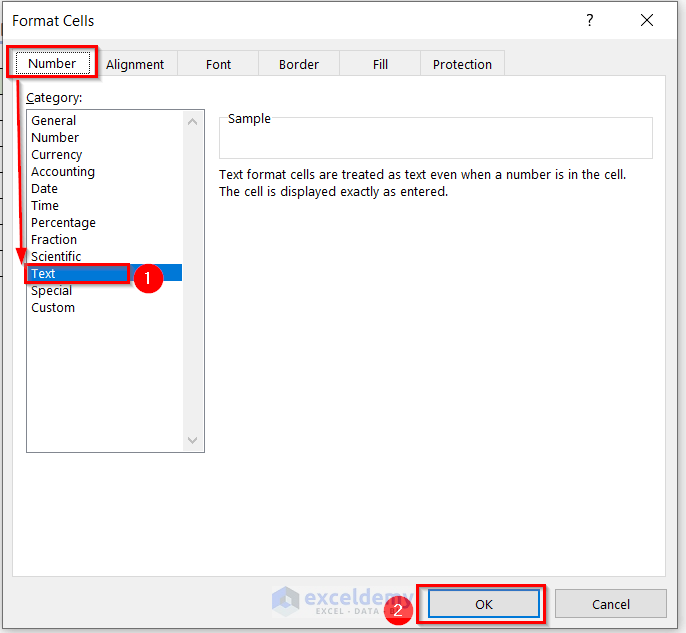
A dialog box named Format Cells will appear.
- From that dialog box, you have to make sure that you are on the Number command.
- Select the Text option.
- Press OK to get the changes.
- Write down your number.
You can see that there is an apostrophe mark before your number, which ensures that the number is in Text format.
You will get the following numbers.
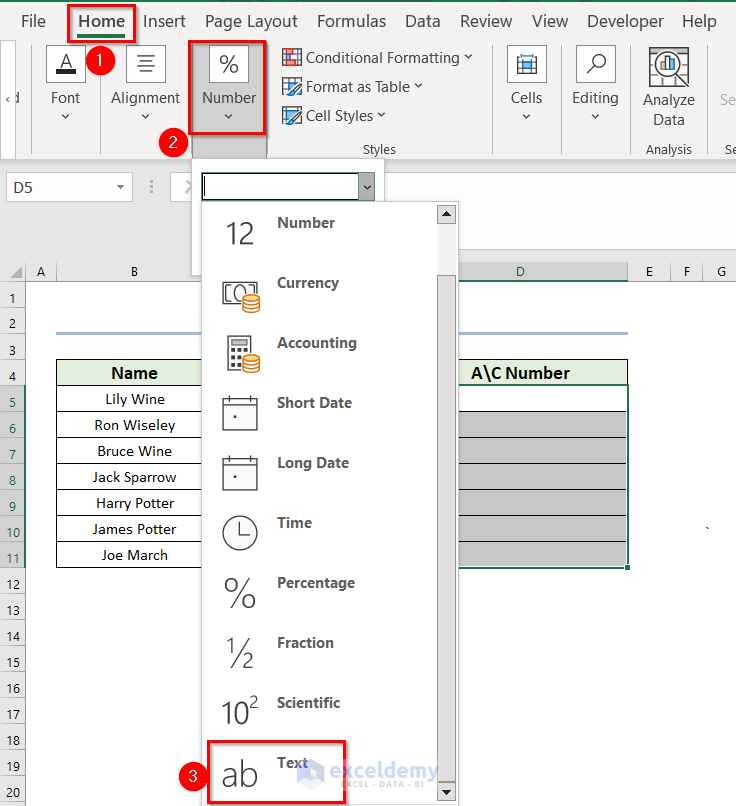
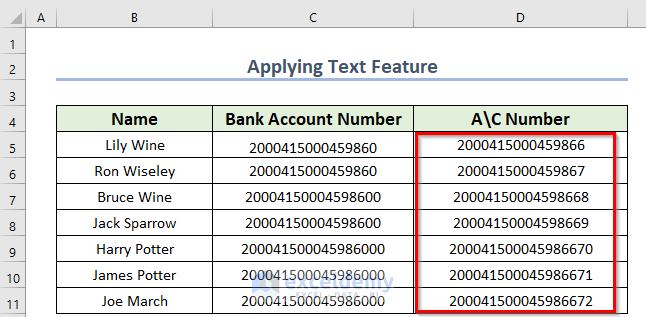
Method 3 – Applying Text Feature
Excel accepts a number with only 15 digits. Thus, after the 15th term of a number, Excel considers all other digits to be zero. You may find changing your numbers to zero.
Solution:
You can apply the Text feature to keep constant your input numbers.
- Select the data range where you want to insert numbers with more than 15 digits. We selected the D5:D11 range.
- From the Home tab >> go to the Number command.
- Choose the Text feature.
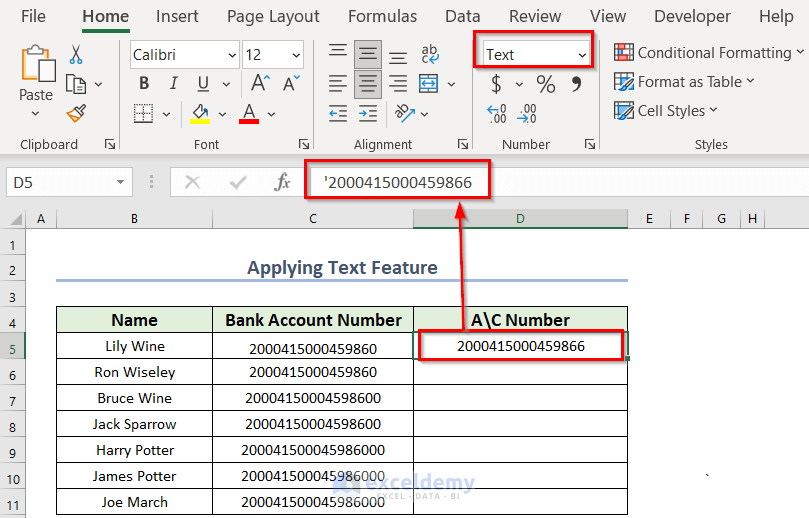
- Write down your number.
There is an apostrophe mark before your number, which ensures that the number is in Text format.
You will get the following numbers.
Method 4 – Use of Legacy Wizard
Another way to stop changing my Excel numbers to zero is by using the Legacy Wizard feature.
- Click on the File tab on the top ribbon.
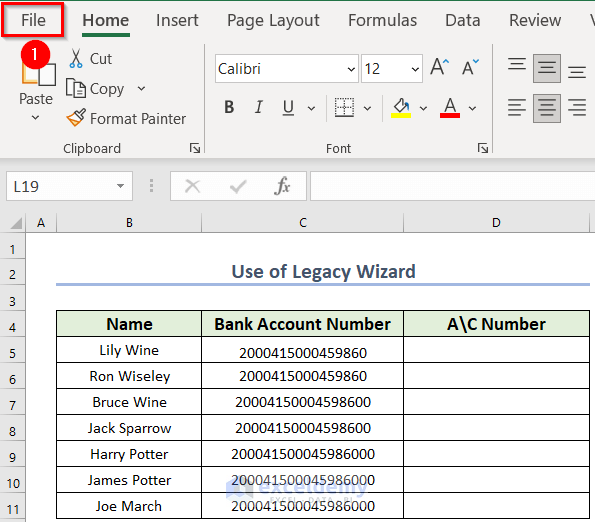
- Select the Options menu from the list.

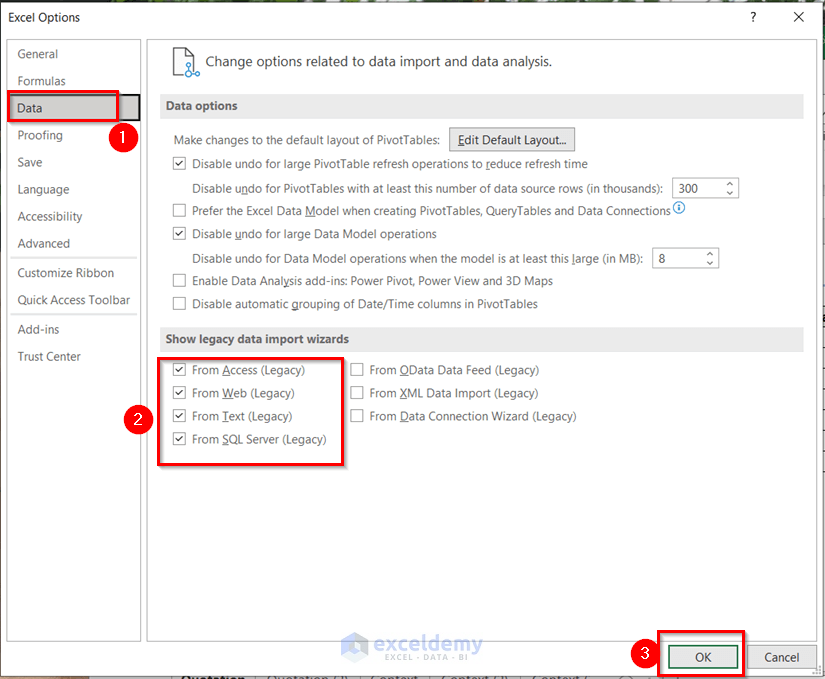
A new window named Excel Options will appear.
- Go to the Data option in the list.
- Mark all the lists under the title “show legacy data, import wizards.”
- Press OK.
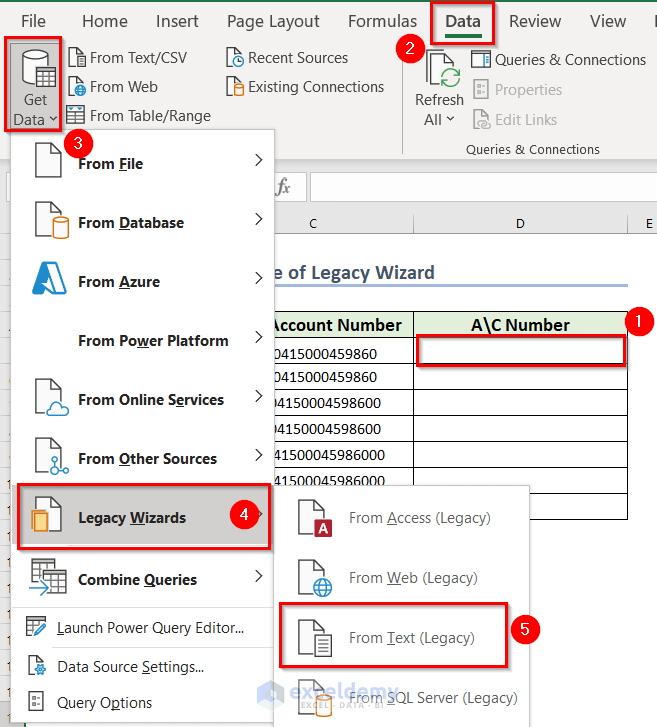
- Select the cell where you want to insert numbers that contain more than 15 digits. We selected the D5 cell.
- From the Data tab >> go to the Get Data menu.
- From the Legacy Wizards feature >> select From Text (Legacy).
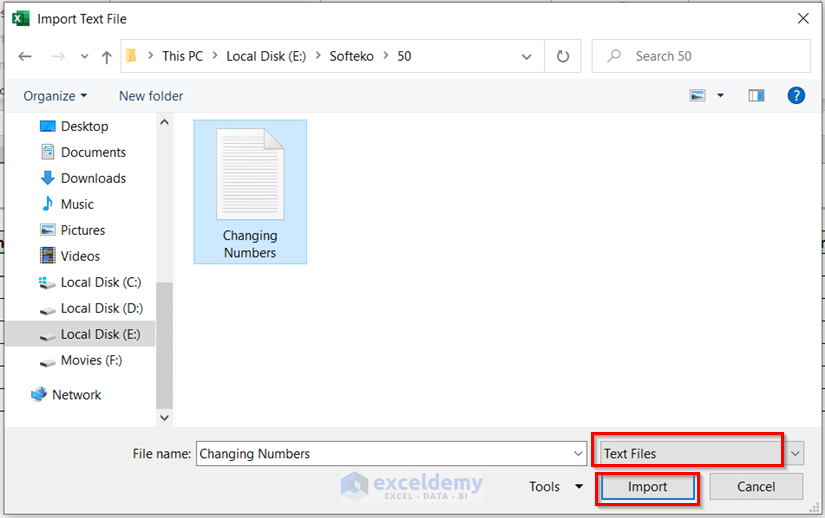
A new dialog box named Import Text File will appear.
- Choose your text file. Select any .txt extension file.
- Click on the Import button.
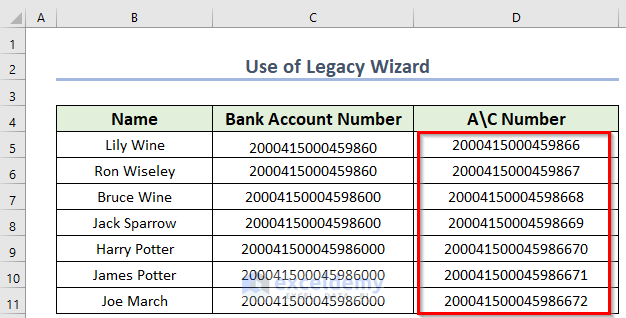
Write all the required numbers in a text file; you should import that particular file.
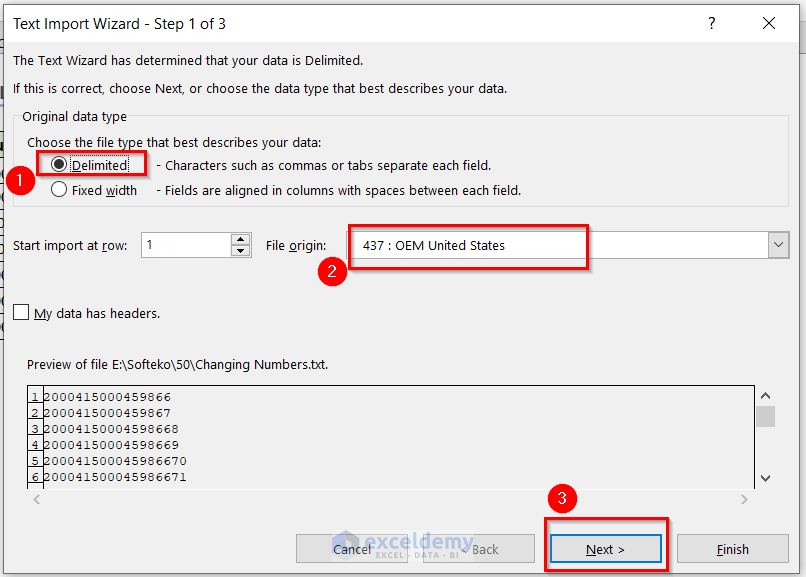
A new window named Text Import Wizard – Step 1 of 3 will appear.
- Make sure that the Delimited option is checked.
- Choose 437: OEM United States in the File origin box.
- Click on Next.
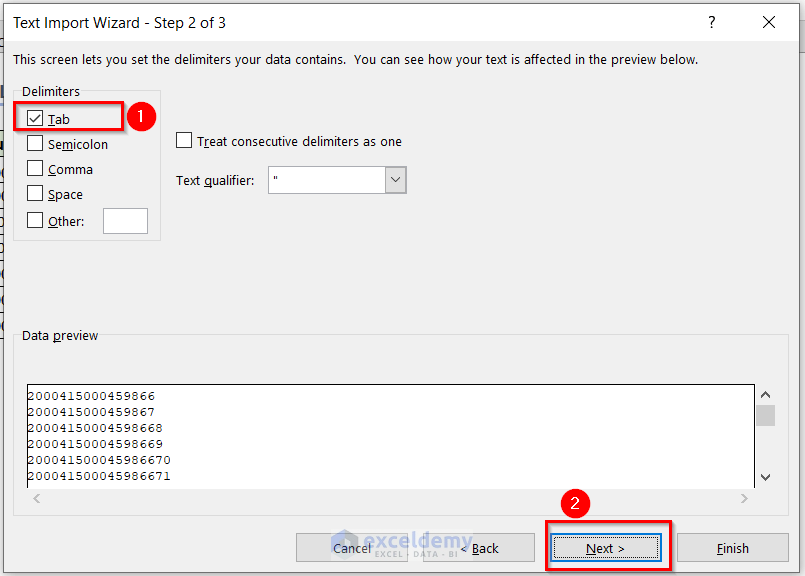
A new window named Text Import Wizard – Step 2 of 3 will appear.
- Make sure that you mark the Tab option from Delimiters.
- Click on the Next option.
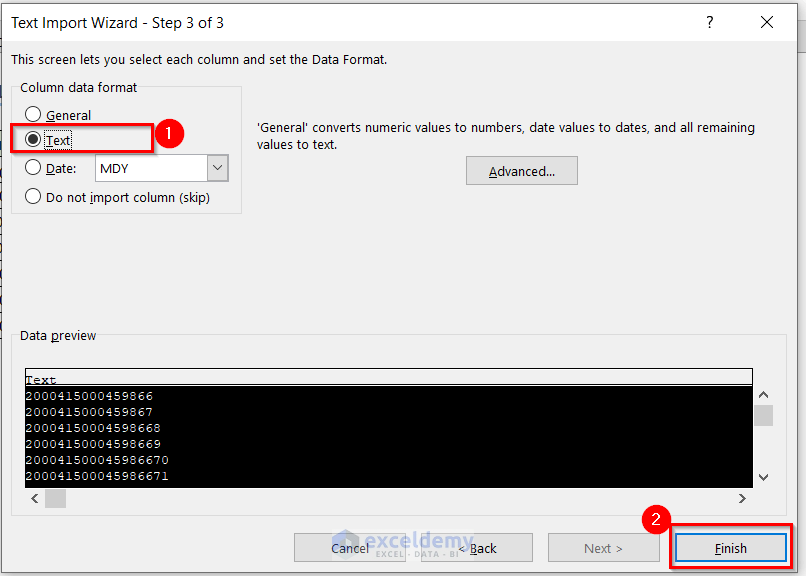
A new window named Text Import Wizard – Step 3 of 3 will appear.
- Choose Text from the Column data format.
- Click the Finish button.
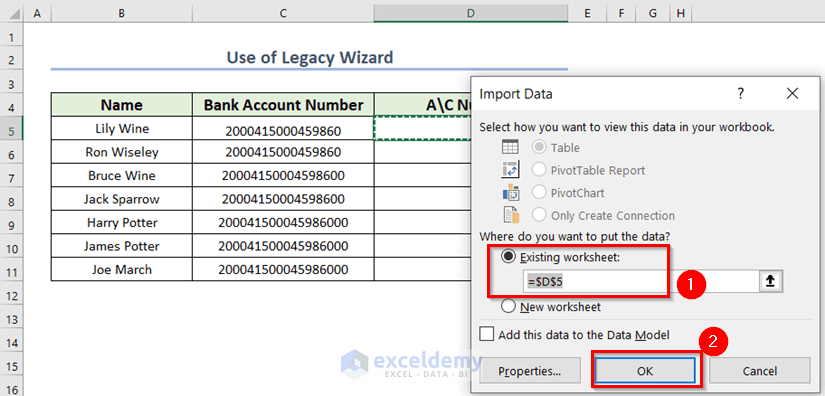
A dialog box named Import Data will appear. You will see that the Existing worksheet is marked including the cell reference.
- Press OK.
See all the numbers in the text file.
Things to Remember
- In all those methods, you have converted all your numbers into Text format.
- In method 4, you write the numbers in a text file and then import them into an Excel file.
Download Practice Workbook
You can download the practice workbook from here:
Related Articles
- How to Stop Autocorrect in Excel for Dates
- [Fixed!] Excel Changing Dates to Random Numbers
- How to Stop Excel from Changing Numbers to Scientific Notation
- How to Stop Excel from Auto Formatting Hyperlinks
- How to Stop Excel from Changing Numbers to Dates
- How to Prevent Cell Format Changes Automatically in Excel
- How to Stop Excel from Changing Last Number to 0
- Why Is Excel Changing My Numbers?
<< Go Back to Excel Auto Formatting | Excel Cell Format | Learn Excel
Get FREE Advanced Excel Exercises with Solutions!
