If you are looking for how to fix a watermark in Excel, then you are in the right place. In our practical life, we often need to use Excel for different purposes whereas in most cases we need to deal with watermarks. Fixing the watermark includes adding, formatting, or removing the watermark. In this article, we’ll try to discuss how to fix watermarks in Excel.
How to Fix Watermark in Excel: 2 Useful Methods
We can add two types of watermarks.
- Picture Watermark
- Text Watermark
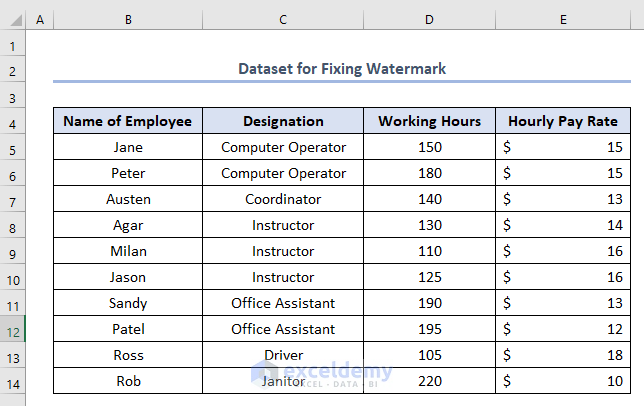
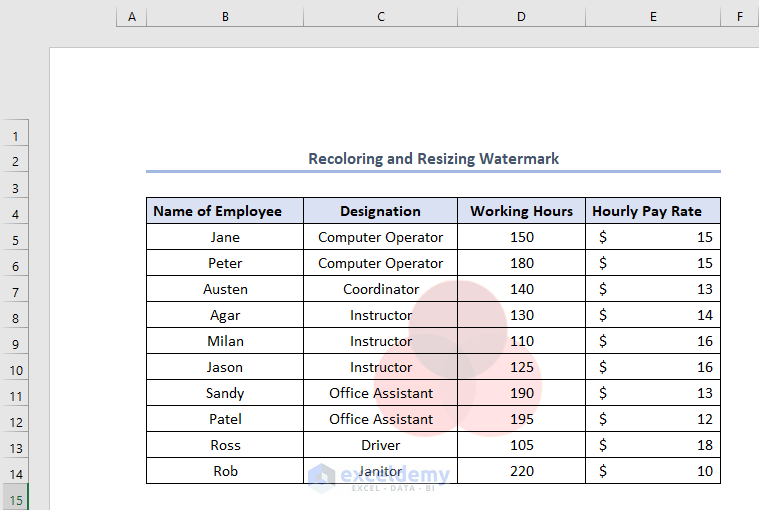
To show these types we have made a dataset named Dataset for Fixing Watermark. The dataset is like this.
Let’s discuss the two types of watermarks in Excel.
1. Use Header & Footer Option to Fix Watermark in Excel
We can use the Header & Footer option to add or remove watermarks for both picture types and text types.
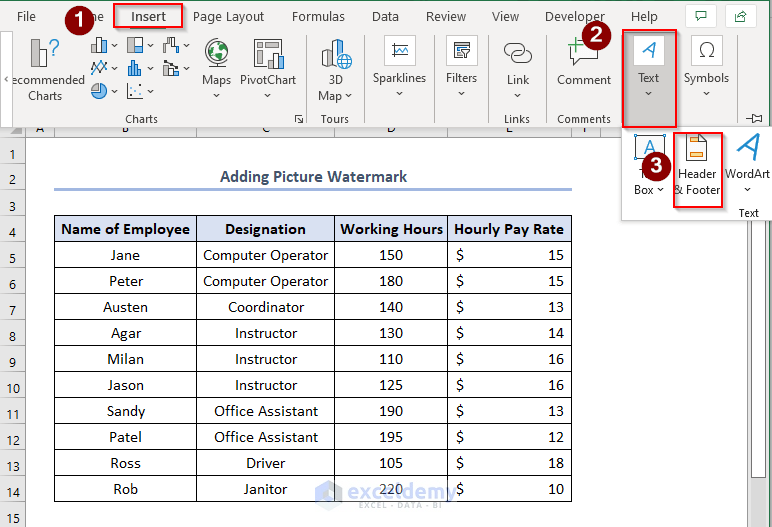
1.1 Adding Picture Watermark
We use a picture watermark when our Excel worksheet needs a representable picture as the background of the sheet. The steps to add a picture watermark are.
- Firstly, go to Insert > select Text > choose Header & Footer.
Eventually, a place for a watermark will appear.
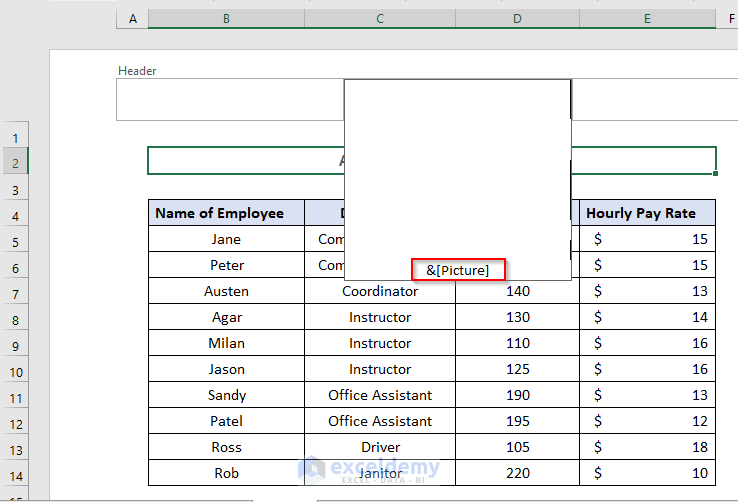
- Secondly, click on the watermark place > go to Header & Footer > select Picture.
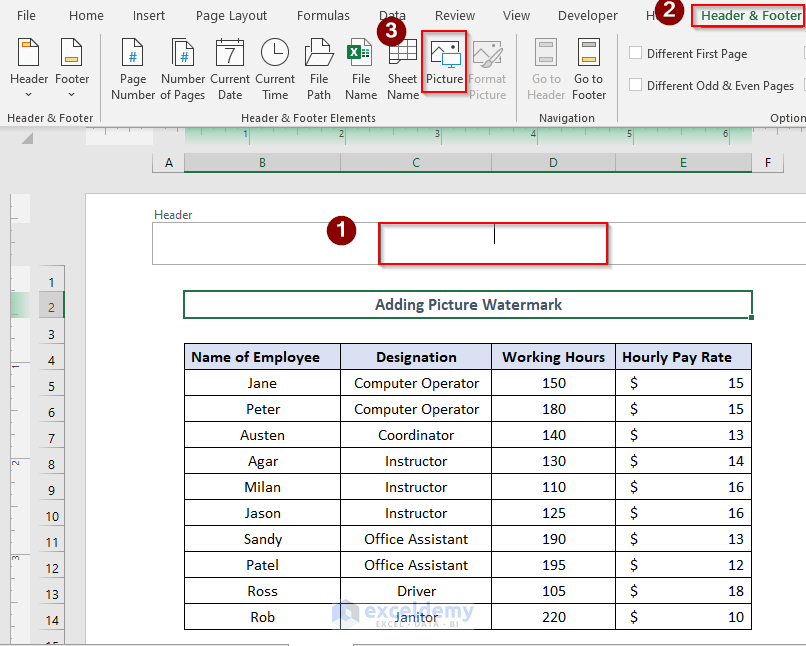
Immediately, an Insert Pictures window will appear.
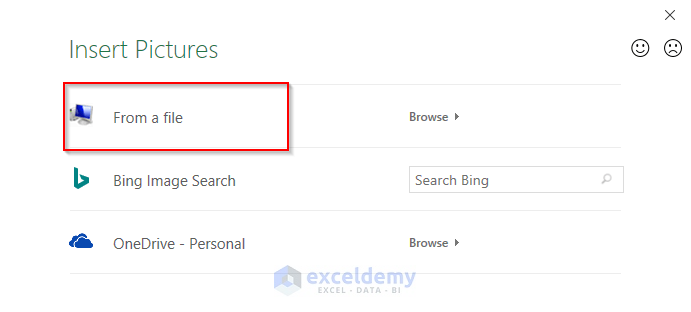
- Thirdly, click From a File and choose the desired picture from our database.
Consequently, a picture watermark that we have chosen will be added.
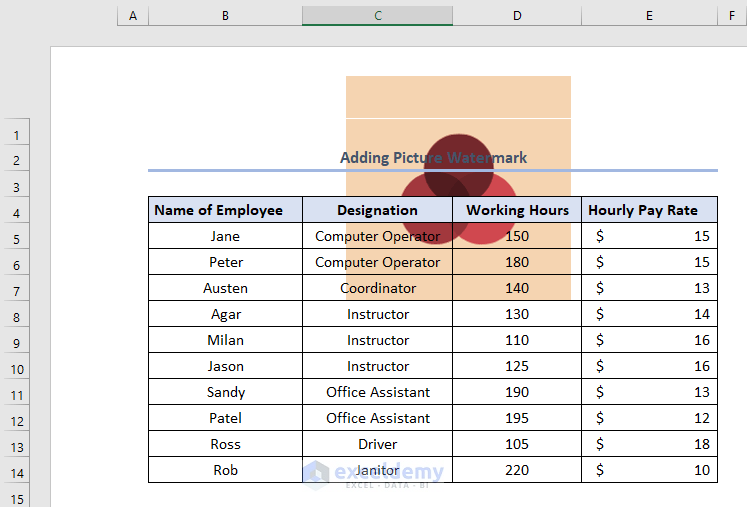
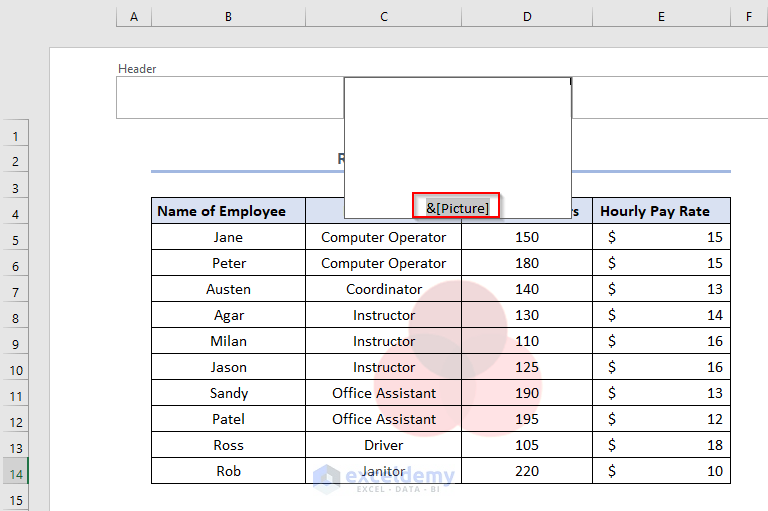
- Fourthly, we need to place the watermark in the middle of our sheet.
- Put the cursor on the left side of &[picture] and press ENTER. The watermark will go downwards with every click of ENTER.
- Fifthly, continue to press ENTER until the watermark reaches the desired place.
- Sixthly, click the cursor on any cell of the sheet.
- Finally, we’ll get the watermark at our desired place.
Read More: How to Add Watermark in Excel
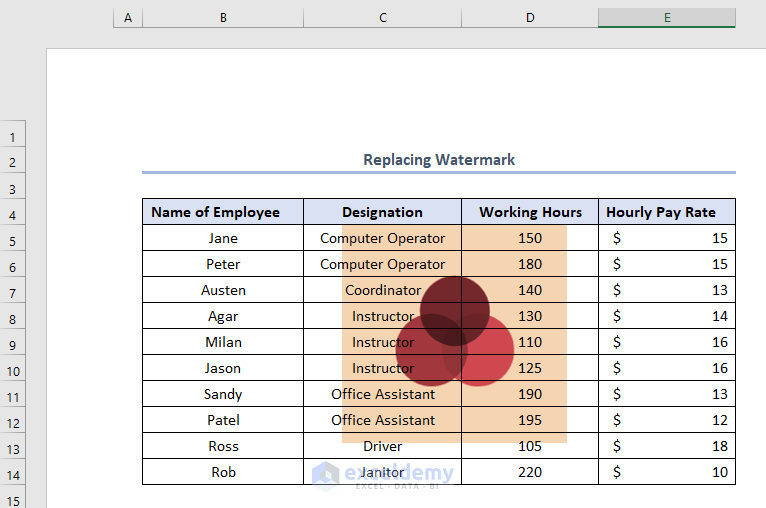
1.2 Formatting Picture Watermark
After adding the picture watermark we need to format it to resize and recolor it.
- Initially, put the cursor on the watermark cell > choose Header & Footer > select Format Picture.
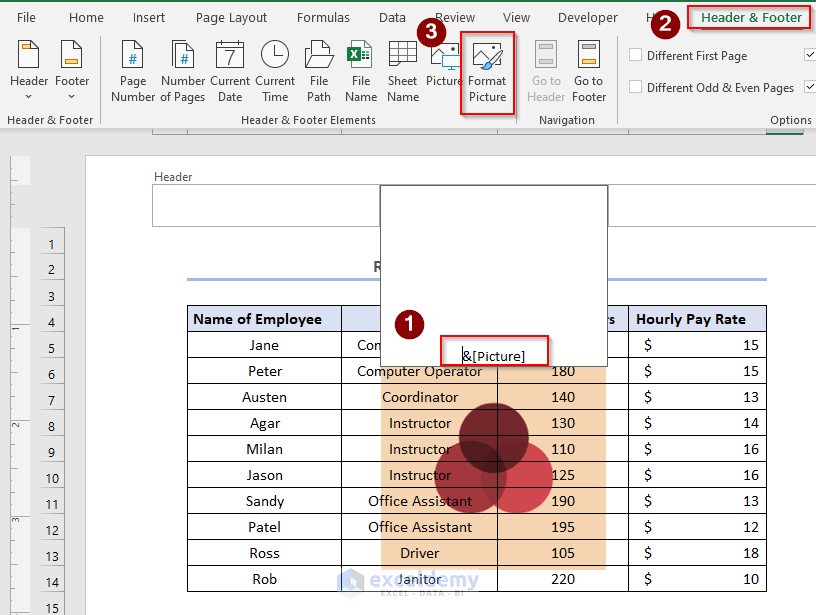
- Eventually, a Format Picture window will appear.
- Secondly, go to the Picture option > click on the options button in the Color box > pick Washout.
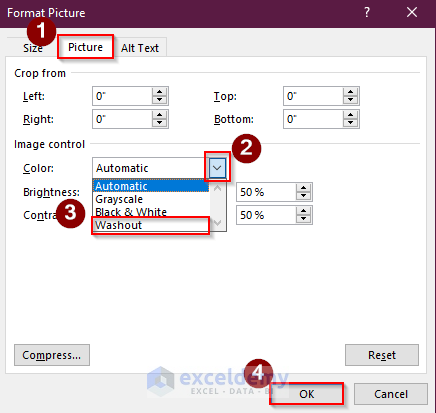
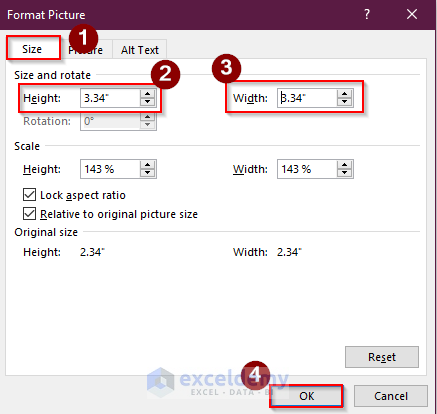
- Again, go to Size option > change the Height and Width to 3.34” and 3.34” respectively.
- Thirdly, click OK.
Consequently, we’ll see that our watermark is recolored and resized like the picture below.
1.3 Removing Picture Watermark
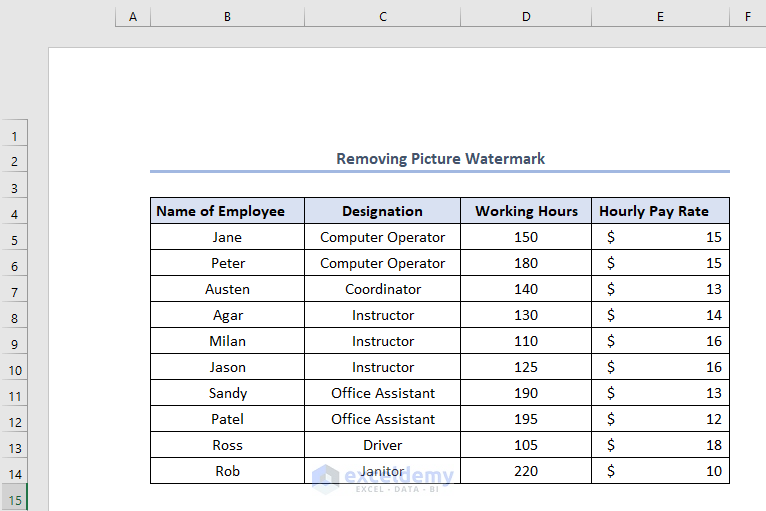
We can follow some simple steps to remove the watermark which we have added through the Header & Footer option of the dataset below.

- Firstly, select the whole text of the watermark.
- Secondly, press DELETE.
Consequently, we’ll get our dataset without the watermark by removing it.
Read More: How to Remove Watermark in Excel
1.4 Adding Text Watermark
Another type of watermark we can add through the Header & Footer option is the Text Watermark.
- To add the text watermark, initially go to Insert > select Text > choose Header & Footer.

Eventually, the place for the watermark will appear.
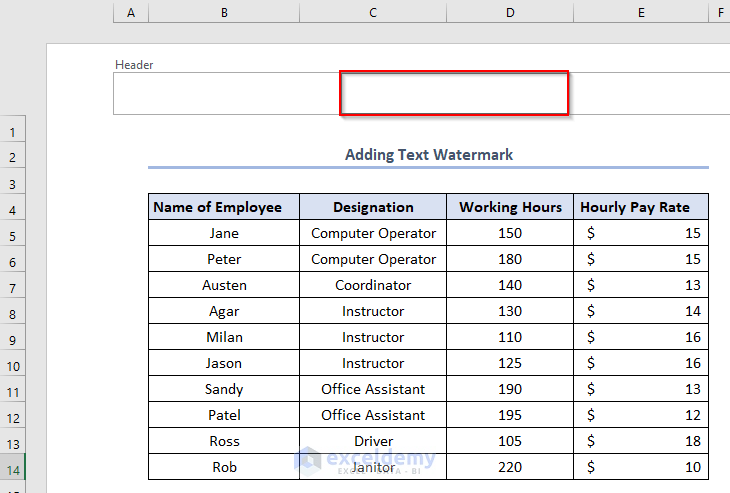
- Secondly, click on the watermark and write the text. Here, it is ExcelDemy.
1.5 Formatting and Removing Text Watermark
Additionally, we need to format the text watermark.
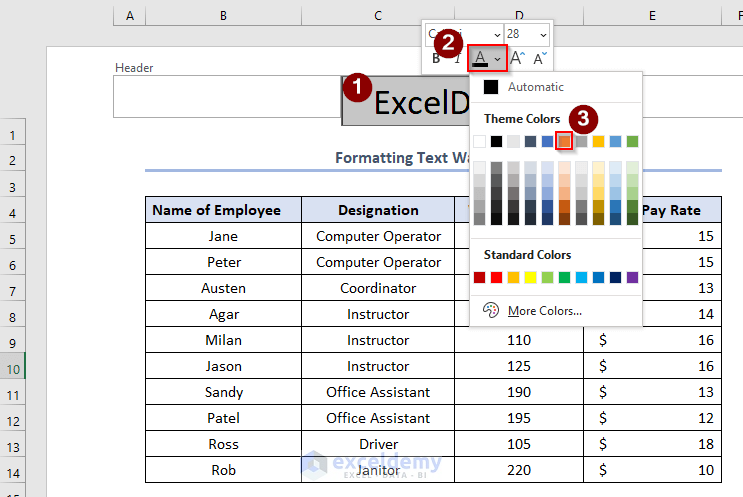
- Firstly, select the text watermark, and eventually, the formatting options will appear.
- Secondly, to change the size of the text, click on the size option > choose any size according to your requirements. Here, we have selected 28.
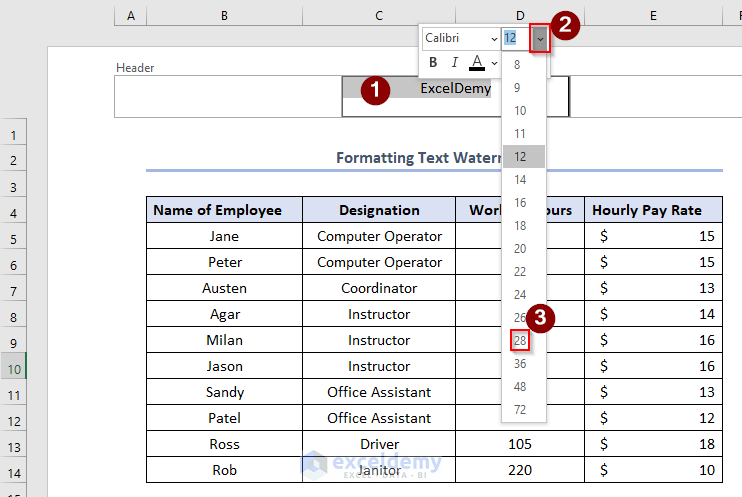
- Now, to change the color of the text, select the color option > choose any color from there.
- Press CTRL + B or click on B to bold the text.
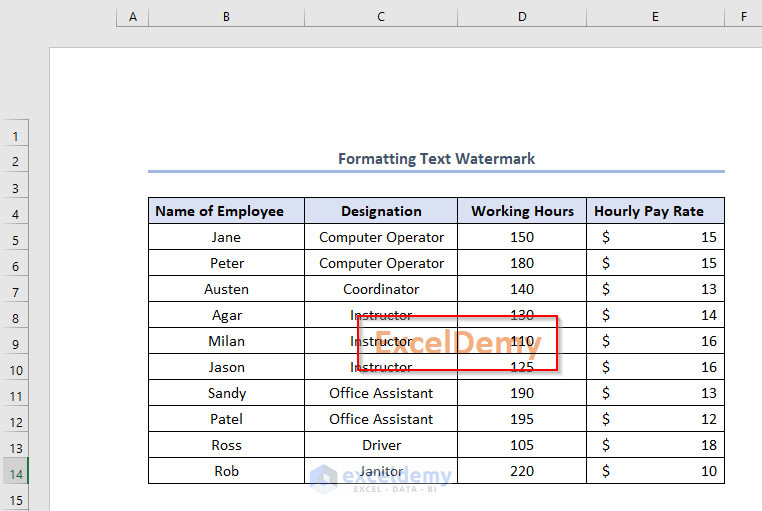
- Press ENTER a couple of times by placing the cursor on the left side of the text to replace it.
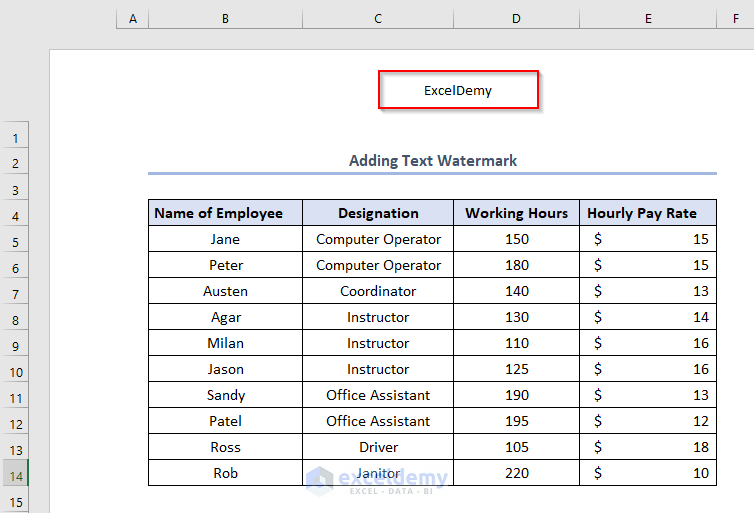
Finally, our text watermark will look like this.
- Additionally, to remove the watermark follow the same steps of Method 1.3 of Removing Picture Watermark.
2. Utilize WordArt Feature
We can use the WordArt feature when we need to add only text watermarks.
2.1 Adding and Formatting Watermark
- To add this feature, initially go to Insert> click Text > choose WordArt > pick any text type from there.

Eventually, the place for adding text will appear.

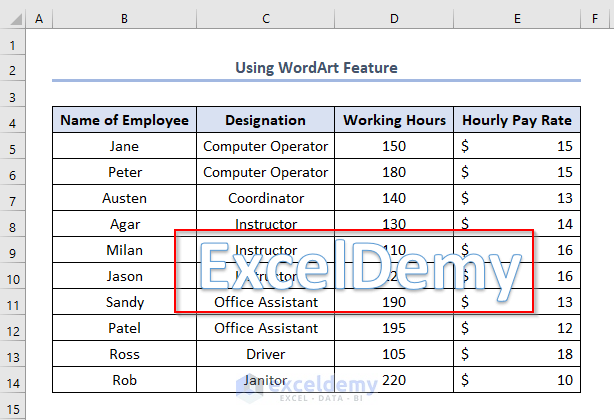
- Secondly, write the required text in the box. Here, we have written ExcelDemy.
- After writing the text we need to format and replace the watermark. We can follow the same steps of formatting that we have taken for Method 1.4 of Formatting and Removing Text Watermark.
Finally, we’ll get our text watermark like the picture below.
2.2 Removing Watermark
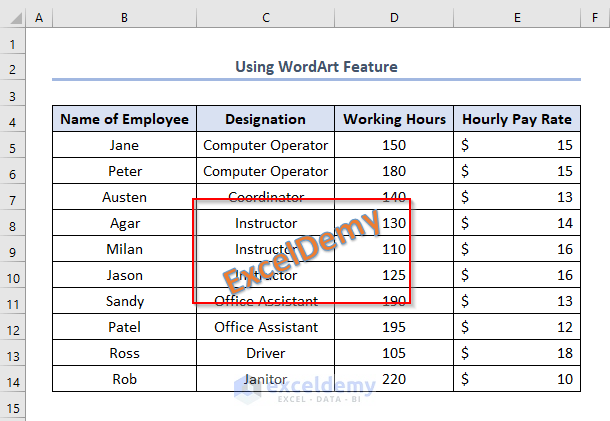
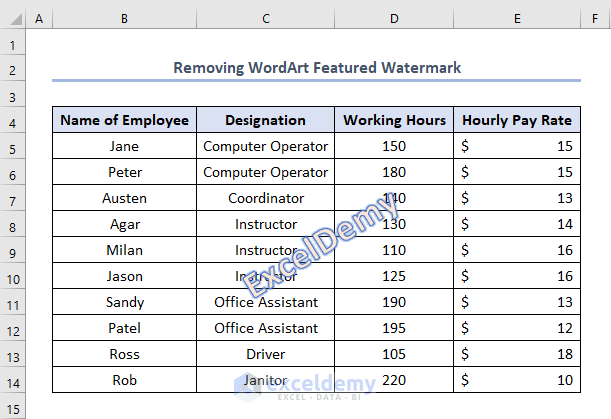
The steps of removing WordArt featured watermarks are different from the removal of previous watermarks. We need to remove the watermark of the following dataset.
- Initially, press CTRL + G, and eventually a Go To window will open.
- Secondly, click the Special
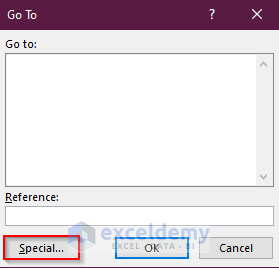
- A Go To Special window will appear.
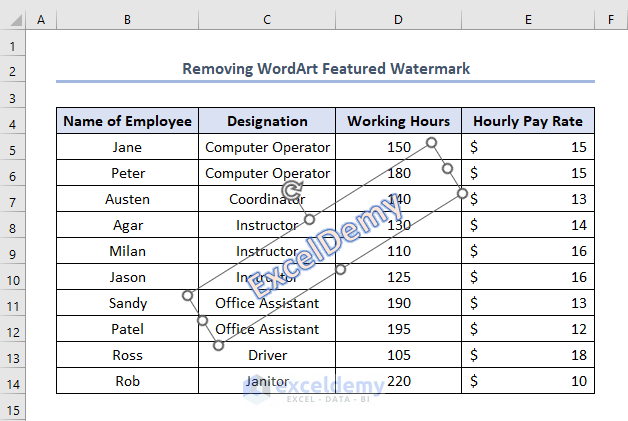
- Thirdly, select Objects and click OK.

- Consequently, an editable box will appear around the watermark.
- Finally, click on the box and press DELETE or BACKSPACE the text, slide the box outside the dataset and click on any cell.
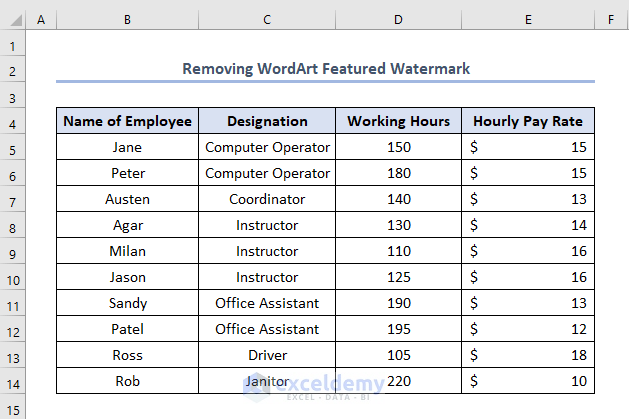
Finally, the watermark will be removed from our dataset and we’ll get our original dataset.
Things to Remember
- To format the watermark created by the Header & Footer option, we need to click on the watermark first. Otherwise, the option of Header & Footer will not appear to continue the formatting.
- We need to select any cell outside the dataset to activate the watermark after entering it in the case of Method 1.
Download Practice Workbook
Conclusion
We can fix any kind of watermark in Excel sheets efficiently if we study this article properly. Please feel free to add any comments or queries in the section below.
Related Article
<< Go Back to Watermark | Page Setup | Print in Excel | Learn Excel
Get FREE Advanced Excel Exercises with Solutions!
