While working in Excel, sometimes we need to add or Shift a Row or Column in our Worksheet. When we insert a new Cell, it pushes the next cell up to the end of the worksheet. If there is data in the Last Row or Last Column, it won’t get a Cell to push the next. That’s why it pops up with Excel cannot Shift Nonblank Cells error. Excel provides us with many ways to fix that problem. Today, In this tutorial, you will get to learn 4 effective ways to fix Excel that cannot shift nonblank cells.
Reasons Behind You Cannot Shift Nonblank Cells in Excel
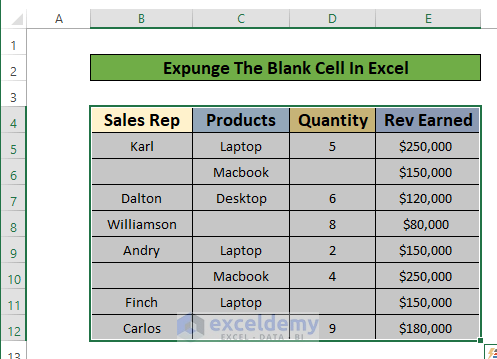
Let’s say, we have a data set where Sales Representative, Products, Quantity of Sales, and Revenue Earned are given in Column B, Column C, Column D, and Column E respectively.
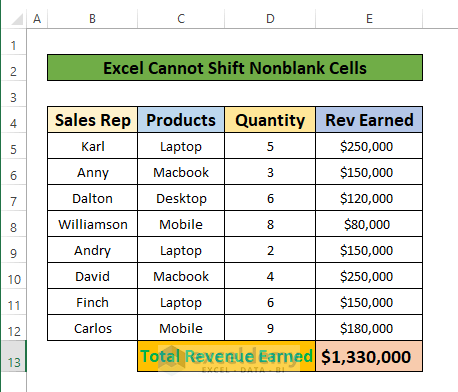
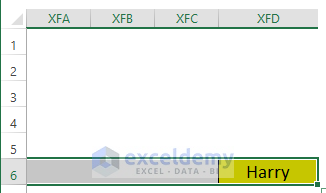
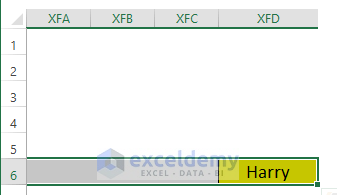
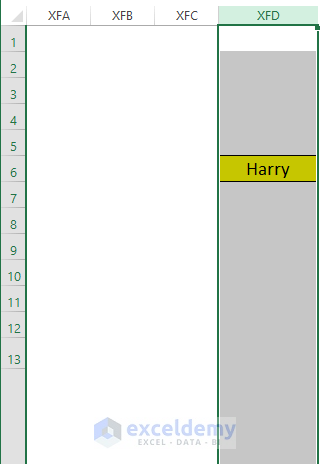
And also, this dataset has data in the last column named Column XFD.
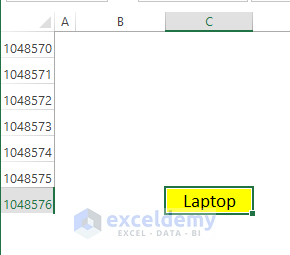
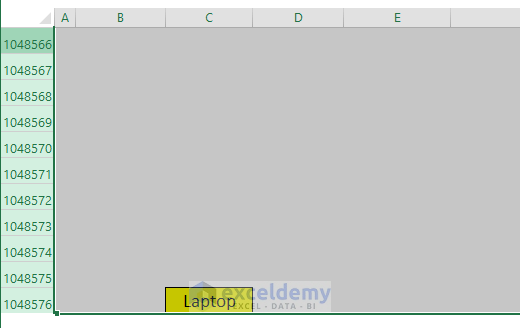
And another data is in the last Row10,48,576.
Now when we want to shift a nonblank cell we will notice that Excel is showing us a warning message. There are many reasons why we cannot shift our nonblank cells. The two major reasons are discussed below.
1. Nonblank Last Cell in Last Column of Entire Worksheet
In our Worksheet, Now we will insert a cell in Column C6. To do this first you need to select Cell C6.
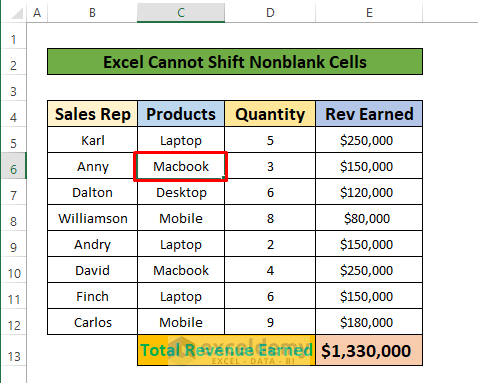
After that press Right-Click on your Mouse. Now, a window pops up. In that window, you select the Insert.

After selecting the insert menu, a cell wouldn’t be added but an alarm like Microsoft Excel shows in front of us.
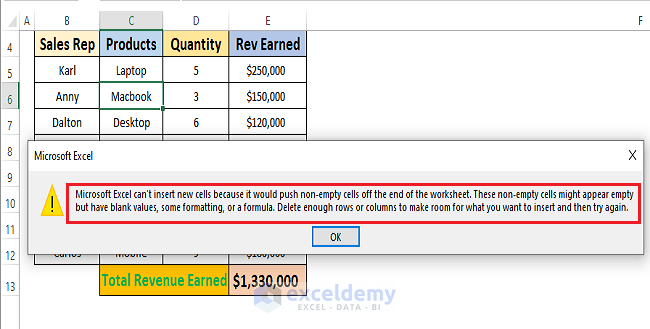
That’s happened because there is data in the Last Column XFD.

2. Nonblank Last Cell in Last Row of Entire Worksheet
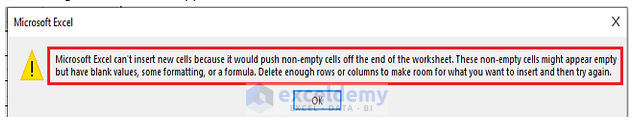
After performing the column operation, now we will insert a Row just below Row 5. To do that first select Row 5 of our dataset.
Then follow the directions
Home → Cells Bar → Insert → Insert Sheet Rows  After doing these an alarm appears in front of us named Microsoft Excel.
How to Solve Excel Cannot Shift Nonblank Cells: 4 Suitable Methods
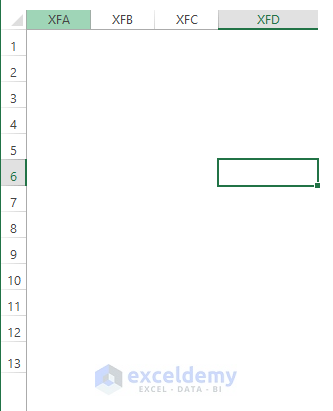
1. Delete The Last Column Data to Shift Nonblank Cells in Excel
To delete the last column data, you would follow the following steps:
Step 1:
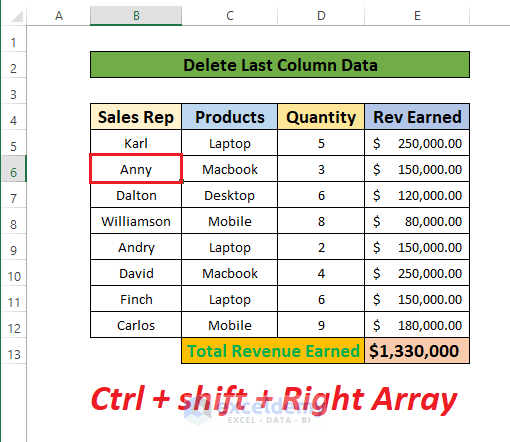
First, select a Cell and go to the last Column in our Worksheet. To do that press Ctrl + Shift + Right Array simultaneously on the Keyboard.
Step 2:
Then we can reach the last Column XFD.
Step 3:
After that, select Column XFD. For doing this, press the column header. Now press the Delete button on your Keyboard.
Step 4:
After deleting the last Column Data, at last, you will now insert Cell (Column) on your worksheet.
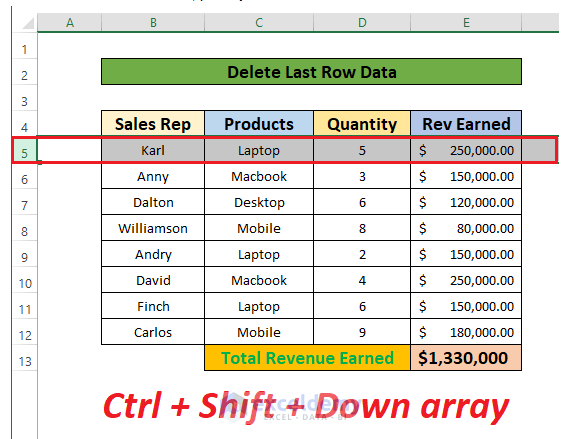
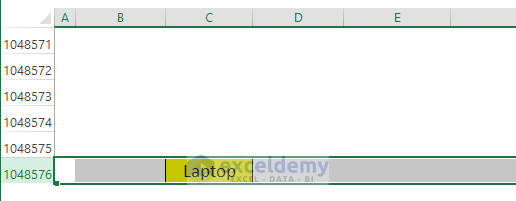
2. Remove The Last Row Data to Shift Nonblank Data in Excel
After deleting the Last Column, now we will remove the Last Row in our worksheet. For removing the Last Row, follow the steps:
Step 1:
- Select the Row 5. To do that, place your Cursor on Row 5 and click on Row 5.
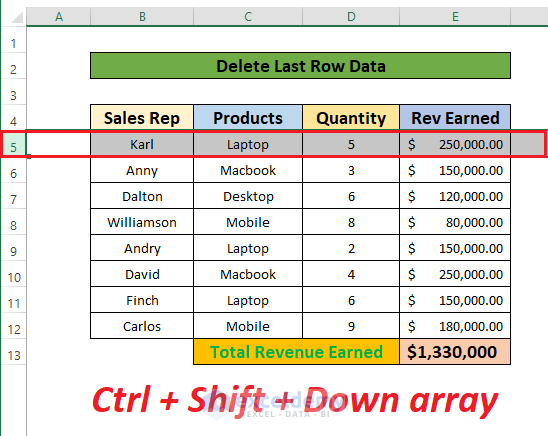
Step 2:
- Now press Ctrl + Shift + Down Array simultaneously on the Keyboard
- After doing these, select Row 1048576.
Step 3:
- Now press Right-Click button on your Mouse and a window pops up.
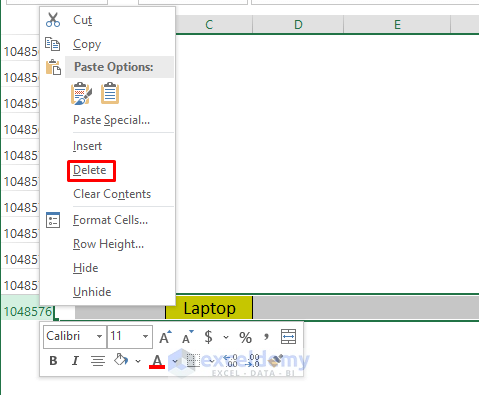
- Then press After clicking the Delete menu, our selected Row would be deleted.
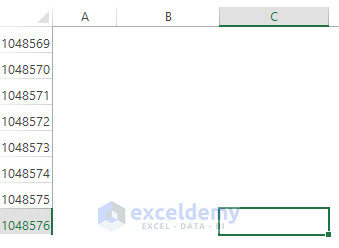
Finally, we would insert Row in our desired dataset.
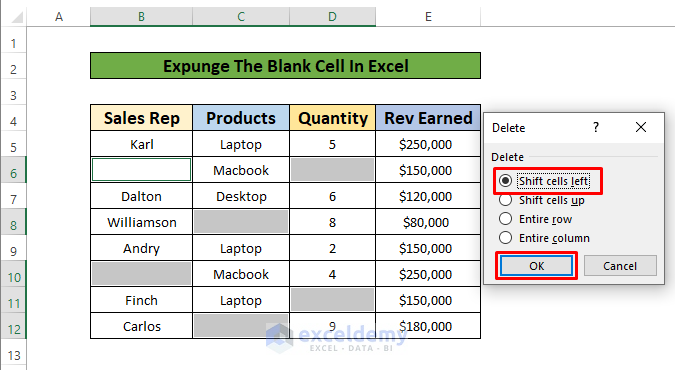
3. Expunge The Blank Cell to Shift Nonblank Cells in Excel
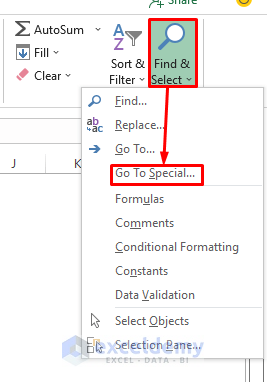
After deleting the Last Column and Last Row data, now we can expunge blank Cells. For doing this, we will follow the followings steps:
Step 1:
- First, select our worksheet.
Step 2:
- Then go to Home Menu Bar and select Editing Bar → Find & Select → Go To Special option.
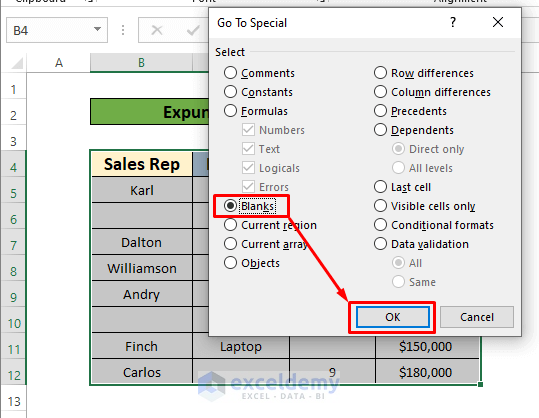
 Step 3:
- After that, click on the Blank box and press the OK button.
- Then blank Cells would be selected and press Right-Click on the Mouse then a window will pop up at this time click on the Delete button.
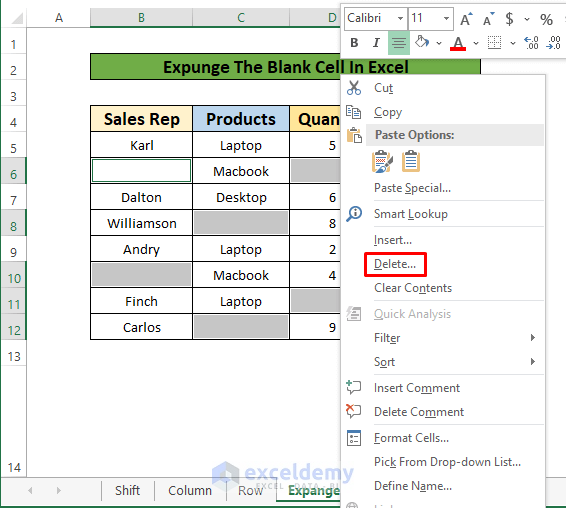
Step 4:
- After that click on the dialog box named Shift Cell Left and then press the OK button.
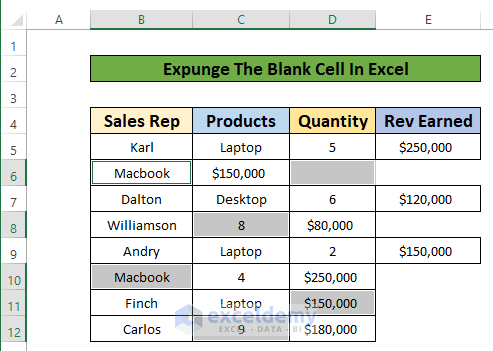
- Finally, we will get our desired output like our screenshot. Now we are able to insert Row or Columns in Excel.
Read More: How to Shift Cells Up in Excel
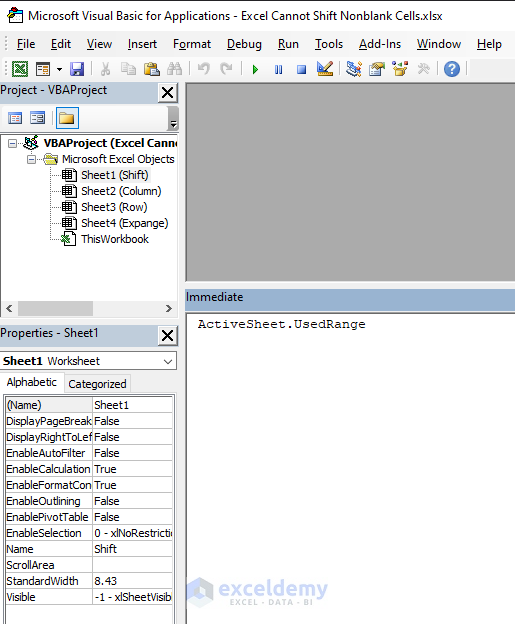
4. Run a VBA Code to Shift Nonblank Cells in Excel
When you are not able to Insert Columns or Rows in Excel then you can apply Visual Basic for Applications to fix this issue. In the VBA, you have to enter only a single line of code which will reset the used area of your Excel Worksheet.
Step1:
- First, select a Cell C8 and press Alt + F11 on your
- Now press Ctrl + G to open the Immediate window as in our Screenshot.
- After that, type UsedRange in the Immediate window and press Enter button from Keyboard.
- Now go to File → Close and Return to Microsoft Excel and finally you will back to your Excel.
Now you can insert Columns or Row in your Worksheet.
Things to Remember
- If you want to delete the last Column data, you will follow the instructions:
Ctrl + Shift + Right Array → Delete
- If you want to delete the last Column data, you will follow the instructions:
Ctrl + Shift + Down Array → Delete
- Another way is, Home → Editing → Find & Select → Go to Special → Blank → Delete → Shift Cells Left
Download Practice Workbook
Download this practice workbook to exercise while you are reading this article.[/wpsm_box]
Conclusion
In this article, we discuss the four suitable Methods to solve shifting nonblank cells in Excel. You are most welcome to comment if you have any questions or queries.
Related Articles
- How to Shift Cells Down in Excel
- How to Shift Cells Down in Excel without Changing Formula
- How to Shift Cells Right in Excel
- How to Tab to Certain Cells in Excel
- How to Perform Double Click Cell Jump in Excel
- How to Move Down One Cell Using Excel VBA
- Move One Cell to Right Using VBA in Excel
<< Go Back to Move Cells | Excel Cells | Learn Excel
Get FREE Advanced Excel Exercises with Solutions!
