If you are looking for the difference between alignment and orientation in Excel, this article is for you. Here, the following article will help you to understand the content smoothly.
What Is Alignment in Excel?
In Excel, cell alignment is defining the position of an item (text or number) in the cell. It is an order of text or numbers in a cell.
What Is Orientation in Excel?
In Excel, cell orientation means orienting or rotating the text or the number of a cell. Depending on the angle of degree, we can orient a text or number of a cell.
Types of Alignment in Excel
There are two basic types of alignment in Excel. These are:
- Here, Vertical Alignment includes
-
-
-
-
- Top Align
- Middle Align
- Bottom Align
-
-
-
- Here, Horizontal Alignment includes
-
-
-
-
- Align Left
- Center
- Align Right
-
-
-
You will get them in the Alignment group of the Home tab.
Besides these types, there is an Alignment Setting option, which is helpful when we manually want to set alignment.
Let us now discuss these types elaborately:
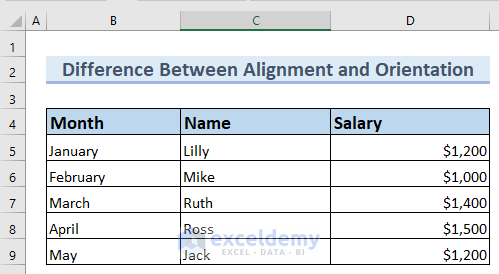
The following table contains the Month, Name, and Salary columns. We can see the default alignment of the values in the cells. Here, we can see, that the text in the Month and Name columns are aligned at the left in the cells. Along with that, the numbers in the Salary column are aligned right in the cells.
After that, we want to check the alignment type of the cells of the table.
- To do so, we select the entire dataset >> go to the Home tab >> go to the Alignment group.
In the Alignment group, we can see the alignment is set as vertically Bottom Align.
Now, using this dataset, we will show you the difference between alignment and orientation.

In the following section, we will explain the alignments in detail.
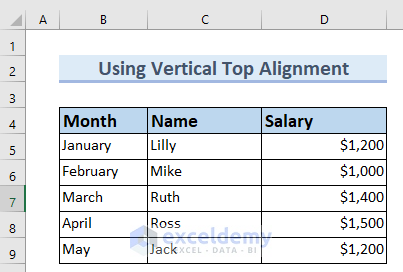
I. Vertical Top Align
Vertical Top alignment is useful to align the data of a cell or a group of cells vertically up.
We have to follow some simple steps to do the task.
- First, we have to select the cells that we want to set alignment as Vertical Top.
Here, we selected the entire dataset as we want to align all the cells of this dataset as Vertical Top. You can select a number of cells or a single cell according to your needs.
- After that, we will go to the Home tab.
- At this point, from the Alignment group, we have to select Top Align.

Therefore, you can see, that all the cells of the dataset have been aligned Vertically Top.
II. Vertical Middle Align
This alignment helps the text or number in a cell to set in a vertical middle position.
We have to follow some easy steps to do the task.
- First of all, we have to select the cells that we want to set alignment as Vertical Top.
Here, we selected the entire dataset as we want to align all the cells of this dataset as Vertical Middle. You can select a number of cells or a single cell according to your needs.
- Afterward, we will go to the Home tab.
- Next, from the Alignment group, we have to select Middle Align.

As a result, you can see, that all the cells of the dataset have been aligned Vertically Middle.

III. Vertical Bottom Align
This is the alignment of text or numbers in a cell to a vertically downward position.
Although the default alignment is set as Vertical Bottom, in many cases you might have a dataset where the text is aligned in a different position. Such as the Vertical Top alignment is present in the following dataset.
In that case, you can change the alignment to Vertical Bottom by following some easy steps.

- In the beginning, we have to select the cells that we want to set alignment as Vertical Top.
Here, we selected the entire dataset as we want to align all the cells of this dataset as Vertical Bottom. You can select a number of cells or a single cell according to your needs.
- Along with that, we will go to the Home tab.
- Next, from the Alignment group, we have to select Bottom Align.

Then, you can see, that all the cells of the dataset have been aligned Vertically Bottom.

IV. Horizontal Left Alignment
Horizontal Left Align puts the text or number in a horizontally left position in the cell. We will go through the following simple steps to create horizontal Left alignment.
- First of all, we have to select the cells that we want to set alignment as Vertical Top.
Here, we selected the entire dataset as we want to align all the cells of this dataset as horizontal left. You can select a number of cells or a single cell according to your needs.
- Along with that, we will go to the Home tab.
- Next, from the Alignment group, we have to select Align Left.
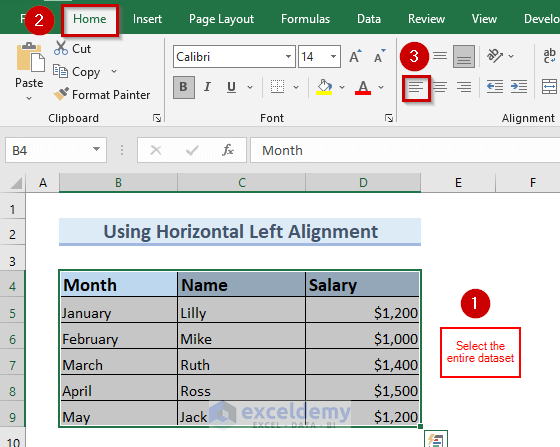
Then, you can easily notice the values of the Salary column have been aligned towards the left position.
Hence, all the cells of the dataset have been aligned horizontally left.

V. Horizontal Center Alignment
Horizontal Center alignment puts the text or number in a horizontally center position in the cell. We will go through the following simple steps to create horizontal Center alignment.
- First, we have to select the cells that we want to set alignment as Vertical Top.
Here, we selected the entire dataset as we want to align all the cells of this dataset as a horizontal Center. You can select a number of cells or a single cell according to your needs.
- Moreover, we will go to the Home tab.
- Next, from the Alignment group, we have to select Center to align.

Then, you can easily notice the values of all the columns have been aligned towards the center position.
Hence, all the cells of the dataset have been aligned horizontally center.

VI. Horizontal Right Alignment
Horizontal Right alignment puts the text or number to a horizontally right position in the cell. We will go through the following simple steps to create horizontal Right alignment.
- First of all, we have to select the cells that we want to set alignment as Vertical Top.
Here, we selected the entire dataset as we want to align all the cells of this dataset as horizontal Right. You can select a number of cells or a single cell according to your needs.
- After that, we will go to the Home tab.
- Then, from the Alignment group, we have to select Right align.
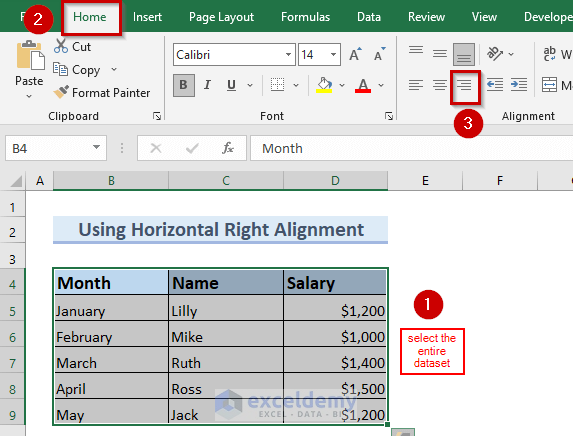
Therefore, you can easily notice the values of the Month and Name columns have been aligned in the right position.
As a result, all the cells of the dataset have been aligned horizontally right.

VII. Using Alignment Setting Option
This option is useful when you want to set the text or number of a cell in a different alignment other than the default Excel alignments. To do so, we will go through the following easy steps.
- First, we have to select the cells that we want to set alignment as Vertical Top.
Here, we selected the entire dataset as we want to align all the cells of this dataset as horizontal Right. You can select a number of cells or a single cell according to your needs.
- Afterward, we will go to the Home tab.
- After that, from the Alignment group, we have to select Alignment Settings, which is marked with a red color box.

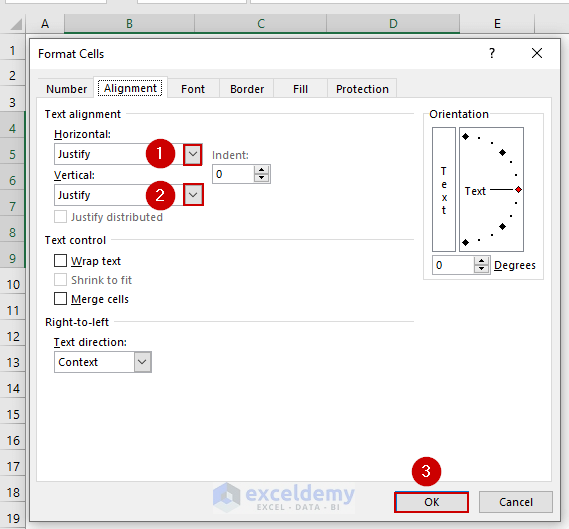
A Format Cells dialog box will appear.
- Next, click on the downward arrow of the Horizontal box to bring out the alignment options.
Here, we selected Justify as Horizontal alignment, you can select any options according to your needs.
- Along with that, click on the downward arrow of the Vertical box to bring out the alignment options.
Here, we selected Justify as Vertical alignment, you can select any options according to your needs.
- Afterward, click OK.
As a result, you can see the cells of the table have been aligned in Justify.

Here, we have described all possible features of alignment that will help you to understand the difference between alignment and orientation in Excel.
Types of Orientation in Excel
The orientation option is present in the Alignment group in Excel. There are two types of orientation. These are
- Vertical Text orientation, this type builds the character of the text or number on top of one another. Whether we can keep the Vertical Text orientation option on or off.
- Rotate Text orientation, the rotation of text or number can be done up to 90 degrees. We can rotate the text or number clockwise and counter-clockwise. Excel has 4 default rotation options, they are
-
-
-
-
- Angle Counterclockwise
- Angle Clockwise
- Rotate Text Up
- Rotate Text Down
-
-
-
Besides these options, there is a Format Cell Alignment option, which is helpful when we manually want to set a degree for rotation.
Let us now discuss these types elaborately.
The following dataset has Month, Name, and Salary columns. Here, all the cells have a vertical center and horizontal middle alignment. Using this dataset, we will demonstrate to you the difference between alignment and orientation in Excel.

I. Vertical Text Orientation
Vertical Text orientation makes the cell content vertical, which means each letter of the text in the cells will be arranged vertically.
We will go through the following steps to create Vertical Text orientation.
- First of all, select the column headers of the following table.
Here, you can select any cell or group of cells for Vertical Text orientation.
- After that, go to the Home tab.
- Next, from the Alignment group >> select Orientation, which is marked with a red color box.

Next, from Orientation select the Vertical Text option.

Therefore, there is upward rotation in the column headers
However, you can not easily notice the column header, as there is no proper adjustment in the cells.
To make the columns headers visible, we have to extend Row 4.
- To do so, we have to double-click on Row 4.

As a result, you can see the column headers with Vertical Text orientation.

Read More: How to Mirror Text in Excel
II. Angle Counterclockwise Orientation
The Angle Counterclockwise orientation will orient the cell content of a cell in a counterclockwise direction.
We will go through the following steps to create an Angle Counterclockwise orientation.
- First, select the column headers of the following table.
Here, you can select any cell or group of cells for Angle Counterclockwise orientation.
- Afterward, go to the Home tab.
- Along with that, from the Alignment group >> select Orientation, which is marked with a red color box.
- Then, from the Orientation group >> select Angle Counterclockwise.
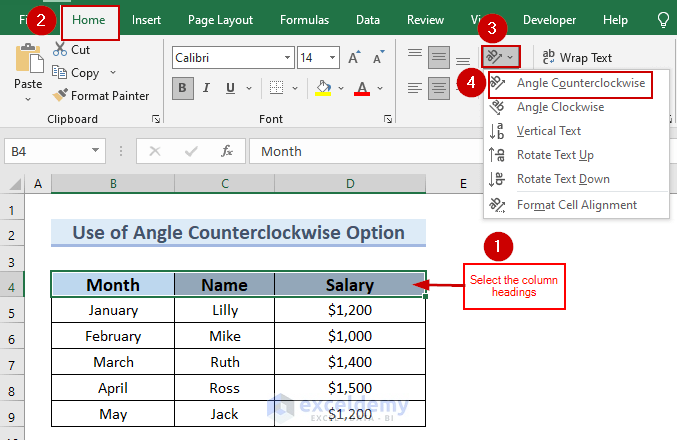
Therefore, you can see the column headers with an Angle Counterclockwise orientation.

Read More: How to Change Orientation of Text to 22 Degrees in Excel
III. Angle Clockwise Orientation
The Angle Clockwise orientation will orient the cell content of a cell in a clockwise direction.
We will go through the following steps to create an Angle Clockwise orientation.
- First of all, select the column headers of the following table.
Here, you can select any cell or group of cells for Angle Clockwise orientation.
- After that, go to the Home tab.
- Afterward, from the Alignment group >> select Orientation, which is marked with a red color box.
- Next, from the Orientation group >> select Angle Clockwise.

Hence, you can see the column headers with an Angle Counterclockwise orientation.

Read More: How to Rotate Text by 180 Degrees in Excel
IV. Rotate Text Up
The Rotate Text Up orientation will orient the cell content of a cell upward.
We will go through the following steps to create Rotate Text Up orientation.
- First, select the column headers of the following table.
Here, you can select any cell or group of cells for Rotate Text Up orientation.
- Then, go to the Home tab.
- Next, from the Alignment group >> select Orientation, which is marked with a red color box.
- Then, from the Orientation group >> select Rotate Text Up.
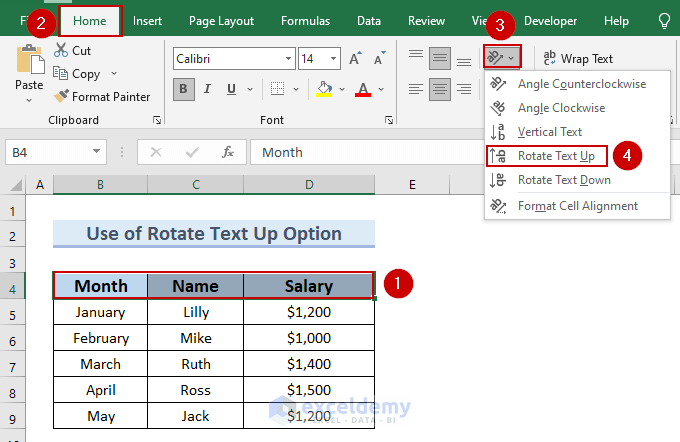
Hence, there is an upward rotation in the column headers.
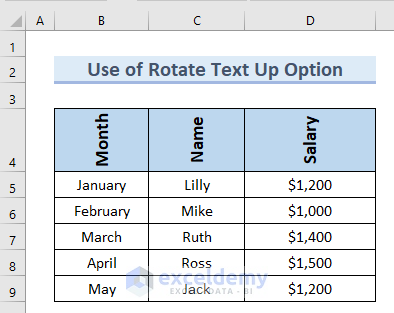
However, you can not easily notice the column header, as there is no proper adjustment in the cells.
To make the columns headers visible, we have to extend Row 4.
- To do so, we have to double-click on Row 4.

Therefore, you can see the column headers with Rotate Text Up orientation.
V. Rotate Text Down
The Rotate Text Down orientation will orient the cell content of a cell upward.
We will go through the following steps to create Rotate Text Down orientation.
First of all, select the column headers of the following table.
Here, you can select any cell or group of cells for Rotate Text Down orientation.
Afterward, go to the Home tab.
Moreover, from the Alignment group >> select Orientation, which is marked with a red color box.
Along with that, from the Orientation group >> select Rotate Text Down.

Hence, there is a downward rotation in the column headers
However, you can not easily notice the column header, as there is no proper adjustment in the cells.
To make the column headers visible, we have to extend Row 4.
- To do so, we have to double-click on Row 4.

Therefore, you can see the column headers with Rotate Text Down orientation.

VI. Use of Format Cell Alignment Option
Format Cell Alignment option is helpful when you want to manually set a degree for orientation.
To do so, we will go through the following steps.
- First, select the column headers of the following table.
Here, you can select any cell or group of cells.
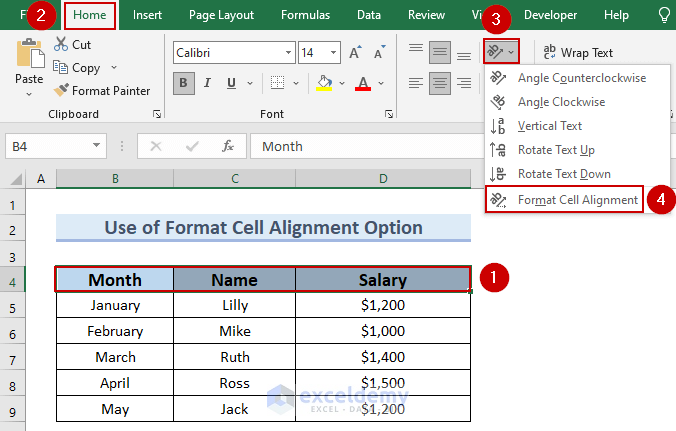
- Then, go to the Home tab.
- Afterward, from the Alignment group >> select Orientation, which is marked with a red color box.
- Then, from the Orientation group >> select Format Cell Alignment.
A Format Cells dialog box will appear.
- After that, we set the Degrees as 50.
You can set the Degrees according to your needs.
- Then, click OK.

Therefore, you can see the column headers with an orientation of 50 degrees.

Here, we have described all possible features of orientation that will help you understand the difference between alignment and orientation in Excel.
Differences Between Alignment and Orientation
You can understand the difference between Alignment and Orientation in Excel by going through the following table.
| Alignment | Orientation |
|---|---|
| Alignment defines the position of an item (text or number) in the cell. | Orientation means orienting or rotating text or numbers in a cell. |
| It sets the text or number of an in a horizontal or vertical position. | It sets the text or number of a cell to a degree of angle. |
| A cell item has Vertical Bottom alignment as default alignment. | A cell item has no default orientation. |
| Cells do not need adjustment after setting an alignment. | For most of the orientation types, cells need adjustment after setting an orientation. |
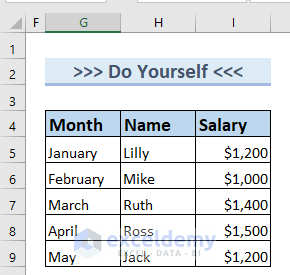
Practice Section
You can download the above Excel file to practice the explained types.
Download Practice Workbook
Conclusion
Here, we tried to show you the difference between Alignment and Orientation in Excel. Thank you for reading this article, we hope this was helpful. If you have any queries or suggestions, please let us know in the comment section below.
Related Articles
- How to Write Vertically in Excel
- How to Change Text Orientation in Excel
- How to Change Orientation from Horizontal to Vertical in Excel
<< Go Back to Rotate Text | Text Formatting | Learn Excel
Get FREE Advanced Excel Exercises with Solutions!
