While working with Microsoft Excel, sometimes we have to change the orientation of some data. We may need to arrange the texts in the most accessible way possible. In this situation, the techniques for changing text orientation in Excel are highly beneficial and successful. We can rotate words in various directions for appropriate displays while using Microsoft Excel for data analysis. In this article, we will demonstrate different ways to change the orientation of the text to 22 degrees in Excel.
How to Change Orientation of Text to 22 Degrees in Excel: 3 Effective Ways
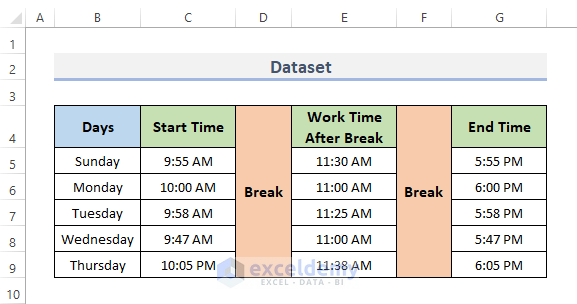
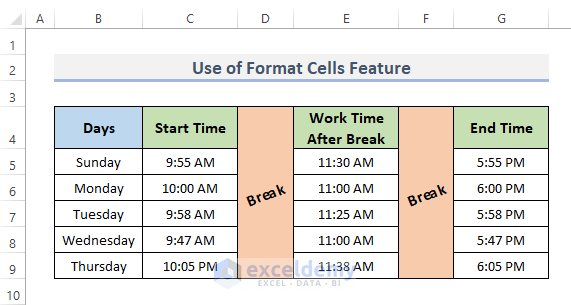
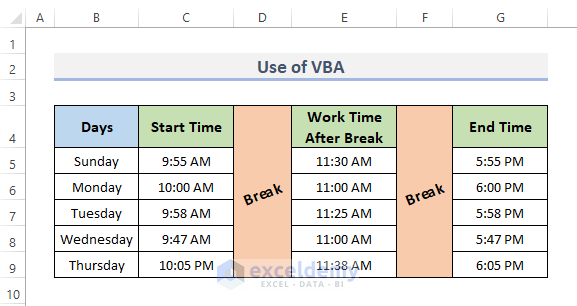
To change the orientation of the text to 22 degrees in Excel, we are going to use the following dataset. The dataset contains companies’ specific employee tracker lists for a week. So, the dataset has Days, Start Time, Break, Work Time After Break, Break again, and finally the End Time. As the Break time is the same every day, we just merged the break time cell and now, we want to change the orientation of the text Break to 22 degrees.
1. Use Excel Format Cells Feature to Convert Orientation of Text to 22 Degrees
We are able to modify the appearance of cell data in the spreadsheet while using Format Cells. This tool has different options. With the Alignment of Orientation option, we can easily change the orientation of the text. Let’s look at the steps down to use the feature to change the orientation of the text.
STEPS:
- Firstly, select the cell or range of cells in which you want to change the orientation. In our case, we want to change the orientation of data in cells D5 and F5.
- Secondly, go to the Home tab from the ribbon.
- Thirdly, click on the Orientation drop-down menu, under the Alignment group.
- Then, select Format Cell Alignment.
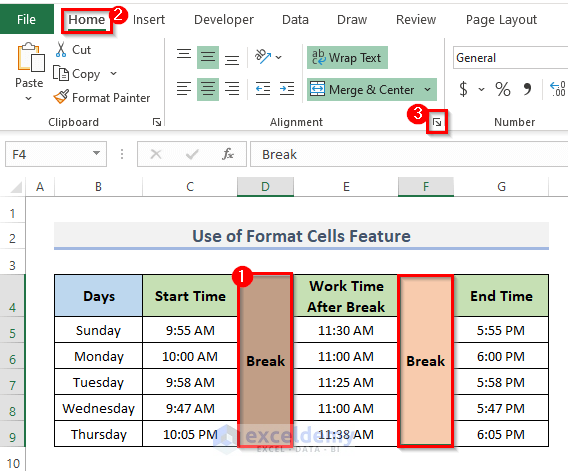
- Alternatively, select the cells > go to Home tab > click on the tiny arrow icon, under Alignment group.
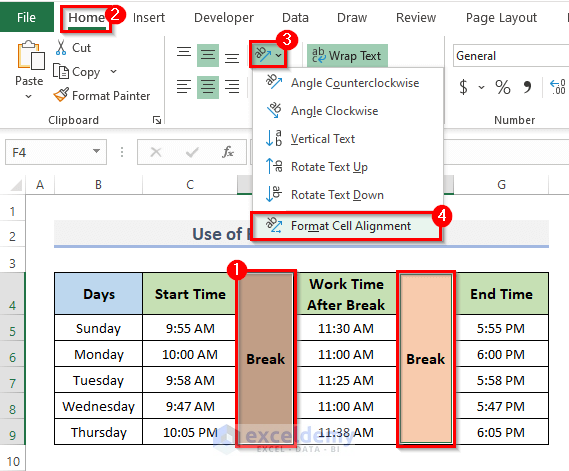
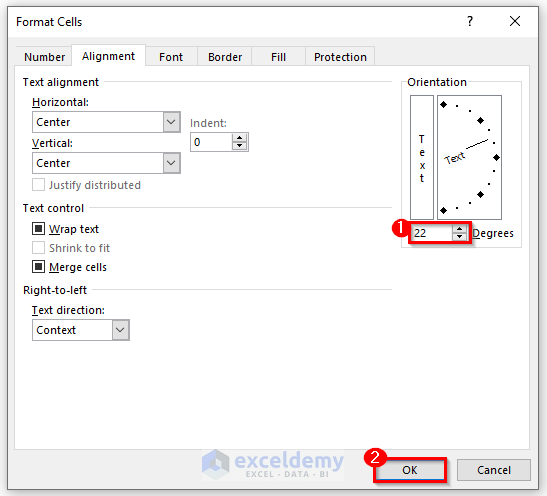
- Thus, the Format Cells dialog box will appear.
- This will automatically take you to the Alignment menu on the Format Cells ribbon.
- Next, in the Orientation category, write down the Degrees in which you wish to set the text orientation. In our case, we set 22 Degrees.
- Further, click OK to complete the procedures.
- Finally, by doing this we can change the orientation of the text Break of 22 Degrees.
Read More: How to Change Text Orientation in Excel
2. Change Orientation of Text to 22 Degrees with Keyboard Shortcut
To complete the work quickly we are always looking for a shortcut. With Excel, we can use the keyboard shortcut to change the orientation of the text to 22 degrees. For this, we must follow the instructions below.
STEPS:
- To begin with, select the cells D5 and F5.
- Then, press the keyboard shortcut Alt + H.
- This will show all the keyboard shortcuts of the Excel ribbon.
- We can either use the FQ or FA to open the Format Cells dialog. If we use the FA shortcut this will directly take you to the Alignment menu of the Format Cells window.
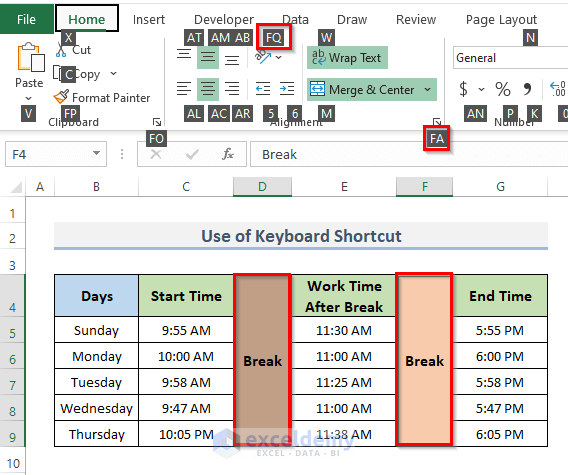
- In this case, we use the FQ shortcut which is the Orientation drop-down menu.
- Further, to select Format Cell Alignment we press the keyboard shortcut M.
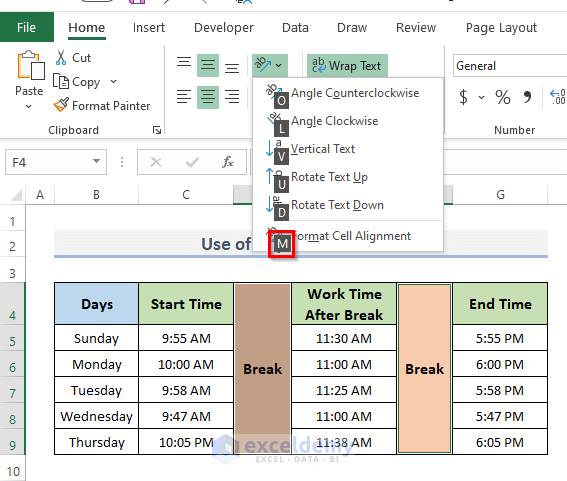
- Likewise the previous method, the Format Cells dialog box will show up. When you do this, the Format Cells ribbon’s Alignment menu will appear automatically.
- Next, list the degrees at which you want the text orientation to be set in the Orientation category. In this instance, we chose 22 degrees.
- Click OK one more to finish the steps.
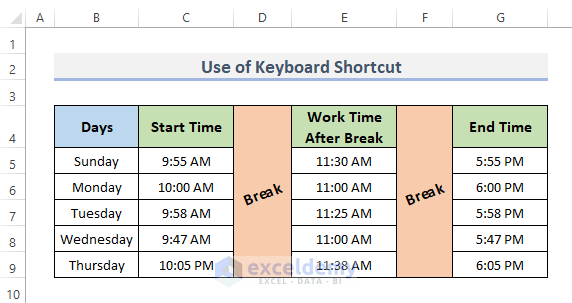
- This will allow you to adjust the text Break of 22 Degrees orientation.
Read More: How to Mirror Text in Excel
3. Apply Excel VBA to Rotate Orientation of Text to 22 Degrees
With Excel VBA, users can easily use the code which acts as Excel menus from the ribbon. To use the VBA code to generate a table from the range, let’s follow the procedure.
STEPS:
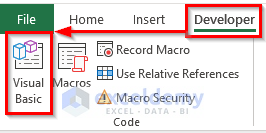
- Firstly, go to the Developer tab from the ribbon.
- Secondly, from the Code category, click on Visual Basic to open the Visual Basic Editor. Or press Alt + F11 to open the Visual Basic Editor.
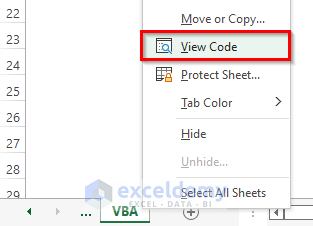
- Instead of doing this, you can just right-click on your worksheet and go to View Code. This will also take you to Visual Basic Editor.
- This will appear in the Visual Basic Editor where we write our codes to create a table from range.
- Thirdly, click on Module from the Insert drop-down menu bar.
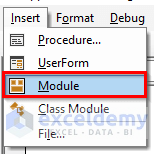
- This will create a Module in your workbook.
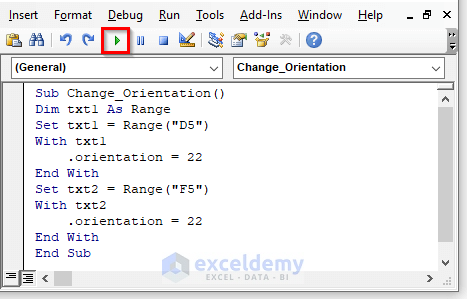
- And, copy and paste the VBA code shown below.
VBA Code:
Sub Change_Orientation()
Dim txt1 As Range
Set txt1 = Range("D5")
With txt1
    .orientation = 22
End With
Set txt2 = Range("F5")
With txt2
    .orientation = 22
End With
End Sub- After that, run the code by clicking on the RubSub button or pressing the keyboard shortcut F5.
- This will display the Macros dialog box.
- Now select the declaration of code and click on the Run button.
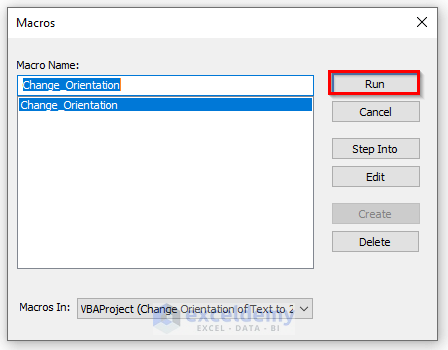
- Lastly, you can see that the text orientation is now changed.
Code Explanation
- Sub Create_Table(): Sub is a part of the code that is used to handle the work in the code but will not return any value. It is also known as subprocedure. So we name our procedure Change_Orientation().
- Dim txt1 As Range: The DIM statement in VBA refers to “declare,” and it must be used to declare a variable. So, we declare our range text1.
- Set txt1 = Range(“D5”) and Set txt2 = Range(“F5”): VBA Set simply allows us to avoid having to type in the range we need to pick over and over again when running the code. So, we set our range to the current region and our worksheet to the active worksheet.
- With txt1: The With statement allows you to make a sequence of statements on a single object without having to requalify the object’s name. So, we make the With statement with the variable range.
- End Sub: This will end the procedure.
Read More: Difference Between Alignment and Orientation in Excel
Things to Keep in Mind
- To automatically fit the column and row heights, use the keyboard commands Alt + H + O + I and Alt + H + O + I + A, respectively.
- Don’t forget to choose the cells whose orientation you wish to modify. Otherwise, no results will be displayed.
Download Practice Workbook
Conclusion
The above procedures will assist you in changing the Orientation of Text to 22 Degrees in Excel. Hope this will help you! Please let us know in the comment section if you have any questions, suggestions, or feedback.
Related Articles
- How to Change Orientation from Horizontal to Vertical in Excel
- How to Rotate Text by 180 Degrees in Excel
- How to Write Vertically in Excel
<< Go Back to Rotate Text | Text Formatting | Learn Excel
Get FREE Advanced Excel Exercises with Solutions!
