When you are working on a dataset for presenting to customers or stakeholders, you may need to organize the texts in the most easily readable way. In this case, the methods to change text orientation in Excel are very helpful and effective. In this article, we will explore 5 easy methods on how to change text orientation in Excel.
How to Change Text Orientation in Excel: 5 Easy Methods
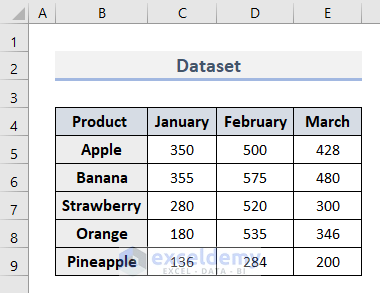
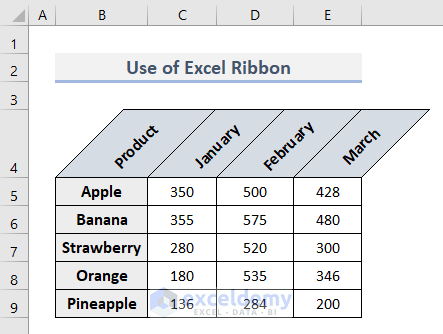
To learn the methods, we have taken a dataset here as an example. This dataset represents the sales quantity of 5 fruits in the first 3 months of a year.
Let’s follow the method below to change text orientation in Excel.
Method 1: Change Text Orientation with Excel Ribbon Command
In the first method, we will change the text orientation of a selected data series with an Excel ribbon. Follow the steps below:
- First, select header cells B4:E4.
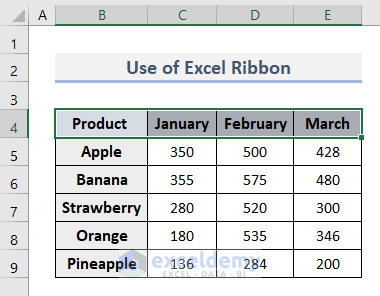
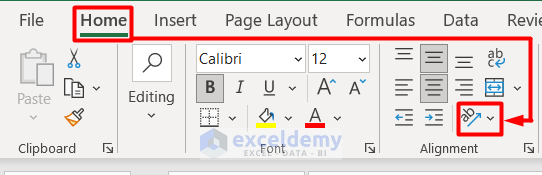
- Following, go to the Home tab of Excel Ribbon.
- Next, select the Orientation icon from the Alignment section.
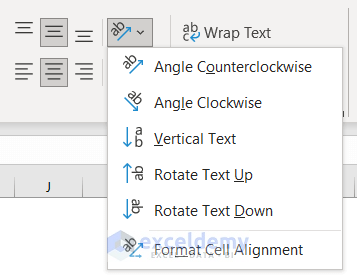
- After that, choose any type of orientation from the drop-down list.
- For example, here we have chosen the Angle CounterClockwise option.
- Finally, we have changed the text orientation of the header in this dataset.
- Don’t forget to explore other Alignment options in this ribbon.

Read More: Difference Between Alignment and Orientation in Excel
Method 2: Rotate Cell Text from Format Cells Dialogue Box in Excel
In the second method, let’s learn to rotate cell texts from the Format Cells dialogue box.
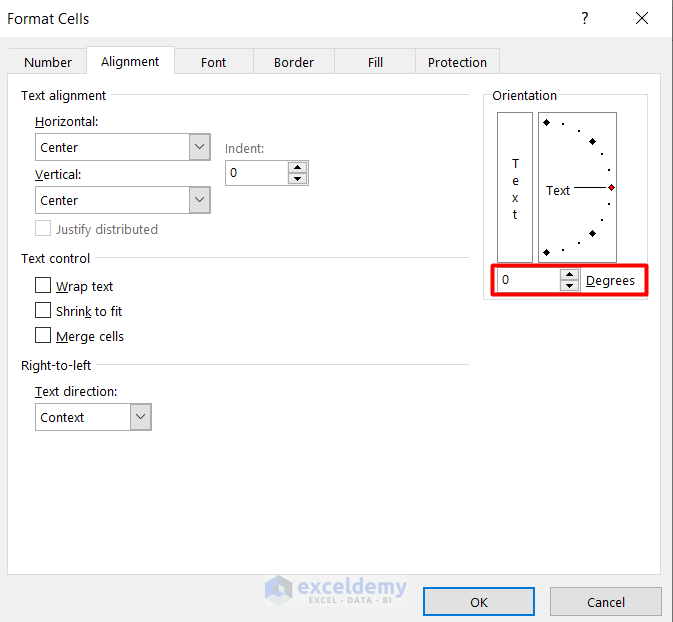
- First, select the headers and right-click to open a Context Menu.
- Secondly, select the Format Cells options from here.
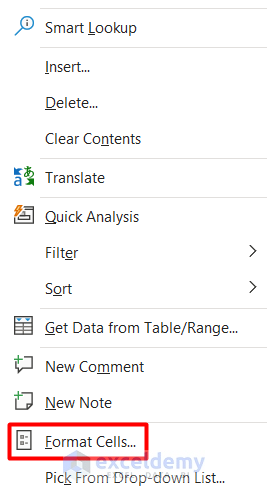
- A new Format Cells window will appear.
- Here, change the angle of text from the Orientation section.
- Then, press OK.

- That’s it, you can see the header text orientation is changed now.

Read More: How to Change Orientation of Text to 22 Degrees in Excel
Method 3: Use Excel VBA Code to Change Text Orientation
In this method, we will go through the Excel VBA code for changing text orientation. Following is the procedure for this:
- In the beginning, select Visual Basic from the Developer tab.
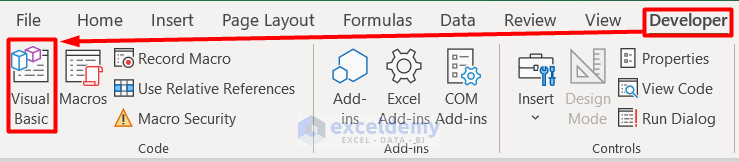
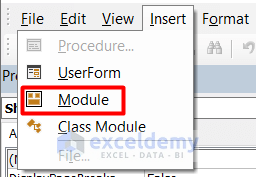
- Then, select Module from the Insert tab in the new window.
- Now, insert this VBA code on the blank page.
Sub RotateCellRange()
Dim rg As Range
Dim orientation As Double
On Error Resume Next
Set rg = Application.InputBox(Prompt:="cell range", Title:="Cell range", Type:=8)
orientation = Application.InputBox("Set the orientation angle", "Orientation angle")
If Err.Number <> 0 Then Exit Sub
On Error GoTo 0
rg.HorizontalAlignment = xlGeneral
rg.VerticalAlignment = xlBottom
rg.WrapText = False
rg.orientation = orientation
rg.ShrinkToFit = True
rg.MergeCells = False
End Sub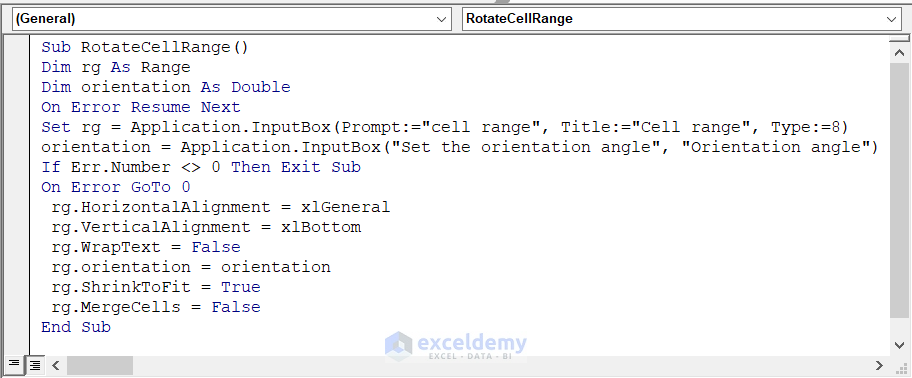
- After that, click on the Run Sub button on the upper layer of the ribbon. You may press the F5 key instead of clicking the button.

- Here, you can see a new Macros window pop up.
- Click on Run.

- Now, it will direct you to the Cell Range window.
- Select the header cells B4:E4. It will show like this:

- Then, click OK.
- After this, another window Orientation angle appears to determine the angle.
- Insert the angle you want and press OK.
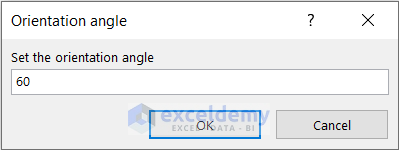
- Finally, we have successfully rotated the text orientation.

Method 4: Apply Keyboard Shortcuts to Change Text Orientation
Another method to change text orientation is to apply some keyboard shortcuts. It is a very quick technique to work on. Let’s see the process below:
- First, select the cell range B4:E4.
- Then, type the keyboard shortcut below:
Alt + H + F + Q- Now, you can see the Orientation drop-down section defining the shortcuts for each type.

- Type any of the shortcut keys. For example, we have used this shortcut to Rotate Text Up.
Alt + H + F + Q + U- That’s it, we can see the text orientation has changed by applying the keyboard shortcut.

Read More: How to Mirror Text in Excel
Method 5: Rearrange Text Alignment with WordArt in Excel
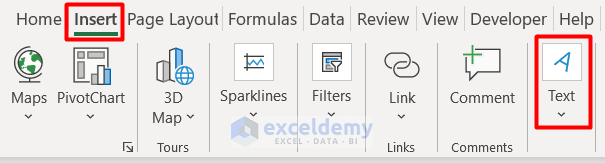
This final method is applicable for individual text box options only. Let’s see how it works:
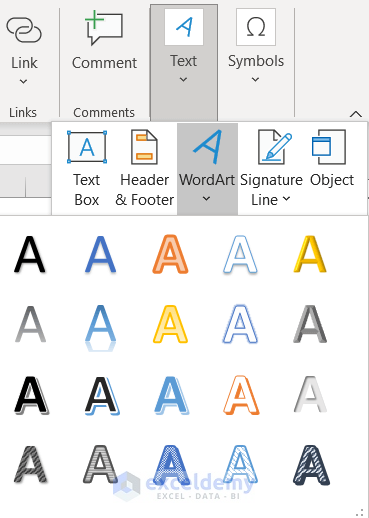
- First, select the Text option in the Insert tab.
- Then, choose any style of WordArt from the drop-down section.
- Now, a new Text Box will appear.
- Here, type your required text like this:

- After this, right-click and select Format Shape from the Context Menu.

- In the Form Shape panel, click on the Text Options and modify your text according to your preference.
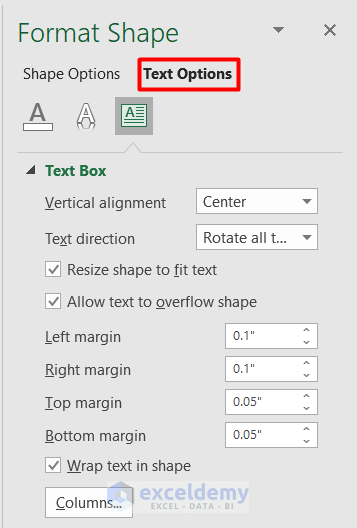
- Here, we have changed the Text Direction and the final output looks like this:

How to Return to Default Text Orientation in Excel
Now, that we know the 5 methods to change text orientation in Excel, we will quickly go through the process to return to its default mode for each of the methods.
- If you change the orientation from the Excel Ribbon, then just deselect the option you selected previously.

- In the case of using the Format Cells Dialogue Box, turn the angle of orientation 0 in the Orientation box to make it just like before.
- When you change the orientation with Excel VBA, apply the angle of orientation as 0. It will result in returning to its default state.

- In the last method where we used WordArt, go to the Format Shape panel and just change the Text Direction to Horizontal in Text Options.

Quick Tips
- It is better to keep the orientation angle at 30 or 60 for a better presentation view.
- Use the keyboard shortcuts Alt + H + O + I and Alt + H + O + I + A to autofit the column and row height respectively.
- Never forget to select the cells that you want to change orientation. Otherwise, it will not show any results.
Download Workbook
Conclusion
I concluded the article with the hope that it was a helpful one on how to change text orientation in Excel with 5 methods. You also learned the process to return to the default state. Let us know your insightful suggestions.
Related Articles
- How to rotate text 180 degrees in Excel
- How to Write Vertically in Excel
- How to Change Orientation from Horizontal to Vertical in Excel
<< Go Back to Rotate Text | Text Formatting | Learn Excel
Get FREE Advanced Excel Exercises with Solutions!
